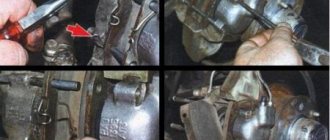
The brake system in any car requires timely inspection for wear of its components, which implies the need for further replacement of all failed parts. These actions cannot be neglected, since the safety of the driver and his companions directly depends on the effectiveness of the entire braking unit. Such statements are also typical for the domestic Lada Lagrus station wagon, which today will be the “hero” of our material.
Signs of pad wear
The instruction manual for a Lada Lagrus with a 16-valve engine, as a rule, contains very detailed information regarding this issue. It also displays all the parameters that characterize the front brake pads. The degree of wear of these consumable components is determined by the residual thickness of the friction linings, which come into direct contact with the discs or drums during braking.
In this regard, gradual and natural abrasion occurs. Many experts are inclined to believe that front brake pads are the most intensively worn consumables. Here you should not wait until the end of the scheduled service life, expressed in mileage (20-30 thousand km), but observe the level of wear with sufficient frequency, and then make a decision on replacement. It is no secret that failed front brake pads provoke increased wear on the working surfaces of discs or drums. Replacing the front brake pads in a Lada Lagrus car is very expensive, so it is not recommended to “bring” the car to this condition.
Renault Sandero Stepway trunk volume
Renault Sandero tank volume
Spoiler for Renault Sandero
Some of the most common signs of wear include the following:
- the appearance of a squeak when the brake is activated;
- spontaneous change in direction of movement from a straight trajectory;
- the brake pedal vibrates when pressed;
- it is impossible to lock the wheels with the handbrake, even with the drive cable fully tensioned;
- reducing the thickness of the disc beyond the limit of 21.8 mm;
- the thickness of the friction linings on the pads has approached the critical value of 2 mm;
- the working surface of the pads is dotted with grooves and chips.
Regular inspection followed by replacement of worn-out components allows you to eliminate the manifestation of these factors.
Conclusion
Undoubtedly, the use of worn pads is unsafe for both the driver and his passengers, so the car owner himself must monitor their condition. Only a responsible attitude to technical inspection can prevent machine malfunctions that can lead to accidents.
Similar articles:
- How to replace lamps in a Lada Largus car: low and high beams, dimensions, brake lights, turn signals
- Practical recommendations for choosing and replacing spark plugs on the Lada Largus
- How to change oil in Lada Largus
- How to quickly and efficiently replace the timing belt on a Lada Largus?
- How to adjust headlights on Lada Largus
Procedure
- First, we purchase suitable pads. The set of front consumables consists of 4 pieces (2 pieces on each side).
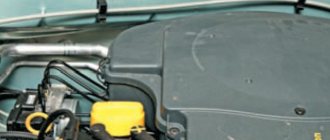
- We control the brake circuit fluid level in the corresponding reservoir (under the hood) using the marks on its body. If the level reaches the maximum level, then it will need to be taken with a syringe, since after installing the new pads there will be a natural (due to the greater thickness of the pads) rise.
- We loosen the tightening torques of the bolts of the front wheel from which the replacement is supposed to begin.
- We hang this part of the car with any available device designed for this purpose. We remove the wheel. Don't forget about safety supports (if a jack is used).
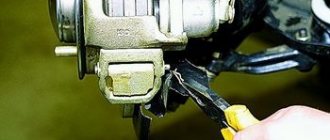
- We take a screwdriver, which we insert between the pad and the disc, and with a pressing force we move it towards the cylinder. The rod is hidden in the cylinder, which provides free space for removing the pads.
- Now we loosen the tightening torque of the caliper bracket, and then move it up.
- We remove the old pads.
- We inspect the springs of the clamping mechanism for their deformation and breakage. If this fact is obvious, then we change it.
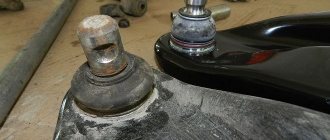
- We check the integrity of the rubber covers on the caliper guides. We lubricate the guides themselves with a special compound. This will prevent them from souring, and the bracket will move freely during the exit or entry of the piston.
- We carefully clean the seats for new pads.
- The linings on “fresh” pads are thicker than on old products, so the piston must be recessed to the full extent of its stroke. This will provide enough space for the correct installation of consumables.
- After installation, perform the assembly process in reverse order.
Replacement of front brake pads is completed.
We repeat the entire list of these manipulations on the other side of the LADA Largus.
If there is a need to replace the rear pads, then the principle of operation is similar, with the exception of some nuances.
Instructions for replacing the rear pads of a Lada car
Let's consider the process of installing drum brake pads. It’s worth noting right away that replacing certain parts on drum brakes should be done strictly on both wheels. It is also unsafe to equip the left and right wheels with pads of different brands, manufacturers, and sizes.
In order to remove the pads, you need to fix the car on a two-post electro-hydraulic lift (which not everyone has, and in this case you need to find a service station). Raise the hand drive lever and turn off the engine. Next, remove both wheels. After this, release the handbrake. Now you can adjust the height of the car for convenience.
Next we see the drum in front of us, remove the body. Inside, it consists of many springs (lower tension spring, for attaching the spacer bar, upper tension spring). The pads on Largus are located along the edges of the circle; a drive lever is attached to one of them, which regulates the parking brake. Above the pads between them we observe the location of the brake cylinder. The above-mentioned springs, together with a spacer bar, regulate the gap between the pads.
We begin disassembling the mechanism by removing the upper and lower springs that tighten the brake. Next, remove the springs on the spacer bar (using a screwdriver or pliers) and on the guides. After this, the assembled strip itself with the mechanism is detached, which regulates the gap. Finally, having removed the handbrake cable from the lever on the block, we disconnect the rear blocks of the Lada.
Before we begin replacing parts, we thoroughly clean the entire rear mechanism with a wire brush and treat the thread surface on the spacer bar with lubricant.
To install the pads, it is necessary to assemble the gap adjustment mechanism with the pads and the parking brake cable. Then we attach this structure to the brake drum of the Lada Largus. The final stage is to install the tension springs (lower and upper) and guide springs in place. Finally, we put on the drum and wheel, after which you should check the gap adjustment mechanism by pressing the pedal all the way 3 times. If a click appears, the mechanism is adjusted.
How to operate the car after replacing the pads?
After installing new pads in a Lada Lagrus with a 16-valve engine, you should not rush to drive onto roads with heavy traffic. The first presses on the brake pedal can cause inefficiency of the entire system, because consumables require time to grind into the working surfaces of the discs. Contact during this period does not occur over the entire surface, which explains the low performance of the pads. Over time, the situation will normalize. To properly “break in” the LADA Largus pads, we recommend choosing road sections with no heavy traffic. Once the process of grinding the pads to the discs is complete, you can observe the effectiveness of the brakes. At first, we recommend avoiding sudden braking to prevent excessive heating of the new linings. In “quiet” mode you should travel at least 100 km.
Recommendations after replacing the front brake pads on a Lada Largus
After replacing worn brake pads with new ones, do not rush to immediately drive onto busy highways. It is possible that at the first intensive braking you will be unpleasantly surprised by the low efficiency of the brakes, although the pads are branded. The brake discs also wear out, and the new pads only touch them at the edges, practically without braking. Choose a quiet street or passage without cars and brake smoothly several times so that the pads get used and begin to fit the entire surface. At the same time, evaluate the effectiveness of the brakes. Try not to brake sharply for at least the first 200 km. When unused pads become very hot, the top layer of their linings burns and the brakes will not be as effective for a long time.
If the mileage is high enough or the quality of the factory installed brake pads on the Lada Largus is poor, you can replace them with new ones yourself, using a minimum of tools, namely:
- Flat screwdriver
- Balloon wrench and jack
- 13 and 15 mm wrenches
- Mount
Let's sum it up
Since the LADA Largus brake system has a significant impact on the safety of movement, the elements require increased attention and timely replacement of the front brake pads. We do not recommend allowing excessive levels of wear on the working surfaces. The specified consumable components that have become unusable should be promptly replaced. Buy products only of decent quality, which will allow you to gain confidence in the stable functioning of the brake unit only in normal mode, but also in emergency situations.
What types of brakes are there?
Throughout the history of the automotive industry, 3 types of brakes have been installed on cars:
- tape;
- drums;
- disk.
The first cars had a band brake system. The wheel axle was covered with tape. The driver had access to it at any time. If he needed to slow down, he pulled the tape, and this allowed him to reduce the speed.
Through “evolution,” the band brake was replaced by a drum mechanism. The principle of operation is the simultaneous rotation of a hollow drum with a wheel, which is bursting inside with pads. This slows down the car. This type of brake has proven itself well, but it also has disadvantages. With frequent heavy use, the drum overheats, since the ventilation in this closed system is not the same as that of a disk mechanism.
Just like overheating, moisture getting into the mechanism is also harmful to the drum. When individual parts become wet, the effectiveness of the brakes decreases. If any part in the drum wears out or falls off, it remains inside the system. This is both a minus and a plus. Indeed, in this case, the driver will hear a knock, and it will be possible to take measures to replace the part.
The disc brake system is the most reliable mechanism that eliminates the above-mentioned disadvantages of previous systems. Disc brakes work by rotating the disc simultaneously with the wheel, and when you press the brake pedal, the pads jam the rotation of the disc from the outside. Unlike the drum, the disc is ventilated, so it is less susceptible to overheating than the drum. The discs do not retain moisture and damaged parts. The operating principle of this system is based on the ability to work under heavy loads. Therefore, you can stop your car faster with disc brakes.
Such mechanisms are often front-facing and ventilated. Ventilation holes cover the entire radius of the disc. Some modifications have transverse ventilation holes. With their help, excess heat is removed, weight is reduced and worn parts are removed.
Due to the fact that the drum mechanism costs much less than the disk mechanism, today both disks and drums are used.
