Cost of lamps
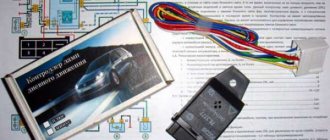
All of the above lamps can be purchased at almost any auto store. For example, a Philips H4 Premium +30 low beam lamp installed from the factory costs about 120-150 rubles. PTF lamp H11 Philips Eco Vision about 500-600 rubles per joke. All other lamps cost no more than 40-50 rubles.
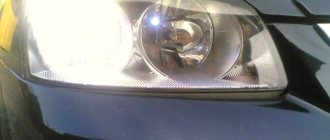
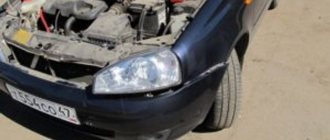
Low beam bulbs on a Lada Largus car are a short-lived element, so sooner or later car owners will definitely have to deal with replacing them. For beginners, this task usually raises many questions. Therefore, below we will look at how to choose the right one and how to change the low beam bulb on Largus.
Choice
Currently on the market you can find such lamps from a variety of manufacturers, among which are the following:
In addition, domestic Mayak light bulbs have recently proven themselves to be quite good. Their advantages include not only low price, but good quality.
Of course, when choosing lamps you need to pay attention not only to the brand, but also to the following characteristics of the lighting element:
However, it should be noted that such light illuminates the road well only in dry weather. In fog or rain, ordinary lamps are preferable.
Note! To install xenon and halogen lamps, you should contact a service center for help, since this work requires the installation of additional equipment and changes to the software. Accordingly, the installation of such lighting is quite expensive.
Thus, each driver can choose the most suitable light bulb, taking into account his own financial capabilities and the conditions in which the car will be operated.
Replacing the low beam lamp on a Lada Largus is carried out in the following order:
- Next, you need to install a new light bulb in place. It is better to do this work with gloves so as not to touch the glass flask with your own hands. The fact is that traces of fat can lead to rapid burnout of the lamp.
- Then you need to fix the base with a spring clip, put the block on the contacts and then install the plug in place.
- At the end of the work, you should connect the battery and check the operation of the headlights.
This completes the replacement of the low beam lamp in Largus. As we can see, this operation is carried out extremely simply.
If, after replacing the lamp, the low beam on the Lada Largus still does not light up, the cause of the malfunction may be a blown fuse. Replacing them is even easier than the paws, since they are located in the cabin, on the left side of the steering column.
- F9 - left headlight.
- F10 - right headlight.
Often the cause of the malfunction is poor contacts of the fuse terminals. In this case, you just need to clean them.
Headlight adjustment
Car owners know that the procedure for adjusting Largus headlights with your own hands is not the fastest and easiest process. But it is extremely important, since the safety of those in the cabin depends on the correct setting of the light. The fact that there is a need to adjust the lighting of the head optics may be indicated by the signals of oncoming cars: they will flash their high beams, indicating that you are blinding them.
Before you start setting up, you need to make sure that it is necessary. The correct light is ensured by the following conditions:
- good condition of shock absorbers;
- optimal tire size and pressure;
- uniform distribution of load on different parts of the body.
If these criteria are deviated, the glow angle will be incorrect. If the problems described above are not identified, then you can safely move on to adjusting the light.
Conclusion
You can get additional useful information on the discussed topic from the video in this article.
During operation of the vehicle, the headlight bulbs may burn out. If you decide to replace them not at the dealer, but yourself, we recommend that you first study the instructions. The fact is that on the Lada Largus the lamps in the headlights change with some features, which we will discuss later.
Stop signal
The principle of replacement is similar to the installation of the above-mentioned lamps, but it has its own nuances. Here, first, the trunk lid is opened and its decorative panel is removed. So, in order to replace the brake light, you must first of all clear the approach to the wing nuts.
After removing them, the entire headlight is turned out, which would be very problematic to do on your own. After all, you need to bring out its upper and lower parts at the same time so that they do not become a surprise. After unscrewing the screws, access to the lamp is open. The failed part is replaced, and all the previously listed steps are performed in the reverse order.
What kind of bulbs are in the headlights?
- Low and high beam lamp – H4, power 12V, 60/55W;
- Bulb dimensions – W5W, power 5W;
- Front turn signal lamp - PY21W;
- Fog lamps - H11, power 12V, 55W.
Lighting elements of Lada Largus
It is worth noting that all lamps used in headlight lighting of Lada Largus cars are divided into three types:
- halogen;
- xenon;
- LED
The most common type of headlights for low or high beam are LED variations, since these are the most powerful and efficient lamps in terms of energy conservation. In addition, they can be used for brake lights, turn signals or markers.
Low and high beam
One lamp is responsible for low and high beam. Its resource is 2000-4000 hours. To gain access to the left headlight unit, you must remove the battery.
- Turn the lid counterclockwise;
- Remove the cover by releasing the latch.
- Remove the block with wires by unclipping the lock;
- Remove the rubber cover by prying it off by the edge.
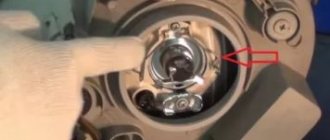
- Unscrew the lamp clamp to the side;
- Remove the headlight bulb.
Installing a new lamp in the Largus headlight is carried out in the reverse order. You need to hold the lamp by the base; it is not recommended to touch the bulb with your fingers. If necessary, wipe the flask with a microfiber cloth that does not leave lint. The process of replacing the H4 lamp is also shown in the video:
Replacement of Lada Largus (R90) lamps, from 2012 onwards.
The information is relevant for Lada Largus 2012, 2013, 2014, 2015, 2021, 2021, 2021 models.
| Lamps used on cars | |
| Name | Type |
| high/low beam headlights | H4 |
| front side lights | W5W |
| front direction indicators | PY21W |
| side turn signal light | WY5W |
| front fog lamp | H11 |
| interior lighting | W5W |
| glove compartment lighting | W5W |
| additional brake light | P21W |
| license plate light | W5W |
| rear fog light | P21W |
| luggage compartment lighting | W5W |
| brake light/tail light | P21/5W |
| reversing light | P21W |
| rear turn signals | PY21W |
To replace the lamps in the headlight unit, perform the following operations. 1. Open the hood. 2. Disconnect the wire from the negative terminal of the battery.
3. To replace the high/low beam lamp, turn the plastic headlight cover counterclockwise...
4. ...press the cover latch...
5. Remove the cover
6. Press the lock of the headlight lamp wiring harness block...
7. Unhook the block from the lamp base
8. Pry up the edge of the rubber headlight cover...
9. ...and remove the cover.
10. Remove the spring clip of the lamp from under the hooks on the reflector...
11. ...open the latch...
12. ...and remove the headlight bulb. 13. Insert the new lamp into the reflector, secure it with the spring holder, install the rubber cover, attach the wiring harness block to it and install the plastic cover.
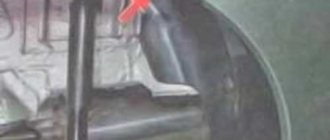
14. To replace the side light , remove the fender liner, since there is no access to the lamp from the engine compartment. 15. Turn the side light bulb socket clockwise (for the right headlight, counterclockwise)... 16. ...and remove it from the headlight. 17. Remove the baseless lamp from the socket. 18. Insert a new lamp into the socket and install the socket in place. 19. To replace the front turn signal , remove the fender liner, since there is no access to the lamp from the engine compartment.
20. Turn the turn signal bulb socket counterclockwise...
21. ...and remove it from the headlight housing.
22. Lightly press the lamp into the socket, turn counterclockwise...
23. ...and remove it from the cartridge. 24. Install the new lamp into the socket, and the socket into the headlight unit.
To replace the fog lamp bulb, perform the following steps. 1. Remove the front fender liner.
2. Press out the fastening clamp of the wiring harness block...
3. ...and disconnect the block from the fog light bulb.
4. Turn the lamp a third of a turn counterclockwise...
5. ...and remove it from the reflector. 6. Install the new lamp in the reverse order of removal.
To replace the side turn signal lamp bulb, perform the following steps. 1. Using a special plastic mounting paddle, pry off the side turn signal light...
2. ...and remove it from the hole in the front fender
3. Rotate the lamp socket 90° counterclockwise...
4. ...and remove the cartridge from the flashlight body. 5. Remove the lamp from the socket. 6. Insert the new lamp into the socket and the socket into the lamp body. 7. Install the side turn signal light in the reverse order of removal.
To replace any bulb in the rear light, follow these steps: 1. Disconnect the wire from the negative terminal of the battery. 2. Remove the rear light.
3. Squeeze the top one
4. ...and two lower holders.
5. ...and remove the rear cover of the flashlight complete with lamp sockets.
6. Lightly press the lamp requiring replacement into the socket, turn it counterclockwise...
7. Remove from socket 8. When installing a new lamp, the protrusions on the lamp base should fit into the slots on the socket. Lock the lamp in the socket by turning it clockwise until it stops. 9. Install the light in the reverse order of removal.
To replace the lamp in the license plate light, perform the following steps. You will need a T20 TORX key. 1. Remove the screw securing the diffuser...
2. ...and remove the lens from the left tailgate trim.
3. Remove the baseless lamp from the socket 4. Install a new lamp. 5. Install the flashlight lens in the reverse order of removal.
