Standard replacement procedure
- Replacing the low beam lamp, as well as the high beam, begins by disconnecting the on-board power supply. This precedes all electrical repair work. In this case, a special switch is turned or the negative terminal is disconnected from the battery, which avoids accidental short circuits or erroneous connections during installation.
- The place where the Largus lamp will be replaced is determined. There, the rubber plugs covering the electrical components are removed, and two metal antennae are opened in front of the car owner, fixing them in the reflector. They are separated so that the used parts can come out of their seat without damaging the housing.
- Next, you need to disconnect the plugs from the wiring that was previously disconnected. Here it is worth paying attention to the order of arrangement, otherwise, during the installation of new parts, everything can be mixed up and they will have to be changed again.
- After connecting the plug with wiring to the new parts, they are mounted in place and secured with antennae. You should try not to touch the flasks with your hands, as this can lead to their rapid failure.
- If the light is dim during lighting, and the headlights flash when you turn on the headlights, then it is imperative to restore the contacts of the wires with the vehicle body. This is especially true for a marker lamp, because the fat that gets there begins to evaporate when heated and can cause ignition.
- At the end of this procedure, you need to put on the rubber plugs and secure all the parts in their places. After this, the car will be ready for use and the driver does not have to worry about malfunctions of the Lada Largus lighting fixtures.
As practice shows, in modern domestic cars, one of which is the Lada Largus, lamps with directional luminous flux are most often used. The essence of such lighting is a reliable view in front of and behind the car. At the same time, inconvenience to other traffic participants heading towards the driver or driving behind is excluded.
Fog lights
Before installing a PTF, many people wonder whether it is necessary? Fog is an infrequent occurrence. However, many experienced drivers advise that if fog lights are not included in the factory equipment, they must be installed. This guarantees a comfortable ride not only when driving in fog, but also on suburban highways, in poor lighting conditions at night on certain sections of the highway.
In addition, for better illumination of the road when traveling, you can install special incandescent lamps with a yellow spectrum.
Like replacing a Logan headlight, doing your own reconstruction of foglights will require the owner of a Renault Logan to comply with a number of rules.
- optics are installed symmetrically;
- The PTF does not protrude or protrude beyond the dimensions;
- lighting optics below the main beam headlights.
Installation is impossible without special tools:
- a ruler, but a tape measure is better;
- keys and screwdrivers, it is better to prepare sets;
- drill;
- drill.
- Preparing the car: place it on a flat surface, the car is immobilized.
- Preparation for installation: symmetrically mark the places for the PTF.
- Prepare places for optics. It is better to start with a small hole and gradually increase the size. This will avoid cracks.
- Treatment of holes with anticorrosive agent.
- The work of installing fog lights on a Renault Logan ends with installing the relay - preferably in a free place where water cannot get in.
Stop signal
The principle of replacement is similar to the installation of the above-mentioned lamps, but it has its own nuances. Here, first, the trunk lid is opened and its decorative panel is removed. So, in order to replace the brake light, you must first of all clear the approach to the wing nuts.
After removing them, the entire headlight is turned out, which would be very problematic to do on your own. After all, you need to bring out its upper and lower parts at the same time so that they do not become a surprise. After unscrewing the screws, access to the lamp is open. The failed part is replaced, and all the previously listed steps are performed in the reverse order.
Dimensions
A special feature of this procedure is the preliminary dismantling of the headlight unit, under which the side light lamps are located. After this, it is necessary to disconnect the wires from the battery, which is done with extreme care.
Removing the front bumper will allow you to get to the cover that protects the dimensions. Since they come into contact with other light devices, it is advisable to carry out all procedures using sterile gloves. If any device has been touched, it must be wiped with a clean, lint-free cloth.
To replace the side light bulb in Largus, the socket of the old part is turned counterclockwise. The black and yellow wires connect it to the battery, so it turns off from them. A new part is installed in this place, and assembly is carried out in the reverse order.
Replacing a low beam lamp on a Lada Largus: how much does it cost?
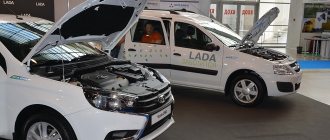
The ability to independently replace light bulbs in your car's lighting fixtures is very useful, as it allows you to save both time and money. Today we will see that replacing a low beam lamp in a Lada Largus is a fairly simple task that anyone can do.
General information about this model
The first LADA Largus car rolled off the AvtoVAZ assembly line and went on sale in 2012. It was a Romanian Dacia Logan MCV, adapted for the Russian market. The car is produced to this day and has four modifications:
- Largus R90 – passenger station wagon for five and seven seats;
- Largus F90 – cargo van;
- Largus Cross is essentially the same five- and seven-seater station wagon, but with increased ground clearance and slightly different exterior and interior trim;
- Largus CNG – production started in 2021. Modification with gas cylinder equipment.
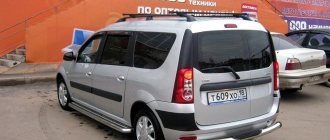
Passenger station wagon (left) and Largus Cross
Note. The first Largus rolled off the assembly line a year earlier - in 2011, but was intended for sea trials.
What lamps are used
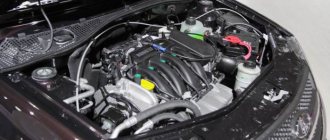
Before we figure out how to change a light bulb on Largus, let’s determine what lighting devices are used in the headlights of this car. The Largus headlights have only three lamps:
Low/high beam . Halogen double helix with H4 base. The power of the spirals is 55 and 60 W, respectively.
High and low beam lamp for Largus
Parking lights . Incandescent bulbs with W5W socket. Power 5 W.
Front side light bulb Lada Largus
Turn indicator . Incandescent bulb with an orange cylinder with a PY21W base. Power 21 W.
Front turn signal lamp Lada Largus
Closer to the side there is a turn signal light, in the center there is a device responsible for high and low beam, and underneath it is a side light bulb.
So, we figured out the types of lamps. A bulb with an H4 socket is responsible for the low and high beam. All that remains is to decide which one to choose, because the range of light bulbs with such a base on the modern market is quite wide.
But by what criterion should you choose? Price? Quality of light? Life time? Colorful temperature? All these parameters are important for any light bulb, but, alas, they often exclude each other - cheap cannot be of high quality, and vice versa. This means that we will choose according to the price/quality ratio and our financial capabilities, focusing on the brand.
According to independent experts of the company, the price/quality ratio of the lamps was distributed as follows:
- Bosch;
- Osram;
- Philips;
- Narva;
- "Lighthouse".
Of course, the above rating does not mean that you should only take Bosch. The products of this manufacturer are quite expensive, although they have the highest characteristics.
Domestic Mayak lamps, for example, are inferior to Bosch in many respects, but are much cheaper than the latter.
Thus, the choice will depend not only on the desire to get the best, but also on material capabilities.
Important! In order not to buy a Chinese counterfeit instead of Bosch or Narva, we will only buy light bulbs in specialized stores. And the fact that the same lighting device on the nearest market costs half as much should not rejoice, but be alarming.
What do we need for work?
In order to replace the lamps in the headlights of the Lada Largus, we will need:
- Torx key T-20;
- clean cotton gloves;
- replacement H4 bulbs.
Let's start replacing
If everything is ready, then you can start replacing the low beam bulb. In order to gain access to the Lada Largus headlight, you need to remove the plastic fender liners. Take the Torx key and unscrew the screws securing it.
To remove the fender liner, you need to unscrew several screws
There are two headlights in front of us: below is the fog light (PTF), above it is the head light. Naturally, we need the latter. For clarity, in the photos below, all actions will be performed with the headlight removed. We will work from under the wing.
We find the hatch for the high/low beam lamp. It is closed with a protective plastic cover. Press the latch and remove it.
Under it we see a rubber boot, from the center of which protrudes the light bulb power connector. We remove it from the lamp by simply pulling it out.
Now you can remove the boot itself.
In front of us is a light bulb, pressed with a spring clamp. We press our finger on the upper part of the lamp clamp and remove it from under the hook on the reflector.
After this, simply fold the spring down, freeing the lamp.
Now nothing holds the lamp
We take it by the body and remove it from the reflector. It's time to put on gloves, because you can't handle the bulb of a halogen lamp with bare hands: the remaining particles of sweat on it will cause local overheating of the glass, and it will simply melt. If you don’t have gloves, then hold the new light bulb only by the base, without touching the bulb.
If we accidentally touched the flask with our bare hands or simply got it dirty with something, we wipe it with a napkin soaked in alcohol.
We install the device in place of the burnt one, monitoring the position of the keys on the base. One of the keys looks up, two symmetrical to it look down. We fix the lamp with a bracket, put on the boot, power supply, and protective cover. Now you can check if everything works, and if so, then install the fender liner in place, securing it with screws.
On a note. Some craftsmen do without removing the fender liners, performing all manipulations from the engine compartment. But, firstly, for this you need to have the hands of a pianist, and secondly, when working with the left headlight, you will still have to remove the battery.
In order to climb through all these pipes, you need to have the hands of a pianist and remarkable patience
What to do if the light still doesn’t work
If after replacing the lamp the low beam still does not work, you will have to look for the fault. First of all, we check the fuses responsible for the corresponding headlight. They are located in the mounting block, which is located on the left side of the driver and is closed with a decorative cover.
Location of the mounting block in Lada Largus (decorative cover removed)
The low beam is controlled by fuses F9 and F10 for the left and right headlights, respectively. You can find them based on the following photo:
Numbering of fuses in the interior mounting block of Lada Largus Useful! The numbering and location of the fuses are marked on the inner surface of the decorative cover. There are also spare inserts and tweezers for replacing them.
If the fuses are intact, then you will have to look for the problem in the wiring and connecting blocks. The contacts in the pads may oxidize, the wire may fray or, due to poor contact, burn away from the pads. If we have electrical knowledge, we look for it ourselves.
If not, contact a qualified specialist or even a regular electrician.
So we learned how to change low beam bulbs in a Lada Largus ourselves. Now there is no point in wasting time and money on a trip to the service station - after all, you can do everything yourself in a matter of minutes.
What kind of bulbs are in the headlights?
Several types and classes are used in automobile lighting. The following lamps are suitable for Largus:
- optics type H4 with a power of 12 watts, 60/55W for near and far illumination;
- PTF lamps with characteristics H11, 12 W, 55W;
- for side lights, W5W models with a power of 5W are acceptable;
- PY21W for turn signals.
Mid and high beam
One lamp is responsible for low and high beam. Its resource is 2000-4000 hours. To access the left headlight, remove the battery.
- Turn the cap counterclockwise;
- Remove the cover by releasing the lock.
replacing low and low light bulbs Lada Largus replacing low and low light bulbs Lada Largus
- Remove the socket from the wires by clicking the lock;
- Remove the rubber cover by pulling on the edge.
replacing low and low light bulbs Lada Largus replacing low and low light bulbs Lada Largus
- Disconnect the lamp assembly clamps;
- Remove the headlight.
replacing low and low light bulbs Lada Largus replacing low and low light bulbs Lada Largus
What to choose for replacement
The standard factory installation is a halogen H4 light bulb on Largus. However, the modern car market offers alternative options for daytime car optics. There are three analogues:
Xenon ones have a bluish glow, which is inconvenient in cloudy or rainy-snowy weather. Halogen units shine brightly and warmly. They are a common installation option, although they are inferior in power to other analogues. The advantage of LED elements is that they can store energy for a long time at high power.
How to replace
After choosing a light bulb model for Largus, new components are purchased.
It is not recommended to use used cartridges and fuses: during long-term storage, electrical wiring contacts, terminals and adjacent components oxidize.
Required components to replace the front low beam lamp:
- car lamps;
- circuit breakers;
- cartridge;
- tools (screwdriver, pliers, etc.).
To begin with, the car's electrical network is disconnected from the power supply (battery), then the burnt-out part is removed.
Daylight
If the optics on the Lada Largus are faulty, replacing the light bulb will require the following algorithm:
- The rubber pad is removed, which serves as protection for the electrical unit.
- The block with the installed wires is removed.
- The U-shaped lock moves (moving to the side and back).
- The electric lamp is pulled out.
- The detail changes.
It is important to remember the orientation of the cartridge - two teeth at the top, one at the bottom.
How to replace a Largus lamp:
- When installing, hold the lamp by the base or use microfiber, otherwise marks will remain on the electrical appliance and it will burn out faster;
- Repeat all the above steps to remove the optics in reverse order.
It is recommended to replace both bulbs at the same time. This will prevent unexpected overheating of the remaining part and ensure the same light beam parameter.
How to remove a headlight on a Largus video
Removing the headlight
Lada Largus
We remove the headlight unit for replacement. Remove the front bumper (see “Removing the front bumper”, p. 238). We disconnect the wire blocks from the headlight lamp and the turn signal lamp socket and remove the socket with the side light lamp from the headlight housing (see “Replacing lamps in the headlight,” p. 211).
We remove the protective cover from the housing of the actuator of the headlight beam direction control.
We remove the cable sheath from the holder on the actuator housing.
To change the direction of the light beam in the vertical plane, rotate screw 1 with a 6-point hexagon (see previous photo), inserting the hexagon through the hole in the upper cross member of the radiator frame. To change the direction of the light beam in the horizontal plane, rotate knob 2.
The headlight unit is removed in case of body work or when replacing it. The glass on the Lada Largus headlight unit is glued in and if it is damaged, the headlight unit is completely replaced (along with it). Replacement operations are shown using the example of the left headlight unit. The right headlight unit is replaced in the same way. The main problem when removing the front headlight of a Lada Largus car will be the need to remove the front bumper.
The procedure for adjusting the headlights of Lada Largus
This procedure can be carried out by the car owner independently or by contacting service center specialists. Moreover, it is almost the same on all modifications of such a vehicle. It is carried out both on a completely new car and on one that has already been driven for more than one year.
Preliminary data fixation
Before starting this diagnostic step, the driver should prepare a tool box, a spare tire, and a full tank of fuel. The car is placed on a horizontal surface, and the smoother it is, the more accurate the indicators of the current state of the headlights will be. In addition to this, the engine remains idling and the handbrake is fully depressed.
An artificial wall is installed in front of the car, the height of which is 1.8–2.0 m. Moreover, the distance showing how any headlight on Largus works should not exceed 2.8–3.2 m. It is worth noting that such a visual barrier can make it yourself from chipboard or similar materials.
This scheme is suitable not only for Largus, but also for other cars
A load weighing 55–70 kg is placed on the driver’s seat. This helps align the lighting line. After this, the distance between the headlights, their height above the road is measured and the average value between them is found. All this is transferred to the wall using chalk, ultimately representing a dot projection with marked edges and centers of the headlights.
The actual adjustment
To start adjusting the lighting, you need to create pressure in the chair, that is, either sit on the seat or put additional weight there. At the same time, slight rocking of the car will help remove vibrations from the body and shock absorbers.
The regulator is moved to a position oriented towards one person. This is precisely why the load was placed on the driver's seat. Then the low beam is turned on and the output is carefully examined with the actual deflection of each headlight beam.
Under the hood there are regulators that allow you to use a screwdriver to level the output of the light beams. They must fully correspond to the points displayed on the artificial wall, both vertically and horizontally.
Checking the correction made
All optics, like each individual headlight of the Lada Largus, are considered adjusted if its rays go directly to their wall projections. Fixing the adjustment and checking the work done is carried out through a test drive. The main thing here is that the light beams of car headlights did not blind other road users.