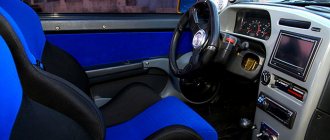
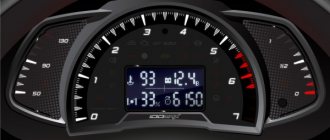
Lada Priora is a worthy representative of the Russian automobile industry. It is on a par with foreign-made “classmates”, but compares favorably with them due to its attractive price. The operation of the Priora engine is controlled by an on-board computer, or ECU. He manages the fuel supply system and ensures the synchronous operation of all units.
Every car has hidden capabilities. Chip tuning allows you to take advantage of this potential. Reprogramming is carried out through the OBD diagnostic port. By adjusting the engine control program, you can change the air-fuel mixture supply mode, ignition timing and other engine operating characteristics.
Pros and cons of Priora chip tuning
The Internet is replete with stories about the fantastic possibilities of chip tuning. It says that only by updating the controller firmware you can increase engine power by up to 50%, torque by up to 30% and reduce fuel consumption by 15%. However, this contradicts the laws of physics. The power of an internal combustion engine is the product of torque and speed. To increase the motor power, it is necessary to increase one of the indicated factors.
It is almost impossible to increase torque programmatically, but you can increase the number of revolutions per unit time by reducing the ignition timing. However, this increase in Priora engine power is limited and does not exceed 5-7%. The consequences of such an “improvement” must also be taken into account. Ignition advance causes an increase in temperature in the combustion chamber and an increase in the content of carbon dioxide and carbon monoxide in the exhaust. This harms the ecosystem and threatens problems with passing exhaust gas control.
After modification of the Priora engine, it becomes sensitive to the quality of the fuel, or rather, to the octane number of gasoline. An increase in engine power by 5% is practically not felt, and reprogramming threatens to cause additional problems and loss of the car’s warranty.
Lada Priora Sedan Loud Sound › Logbook › Preparation for firmware and do-it-yourself firmware
Hi all!
I decided to flash the firmware for my car, even though I was tired of this firmware. Firstly, this is not a guide to action, you do everything at your own peril and risk! I will describe everything here in general terms, because this is my first acquaintance with this process and software. For the work I needed a Phillips screwdriver, a ratchet with 8 and 10 heads, a T15 sprocket, a soldering iron, PAK loader v3, a laptop, a power supply from a computer (modified ), multimeter, software list: ChiptuningPRO 7, CombiLoader 2.15. First, unscrew the air duct cover near the passenger’s feet, it is secured with 1 bolt
Next, use a ratchet with a 10mm head to unscrew the 2 outer nuts and move the ecu towards the engine compartment, literally 1 cm is enough, then pull up and the “brains” will calmly come out of the grooves
Next, we turn the brains so that it is convenient to unfasten the connector clasp and use a screwdriver or hand to pull it to the side (be careful, I broke mine because the plastic became very fragile)
We take out the connector and take it to the place of experiments)
Now you need to find out which brains you have installed, this is indicated on the label, but you can also find out programmatically, I can’t write about modifying the cable, because I have a ready-made Pak one, from the faces. software of both combi and chiptune 7, other articles describe how and what. Well, my brains are Bosch 7.9.7+, so minimal modification will be required, just transfer 1 shortcut so that the brains switch to BSL mode, to do this we unscrew the brains from the plastic, 4 turns by 8, then unscrew the bolts with a T15 sprocket. After resoldering, the rezuk can be left in place, there is nothing wrong with that
Now the preparation of the brain for the firmware is completed) Now let's prepare the workplace) It turned out like this for me: I took the power supply from the computer, shorted the green and black wires on the main block, then cut off 1 connector and connected it to the yellow (+12v) and black (-) using the cigarette lighter crabs ( this will be the power supply for the brain), having previously cleaned it by winding it around the probes of the multimeter
Then I connected the brains to the pack connector and to the laptop
Now we launch the combi loader, connect the brains to the cigarette lighter, and first do a diagnostics of the brains in order to find out the firmware number
I didn’t take any further photos, I’ll describe it this way: select the version of our brains in the left menu, press the read button below to read the current firmware, then save it with the blue floppy button, done, the current firmware is saved! Now we either download from the Internet, or modify the current firmware via ChiptunePro (whichever you prefer) and open it in the combo: File-open, and press record. The program will ask you that everything will be erased, we agree, then it will ask whether we will flash it through diagnostics or not, we agree again, a couple of minutes and the whole machine is flashed!
In principle, there is nothing complicated in flashing a car, I did it the first time, I took the ready-made firmware, but modified it a little in the chiptune program (I made the cutoff higher and lowered the tropical mode from 105 degrees to 97). After driving about 10 km, I can say that The car has become faster, but the fuel consumption has not changed, well, I’ll add it once I’ve driven at least 100 km). If anyone needs it, I can send you my firmware (economy with modifications online) and the finished semi-sport one). There were also firmwares somewhere not only for Priors, Shnivy, Kalina, January and something else, economy, sports, etc. some were built individually. I repeat once again, all actions occur at your own peril and risk! This article is for entertainment purposes only! If you have questions or criticism, I’m always ready to answer in the comments.
Main stages of chip tuning
Before you begin upgrading the engine, you must bring it into a condition that meets factory specifications. Otherwise, the cost of chip tuning and the setup itself will be pointless. The reprogramming procedure does not depend on the make of the car or the number of camshafts with 8-valve or 16-valve mechanisms. Chip tuning of the Priora engine consists of four stages:
- Reading the standard program in the ECU - this procedure is carried out through the OBD diagnostic connector.
- Editing a downloaded program.
- Uploading the edited, firmware program back to the controller.
- Checking the operation of all vehicle components on a special stand equipped with instrumentation and mechanical rollers, or in the field.
If the program needs to be modified, it is adjusted and uploaded back to the ECU. The described procedure is repeated until the desired result is achieved. You can do the firmware of the program yourself if you have knowledge in the field of computer programming and special equipment.
Lada Priora Hatchback В(SЁ) [PRO]100 › Logbook › [PRO] ECU and its firmware
Finally, the long-awaited vacation has arrived and I got around to updating my BZ. Folders with photos on many topics and improvements have long been created on the computer, but my laziness always defeats me. This topic, I think, is familiar to many, but it is primarily for those who are VERY
doubts whether to flash the car or not.
I thought for a long time, read a lot, and repeatedly asked my “wired” friends whether to do this or not. And having still not found any compelling arguments in one favor or another, I decided to take a risk, especially since an acquaintance suggested that I get the firmware at a discount in exchange for an objective review of the program. I didn’t ask the author and model of the firmware (and still don’t know) for the objectivity of the test and to avoid endless flooding on the topic “ who is cooler, Paulus or Icebreaker
”!
I also ask you not to start discussions like “ you’ll kill the engine with detonation
”, “
how the car drove ***
”, “
consumption has dropped and it’s stopped charging
” and other non-Orthodox heresies. The ECU firmware itself took place after the birth of my daughter, because at that time I thought that this was an extreme modification to my car (more on this a little later). I was walking in the month of February - winter, ice, everything to do + lack of roads in our wonderful city. I came to Alexey Viktorovich, who was then unknown to me, with a request to reprogram my computer.
We drove the car into the box and he began connecting all the wires and the laptop to my Lada.
Then they tried for a long time to make friends between the computer and the laptop, and then a miracle happened
The news about the model of the brains of my car neither pleased nor saddened me - having read about different models in advance, I understood only one thing - Bosch is German (I hope German) quality and Bosch is difficulties in flashing and more. Before replacing the firmware, computer diagnostics of the car were carried out and an error was detected in the misfire in the third cylinder. It seems that the error is “popular” and does not seem to be repeated, so it was reset.
Before updating the firmware, they merged the native firmware from my computer just in case (at this moment I finally calmed down because backup is possible) and started uploading a new one
Source
Rules for handling the motor after flashing
Chip tuning, carried out by a highly qualified specialist, really improves the performance of a naturally aspirated engine: it increases its power, increases throttle response, which is especially important in overtaking mode, and reduces fuel consumption. When overtaking, the maneuver time is reduced, you have to press the gas pedal less when driving without acceleration, and change gear less often when using a manual transmission. Otherwise, driving a chip-tuned car is no different from driving a regular car.
Individual modification of the engine, performed professionally and using modern equipment, has a positive effect on the functioning of the engine. Chip tuning allows you to make the operation of the power unit more flexible and dynamic. At the same time, it is also necessary to take into account the negative consequences of such alterations: the service life of the catalyst is significantly reduced and the engine service life is reduced.
We recommend reading:
- Bumper options for Priora and their comparative characteristics
- Engine protection on Priora
- Installation: additional door seals Priora
- Installing an air conditioner on a Lada Priora
- New firmware for VAZ 2114
- Wheel rims for Lada Priora
How to flash Bosch ECU 7.9.7+
How to flash Bosch ECU 7.9.7+
Here I will tell you how you can flash the ECU of a VAZ 21703 Lada Priora, since I myself decided not to pay anyone money and do it myself, everything worked out and works great, and those who say and scare you that nothing will work out for you simply they want to get money out of you!
I won’t lie, you will still have to spend around 1000 rubles. to purchase an adapter and firmware, but it’s worth it, after that you can upload any firmware to your taste and do it to your friends for a small fee and get the money back, and drink beer.
For this we need:
Universal adapter KL-Line BM9213 USB MASTER KIT for tuning a car with an injection engine, you will not chip the carburetor with it,
You can read more about it and how to purchase it here. For the adapter, you will need a virtual COM port driver for Win XP, Vista can be downloaded here, you can also use another adapter VAG COM USB KKL v409.1 which you can buy from our partners, this is the same KK-Line adapter only in a housing and for ridiculous money.
Next, to flash the chip firmware, we will need ChipLoader 1.96, you can also use the newer version of ChipLoader 1.97.7, but the previous one also works stably, so I don’t see the need to use the new one.
in the Help > Help tab you will find the User Guide, also go to the settings and uncheck all the boxes as shown in the figure above. In order for the block to start sewing, it needs to be modified according to the instructions in the User's Manual, everything is described in detail there.
You will also need firmware, if you just want to try chipping, then first you can try the free Tuned VAZ firmware, but I would advise you to immediately flash the normal VAZ Commercial firmware, the difference is significant.
Also, many beginners wonder why ChipLoader gives an error after selecting a 260 kB firmware?
The answer is simple, ChipLoader supports firmware only in full-size format, i.e. “Decrypt” size is 832 KB (851,968 bytes) to decrypt the firmware we need the SMS Enigma new v 1.10 program
First, you need to remove the ECU to read the inscription on the sticker, then you need to determine its type, you can do this here, my sticker looked like this:
I have identified my unit as Bosch 7.9.7+; in order to program it, it needs to be modified; it is written how to do this here
Next we need to assemble a simple circuit, I made it simply from thick wires so that they could fit onto the ECU pins.
I took the 12 volt power supply from 8 1.5V batteries, you can use a power supply, but only a stabilized one, do not use pulsed ones from the computer from the one from which you will be sewing, units from Sega Dandy consoles and other Chinese equipment are not suitable, it is better to take power from batteries straight from the car, and sew on a laptop without connecting to the network, or use an uninterruptible power supply in case the power suddenly goes out 
We disassemble our block and solder the resistor on the board
after reprog return it back.
connecting to the connector is not difficult, the outermost outputs are numbered, the rest can be counted, the connector looks like this:
It is advisable to follow the connection sequence: install the driver on the adapter, it is a virtual com port, and in the settings change it to COM-1, Connect the wires according to the diagram to the ECU, switch S1 should be turned down (see diagram) S2 is disconnected, then we connect everything with Master Kit Adapter or VAG COM USB KKL v409.1 (plus circuits to the plus of the adapter, GND - circuits to GND - adapter, we do not connect the power, insert the adapter into the USB, it is detected, now we connect the 12 volt power to our circuit, in a few seconds turn on the S2 switch (this is the ignition), run the ChipLoader1.96 program and select your virtual port there, click establish a connection, if it’s established, select the firmware and click load, you don’t need to erase anything, if it’s not installed, turn off S2, wait a few seconds and repeat the procedure, everything is sewn fine.
After flashing the firmware, we install the unit in place and connect to the diagnostic block according to this diagram:
and be sure to reset self-learning using InitECU. everything is ready, congratulations, you are now chipun
What does the controller control?
After processing the information, the Lada Priora ECU makes adjustments to the operation of the following mechanisms:
- ignition systems;
- cooling systems - controls the operation of the fan;
- fuel system (operation of injectors and fuel pump);
- interior climate control systems (air conditioning operating modes);
- exhaust gas vapor recovery systems;
Control occurs by closing the output circuits through the output transistors.
Error codes
In error mode, the computer may display the following codes:
After troubleshooting, you need to reset the error. If no action is performed within 20 seconds, the on-board computer goes into normal operation.
A little about firmware
If you still decide to upgrade the ECU yourself, use only high-quality firmware. According to reviews from car enthusiasts, Paulus firmware is a good option, as they “correctly” change the settings of the electronic unit. Moreover, they should be downloaded from official sites, and not from third parties. Because you can run into a fake and spoil the characteristics of the car.
Therefore, be extremely careful when choosing new software, since the cost of an error is very high and there is a risk of damaging your car with low-quality software.
ECU programming
In order to select our ECU, you need to go to the “Protocols” - “BootLoader Tricore” tab and select the 428th protocol.
After selecting the protocol, we will be shown instructions for working with the block, click “OK” and see the following window.
The window is divided into two tabs:
- Reading with the backup checkbox allowing you to make a backup copy of the ECU. And also read flash and eeprom with one button.
- Writing with the restore checkbox allowing you to restore the ECU using a backup copy.
Each tab contains 3 items:
- Micro Maps (flash)
- extflash not present (I assume that this item is needed to generate a recovery point file)
- EEprom
In order to read the firmware file, you need to uncheck “backup” in the “Reading” window and check the box next to “Micro Maps”. Then press the “READ” button and wait until the file is downloaded.
If you want to upload tune firmware to the block. In the “Writing” window, you need to uncheck “restore” and check the box next to “Micro Maps”. Then press the “WRITE” button, wait for the file to download and you’re done!
A more detailed video report can be viewed on the DimaMehanik Entertainment channel
You can also view this and other reports in the Vkontakte group