Vinyl film: principle of pasting
One of the alternatives to painting motorcycles may be to decorate parts through a process such as covering them with vinyl film.
This approach has at least two advantages. Firstly, it becomes possible to eliminate minor surface defects without the need to paint them. In addition, the preparatory stage is significantly reduced. Secondly, pasting takes much less time than painting and polishing, and its labor intensity is noticeably lower. Thirdly, pasting allows you to create a unique decorative effect, which cannot be achieved with any paint. The structure of vinyl can be two- or three-layer. A process such as covering a tank, frame or plastic with vinyl film consists of the following steps.
- Select a color (if you are going to use a plain film) or a pattern.
- Surface preparation, which involves washing and degreasing metal or plastic.
- Pasting with film. It can be applied dry or wet. The second option is more technologically advanced, as it allows you not only to eliminate air bubbles, but also to apply the vinyl itself repeatedly, achieving an ideal result.
Naturally, it is unlikely that you will be able to complete all the work yourself. This will require special equipment, especially for complex surface topography. But the result of the work done and the uniqueness of the motorcycle equipment are definitely worth the money spent.
Today you can find several main types of vinyl on sale, used for decorating and protecting parts of cars and motorcycles.
- Simple. It is distinguished by its durable color and glossy or matte structure.
- Graphic. Vinyl, which allows you to apply images or patterns on a digital plotter, after which the motorcycle will be covered with such film.
- Texture. A special type of vinyl that allows you to imitate the structure of natural materials, such as chrome, wood, leather, etc.
- Carbon. One of the most popular types of vinyl, since it is most often used for self-covering with film. Formally, it is a subspecies of the textured type, but differs from it by a characteristic structure like carbon fibers.
- Chameleon. A special type of film that changes color depending on the angle of view and exposure to sunlight.
- Anti-gravel. Vinyl, the main role of which is to protect the paintwork of motorcycle parts.
Previous PaintingTypes of decorative painting of a car body Next PaintingHow to apply and how long it takes to dry car varnish
Ready-made paint in aerosol cans
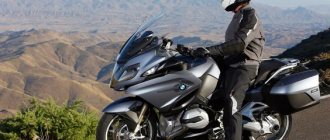
Paint manufacturers offer a whole palette of the most popular colors. The most successful range here is silver. For added reliability, some use light or dark silver paint for rims instead of the usual metallic paint.
In any case, you will not find the original autoflower in a bottle; you will have to select the closest existing autoflower.
Spray painting a motorcycle
In order to save money on the purchase of painting equipment, some motorcycle owners paint motorcycle parts using a spray can. It must be admitted that in this way you can also achieve very good results.
Before starting work, the can itself should be shaken vigorously. To avoid an unexpected effect, the product should first be tested on another surface, that is, we perform the so-called rehearsal painting.
The temperature indoors or outdoors where painting is done should be about 20 °C.
Aerosol paint is applied at a distance of 25-30 cm from the surface.
- Remove parts from the motorcycle and tape those parts that we will not paint (for example, the tail light).
- Prime the parts where the paint has peeled off to the plastic. Apply the putty and let it dry for at least an hour.
- Clean with sandpaper. First the 200th, which will reduce the leveling time, and after the 400th or 600th. But at the final stage it’s 1000 or higher.
- We do painting. The base coat is applied first, followed by another 2-3 layers of paint, with a 15-minute break between each application.
Some motorcycle owners also apply clear varnish after paint. The technology for applying it is no different from the technology for applying paint.
What defects can you encounter when painting?
- If the surface is poorly prepared, poorly cleaned, primed, etc. The applied coating may soon begin to peel off. The only way out in this case is to do all the work again, but at a higher quality;
- Due to the high viscosity of the paint, strong spray pressure, or too thick a finishing layer, the surface may not be painted evenly. This can only be corrected by smoothing the surface and applying a new layer;
- Incorrectly selected putty can lead to rapid fading of the treated surface. To eliminate such a defect, it is necessary to clean off the old coating to the metal and apply a new one.
Approximate prices for services
| № | Name of works | Number of standard hours | Standard hour cost (RUB) | Total cost (RUB) |
| 1 | Motorcycle painting | 39,9 | 1200 | 47880 |
| 2 | Painting motorcycle parts | 3,9 | 1200 | 4680 |
| 3 | Motorcycle frame painting | 9,9 | 1200 | 11880 |
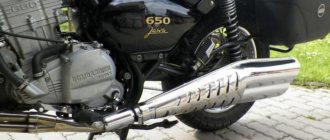
| 4 | Painting a motorcycle muffler | 4,9 | 1200 | 5880 |
| 5 | Painting plastic parts of a motorcycle | 4,9 | 1200 | 5880 |
| 6 | Painting a motorcycle tank | 5,9 | 1200 | 7080 |
Please note that this online resource (including the indicated prices for services) is for informational purposes only and under no circumstances constitutes a public offer as defined by the provisions of Article 437 (2) of the Civil Code of the Russian Federation. The cost of work varies depending on the make of the car, its age and technical condition.
The first thing is paint, and then the technique
It is paint that is a component with a capital letter, not “direct hands”, but paint. Because a clumsy person with an expensive color scheme can get an attractive result, but a master with something unclear will not get anything good
That’s why it’s so important to understand the recipe and ingredients.
There are small factors to consider when purchasing paint. Firstly, the cost
It's not even worth explaining. The cheaper this design solution is, the better. Secondly, the technique and complexity of applying the material. Sometimes it happens that it is simply impossible to apply paint with your own hands. It either bursts or falls off, in general, you need a special environment and special tools. Thirdly, drying time. This factor is also worth paying attention to. After all, not every material dries quickly and evenly; for some options it is worth creating special conditions.
Materials and tools used
Even in artisanal conditions, that is, in your own garage, the work of painting a motorcycle can be completed at a fairly high level. You just need to strictly follow the motorcycle painting technology, as well as use high-quality materials and tools. The material component of the process includes such components.
Dye. What type, texture, color is determined by the owner, based on his own preferences or objective circumstances (for example, during local repairs, you will have to match the color of the new paint to the old one). Primer. Another irreplaceable component that provides the required level of adhesion - adhesion of paint to the surface of the part. In addition, some of the primers may contain anti-corrosion additives.
This is especially important when it comes to metal parts with pockets of corrosion. Putty. This is a plastic mass that is used to smooth out the geometry of painted parts (scratches, dents, holes, etc.)
P.). Abrasives. Coarse and fine-grained materials used for removing old coatings, as well as roughing and finishing surfaces. Protective materials. This is a set of film products designed to protect those parts or components of a motorcycle that should not be painted.
As for tools, special attention should be paid to the means of applying putty and primer masses and the paint itself. In the first case, sets of spatulas are used, but the primer and paint will have to be applied using special spray guns (paint guns) to improve the quality of the layer.
Stickers
The simplest and most basic way of tuning. It’s one thing when they reflect the pilot’s merits, for example, participation in events or routes traveled, as well as membership in a team. It’s a completely different matter when they try to hide scratches, dents or even rust behind stickers, then everything is used, from stickers “love is...” to “thanks to grandfather for the victory.”
Stickers that really decorate your motorcycle should be sprayed with varnish so that they do not roll off along the edges and do not suffer from the weather.
Choosing paint for a motorcycle
First of all, you need to select one of the paints and varnishes. Motorcycle paint must be suitable for its intended purpose. The following types will be required:
- Acrylic compositions are presented in a wide range of colors and are resistant to mechanical stress. Disadvantage: they are easily washed off with gasoline and are not suitable for application to the tank area.
- Alkyd paints are more resistant to chemicals, durable, and easy to apply. Disadvantage: relatively high cost, poor range of shades.
- Nitro-enamel types have proven themselves to consumers due to their low price, ease of use, and range of colors. Against the background of significant advantages, there are significant disadvantages: the surface is exposed to adverse factors, both mechanical and chemical in origin, and has a low shine. This is a seasonal option that requires annual renewal.
It all depends on the budget and time that you are willing to spend on your “iron friend.” This is interesting: car varnish in a can.
SUSPENSION
| Name of works | Price, rub | Note |
| Fork bulkhead, with replacement of oil seals. (reversal) | from 3000 | including dismantling and installation |
| Fork bulkhead, with replacement of oil seals. (telescope) | from 2500 | including dismantling and installation |
| Replacing steering column bearings on a classic | from 3000 | check the price with a mechanic |
| Replacing steering column bearings on a sportbike | from 2500 | check the price with a mechanic |
| Replacing rear shock absorbers | from 800 | |
| Replacing the monoshock absorber | from 1000 | |
| Replacing front wheel bearings with wheel removal | from 1000 | |
| Replacing rear wheel bearings with wheel removal | from 1500 | |
| Editing disks | — | check the price with a mechanic |
| Replacing chain and sprockets | 2500 | |
| Chain lubrication | 200 | |
| Changing the oil in the gearbox | 300 | |
| Chain tightening | 200 | |
| Removing and installing wheels | 500 | |
| Cleaning and Lubricating the Chain | 800 | |
| Replacing swingarm bearings | from 2000 |
Types of paint and their choice
The choice of paint is based on two points:
- On the cost of paint.
- On the difficulty of applying at home.
The following types of paints are used to paint a motorcycle:
- Nitro-enamel.
Such paints are in greatest demand because they have a relatively low price and are quite easy to use. This paint dries quickly. Another advantage of the paint is the wide range of colors. At the same time, it also has a number of disadvantages. Firstly, it gives the surface a slight shine. Secondly, nitro paints have poor resistance to chemical and mechanical influences. However, this coating is ideal for touching up small details.
Alkyd paints.
This type of paint has a high cost. This is the main drawback. Also, the range of colors is quite limited. Alkyd paints have undeniable advantages. The application technology is simple, which allows you to paint at home. The paint is highly resistant to fading and chemical attack, and the coating strength is very high.
Acrylic paints are more expensive than nitro-enamel paints.
This is caused by the drying speed of paints, their composition, and method of application. In addition, such paints are less susceptible to mechanical stress. Resistance to chemical irritants is very weak. A tank painted with this paint will definitely change its color if gasoline gets in, since the paint will gradually wash off.
When choosing a paint, you should consider how often you are willing to repaint your motorcycle. Cheaper options will be less durable and the original presentable appearance will deteriorate very quickly.
Color selection
Painting a motorcycle in one color or another reflects the character and preferences of its owner. Many fans of fast driving like to experiment, combine shades, and radically change color. However, if you wanted to repaint the motorcycle, for example, from red to black, then this must be recorded in the traffic police. Common shades: red, blue, black. Usually the frame is painted one color, the tank and protective elements in another, and small parts in a third. But it is possible to apply a single color preference. Professionals do not recommend using paint with a metallic effect. The recommendation is due to its high cost, difficulties of application at home and errors that will be clearly visible on the surface as a result of painting.
Pay attention to: Technology of painting scratches on cars: surface preparation, choice of composition and methods of its application
Painting technology
If you follow painting technology and use high-quality materials and tools, you can paint a motorcycle at home.
Choice of paint and primer. The first step is to purchase primer grades GF-21 or FL-03K, since they do not react with the main coating and have good adhesion.
We choose paint mainly from three options:
- Nitro-enamel. Is the most popular option. Among the main advantages, it is worth noting the low cost, a huge selection of shades and quick drying. But the disadvantages are low gloss, low resistance to chemical materials and poor resistance to mechanical stress. This option can also be called seasonal, since the paint can be damaged even by drops of oil and sand flying in motion.
- Alkyd. It is a more practical option that holds chemical solvents tightly. Resistant to mechanical damage. The cost of such paints is higher compared to the previous option, plus there is not much variety of colors.
- Acrylic. It is an intermediate option, which is characterized by mechanical resistance, excellent choice of colors, and easy application. In addition to the tank, almost all parts can be painted with this paint. If you drop gasoline, the color will immediately change to a duller shade.
If you don’t have a lot of money, but have enough time, then nitro enamels are just right. For other cases, it is worth taking alkyd or acrylic paints (for everything except the tank).
You also need to prepare:
- Remover for old paint;
- Degreaser (white spirit);
- Paint thinner;
- Sandpaper (600 and 1000);
- Putty;
- Masking tape;
- Air compressor with a spray gun and a set of sprayers;
Preparation. Once everything you need is on hand, you can begin preparatory work. I would like to immediately note that the majority of the time will be spent on this, but further success will largely depend on this.
- First of all, prepare your work area. Vacuum the floor, stick a film on the ceiling (from falling dirt), spill a little water on the floor to prevent dust from rising.
- Wash the part from dirt and oil;
- Straighten the surface (if necessary, carry out welding work);
- Remove the paint layer (with sandpaper, a power tool with a special attachment, or a chemical remover);
- Degrease the cleaned surface and begin mixing the soil;
- Apply 3-4 layers of primer;
- Dry the part for 2-3 days at normal temperature or at 100 degrees (until dry);
- Apply putty to the primed surface (if necessary), while trying to make the layer as thin as possible;
- Level the putty areas with 600 sandpaper, and the entire part with 1000 sandpaper.
Painting. We begin the painting process by mixing the paint and, if necessary, diluting it with a solvent.
Next, we will need to charge the spray gun, adjust the spray spot and apply the first layer at a distance of 25 - 30 cm. At the same time, it should be applied as thinly as possible, since it is considered a developing film. Next, we check the part, and if defects from previous work are detected, they should be eliminated in a timely manner.
Remember! Before you start applying paint, you should correctly adjust the spray gun so that the applied layer is within the range of 80 - 120 microns. In this case, the hand should move at a speed of approximately 40 cm/s.
We wait until the paint dries. Lightly sand the first layer and begin applying the second layer. Again, wait until the layer dries, lightly sand and apply the third – finishing layer.
Preparing a motorcycle for painting
Before you get started, you need to figure out how to properly paint a motorcycle. Firstly, an important stage is the preparatory work. If you do not perform a number of preliminary steps, you may not expect a good result. Let's consider the manipulations in stages: Stage 1. Preparing the site. Thorough cleaning of the room from dirt, sticking a protective film on the ceiling. The floor can be moistened with water to prevent dust from rising. You will also need to dismantle parts that need painting. They need to be cleaned of dirt and dust particles, rinsed and dried well. Stage 2. Preparation of materials. You will need: sandpaper, abrasives, degreaser, removing old paint, solvent, masking tape, protective materials, putty, primer, tools for applying preparatory layers, as well as the paint itself (air compressor with a spray gun and a set of sprayers, gloves, respirator). Stage 3. Surface cleaning. Using sandpaper, clean the parts from the paint layer and rust. If the paint is factory-made, then you can perform surface manipulations, stripping only to the primer layer. When repainting or damage is present, the motorcycle is stripped completely to bare metal. To speed up the process, you can use chemicals and removers. Apply the solution to the surface, then clean off the remaining layer with a spatula or knife. After cleaning, the surface must be degreased. Stage 4. Putty. Applying plastic material, smoothing visible defects. The work is performed in several steps. Each layer is applied at intervals to allow the previous coating to dry (20-30 minutes). Finally, treatment with abrasives, grinding, degreasing. Stage 5. Primer. Provides reliable adhesion of the coloring composition to metal or plastic. It is important to take into account that treat plastic parts with primer for plastic, metal components with an anti-corrosion or universal compound. The primer is applied in several layers with an intermediate drying period (about 30 minutes). Finish by sanding it down with P-400 sandpaper.
Remember! All work is carried out wearing gloves and a respirator. Don't ignore precautions. Protect your skin and lungs from the harmful effects of chemicals and fumes.
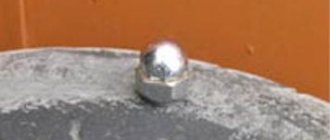
Sanded tank
Primer applied Please note: How to properly paint a car body using a roller: step-by-step painting instructions
Types of paint and their choice
The choice of paint is based on two points:
- On the cost of paint.
- On the difficulty of applying at home.
The following types of paints are used to paint a motorcycle:
Such paints are in greatest demand because they have a relatively low price and are quite easy to use. This paint dries quickly. Another advantage of the paint is the wide range of colors. At the same time, it also has a number of disadvantages. Firstly, it gives the surface a slight shine. Secondly, nitro paints have poor resistance to chemical and mechanical influences. However, this coating is ideal for touching up small details.
This type of paint has a high cost. This is the main drawback. Also, the range of colors is quite limited. Alkyd paints have undeniable advantages. The application technology is simple, which allows you to paint at home. The paint is highly resistant to fading and chemical attack, and the coating strength is very high.
- Acrylic paints are more expensive than nitro-enamel paints.
- This is caused by the drying speed of paints, their composition, and method of application. In addition, such paints are less susceptible to mechanical stress. Resistance to chemical irritants is very weak. A tank painted with this paint will definitely change its color if gasoline gets in, since the paint will gradually wash off.
When choosing a paint, you should consider how often you are willing to repaint your motorcycle. Cheaper options will be less durable and the original presentable appearance will deteriorate very quickly.Before proceeding to painting the surfaces, they must be primed. There are special nitro primers in aerosol cans. This form of release allows you to prime the surface very efficiently and quickly. Preparing the surface is extremely necessary if an expensive dye is used. If there are dents or deep scratches on any parts, such places should be puttied before applying primer.
Primer is necessary for the paint to adhere better. By and large, before starting painting, you should remove the old paint from the motorcycle. If you don’t have the time or desire for this, you can use sandpaper to go over paint cracks and places with rust. After the surface has been mechanically treated, it must be degreased. To do this, you need to purchase a solvent. Only after this is the primer applied. Only after the soil has dried is the dye applied. Painting a motorcycle with your own hands is not very difficult.
- Before repainting a motorcycle in a different color, you must contact the traffic police and obtain permission. All actions to change color must be legalized.
- When applying primer to the prepared surface, do not smear it with a brush.
- It is better to paint a surface primed with nitro primer immediately. It will be difficult to degrease such a surface.
- Applying a color layer is not the last step. The surface must be thoroughly polished. This will remove minor imperfections and make the surface more resistant to impact. To do this, you can use a drill with a felt wheel and a special polish.
To paint a motorcycle, you may need a special tool for applying paint, as well as a heat camera. A spray gun is necessary so that the paint lays evenly. Alternatively, you can use spray paints.
Motorcycle painting - where it all started
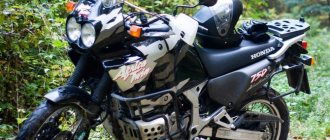
How it all started: Painting a motorcycle would not have been mandatory if it weren’t for the operating conditions of the motorcycle and the abuse it suffered off-road.
In mid-November 2021, the idea arose to refresh the appearance of the motorcycle. So to speak, bring him into divine form. The reason was the lack of a normal appearance, which suffered greatly during the trips. And since, on trips, I managed to ride a motorcycle into the forest and fields, the view was terrible. Something is worn out, chipped in some places, and in some places the paint is just chipped off. In general, it’s decided. Let's paint.
I don’t know what the process of painting car/motor vehicle parts looks like. I've never painted anything in my life. But a healthy interest and a bit of fuckery suggested that I do it myself. In general, the soul rushed to heaven.
Of course, with the belief that I can do everything myself. Various cans of spray paint were purchased for these purposes. A can of paint varnish, a lot of skins and other things that seemed to me to be the right material. Of course, it was decided to paint it in the office. Why should he be idle on weekends? Let it be useful! After spreading a piece of film on the floor, painting the motorcycle began. The intermediate result of painting looked something like this
The results of self-painting
As a result, I was pleased with painting individual elements of the motorcycle myself. I successfully covered the entire office floor with paint. I gained invaluable experience in painting and realized that it was easier and better to pay money to those who do this professionally. By the way, of all the things I painted myself, the only thing I will finish painting is the motorcycle helmet. I still want to do it myself. Yes, and he is my third. So, if I mess something up, it’s not a big deal.
Normal motorcycle painting
Being in some kind of nirvana from what had been done and the completely trashed office, it was decided to trash it even more.
Why did you decide to go to a hardware store? Buy even more film and even more paint in cans. Somewhere inside me, my novice car painter was running and shouting: Fuck it, let's dance! In my opinion it would be fun. But it didn’t work out. Laziness and optimization won. After standing outside the store and rummaging through Google maps, I found the nearest painting service. I arrived there. There is no point in talking for a long time about how they painted it. Because they painted quickly and well. The entire painting took 3 days.
Of course, everything that was painted by me was cleaned and made suitable for painting by specialists. We agreed on the color the motorcycle will be painted. It didn't take long to choose. The motorcycle itself is black. I wanted to make it a little brighter. Hence the choice of color. The motorcycle will be blue and black. It'll look awesome
Three days later everything was ready. The motorcycle parts were given to me. For all the fun it cost 28,000 rubles. For this money we painted:
- Front fender
- Rear wing
- Side plastic (all)
- Gas tank
- Tidying up
- Faro
Which in my opinion is not bad at all.
The result of painting a motorcycle
I was pleased with the paint job of the motorcycle.
The color and speed of painting - no doubt. The end result of the work makes me happy. By the way, here are some of the photos after painting. I think that in the coming days we will put this whole thing on a motorcycle and see how it will look after a small update. Once we assemble it, I’ll make a short video of the motorcycle. That's it, I went to the service center to film the assembly process.
Spray painting
Do-it-yourself repairs are not a quick and painstaking task. Even to spray paint, you need to prepare the surface. I want the paint not to peel off and the new shiny sides not to be dotted with painted scratches.
Spray painting parts
In order for the paint to lay evenly and last as long as possible, actions are required as in the usual repair of a damaged surface: leveling, putty, primer and sometimes intermediate procedures. But which parts exactly require special attention?
Painting the main details
So, let's begin. The moped doesn't have many parts that need painting. First of all, these are the tank, sides and tail. Wings. The tank is made of steel and can be painted using automotive technology. If the dents are shallow, then they can be sanded and puttied along with the rest of the scratches. Then go over it with sandpaper, cover it with a primer and after drying apply paint. Both primer, paint, and varnish can be applied with a spray can. It will be necessary to give several layers after the previous coating has completely dried. You can apply stickers before applying the varnish. Under varnish they look richer and cannot be washed off with a high pressure washer.
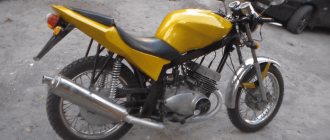
Scooter decorated with stickers
Moped sides and fenders are usually made of thick ABS plastic. Putty and primer must be purchased specifically for this material. The sidewalls do not suffer much from use. Maybe they don't need to be painted? Only if the painting does not change the concept.
How to solder cracks correctly
The front part of the wing will most likely undergo extensive repairs. The cracks need to be soldered with a soldering iron and then with the same soldering iron, press in the wire mesh, which can be bought at a hardware store. This is a mesh for plaster. The cell size is two millimeters. The mesh will strengthen the fault. The scar from the soldering iron must be cleaned with coarse sandpaper and then puttied. Further painting operations are the same as with the tank. But there must be primer for plastic. Otherwise the paint will bubble.
Sealing a crack on a scooter
We restore plastic
The plastic of the scooter, although it is also made of ABS, is thinner. And there is a chance, if you start painting a scooter, you will ruin everything with your own hands. First, it is necessary to determine how many elements of plastic are lost irretrievably. Is the repair justified, or is it easier to find another part, a new one? A careful scooter owner never leaves plastic fragments at the crash site.
Even a piece crushed to smithereens can be folded like a puzzle and soldered on the wire mesh, which has already been discussed. Although for many scooters the Chinese have established the production of cladding parts. The new plastic is already painted and if the color does not match, it can be changed. Simply spray paint without additional preparation. Just matte it a little with sandpaper (to matte means to make the surface matte).
Severely damaged part after sealing
The entire process of restoring the plastic will take much longer than the rest of the scooter's painting. Repairing plastic with a soldering iron is quite a harmful task. All work must be carried out in well-ventilated areas.
Preparing for painting
Before painting, the area where the paint will be sprayed must be free of dust. Because electrified dust will stick to the paint and then no amount of sanding will remove this grain. If you are desperate to achieve the result you expected with a spray can, and still decide to take the plastic to professional painters, persistently warn them that there is no need to dry plastic in the drying chamber. Let him stay with them longer. In the drying chamber, the parts will simply shrink, like a pure wool sweater in boiling water. Afterwards, all this “beauty” can simply be thrown away. The facings will not stretch over the fastening points.
Necessary materials
For repair and painting I needed the following items and materials:
- sandpaper with grit 120, 500 and 1000
- automotive putty (I used Novol Bumper Fix)
- universal primer Motip (1 bottle)
- aerosol acrylic paint Motip (2-3 cans)
- aerosol acrylic glossy varnish (2-3 cans depending on volume), I used Dupli-Color varnish. Varnish is needed if the paint is metallic
- White Spirit
- masking tape
You need to use only expensive paint from a good brand (for example, Motip), otherwise the result will be unsatisfactory. Cheap cylinders generate dust unevenly, so it is impossible to paint them decently.
How to profitably exchange a used car
To guarantee the legality of the used car exchange service and its objective cost, the purchase and sale process should be carried out at a trusted auto center. Here the client will be offered:
- Diagnostics of the old model, on the basis of which its cost will be determined;
- Selection of cars for exchange, completely new or with a clean mileage history: all cars undergo forensic examination, therefore the car dealership will never sell a car with a “dark past”;
- Legal support of the transaction: the client enters into a notarized agreement and, if necessary, can use the credit services of the car dealership’s partner bank;
- Efficiency of the service: the client does not need to look for buyers for his vehicle; he does not need to settle issues with the traffic police or the bank. The listed functions are the task of the auto center.
Read here! Russians are expecting an updated Kia Stinger
Thus, with minimal documents, it is possible to buy an improved car within one to three days. The used car exchange service makes it possible to regularly change the owner’s vehicle fleet by purchasing its best models.
Work order
| Types of jobs | Processes and subtleties |
| Preparation. | At this stage, you need to decide on the upcoming scope of work: choose the color of the paint, the necessary putty and primer according to the parameters. If you have to paint individual components, for example, a tank, then you will need to resort to dismantling all unnecessary elements. |
| Puttying. | This is a layer of plastic material that smoothes out visible surface defects (dents, scratches, etc.). The putty will have to be applied in several layers, and the thickness of each should not exceed 1 mm, and the total thickness should not exceed 3 mm. This is due to the fact that at a higher value, high stresses arise in the thickness of the material, which can lead to the formation of cracks. A pause of approximately 20 minutes is maintained between each layer to ensure complete drying of the putty. The finished layer is processed with abrasives to the required geometry. |
| Padding. | On the prepared and leveled surface of the part, you need to apply several layers of primer with intermediate exposure. This will ensure reliable adhesion of the paint to metal or plastic. |
| Painting. | Uniform coverage and color can be ensured by the use of special paint guns. The distance from the exhaust hole to the surface of the part is maintained at approximately 30–50 cm to ensure maximum area coverage with the same layer thickness. You need several layers of paint: the more there are and the thinner they are, the better the final result will be. |
| Varnish coating. | This protective coating is applied in 3–5 layers. The work is carried out very carefully to avoid smudges. It will not be possible to eliminate them without removing the paint layer and repeating the previous steps. |
| Motorcycle polishing. | For this, various polishing pastes are used, which can be purchased at almost any auto store. Thanks to it, it is possible to achieve the ideal shine of a muffler or a painted part made of metal or plastic that has become dull from regular use. In addition, the polish eliminates minor irregularities and scratches on the surface. |
Briefly about the work procedure
1. Remove damaged parts from the scooter and wash them thoroughly with laundry soap, leaving no traces of oils.
2. Glue the cracks according to the repair kit instructions.
3. Using polyester putty, achieve final evenness of the seam.
4. Apply one thin coat of adhesion promoter to the exposed plastic.
5. After ten minutes of exposure, apply 2-3 layers of acrylic primer.
6. Sand the primer with P 800 abrasive and apply 2 layers of paint.
7. If you have metallic or pearlescent paint, you need to apply a clear varnish after 40 minutes.
Most often, scooters are painted in two or three colors. To speed up the process, you must first apply different enamels one at a time, and then 40 minutes after using the last one, apply varnish to all parts at the same time. The difference in waiting time before applying enamel does not matter for each individual paint.
And one more important note. During preparatory work for painting a scooter, clean gloves should always be worn on your hands.
This will protect the skin of your fingers from being rubbed by rough abrasives.
Scooter plastic painting
The main problem when painting plastics is poor adhesion of paints and varnishes to the surface of the plastic. But chemists found a solution and created a product under the scientific name adhesion promoter.
In the retail chain, this product is often referred to as 1K primer for plastic, although, in fact, it is not a primer. Often inexperienced painters call the same material a plasticizer, which is also completely wrong. The plasticizer is a thick, clear liquid used for painting very flexible plastics and is added directly to the primer, acrylic paint or varnish, while the adhesion promoter is applied directly to the bare plastic.
Painting a scooter is almost no different from painting a car bumper. The only difference is the different color scheme. In other words, you most likely won't find the exact same paint, even in a color matching lab. There is only one way out - to paint the part completely, in a similar car color.
Reasons to paint a motorcycle
Each motorcycle owner independently decides whether to paint his motorcycle or not. There are several reasons why motorcyclists decide to change the color or touch up parts of their motorcycle:
Damaged appearance
Motorcyclists often encounter troubles on the roads. There are emergency situations that lead to the fact that motorcycle equipment becomes unattractive with all sorts of scratches and chips. This makes the external qualities of any motorcycle unattractive. Bikers immediately have a desire to change something and make their “iron horse” the same.
Feeling tired of the same color of the motorcycle
When you see the same thing over and over for a long time, sooner or later you want to change something. So motorcyclists, who very often see their bike in one color, one day decide to change it.
Desire to upgrade your motorcycle
Over time, old paint becomes very dull. It does not shine in the sun and motorcycle equipment becomes invisible and faded against the background of other vehicles. Therefore, the reason for painting is not the brightness or saturation of the shade of the motorcycle. Motorcyclists use a new coat of paint to make their bike look like new again. To do this, you just need to master the technique of how to paint a motorcycle yourself.
Motorcycle painting
It's no secret that before painting any surface, it must first be carefully treated. What to do? First, you should remove all parts that will subsequently be subject to this procedure. When all the parts are in place, you need to start processing. Painting a motorcycle begins with sanding the parts. After all, the surface must be perfectly flat. Is the work front ready? Then the next step is primer.
Car primer in cans is well suited for this procedure. This white mixture should be applied with high quality, because the result is already being laid. Everything is prepared - time to paint. Acrylic material dries quickly. The paint must be applied in several layers. The final fixing procedure is varnishing. The varnish will add shine and keep the paint in its original form. Again, you can use materials in cylinders. Their advantage is ease of use.
Painting motorcycle rims
Painting motorcycle rims can be called one of the simplest painting operations.
The work procedure is divided into several stages that even a beginner can complete.
- To avoid touching the rubber and other parts of the motorcycle when painting, we remove the wheels and carry out tire fitting.
- We carefully wash the discs from dirt, which is best done not with household detergents, but with special products for cars, since they can remove dirt as efficiently as possible.
- If there is damage on the surface of the disc, it should be removed. Using a grinding machine (at low speed) or sandpaper, remove the rust and the old paint layer.
- Thoroughly clean the surface of the disc and degrease it.
- Apply the first layer of paint with a spray gun, and after drying the next one. How many layers will need to be applied to get a bright and deep color, everyone must decide for themselves.
Types of paints
Painting a motorcycle usually involves the use of three types of paint. Each of them has its own qualities and characteristics. Which one to choose is up to each individual to decide. So, the first type of coloring material is nitro-enamel. It is one of the most common. Why? Because nitro-enamel paints are the cheapest. But, as always, low cost is not an indicator of quality. First the pros. NE (an abbreviation often found on packaging) dries very quickly. Just ten to thirty minutes at room temperature and the paint will dry. This is a fairly good quality, because it allows you to speed up the work process.
Painting motorcycle plastic
To paint the plastic of a motorcycle, you need to perform a number of operations.
Surface cleaning. We remove all stickers from the surface of the part and sand all damaged areas. Sand until it acquires a matte shine. Then, to remove all irregularities, we treat the surface with coarser sandpaper.
Preparing for painting. Apply putty to the surface of the plastic part as much as possible. It may be necessary to apply several coats to achieve the smoothest possible surface. After each filling and drying of the material, sand the surface with fine-grained sandpaper.
Next, using a degreaser, remove dust and remaining grease from the surface, after which we apply a primer. And after it there is also a developer - a special black powder. After repeated sanding, the developer will remain only in those areas where the defect has not been eliminated.
Painting. If possible, we carry out painting in a special chamber, since in this case the chances of a high quality final result can increase significantly. Don’t forget about stickers, that is, if you also want to see them on a plastic motorcycle part, then apply them to the part after applying and completely drying the first layer of varnish.
Painting tools
Before you start painting, you must first purchase everything you need for this. Modern stores offer a large number of products for painting bikes yourself.
For this purpose, it is important to purchase the following tools:
- Any paint. In most cases, spray paint is used for this purpose. It is rich and high quality.
- Sanding material. Scotch Brite will do.
- Substance for degreasing.
- solvent.
- A rag for cleaning the surface to be painted from dust and dirt.
- putty.
- A primer so that the paint lays down in an even layer.
- Masking tape.
All these elements will make it possible to paint either the entire motorcycle or individual parts in a short time.
How to paint a motorcycle
Preparation
When all the materials are in hand, you can begin the preparatory work. It is worth noting that they take up most of the time, but further success will depend on preparation.
How to paint a motorcycle at home? — First of all, we prepare the work site. It is best to carry out a thorough cleaning in advance - vacuum the floor, stick a film under the ceiling to get rid of falling dirt. You can spill a little water on the floor to prevent dust from rising.
- We determine the scope of work, if we repaint a part, then remove it from the motorcycle, if we tint an area, then separate it with masking tape and move on to the next steps.
- We wash the part from dirt and oil.
- We straighten the surface and, if necessary, carry out welding work.
- We remove the paint layer using sandpaper, a special attachment on a power tool, or a chemical remover.
- We degrease the cleaned surface and begin mixing the soil.
- Apply 3-4 layers of primer.
- Dry the part for 2-3 days at normal temperature or at 100 degrees (until dry).
- Apply putty to the primed surface (if necessary), trying to keep the layer as thin as possible.
- We level the putty areas with 600 sandpaper, and the entire part with 1000 sandpaper.
The process of painting a motorcycle begins with mixing the paint. First you need to strain it several times, and then, if necessary, dilute it with a solvent.
We charge the spray gun, adjust the spray spot, and apply the first layer at a distance of 25–35 cm. It must be thin and is considered a developing film. After applying it, we look at the part to detect defects from previous work and eliminate them in time.
Working with a spray gun is a real skill. First of all, you should carefully adjust the remote control so that the applied layer is within the range of 80 - 120 microns. It should be held at right angles to the surface, with deviations of no more than 10 degrees.
The paint is applied in strips, with an overlap of 4-6 cm. In this case, the hand moves at a speed of about 40 cm/s.
We are waiting for the paint to dry. Lightly sand the first layer and apply the second.
Again, wait for the layer to dry, lightly sand it and apply the final third layer. This completes the painting of the motorcycle with your own hands.
Motorcycle painting
After the surface has been processed, you need to build an algorithm for how to paint the motorcycle. Step by step instructions: 1 step. The paint in the jar needs to be strained several times. If necessary, dilute with solvent in a measuring cup, strictly following the instructions in the instructions. Step 2. Next, we load it into the spray gun, adjust the spray spot so that the applied layer is in the range of 80 - 120 microns. Spray painting requires shaking it before use. Step 3. We apply the first thin developing layer at a distance of 25-35 centimeters, holding the spray gun at a right angle to the area to be painted. Deviations of no more than ten degrees are allowed. Step 4 The paint is applied in strips at a speed of 40 cm/s, maintaining an overlap of 4-6 centimeters. We wait for the first layer to dry and lightly sand it. Step 5 We apply a second layer, denser and thicker, also wait for it to dry and sand. Step 6 If necessary, a third layer is allowed. To finish painting the motorcycle, leave its parts to dry for a day. Step 7 Cover with varnish. The protective coating is carefully applied in 3–5 layers. Step 8 Polishing. A simple application of polishing paste will add shine and eliminate minor irregularities and scratches. Please note that painting a motorcycle gas tank requires following basic rules. So:
- Be sure to drain all the gasoline and dry the tank until the vapors completely disappear;
- clean the coating down to the metal base;
- we fix the chips, you can photograph them;
- We protect all the gas tank openings with masking tape so that paint does not get inside;
- apply 4-5 layers of primer, taking into account chips, dry each one and sand it;
- apply several layers of paint, dry, glue airbrushing or stickers;
- coat with varnish in 3-4 layers, protecting the coating from gasoline during operation.
Pay attention to: How to determine the thickness of a car's paint when inspecting it, useful tips
It is better to carry out all manipulations in a shadow-free, ventilated room with a temperature of at least 20 degrees and a humidity below 50%. You cannot use acrylic paints; alkyd or nitro-enamel compositions are suitable. Painting the plastic of a motorcycle is also done taking into account the plastic coating. You will need special soil and a well-equipped room protected from dust. If possible, it is better to paint the plastic of a motorcycle with your own hands in a special chamber (capsule), so you will achieve a high-quality result.
Painting and drying the tank