How to remove the gearbox on a viburnum without removing the engine
All residents of Novosibirsk now have the opportunity to purchase a VAZ gearbox in retail auto stores.
st. Rassvetnaya 17/2
All residents of St. Petersburg have the opportunity to purchase and install a VAZ gearbox from our partners.
Request a call back
Enter your Name and Phone Number and we will definitely call you back!
- Home >
- How to remove and install a gearbox >
- Removal and installation of the Gearbox (Gearbox) Kalina
Removal and installation of the Gearbox (Gearbox) Kalina
We carry out the work on a car lift.
Disconnect the wire from the negative terminal of the battery.
For ease of operation, remove the air filter.
(For ease of operation, the front wheels can be removed.)
Remove the left side of the engine splash guard.
If the transmission is removed for repair, drain the oil.
Remove the four bolts securing the front clutch housing cover...
... and remove the cover.
Disconnect the front suspension arms from the steering knuckles by unscrewing two bolts securing the ball joints to the knuckles on both sides of the car.
With the mounting spade resting on the gearbox housing, press the left inner joints out of it...
... and right-hand drive of the front wheels. Move the drives away from the transmission by moving the corresponding front suspension shock absorbers outward.
Disconnect the wiring harness connectors from the reverse light switch, from the reverse lockout solenoid...
... and from the speed sensor.
Unscrew the nuts of the two bolts securing the torque arm to the gearbox, remove the bolts...
... and move the rod down along with the bracket.
Mark in any way the relative position of the transmission control rod and the shank of the gearshift rod hinge so that when reinstalling, maintain the drive adjustment.
Loosen the nut of the coupling bolt of the transmission control rod clamp...
... and disconnect the rod from the gear shift rod joint.
Disconnect the lower end of the clutch cable from the gearbox.
Disconnect the throttle cable holder from the bracket located on the gearbox next to the hole for the oil level indicator.
Remove the rear bolt securing the ignition coil bracket.
Remove the two upper bolts securing the transmission to the engine, simultaneously securing the second support bracket. Move the throttle cable together with the bracket to the side.
Place a reliable support under the engine or hang it using a lifting mechanism.
Disconnect the left brace mounting bracket from the body without disconnecting the brace from it. Move the stretcher along with the bracket to the side and secure it in any available way. (for example, tied with a wire).
Unscrew the nut of the lower right mounting of the gearbox to the engine and remove the lower end of the intake pipe spacer from the stud. If necessary, loosen the upper mounting nut of this spacer.
Place a secure support under the gearbox.
Remove the bolt from the lower left mounting the gearbox to the engine.
Remove the two bolts securing the left power unit support cushion to the support bracket...
...unscrew the three nuts securing the bracket to the gearbox, remove the spring washers installed under the nuts...
Removal and installation of the gearbox
Servicing the gearbox assumes that the mechanism will have to be removed and its position changed. Before doing this, you need to install the vehicle itself on the lift. The ignition must be turned off completely and the parking brake must be used.
How to repair a gearbox? To do this, disconnect the minus terminal from the battery. The hood must be opened completely. Any manual on gearbox repairs writes about this.
The oil filler cap is also removed. It is necessary to install the previous item after the screen is removed. The gearbox requires loosening the clamp responsible for fixing it. The inlet pipe hose must be disconnected from the corresponding sensor. Gearbox lever play requires the same actions in practice. Then you need to unscrew the air intake nut.
Removal and installation of gearbox Lada Kalina 1117 2004 - 2013
Tools:
- Open-end wrench 8 mm
- Open-end wrench 10 mm
- Open-end wrench 17 mm
- Open-end wrench 19 mm
- Straight box spanner 13 mm
- Straight box spanner 19 mm
- Driver for socket attachment
- Knob attachment 10 mm
- Knob attachment 13 mm
- Knob attachment 15 mm
- Knob attachment 17 mm
- Knob attachment 19 mm
- Knob attachment E-14
- Extension for socket bits
- Adjustable stops 2 pcs.
- Medium Phillips screwdriver
- Medium flat screwdriver
Parts and consumables:
- Wooden blocks 2 pcs.
- CV joint grease-4
- Studs M12x1.25 mm 2 pcs.
- Transmission oil
- Rags
- 3.5 liter capacity
- Funnel with hose attached
Note:
We carry out the work with an assistant on an inspection ditch or overpass.
1. Drain the oil from the gearbox as described here. Disconnect the wire terminal from the negative terminal of the battery. Remove the air filter as described here. Remove the starter as described here. We remove the clutch cable lead from the groove of the clutch release fork lever, following the instructions described here. Remove the left mudguard of the power unit, as described here. Disconnect the wire block from the reverse gear lock solenoid.
2. Disconnect the wiring harness from the reverse light switch.
3. Disconnect the wire block from the speed sensor.
4. Using a 10mm wrench, unscrew the three bolts securing the lower clutch housing cover.
5. Remove the clutch housing cover.
6. Remove the right and left front wheel drives as described here. Using a 13mm spanner, loosen the tightening of the nut of the coupling bolt of the clamp securing the control rod to the shank of the gear selector rod hinge. Then disconnect the transmission control rod.
7. Using a 19mm wrench, unscrew the nuts of the two bolts securing the clutch housing to the gearbox housing (which also secure the torque arm), holding the bolts from turning with a head of the same size.
8. We remove the reaction rod with the bracket from the gearbox.
9. Disconnect the plastic throttle cable holder from the gearbox bracket.
10. Using a 13mm socket, unscrew the bolt securing the ignition coil bracket to the clutch housing.
11. Using a 19mm socket, unscrew the two upper bolts securing the gearbox to the cylinder block, which simultaneously secure the bracket with the holders for the throttle cable and wiring harness. The front bolt (in the direction of vehicle travel) is shorter than the rear bolt. We remove the bracket with the cable and wiring harness from the gearbox.
12. Remove the left front suspension brace as described here. We install adjustable stops through wooden blocks under the engine oil pan and gearbox housing.
13. Using a 19mm spanner, unscrew the nut of the lower rear mounting of the gearbox to the cylinder block.
14. Using a 19mm socket, unscrew the bolt of the lower front fastening of the gearbox to the cylinder block.
15. Using the “E-14” head, unscrew the two screws securing the front left support of the power unit to the support.
How to assemble and disassemble a gearbox on a Lada Kalina
When the ignition is turned off and the car is locked, disconnect the battery by first removing the negative and then the positive terminal. From the box there are plugs with wires for the reverse lights, a locking solenoid and a speed sensor. They also need to be disabled. Don't forget to disconnect the starter.
Many experienced car enthusiasts eventually need to remove the transmission from the car. This usually happens when there is some kind of malfunction, or with high mileage, when the gearbox needs to be rebuilt or a new transmission needs to be installed. Let's look at how to properly remove the box on a Kalina, why it is needed and what safety measures need to be followed.
Repair, features and technical specifications
Inside a VAZ 21118 car, like any other, there is always a gearbox. For a model such as Kalina 1118, this device is a mechanical type design, which is equipped with one reverse stage, as well as 5 forward stages.
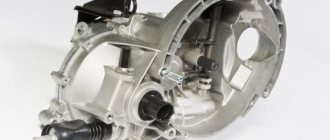
Gearbox from Lada Kalina.
In Lada Kalina, the gearbox is structurally combined with a differential, the main gear. Transmission differential repair should also take this into account.
The mechanism body of the VAZ Kalina car is presented in the form of three aluminum copper crankcases:
Special sealants are applied between them when assembling and repairing the gearbox.
How to remove the gearbox
To remove the gearbox from a Lada Kalina car, you need to be able to hang the car. A lift is best, but an overpass or a pit in a garage will do. You will need a set of tools in the form of keys, sockets, flathead screwdrivers, and pliers. Since the oil will have to be drained, you need a container for used oil with a volume of 4-5 liters, new oil and gloves. The box itself is quite heavy, ask someone to help you.
Transmission removal technique close up
If you are an experienced motorist, removing the box on a Kalina will not be difficult for you. The main thing is to follow safety precautions and instructions.
Hanging the car
First, drive the car onto a pit, lift or overpass, then secure it with the handbrake and put the car in gear. It doesn't hurt to put something under the wheels to prevent the car from rolling. Check if it is securely fastened. If it rolls away, it can cause serious injury and expense if it becomes damaged.
Replacing the release bearing Kalina 2, 1118, Cross, Sport
To make a replacement you will need to put your car on a pit or a lift. Repairs are also possible if you have reliable supports and a jack. It is worth noting that without a pit or lift, the replacement method without removing the box, which is described at the end of the article, is suitable.
Important to know: For work, it is best to use a set of sockets with a ratchet. When directly dismantling the manual transmission, ask someone to help you “pull” it off. To replace the VP without removing the box, you will need two studs with a diameter of 10 mm and a length of 30-35 mm.
How to remove the gearbox and release bearing on Kalina 2 (1.4-1.6 8kl) with your own hands
Replacing the release bearing on a Lada Kalina begins with dismantling the gearbox; this process is described in detail in step-by-step instructions with photos/videos. Perform the operations in order.
Tip: Use a pry bar or other lever to remove the actuators. The process is shown in the photo.
How to change the release bearing on Kalina - step-by-step technology
The clutch release bearing for Kalina 2, 1118, Cross, Sport (including 8 valves) is located in the crankcase (see photo at the beginning of the article), to remove the old “releaser” follow the instructions.
