It is no secret that to drive a car it is not at all necessary to understand the intricacies of the functioning of its components, but you will have to have a general understanding of them. In particular, the Chevrolet Niva gearbox is just such a unit, since while driving the driver controls it by selecting the desired gear.
Proper operation of the car implies careful treatment of all vital components. Complex mechanical components of the Chevrolet Niva are the engine, gearbox, transfer case, and axle gearboxes. They are designed for a certain resource, that is, the manufacturer guarantees trouble-free operation throughout the declared mileage, provided that the owner complies with all requirements and operating rules.
Regarding the variable gearbox (CAT), you can follow the operating rules only if you know about its functions, design and principle of operation. Every driver receives this initial knowledge in a driving school. Without them, all driving will be reduced to unconscious manipulations, which will lead to a reduction in the life of vital components.
Purpose and design of the gearbox
The variable gearbox can simultaneously perform several functions. By controlling the gearbox, the driver rationally distributes the torque obtained when rotating the crankshaft. The shaft cannot be rigidly connected to the wheel drives, since it is necessary to ensure the ability not only to move, but also to stop the car, move it away, and also move in reverse.
The gearbox allows you to separate the engine from the transmission for a long time. This has to be done when the car is parked for a long time or when it is coasting.
The gearbox ensures the conversion of torque, which is transmitted from the engine to the drive wheels. As a result of its operation, the wheels can rotate in a wider range of frequencies than the engine rotates.
Problems with the box
The Niva Chevrolet car, and in particular its gearbox element, as they say, is good, but with its own “peculiarities”. Somewhere after the first 50 thousand km, the device begins to show its teeth. There may be a hum or unusual noise. Such “features” make it clear that the bearings or gears are worn out. If you watch the gearbox for some time, you can determine what exactly needs to be replaced. What other problems can occur with the gearbox?
- Noise, grinding or knocking when the car is moving, and sometimes when warming up.
- Shocks when changing gears.
- The gearbox may refuse to disengage a particular gear.
- Deformation of the lever, which promises complications during the gear shift process.
- Also, transmissions can simply be knocked out.
For each item listed above, there are reasons and ways to solve them. But today we will look at a specific problem - the knocking of the Niva Chevrolet gearbox and we will carry out the repair ourselves.
A knocking sound when the car is moving or when warming up indicates that the bearings, gears, shaft (primary) or axial ones in the gearbox have worn out. Actually, determining what exactly was the reason is sometimes very difficult. And if you do not have the opportunity to completely replace the gearbox, then your only option is to remove the device manually, disassemble it and carry out minor repairs.
Chevrolet Niva gearbox
The design of the gearbox on a Chevrolet Niva is not original and was developed much earlier than the launch of the conveyor. The type of gearbox is a mechanical five-speed with a three-shaft structure. It is possible to highlight the key components of the box, since the complete diagram of its structure is quite voluminous.
Primary shaft (1). It transmits force from the rotating motor. Can be decoupled from the engine for a short time using the clutch release.
Box housing (3). All mechanisms are lubricated with transmission lubricant, so they are located in a sealed crankcase where this lubricant is poured.
Primary shaft oil seal (4) and secondary shaft oil seal (5). It prevents lubricant from leaking where the shaft enters the crankcase.
Gear synchronizers (7, 8, 9). They serve to more clearly engage gears and fix the selected gearing.
The intermediate shaft (6) is designed so that it is in constant engagement with the input shaft. The intermediate shaft houses the gears.
Secondary shaft (2). Is a driven shaft. It also has gears that can move along the axis of the shaft.
The gear selector is the assembly that drives the transmission gear along the output shaft.
The shaft bearings (purple in cross-section) ensure their rotation.
How to choose a new backstage?
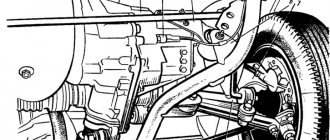
The gearbox linkage is an element of a multi-lever assembly, which is designed to connect the gearbox lever and the rod that fits the power unit. In Niva Chevrolet cars, the rocker is located under the bottom of the vehicle, next to the cardan. This component is susceptible to contamination and the formation of moisture on it, which over time can deteriorate the quality of lubrication of rubbing parts. As a result, parts begin to wear out, which can subsequently lead to various problems.
What kind of rocker should I put on a Niva Chevrolet? This question came to the mind of every Niva car owner who had to deal with a malfunction of this element. In fact, there is nothing difficult in choosing a component.
In practice, many car owners of the above car models install mechanisms from classic Fiat cars on their vehicles. According to reviews on the Internet, these devices are completely suitable for installation in a Chevrolet Niva. However, there is also a negative side. In practice, Niva cars equipped with a mechanism from Fiat cars require more careful adjustment of the element. In addition, despite Italian quality, these components of the transmission system are more susceptible to wear and tear.
Therefore, when choosing a mechanism, you should not “be fooled” by the stories of handicraft “garage” craftsmen and come up with a new headache for yourself. For installation in a Chevrolet Niva, it is better to purchase a standard rocker, which is equipped with basic models of Niva cars.
New rocker for Niva Chevrolet
Gearbox knocking is a fairly common disease and not particularly pleasant. Every time you switch to listen to a rattling sound, you won’t get any nerves. But it is still possible to cure the transmission by carrying out appropriate repairs.
In order to remove the knock of the box, you first need to remove it. To repair the box, you need to have keys (10, 13, 19), a 12 hex key, a screwdriver and pliers. So let's get started:
- Place your machine on a hill or in a hole.
- Disconnect the battery terminal and pour out the oil.
- Get inside the car. Remove the handles from the levers, as well as the transfer cases, the element casing and the cover.
- Remove the casing, boot, lock sensor connector. Remove the gearbox lever itself.
- Set up a gear that reverses, remove the locking sleeve.
- Try to mark the cardan flanges and also the transfer case, so that later you can assemble everything in the correct order.
- Remove the cardan (which is the front one) and the washer (which is the oil deflector).
- Did you see the flange (look at the secondary shaft)? Unscrew the nuts of the elastic coupling from it (this is done with a size 19 wrench).
- Unscrew the nuts on the cushions to the very end of the studs and remove the transfer case.
- Now you need to unscrew the bolts from the cylinder and the starter itself, after first removing the cotter pin and the spring next to it. An extension cord is required for this action.
- And move the starter closer to the radiator.
- Disconnect the sensor that controls the lights (reverse), unscrew the muffler clamp, as well as the bolts from the crankcase and the yoke nuts.
- Unscrew the bolts that hold the box closer to the engine. Carefully disconnect it, just try not to let it hang with all its weight on the input shaft.
- Rock it a little from side to side and gradually move it back until you reach the stop.
- Lower the crankcase down and remove the link from the hole.
Installing the car in the inspection hole
Congratulations, you've removed the gearbox! In order to continue the repair, it needs to be disassembled. You should take your time to disassemble it; immediately prepare a work space for yourself. Advice, lay out all the removed parts exactly in the order in which you remove them, this will greatly simplify the reverse process. As you disassemble the device, observe how the bearings, gears, axles behave, whether there are any abrasions, how the input shaft behaves.
Also interesting: Razdatka Niva 2121 photos - Auto Magazine
You may not have to completely disassemble the element, for example, identifying wear on the bearings is very simple, when you remove the bottom cover, move them a little, if any of the bearings move, it means it is worn out and needs to be replaced. So, let's continue the renovation. You need to do the following:
- First, unscrew the shank nut. Carefully remove the helicopter flange and the mechanism that selects the gear. Check the linkage for cracks.
- Now remove the cover from the back. If you suddenly cannot remove it, then push the bearing race down. It is by looking at the races that the condition and nature of the bearings are examined. If you decide to replace them, then you will need to pierce the bearing (now the secondary shaft) down, remove the clutch housing and check the spring washer.
- Now take out the clip, the bushing (which is remote), and the washer. You will have to disassemble the locking mechanism. To do this, unscrew the gear bolts, as well as the bolt (look at the secondary shaft). Lastly, remove the fungus and the ring.
- Remove fifth gear completely. Disassemble the gear. Take out the fixing ball; to do this, you need to push it inside. Unscrew the third and fourth speed fork bolt, extend the rod, remove it and the cracker. Remove the fixing ball and cracker. And by analogy, disassemble the first and second gears.
- Unscrew the fifth speed fork. Remove the rear gear. Don't forget to check the play.
- Take out the middle bearing, remove the front one, move the shaft back, and then pull it forward. The clip that is inside needs to be knocked down with a chisel.
- Remove the first, second, third and fourth gear forks. Also remove the input shaft, the locking ring needs to be removed, use a hammer or puller for this. Take pliers and remove the ring. Carefully inspect the needle bearing.
- Rocking from side to side, remove the bearing. The shaft needs to be removed. Remove the first and second speed gears, as well as the first, second, third and fourth hub couplings. If you find any malfunctions, you need to release the stopper and remove the third and fourth hub of the third speed. Replace the seals.
We disassemble the handle and lever in the cabin
Hooray, you're done, you've dismantled the box! In order to eliminate the knocking noise, you need to identify the part that has been damaged or worn out. After you find it, continue repairing the box, replace the damaged part, reassemble the device in the reverse order and put it in place.
Greetings, dear friends! In today's article we will talk to you about repairs, transfer case and gearbox on Niva Chevrolet. On a car that we will be repairing, we received complaints from the owner about the presence of extraneous sounds in the car's interior when driving. Increased vibration, hum, noise, and during the inspection it was revealed that the vibrations come from the transfer case of the car, the hum comes from the input shaft bearing in the gearbox. In general, now I will tell you how to fix these problems yourself.
Now let's move on to eliminating vibration in our transfer case, for this:
- Place the removed transfer case on a table or workbench and unscrew the bracket with the cushion.
- Unscrew the top hatch.
- We look there and see that the oil has already used up its potency.
- Next we need to unscrew the shanks. One is located at the back and two at the front. This is quite problematic to do.
- To do this, we need to put the transfer case in lock mode by pulling this lever forward as far as possible.
- We unscrew the upper lever for convenience and use the installation tool to block the transfer case.
- Now we can move on to our shanks. Unscrewing them into one is really hard work. I did this using a vice. when the transfer case in lock mode clamped one of the shanks and loosened the nuts on the other side. Then, turning the transfer case over, I clamped the shank on the other side and loosened the nuts. This is how I took them off.
- Having removed the shanks, we begin to look at the seals. In our case, we can immediately see with the naked eye that they are leaking, so we will need to replace them during the repair process.
- Unscrew the back cover of the transfer case and remove it.
- Remove the corkscrew rings from the bearings.
- Now unscrew the nuts from the shafts. We unscrew them in the same way as the shanks.
- We take out the upper shaft.
- We unscrew the stopper - the forks and slowly pull out the shaft without losing the spring ball.
- Turn the transfer case over and remove the top cover.
- We remove the second cover, having first unscrewed the sensor from it.
- Next, remove this cover.
- We also look at the shaft, spring and ball.
- We remove the shaft and unscrew the remaining nuts.
- Remove the cover, just remember to remove the stopper from the bearing.
- Here we have everything available for inspection and subsequent replacement. In our case, we changed the bearings, this is not difficult to do, if you were able to disassemble the transfer case yourself, then I think you can easily cope with replacing the bearings yourself.
After we have replaced the bearing we begin to assemble the transfer case. Assembly is carried out in the reverse order, but an important point: it is necessary to clean all adjacent surfaces of the old sealant and apply a new one to them.
Now we proceed to partial disassembly of the gearbox on the Chevrolet Niva. In our case, only the bell needs to be removed. It is held on by 5 nuts, so unscrew them.
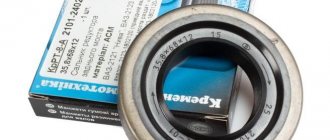
We immediately point out that the oil seal was leaking here, so it needs to be replaced.
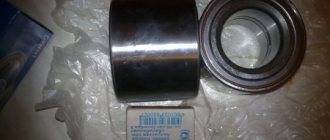
Here is a photo of the input shaft bearing. Remove the stoppers from the outer and inner sides of the bearing race.
The bearing itself is difficult to remove here, so you can’t do it without an assistant. Of course, we could get by with a puller here, but we didn’t have a suitable puller at hand. So we did it like this:
- One held it with montages on both sides, as if pulling it out
- I knocked out the bearing by tapping the copper lining on the input shaft.
Transmission malfunctions
The gearbox, in its basic design, is a gearbox with a variable gear ratio. Since this is a complex device, there may be several reasons for malfunctions. A gearbox failure can be diagnosed by the following signs:
- It is impossible to engage the gear;
- It is impossible to turn off the transmission;
- The engaged gear is not fixed (the speed is knocked out);
- The gear is engaged with difficulty and a characteristic crunch;
- During movement, extraneous noises are heard and vibration is felt.
All possible malfunctions in the trivial classification are divided into malfunctions of the box itself and malfunction of the gear selection mechanism. The first type includes:
- failure of synchronizers;
- gear wear;
- failure of shaft bearings;
- loosening of the nut holding the gear;
- seals leaking.
Maintenance Recommendations
The cause of the malfunction may be the exhaustion of the intended resource, but most often it lies in non-compliance with basic recommendations for operation and maintenance. Routine maintenance includes only timely replacement of transmission lubricant. It needs to be changed every 40 - 45 thousand kilometers.
Poor quality oil can cause increased gear wear, so it is advisable to adhere to the prescribed lubricant replacement schedule.
Repairing a box is an expensive proposition. It often has to be carried out at a service station, so it is necessary to periodically check the oil level in the gearbox and inspect the crankcase for leaks.
