Correct installation of ovals
How to properly install such speakers?
We must remember that they should be installed only in sedans, since in such a car the trunk is separated from the trunk. In hatchbacks, station wagons and other single-volume bodies, it is very difficult to achieve good sound from “ovals”, and it simply does not make sense to do this. The installation site must be as rigid and durable as possible, without rattling or vibrating. If there were no holes in the shelf, you need to cut them to fit the mounting size of the speakers, if possible, between the metal stiffeners.
The metal of the shelf must be properly glued with vibration and noise insulation. To do this, you can use vibration-damping materials with a thickness of 3 or even 4 mm as the first layer and noise-insulating material as the second layer. Sound insulation must be selected according to thickness so that plastic cladding can be installed on top, if any.
The interior must be completely separated from the trunk, without cracks or gaps. You can also use plywood, which is cut to the size of the shelf and firmly installed on it. The plywood itself, for a more aesthetic appearance, can be covered with carpet, leatherette or painted.
The speakers should be installed by screwing them through plywood to metal. It is better to use bolts and nuts rather than self-tapping screws. If you don’t want to mess with plywood, you can use spacer rings made of the same plywood or MDF. The speakers must be fixed firmly, rigidly and without distortion.
After installation, you need to configure the sound correctly. When oval speakers are the only ones in the system, you can only slightly change the equalizer settings. If you also have front speakers, then it is advisable to shift the balance a little forward, thereby dragging the “scene” there.
It’s even better to make a “cut” on the radio, if it allows it, by forcing the oval speakers to play only low frequencies. In this case, this will allow you to achieve the effect of a subwoofer. If the head unit does not have an LPF, you can simply remove the midrange component and tweeter from the pancake, achieving the same result.
Acoustics for a VAZ 2112 car
Acoustics for a VAZ 2112 car
already exists, but it is weak and needs to be replaced. In order to remove holes from the door, it is recommended to take a sheet of aluminum about one and a half millimeters in size. This thickness makes it easy to adjust the sheet to the shape of the door, and if you also make noise insulation from vibroplast underneath it, then when knocking it will resemble wood.
In order not to make a mistake in the sizes, you need to make templates from paper, then take rubber scissors, attach the template and carefully cut out. All this needs to be secured with self-tapping screws. But the vibroplast prevents complete sealing, remove the foil from the material and the problem is solved! Under the foil near the vibroplast
there is a sticky layer, so it turns out that the plug is held not only by the screws, but also by the adhesive base of the vibroplast. The next point is the wires; previously they passed through exactly the hole that we plugged. And then we find a way out, run the wires into the hole for the window regulator, it turns out there is enough space there. The pull of the lock has weakened, we prepare a piece of corrugation, which is made of plastic, maintaining a diameter of 7 mm, do not forget to treat it with vibroplast glue, while simultaneously tearing off the foil from the scraps. The hole that remains from the lock rod is completely sealed with vibroplast, a rubber tube of the lock rod is attached there, we notice that the door has begun to open poorly, the handle is stuck. You need to fix the problem, carefully peel the tube from the vibroplast, and if you can’t do it with your hands, then pick up a knife. Now the door is completely ready for podiums with 16 cm speakers to be attached to it.
This is already a separate case. All this work was done to ensure that the doors did not rattle or make noise. It all depends on the acoustics you install. Not everyone likes powerful music, but our tuning is designed just for hammering. As a rule, we place a subwoofer in the trunk of a car, because it takes up a lot of space in the cabin, and there is a feeling of surround sound if it comes from the rear. It is advisable to make complete sound insulation of the VAZ 2112 car
, Shumka, doors alone are not enough. The work does not take much time, it is quite possible to do it alone. If a professional does it, and more than one, then the work will be done in a very short time; it is recommended to prepare in advance all the tools and materials that will be useful in the process of completing the work. You also need to work in a warm room, the glue should grab everything, but in a cold place it will simply harden. We select the size of the holes according to the diameter of the speakers installed on the car. All contacts must be well insulated in order to prevent fire.
Acoustic modification (soundproofing) of the front doors of VAZ 2110, VAZ 2111, VAZ 2112
engine assembly for a VAZ 2110 car | 2111 | 2112
Acoustics for VAZ 2111
Installation sequence
The sequence of actions when installing speakers on the rear parcel shelf of a car:
We recline the seats for easy mounting. We remove the rear brake light, which is located on the rear shelf: to do this, first unscrew two self-tapping screws. We use a marker (any kind) to outline the future holes for the speakers: you can choose any convenient method for yourself as “marks”. Removing the side struts
If you have a car with side curtains, then you first need to secure the plug, remove it and only then unscrew the screw under it. We remove the airbag with extreme caution. We remove three clips from the shelf and take out the structure itself. The work with the shelf is completed, now we start working with the wires:
The work with the shelf is completed, now let's start working with the wires:
We remove the side posts so that the wires can be connected. Take care in advance to make the necessary holes for the diameter of the speakers. We connect the wires to the speakers and wrap them with electrical tape. We run the wires under the plastic. Let's put the structure back together: pay attention to the safety of all wires.
If installed correctly, the speakers will not make noise even on a bad road. On the contrary, they will improve the sound quality of the music and immerse you in the atmosphere of your favorite tunes.
You can buy car speakers with delivery in Kyiv, Kharkov, Odessa and Dnepr, and also install them in the rear parcel shelf at 130.com.ua.
How to install larger speakers
The car has standard seats for speakers. But what if you need to install larger speakers? This problem can be encountered when installing speakers in car doors. For high-quality installation, special podiums are used, which are purchased ready-made or made for a specific car model and speaker size.
Podiums help speakers sound better due to the extra volume they provide and allow you to install the right size speakers. Sometimes podiums are also installed on the rear parcel shelf of a car, but this is done mainly to improve sound quality.
Lada 2114 Turtle › Logbook › DIY rear shelf.
To begin with, I walked around and looked around the shops. The shelves start at 1500 and go up. It won't work. The plywood turned up. There is a jigsaw. There is a warm garage. All conditions.
This is what you need to take off with.
To begin with, I started dismantling the original shelf and sides. But in the photo they are nothing. They look.
I unscrewed the screws, the sides are in no hurry to fall off. I thought. The sidewall will still go to waste. I solved the problem with a jigsaw.
Machine without shelf. Nothing too.
I left the sides alone for a while. Shelf for long-term storage.
I decided to make the shelf in two parts of different widths. To make it easier to open. Cut it out and screwed the hinges on.
What has happened so far.
Further refinement with a file. Things slowly came to a close.
To begin with, I “carpeted” the turtle.
The most difficult part is the sides. I tightened it and screwed the speaker on.
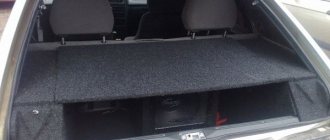
Upholstered and installed a shelf. What happened in the end?
I think it's good. All that remains is to carefully stick the register in the trunk and buy some adhesive tape to secure the shelf. She already fits well, but that’s for sure.
I threw in the wiring, soldered it, connected it, listened. The rear does not outplay the front, but only complements it. This makes me happy. But we need to change our heads.
What surprised me: the rear license plate began to rattle. With the trunk closed, you can only hear it when standing behind you, but with it open... it almost shouts over the music. Or is the ShVI bad or are the speakers good? You'll need to put something under it.
Lada 2115 › Logbook › 46. I put the speakers in the rear shelf
Finally, I got around to installing the speakers in the rear parcel shelf)) We can say that almost a year has passed since the appearance of the speakers, but somehow I kept putting this matter off.
So, I saw N0ISIA’s post that he was giving away standard Chevrolet Cruze speakers (4 pieces) completely free of charge, well, without hesitation, I contacted him and went to pick him up)
What is known about the speakers: They say 20W, 4Ω and I know that they are 16 cm)
What’s strange is that according to the catalog number they are listed as 30W o_O Catalog number 22759401
I'm not chasing super-duper-mega car audio.
The columns themselves have this shape: Z.Y. The doors of the Cruise are held on by only one bolt.
Since it was a pity to destroy the shelf at that time, I decided to go the collective farm route, make something like podiums and cover the final version with carpet. It turned out something like this, the collective farm is still
