Why is there low voltage on the VAZ 2107 (injector)?
Hello, guys) In general, the seven was bought used. I rode it for a month - all the time the voltmeter needle on the dashboard was near the white stripe (12-13 V). And at one point the battery light on the dash came on. I changed the brushes with the regulator. The day seemed to be skating normally, the next day it was like this: at traffic lights 12 V, while driving 16 V... and then the charging disappeared altogether.. I changed the generator, because an autopsy showed that the windings were short-circuited, and the rings on the rotor were very worn out. I decided that it would be better to buy a new winding and rotor. In general, the new generator produced a solid 13 V. Well, with the proximity and dimensions, it could somehow reach 14. It was decided to install a three-level regulator. I installed it now, of course it’s better, but I expected more. In 13.6V mode it produces 12 and a kopeck. In 14.2V mode it produces 13.6V. In 14.7V mode it produces 14.2V. Where is my promised 14.7V? Why do I always have low voltage? Moreover, in 14.7V mode it produces a stable 14.2V - at idle at full load it is slightly lower, at 2000 rpm 14.3V regardless of the load. And here’s another thing, now with a three-level regulator, in order for the battery light on the dashboard to stop lighting (excitation begins), you need to turn on the gas after starting the engine - why is this so?
Lada 2107 › Logbook › low voltage VAZ 2107
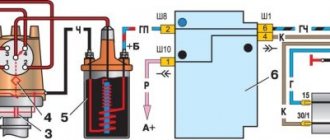
Hi all. I would like to talk about my battle with low voltage levels on my seven. As you know, on injection classics the generator is installed as much as 73! amperes, which ideally should be enough for at least 4 headlights of 100 W each. That's what I thought when purchasing this car to replace the VAZ 2106, in which installing a generator from 08 to 55A solved the problem with undercharging in principle. Imagine my surprise when each switched-on device (headlights, stove, heated glass) deflected the voltmeter needle more and more to the left, ultimately leaving nothing for the battery to recharge... The digital multimeter confirmed the terrible fears - with the above-mentioned consumers turned on, the voltage at the battery terminals was 12 V at idle and 13 V at all speeds above 1500. The belt is tight. There was no limit to surprise. The Chinese eight-wheel drive pulled much more (4 high-range headlights, glass, stove, buffer) and the voltage did not drop below 13.8. Well, something had to be done. With the next kalym, a new similar gene was purchased and immediately introduced to replace the old one. A smoke break, starting the engine and... 13 volts in the load (without it 14, like on the old one). If a hose had turned up, I would have taken gasoline from the tank and burned this creation of Italian masters, but the hose was not at hand and the anger from wasted money and time was replaced by curiosity - what’s the big deal? Armed with a tester, I measured the voltage on the relay regulator (RR), on the wire that comes out of the extra. rectifier and connected to the PP. On it, with the engine running at any speed above 1500 at any load, 14!V. That's when Stirlitz thought to you. It turns out that the generator “thinks” that it is working properly, it maintains its required 14 V for additional. rectifier, but on the main rectifier the voltage dropped in proportion to the load, and he (Gena) had no idea about it. To correct the situation, it was necessary to power the RR from + battery, then the regulator should correctly perform its function. No sooner said than done. a wire was stretched from the main injector relay (first on the left under the glove compartment, thick red wire with a stripe) to the RR. As in the diagram
diagram The white wire coming out of the generator must be disconnected. The complete diagram with symbols can be found here www.drive2.ru/b/1553153/ Now, when the ignition is turned on, the power for the RR comes from the general network, and therefore it will monitor the voltage level through it. Smoke break, engine start and... voila. The standard voltmeter needle freezes at the end of the green zone (14V) at any load, if the engine speed is above 1300 rpm.
Low beam, heater, music are on (not quiet) Finito problem. The only negative is the non-working battery light on the panel, but there is an arrow, so the lamp is not needed in principle. you can remove it - this will make your car lighter, add dynamics and reduce fuel consumption. What a benefit! I hope it helped someone with chronic undercharging. Good luck to everyone on the roads. And a little more information: if we do as indicated above and so www.drive2.ru/b/2031189/, then it is necessary to remove the battery light bulb (3rd from the top) from the tidy, otherwise the light will come on when the ignition is turned on.
PS comrade offers a more “humane” solution
How to repair a generator yourself
Do-it-yourself repair of a VAZ generator involves not only the replacement of individual components, but also a thorough diagnosis of the device. is used for diagnostics . The device shows the voltage in the system.
Normally, the readings are in the range of 13.8-14.8 V when the engine is on. If the voltage is higher or lower than the specified numbers, then it is worth checking the functionality of the generator.
To identify faulty parts, you need to check every element of the system.
Some types of diagnostics are checked with the engine running:
Checking the voltage regulator is performed with the engine turned off but well warmed up. Diagnostics of the diode bridge occurs mainly on dismantled devices. Checking the windings involves disassembling the generator and diagnosing it using an ohmmeter. If a visual inspection does not reveal a winding break, then it is necessary to measure the indicators with a special device. Normally, the indicators are in the range of 5-10 ohms.
Steps to repair electrical faults
Electrical faults can be carried out on an undismantled device .
To do this, the generator needs to be disassembled:
A broken winding or short circuit can only be repaired by completely replacing the wires.
Most often, a malfunction occurs due to a break near the rings or unsoldering of one of the ends of the winding. To repair, you will need to resolder the damaged area. When desoldering, a piece of new wire is simply soldered to the end of the winding.
Replacing diodes, which is indicated by the blinking light on the dashboard and maintaining the required voltage in the system, can only be performed on a disassembled device. If, in addition to a generator breakdown, the engine has problems in its operation, then the experts recommend immediately repairing the engine.
Steps to repair mechanical faults
Repairs to the mechanical part of the device are easier to perform on a dismantled device . To do this you need to complete several steps:
The most common mechanical damage is wear of the rotor bearing.
During disassembly, you can replace the part or simply fill it with oil to eliminate unpleasant sounds and noises. A broken relay may also need to be replaced.
Installation of the unit occurs in the reverse order and is quite simple. The work requires a minimum set of tools for proper installation and can be easily completed even by a novice auto mechanic.
What kind of charging should go to the battery from the generator?
It is traditionally believed that 13.5-14.5V should be supplied by the generator to the battery and this is absolutely enough to replenish the battery costs.
It is worth considering that using a battery with a higher power in a car than the manufacturer recommends also requires the installation of a more productive generating device.
It is necessary to take into account the load that the generator must withstand - it is calculated based on the maximum indicators of all electrical appliances and car systems.
Do not forget that the charging current from the energy-generating device will allow you to start the car in the cold season. In order to avoid problems with starting the car, we recommend purchasing generating equipment, the charge current of which will be approximately 10% of the capacity of the power source. That is, a battery of 100 A/h requires a generator that can produce 10A. Please note that for many cars, 100 amp equipment will operate at its maximum capacity, because the power consumption of the automotive system is in the region of 80 amps. Therefore, the choice of a source generating energy must take into account both the battery capacity and network consumption.
What factors should you consider when purchasing a new generator?
When choosing a generator for VAZ cars, it is necessary, first of all, to calculate the total power of all energy-consuming devices and devices in the on-board electrical network. The power of the power source must exceed this total value by 20%.
The type of engine must be taken into account when choosing a generator model. A generator paired with a gasoline engine can be compact and more economical. A diesel generator should be larger and more expensive.
The choice of generator also depends on the technology of combustion of the fuel-air mixture in engines of various types:
- In gasoline engines, fuel is supplied using a carburetor or injector. Here, the fuel-air mixture is sucked into the combustion chamber due to the vacuum created. There it is compressed and ignited by a spark from the spark plug. In this case, the supply of mixture to the combustion chamber is not regulated (does not depend on engine speed).
- Diesel engines use only an injector. Here the combustible mixture is injected into the combustion chambers under pressure and enters through the nozzles. Their opening is regulated by an electronic device (controller) with many sensors that respond to the speed of the vehicle, the voltage in the on-board electrical network and other indicators. Such engines consume less fuel, but are more energy-intensive due to the presence of auxiliary electronic devices. A car with such an engine requires a more powerful generator.
Installing a weak power source on the “injector” will lead to its rapid breakdown and damage to the battery.
How to check the alternator voltage on the battery
The potential difference can be diagnosed in two ways - directly at the generating equipment and through the battery. The generator is directly connected to the power source with a thick wire, therefore, to check the level of potential difference, you can measure the voltage at the power source. To do this, you will need special devices - a voltmeter, multimeter or load plug.
The wires of the first measuring instruments are connected to the battery in any sequence. The plug must be connected to the battery terminals with strict observance of polarity. It is generally accepted that the normal voltage in the network should not be lower than 12 volts. At idle speed without turning on all the electrical appliances of the car, this indicator should be at the level of 13.5-14V. A drop in voltage values to 13.3-13.8 volts is considered acceptable.
At the same time, using conventional testing equipment, you can check the resistance of the generator elements - rotor, stator and diode bridge. Diagnostics of rotary equipment is carried out by its winding. It is necessary to connect the probes of the device with slip rings. If the multimeter gives readings from 2, 3 to 5.1 ohms, then this element is working. The current consumption of the winding should be within 3-4.5 amperes.
Its normal resistance is 0.2 Ohm. The diode bridge is checked by the presence or absence of resistance, the indicators do not matter. The only thing worth considering is that there should not be a zero dimension. Measurements are carried out in pairs - positive output and all plates on this side or minus and all elements.
We remind you that for normal charging of a car battery, the voltage supplied by the generator must be from 13.5 to 14 volts.
Malfunctions and their elimination
Let's start with the simplest and most obvious. From the work of indicators. These are the difficulties that may arise.
Constantly lit indicator (even when the ignition is turned off)
To eliminate the problem, you will need to replace the diode bridge with a new one. The reason for this was a short circuit on it. You can try to repair it, but this requires knowledge. Replacement cost is low.
Devices and sensors do not work
To do this, you will need to check all wiring and contacts. Often the cause of such an incident is the fuse box. It is necessary to check the voltage in all areas to determine the location of the fault. If the cause is the generator, then you need to check the belt tension and the stability of the pulley. Next, the “chocolate”, brushes, and diode bridge must be checked.
The battery indicator is always on when the ignition is on
You need to start by checking the battery. In this case, the inspection is carried out both on a cooled down car and on a warm one. If overheating and boiling occurs, then you need to check the voltage regulator unit on the generator and check the wear of the brushes. We must not forget about the belt, pulley and bearings. To avoid unnecessary work, you need to measure the voltage between the generator and the battery. Most often this is a signal that the battery is not charging.
The indicator flashes
If in the previous case there is often not enough charging, here, on the contrary, there is a recharge. The regulator and brush assembly need to be replaced.
Noise
The noise may be caused by worn bearings, excessive tension or loosening of the belt. You need to make sure that all fasteners are secure and the gaskets are intact. Less commonly, the cause of this is a malfunction of the rotor or stator. And, again, the same generator brushes can make the most unpleasant sounds. In this case, they are changed or wiped with gasoline.
Voltage drops
This is best seen at night. If the headlights burn unevenly and constantly change light intensity, then the voltage regulator needs to be replaced.
How many amperes does a car alternator produce per battery?
The current strength required by the electrical system of each car is individual and depends on the number of electricity consumers and their values. And also the charge current must be sufficient to charge the power source.
It is worth noting that ampere readings appear only when there is a load in the vehicle’s electrical system and, accordingly, the battery is discharged. After starting the car engine, the charging current is about 6-10 amperes and drops over time, because the battery is charging, taking on the main energy consumption. If you turn on additional equipment - headlights, radio or heated mirrors, you can see an increase in the charging current values.
When purchasing a generator, pay attention to its technical characteristics, which the manufacturer indicates on the case - that’s where you will find information about the maximum current that will flow to the battery.
In the table below you can see the approximate current values that the generator shows at different loads.
Table 1. How many amperes the generator produces under load.
In modern cars, breakdowns of the electrical system are one of the most common. A large number of electronics requires particularly careful monitoring of the operation and condition of the generator and battery, because their failure can immobilize the car. The most common signs of a generator malfunction are:
If you notice incorrect operation of the car, then perhaps the battery charging current from the generator is insufficient.
All malfunctions of electrical equipment, which includes the vehicle’s energy-generating device, are mechanical (deformation or breakage of fasteners, housing, malfunction of bearings, pressure springs, drive belt, etc.) or electrical (winding breaks, diode bridge malfunctions, burnout or wear of brushes , short circuits between turns, breakdowns, etc.).
Don’t write off a non-working generator: find out if there are repair kits and spare parts. Replace them if possible. If you cannot carry out repair work yourself, then take the generator to a workshop. Many craftsmen will be able to restore the unit at no extra cost and in the shortest possible time.
However, some breakdowns require the purchase of a new device that generates electricity. For example, a failing bearing that is soldered into the generator housing cannot be restored or replaced in most cases.
Remember that failure of this unit can be caused not only by wear and corrosion, but also by poor quality of elements and components; excessive load; external influence of salts, liquids, temperatures.
Generator repair
In this manual we will look in detail at the VAZ 2107 - generator repair. For repairs, you will need a bearing puller, a mandrel for pressing and knocking out bearings in the generator cover. So let's get started:
Using a socket wrench, unscrew the nut securing the pulley and impeller, and use a screwdriver to hold the rotor from turning;
Unscrew the impeller fastening nut
We pull the pulley off the shaft, then the fan impeller, take out the key, take out the spacer washers;
We remove the pulley, impeller and spacers
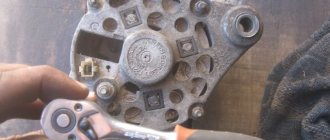
We unhook the voltage regulator relay, first unscrew the fastening screws, and disconnect the wire block;
Unscrew the screws securing the relay
We take out the voltage regulator along with the brush assembly from the housing;
We take out the regulator and brushes
We unscrew the nuts securing the generator cover with a 10-mm socket and a ratchet, and remove the bolts;
Unscrew the nuts securing the cover
We rest the cover against a block of wood, helping by hitting the shaft with a rubber hammer, knocking down the front cover;
Removing the front cover
- Remove the cover and take out the spacer bushing;
- Check the condition of the front ball bearing. To do this, hold the cover tightly, turn and rock the bearing itself (the inner ring of the ball bearing) with your fingers. If excessive play is detected or the bearing is broken, it should be replaced with a new one;
- To replace a faulty ball bearing, use a size 8 wrench to unscrew the nuts securing it;
Unscrew the nuts to remove the ball bearing
We take out the bolts and washers
We select a suitable mandrel (punch) and knock out the bearing;
We take two wooden blocks, rest the edges of the back cover against them, and use a drift made of soft metal to knock out the rotor. If the surfaces of the lids are suddenly damaged, treat them with an abrasive wheel;
- We check the serviceability of the rear ball bearing using the method described in point 8;
- If replacement is required, remove it from the rotor using a puller;
Using a 8-mm socket with an extension and a ratchet, unscrew the nuts securing the diode block (diode bridge) and the leads from the stator winding;
Unscrew the diode bridge
- We take out the bolts and pull out the stator from the cover;
- We check the integrity of the stator winding. If the winding is damaged by mechanical action (scuffs, broken wires), or from overheating (blackened, burnt), then we replace the stator winding or rewind it, if time and price permit;
Pull out the stator winding
- Using a ratchet head, remove the generator output nut along with a washer made of an insulating substance;
- Now we can remove the diode bridge itself;
We take out the diode bridge
Using a Phillips screwdriver, unscrew the screw securing the capacitor and remove the capacitor. We remove the third bolt from the cover, which secures the rectifier unit.
Removing the third bolt
After completely disassembling the generator, we check the stator and rotor using a test lamp (watch the video). VAZ 2107 generator (repair and replacement) yourself is not such a difficult task, you no longer need the services of auto electricians. This will save you a lot of money.
Let's start assembling the VAZ 2107 generator
Before you begin assembly:
- clean all parts from dust and dirt
- blow with air using a compressor.
- It is recommended to wash metal parts with gasoline.
We press a new bearing onto the rotor using a mandrel (or head) with a diameter that matches the diameter of the inner ring of the bearing.
Press the new bearing onto the rotor
Taking both generator covers in your hands, carefully inspect the bearing seats. There should be no damage. Be sure to replace cracked lids with new ones. We perform the assembly in the reverse order, which our instructions tell you. At this point we consider the repair complete. In my opinion, everything is clear here without the video! If it’s not clear, look for the video using the keywords: VAZ, repair, 2107, generator.
One of the reasons why the battery is not charging is a breakdown of the generator. Before you independently repair the VAZ 2107 generator, you need to find out the causes of the breakdown and become familiar with the technology for removing, restoring and installing it.
Other causes of low voltage
A small potential difference in the system is not always associated with a breakdown of the generator or a bad battery. If the diagnosis of these elements does not reveal any problems, then you should pay attention to the following:
Each contact must be tightly adjacent and intact, that is, there must be no formations (for example, sulfation) that will disrupt the flow of current. Incorrect connection of contacts leads to accelerated battery discharge even when the car is not running.
To improve the connection of the elements of the car's electrical system, it is necessary to clean all contacts and restore the integrity of the wires by replacing them or connecting them and wrapping them with insulating tape.
In conclusion, I would like to repeat that stable operation of the car requires constant monitoring of all elements, and the generator should attract special attention. The battery is charged from it and provides electricity to the entire car system. Pay attention to all elements: generator brushes, slip rings, voltage regulator, equipment winding.
The most correct measurements should be carried out when the battery is fully charged and in various modes. Remember that the manufacturer links the characteristics of the generator to the number of engine revolutions - they help produce a certain current.
Detailed video on how to check the generator:
Generator faults
Unfortunately, mechanisms have not yet been invented that would not fail under the influence of time and constant loads.
The VAZ 2107 generator is designed for many years of operation, but in some cases this is hampered by minor breakdowns and malfunctions of its components. You can identify problems with the generator without the help of service station specialists: you just need to carefully monitor all the changes that occur with the car while driving.
The charging indicator light on the instrument panel came on
In the interior of the VAZ 2107, there is a terminal for several signaling devices on the dashboard. One of them is the battery charging indicator light. If it suddenly lights up red, it means there is not enough charge in the battery or there is a problem with the generator. But the alarm does not always indicate a problem with the generator itself; most often the lamp goes off for other reasons:
- slipping of the generator belt drive - you will need to stop the machine and adjust the degree of belt tension;
- there is damage in the warning lamp relay, so it does not work correctly - it is recommended to “ring” the relay in the mounting block and, if necessary, replace it;
- breakage of contacts in the excitation winding is a more serious damage that requires removing the generator from the car, disassembling it and searching for a break;
- severe wear of the brushes in the brush holder - they will need to be replaced, which is quite simple;
- short circuit in the rectifier (most likely, one of the silicon diodes has burned out) - it is recommended to disassemble the generator, test the diodes and replace the failed element.
The driver will immediately notice the signal, as the lamp begins to glow bright red on the instrument panel
The battery is not charging
VAZ 2107 drivers often encounter this problem: the generator seems to be working properly, but there is no power to the battery. The problem may lie in the following malfunctions:
- the alternator belt has stretched - you need to check the degree of its tension or replace it with a new one;
- loosening the fastening of the wire tips - just tighten all the fastening connections and thoroughly clean the contacts and connectors;
- malfunction of the battery itself;
- Damage in the wiring - it is recommended to ring all the wires between the battery and the generator and replace the damaged areas.
If there is no charging, the problem may lie in both the generator and the battery.
The battery is boiling over
Battery boiling over is a sign that the battery does not have long life left. After this, the battery will not be able to function fully, so it will have to be replaced soon. However, so that the replacement does not lead to the same sad consequences, it is necessary to find the cause of the boiling, which may be:
- contamination of the contact between the ground and the housing of the generator regulator - cleaning of the contact is necessary;
- damage to the voltage regulator board itself - replacement of the board is recommended;
- defective battery - if the battery began to boil away immediately after replacement.
It is better not to use the battery after boiling, as its resource is very limited.
When driving there is noise and grinding noise from the generator
The generator has a rotating rotor, so it must make noise during operation. However, if these sounds become increasingly loud and unnatural, you should understand the cause of their occurrence:
- loosening the nut on the pulley - you need to tighten the nut and check the degree of belt tension;
- deterioration of the bearings - in this case, the driver may hear a loud grinding noise and even a howl while driving; it will be necessary to press out the old bearings from the shaft and install new ones;
- short circuit in the winding - the entire stator needs to be replaced;
- creaking brushes - it is recommended to clean the brushes from adhering dirt.
Operating principle and design of generators
We will not consider ancient DC models within the scope of this article. This is the lot of owners of equipment originally from the 60s. Starting from the seventies, AC alternators with external excitation and V-belt drive from the engine crankshaft pulley began to be used. The voltage regulator from the external device (“chocolate bar”) moved to the brush assembly and received the popular name “tablet”. Such models are used on carburetor VAZ cars.
With the advent of injection engines at VAZ, a lot of electricity was needed to power the control unit (ECU, “computer,” “brains”) and the electric fuel pump (EFP). Dynamos became more powerful; the traditional V-belt drive could no longer cope with the increased load and began to slip. This is how poly-V-belts (wide) belts came into automotive electrical installations.
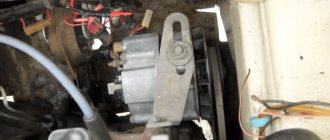
If the number of auxiliary units is more than two (air conditioning compressor, power steering pump), then deflection rollers are used to increase the contact area of the belt with the pulleys. The tension force is adjusted by a tension roller or by moving the generator housing or hydraulic pump.
Replacing the rear and front bearings of the VAZ 2110 generator (2114, 2112, 2111, 2115)
Before you start replacing the bearing, watch a detailed video of removing the generator and disassembling it.
The replacement process is divided into operations:
- Preparatory activities;
- Removal and further analysis of the mechanism;
- Dismantling of old parts;
- Repair and installation of new parts, replacement, assembly, installation, testing the functionality of the unit.
Design of the VAZ 21XX generator, preparation for repair
The detail of the unit is presented in two diagrams, assembled and disassembled.
To install the bearings, prepare a set of tools: - Heads with a ratchet, keys (27, 13, 10, 8, and for 17 - preferably two); - Minus, Phillips screwdrivers; - Vise; - Hammer; - Pliers; - Two-pin puller with paws; - WD-40 liquid and marker.
Next, place the car in a place with good lighting above the hood to remove the mechanism without difficulty, open the hood, find the belt on the pulleys, as well as the terminals. Now we move on to removing the generator and dismantling the bearing.
The process of dismantling the generator and replacing old bearings
- First, disconnect the negative terminal of the battery, then the terminals of the device itself. To do this, you need to unscrew the fastenings of these terminals.
- Study the fastener diagram to begin dismantling the mechanism.
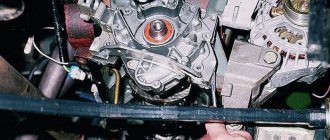
- Next, remove the crankcase protection, then climb under the car. Next, unscrew the fasteners that secure the generator to the frame (positions 5, 2 in the diagram). The process is shown in detail in the photo.
- We hold the mechanism with our hands when unscrewing the last fastener.
- We take out the unit, remove the dirt, and wipe it with a rag. Lubricate the threaded connections with WD-40.
- Now we move on to removing the protective plastic back cover on the generator; we do this carefully with a screwdriver.
- We unscrew the fastenings of the brush holders and the voltage regulator with a Phillips screwdriver. The sequence is shown in the photo.
- After this, remove the pulley from the axle and clamp the product in a vice.
- Using an adjustable or other wrench, unscrew the nut on the pulley so that the shaft does not rotate; insert the hexagon into a special groove at the end.
- Now we remove the washer and disassemble the unit body by unscrewing the corresponding bolts; before doing this, be sure to mark the positions of the body halves with a marker. The entire disassembly process is shown in the photographs.
- We remove the plastic casing and the front ball bearing, gaining access to the armature.
- Now we press the rear bearing of the generator from the armature in two ways:
- Next, we press the rolling element out of the cover of the generating unit.
- We knock it out with a hammer with a mandrel to fit the outer size of the ball bearing (see dimensions below), a 27 socket head is also suitable.
Replacing the rear and front bearings of the VAZ 2110 generator
- Before installing a new bearing in the VAZ 2110 generator, you should wipe the seating surfaces (rotor, housing cover hole) with a rag.
- Next, carefully remove the seal and add thick lubricant to the ball bearing, for example Litol.
- Let's start pressing the rear bearing onto the shaft. To do this, secure the assembly in a vice, place the new part on the shaft, and use a pipe and a hammer to press the part onto the rotor. The force is applied strictly to the inner race.
- We press the front bearing into the front cover of the generator using the old rolling element or a 27-inch head. We insert the new product into the hole evenly, without distortions, place the old element on top, then hammer the part into the hole. We apply force only to the outer ring.
- After replacing the bearings, reassemble the mechanism in the reverse order and install it back on the car. Watch the video for assembly procedure.
- This completes the replacement. Don't forget to read the tips and tricks at the end of the article.
Generator tuning - increasing output
What should owners of classics and carburetor “nines” do if they need more electricity? Installing heated seats, mirrors, and “music” with an external amplifier requires its own amperes, which are nowhere to be found in a jam at idle.
When there is not enough electricity only at idle, we select or grind a pulley of a smaller diameter. This will increase the output at low speeds. But you will have to avoid prolonged movement at maximum engine speed to avoid overloading the bearings.
Are the headlights shining dimly, is there not enough electricity throughout the entire operating range of the engine? Clean the battery terminals. We measure the voltage at idle speed. If it is less than 13.5 V, we will increase the voltage using a diode added to the excitation circuit. The drop across the semiconductor will be about 1 volt, so we will “deceive” the relay regulator.
The optimal charging voltage is considered to be in the range of 13.4-14.4 volts.
Is your carbureted car still running low on amps? We replace the “dynamo” with a similar model from the “injection” modification, specifying the correspondence of the mounting points. If necessary, repress the old pulley.
Example of compatibility by models (families) and generated power:
Data on interchangeability are approximate. Any tuning is done at the owner's responsibility. Therefore, if you just want to replace a broken generator, buy the “original”. It is guaranteed to fit your car. If you love experiments, go for it, your efforts will be rewarded.
Review of generator 9402.3701-14 for VAZ-2170, VAZ-2190, VAZ-1117-1119
Source
Replacing the rear and front bearings of the VAZ 2110 generator (2114, 2112, 2111, 2115)
Before you start replacing the bearing, watch a detailed video of removing the generator and disassembling it.
How to remove and disassemble VAZ 2010 generators
The replacement process is divided into operations:
- Preparatory activities;
- Removal and further analysis of the mechanism;
- Dismantling of old parts;
- Repair and installation of new parts, replacement, assembly, installation, testing the functionality of the unit.
Design of the VAZ 21XX generator, preparation for repair
The detail of the unit is presented in two diagrams, assembled and disassembled.
To install the bearings, prepare a set of tools:
- Heads with ratchet, keys (27, 13, 10, 8, and for 17 - preferably two);
- Minus, Phillips screwdrivers;
- Vise;
- Hammer;
- Pliers;
- Two-pin puller with claws;
- WD-40 liquid and marker.
Next, place the car in a place with good lighting above the hood to remove the mechanism without difficulty, open the hood, find the belt on the pulleys, as well as the terminals. Now we move on to removing the generator and dismantling the bearing.
The process of dismantling the generator and replacing old bearings
- First, disconnect the negative terminal of the battery, then the terminals of the device itself. To do this, you need to unscrew the fastenings of these terminals.
- Study the fastener diagram to begin dismantling the mechanism.
- Next, remove the crankcase protection, then climb under the car. Next, unscrew the fasteners that secure the generator to the frame (positions 5, 2 in the diagram). The process is shown in detail in the photo.
- We hold the mechanism with our hands when unscrewing the last fastener.
- We take out the unit, remove the dirt, and wipe it with a rag. Lubricate the threaded connections with WD-40.
- Now we move on to removing the protective plastic back cover on the generator; we do this carefully with a screwdriver.
There are fragile elements inside (capacitor, brush clamps, diode bridge, voltage regulator), we free these elements from their fastenings and dismantle them so as not to break them when removing the rear bearing of the generator.
- We unscrew the fastenings of the brush holders and the voltage regulator with a Phillips screwdriver. The sequence is shown in the photo.
- After this, remove the pulley from the axle and clamp the product in a vice.
- Using an adjustable or other wrench, unscrew the nut on the pulley so that the shaft does not rotate; insert the hexagon into a special groove at the end.
- Now we remove the washer and disassemble the unit body by unscrewing the corresponding bolts; before doing this, be sure to mark the positions of the body halves with a marker. The entire disassembly process is shown in the photographs.
- We remove the plastic casing and the front ball bearing, gaining access to the armature.
- Now we press the rear bearing of the generator from the armature in two ways:
- Using a two-jaw puller;
- Without a removable device, using two 19mm open-end wrenches (watch the video on how to remove a generator bearing without a puller).
How to remove a bearing from a generator armature without a puller
- Next, we press the rolling element out of the cover of the generating unit.
- We knock it out with a hammer with a mandrel to fit the outer size of the ball bearing (see dimensions below), a 27 socket head is also suitable.
If the body of the old cover is in good condition, then do not buy a new one along with the ball bearing; it is cheaper to change them separately and leave the old cover.
Replacing the rear and front bearings of the VAZ 2110 generator
- Before installing a new bearing in the VAZ 2110 generator, you should wipe the seating surfaces (rotor, housing cover hole) with a rag.
- Next, carefully remove the seal and add thick lubricant to the ball bearing, for example Litol.
- Let's start pressing the rear bearing onto the shaft. To do this, secure the assembly in a vice, place the new part on the shaft, and use a pipe and a hammer to press the part onto the rotor. The force is applied strictly to the inner race.
Select a mandrel (pipe) such that the inner diameter is larger than the diameter of the axle, and the outer diameter is not larger than the inner ring of the ball bearing. (A tall head of 21 will fit).
- We press the front bearing into the front cover of the generator using the old rolling element or a 27-inch head. We insert the new product into the hole evenly, without distortions, place the old element on top, then hammer the part into the hole. We apply force only to the outer ring.
- After replacing the bearings, reassemble the mechanism in the reverse order and install it back on the car. Watch the video for assembly procedure.
- This completes the replacement. Don't forget to read the tips and tricks at the end of the article.
Replacing a VAZ generator bearing
The best generators for VAZ
If the generator is seriously damaged, it does not have to be repaired, but completely replaced. Parts necessary for repair may be missing, or the breakdown may not be repairable at all. Meanwhile, the on-board voltage and the quality of battery charging depend on the good operation of the power unit. It's a shame when, despite a good motor, electrical equipment does not work properly.
And if we are talking about VAZ cars, then sometimes a replacement is in demand due to the lack of power of standard devices. Modern automakers offer many additional devices that increase the level of comfort when traveling, but they also consume a large amount of electricity, and old devices cannot cope, so they have to be replaced with more powerful ones.
Many people are interested: which generator to buy if they have a VAZ? Here you need to consider them separately by model, so before you go shopping, read the recommendations of specialists and compare them with your wishes and capabilities.
How to change bearings on a Priora generator
Failure of rolling elements of VAZ electric generators is fatigue wear due to long-term operation. Let's look at how you can replace the bearings yourself.
- Prepare the device for disassembly. Here's what it looks like with the cover removed.
- Unscrew the voltage regulator and disconnect the wires.
- Unscrew the terminals to remove the diode bridge (marked).
- Disconnect the capacitor.
- Unscrew the 4 studs.
- The studs are unscrewed. Lay the device on its side and use two screwdrivers to separate it into 2 parts.
Note: Sometimes it is necessary to lubricate the mating area of the parts with penetrating silicone or HP grease to make it easier to separate them. You can take the upper part with your hand and tap the lugs with a wooden mallet to knock down the lower part.
- The top ball bearing will open.
- We turn the generator over and install it on a vice. Warm up the lower ball bearing race (You can try without warming up).
- Usually the seat expands when heated, and the ball bearing easily comes out of it. But it happens that the rotor shaft comes out, but the part remains in the seat.
- In this case, you need to continue heating and tapping the part to knock it off the seat. Don't overdo it to avoid breaking the lid. The ball bearing seating areas should be thoroughly cleaned.
- We remove the upper rolling element from the rotor shaft with a puller.
- Take the dimensions of the removed bearings and buy analogues (information is presented below). You might be able to read the numbers.
- Start installing new parts by preparing the seats. Sand with P1000, P1200 or P1500 sandpaper. Lubricate with graphite grease.
- Open the covers at the p/sh, check for the presence of lubricant.
- Add lubricant, close the covers, turn the part over and fill the other side with lubricant, close the covers. Ball bearings are ready for installation.
- Place the small ball bearing on the rotor shaft. Take a tube of the appropriate diameter so that the blows fall on the outer ring.
- Tap the end of the tube with precise blows of a light hammer. When the part snaps into place, you will feel a harsh kickback. This operation is also performed with a puller, only the legs are installed on top of the end.
- Now insert a large bearing into the cover socket and lightly hit the outer race with a hammer to drive it into the seat.
- When the ball bearing fits into the socket, do not forget to mint the edges of the seat in a circle at intervals of 3-4mm. To do this, select a core with a beveled tip (a small chisel or beard will do).
We continue assembly in reverse order. We put on the pulley. Do this in a vice. Clamp the rotor poles, put on the pulley and tighten the nut tightly
There is no key on the shaft, so apply force to ensure the pulley fits snugly. Pay attention to the outer and inner washers. They may vary
When removing the pulley, it is advisable to make a mark so as not to mix it up during assembly.
Note: Next we assemble everything in reverse order.
Pay attention to the cleanliness of contacts. Poor contact is the cause of loss of generator power
Clean oxidized contacts with a file or sandpaper and lubricate them with a special contact cleaner, for example Electronic Shray.
Generators for VAZ 2106 and 2107
The generator on the VAZ 2106-2107 costs the same as on the VAZ 2101 - G221. If you install additional external current consumers that operate constantly, this will lead to undercharging and insufficient current will be supplied from the relay regulator. These additional devices include:
Any similar device will lead to greater power consumption and, consequently, to premature battery discharge, even when the engine is running at high speeds. Standard devices for 2106 were developed a long time ago and are not designed for modern energy-consuming add-ons.
Design and features of KAMAZ generators
The generator consists of the following components and parts:
— The rotor is a coil (aka field winding) made of copper wire, enclosed between two steel pole pieces, and located on the shaft. The pole pieces are made in the form of “crowns” formed by six beak-shaped protrusions facing each other. The ends of the winding are connected to copper ring contacts located on the front or rear of the rotor shaft; — The stator is a ring core, in the grooves of which the turns of three coils (windings) are laid, in which current is generated. Since the generator is three-phase, there are three coils in the stator, and they are connected by a star; - Housing - usually consists of two halves, which are held together with bolts or studs. In some generator models, the stator core is also part of the housing. At the ends of the housing halves there are holes for the passage of cooling air. Also, bearings are usually installed in the housing for free rotation of the rotor shaft; — Brush assembly — two graphite brushes and a brush holder (with springs to ensure constant pressing of the brushes to the contacts on the rotor shaft) to supply voltage to the rotor winding. Usually located on the back cover of the case; - Rectifier - a separate block of diodes (usually six of them are used - two for each stator winding), located on the rear cover of the case; — Voltage regulator — a unit made of discrete elements or microcircuits that ensures constant voltage in the on-board network at a level of 24 V. Usually installed on the back cover of the generator. On many generators, the seasonal voltage adjustment switch is also located here; — Cooling impeller —metal or plastic.
The generator housing has eyes (feet) for mounting this unit on the engine, as well as for adjusting the position of the generator and the tension of the drive belt. The generator is installed at the front end of the engine, in its upper part. Fastening to the block is carried out by two coaxial eyes (paws), another eye is bolted to the drive belt tension bar.
The generator must have several contacts for connection to the vehicle's electrical system. All generators have a “+” contact, which connects to the batteries, and a “-” contact, which goes to the vehicle ground. There may also be special contacts for outputting the phase to the voltage regulator, a contact for connecting to the toggle switch of the starter and instruments, and others. The “+” and “-” contacts are usually made in the form of bolts (since currents up to 90 A pass through them), and the remaining contacts are made in the form of a standard connector.
Lada Priora - generator replacement
The Priora requires a powerful generator; the car has a lot of electronics and a weak installation cannot cope with it.
A generator labeled 5102.3771 is recommended for the Priora, providing a power of 80 A; on luxury versions with even more electronics, a 115 A device is installed. Then which generator is better to install on the Priora?
Car owners recommend a unit produced by KZATEtm Samara plant under number 9402.3701-14, producing 115 A.
There is no need to modify it during installation, you just need to find the connector, because there are differences from the standard one. You can use a plug from a VAZ-2108 from the limit switch for turning on the reversing lights, which costs only 20 rubles.
Next, you will have to make a little modification when connecting to the “B+” power terminal in order to fit it to the desired size.
The cost, of course, of domestic units is higher than that of Chinese or Bulgarian ones, sold for 2200 and 3000, respectively. For Russian ones they ask for about 4000. But if you need repairs with Russian-made components, you can easily find spare parts.
Replacement
The procedure cannot be called complicated, but it is very important to strictly follow the instructions. Based on our recommendations, as well as video tutorials, you can carry out the replacement yourself without any problems.
You have already found out what bearings are on VAZ 2110 generators, purchased a set of new spare parts, so you can start repairing.
Front bearing
Slightly unscrew the mounting nut on the generator, and also loosen the adjusting bolt. Reset the alternator belt and start the engine. This will allow you to verify that the problem is with the generator. If the noise disappears, then we move on. There is still a lot of work ahead of you. Let's move on to the battery, from which the negative terminal should be removed
This is important from a safety point of view and protection against accidental short circuits during repairs. Once the terminal is removed, unscrew all the wires going to your generator. If you have a crankcase guard, unscrew the mounting bolts and remove it. This way you can get to the lower mount of the generator and remove the device
Remove the generator by pushing it through the engine compartment. Using a regular screwdriver or other handy tool, you need to block the generator rotor and then unscrew the pulley. The next step is to look for special latches. By pulling them to the side, you will be able to dismantle the device body. Next, the generator brushes are unscrewed, as well as the mounting bolts holding the halves of the generator assembly. There should be 4 of these bolts in total. We recommend marking both halves of the generator housing to avoid problems during reassembly. Use a flathead screwdriver to pry up the cover and remove it. Practice shows that it is more convenient to remove the rotor from the front cover bearing in the following way. Take a nut and screw it onto the rotor threads. Then hit it with a hammer, first placing a wooden block under it. Find a part whose diameter will coincide with the diameter of the bearing being removed. For example, a 27 millimeter head may be perfect. Gently start tapping the element so that the bearing comes out of its seat. Take the new bearing and prepare to reinstall it. The first step is to treat the new bearing with lubricant so that it lasts as long and reliably as possible. To install a new component, you will need the old bearing. Place it on top of the new device and lightly tap with a hammer to install.
That's it, the front bearing has been removed and replaced. Let's move on to the back.
Rear bearing
- To remove the rear element, you will need a special puller;
- If you don't have a puller, you will have to knock out the component with a chisel. An alternative option is a metal rod and a powerful, strong screwdriver;
- The selected tool is used to strike the bearing with a hammer. Here you definitely need to move along the surface, moving in the opposite direction;
- Some people can easily cope with dismantling; they use a regular strong open-end wrench;
- Now take the socket that you used to remove the front bearing and the old generator element that was removed. With their help, a new bearing is driven into its seat;
- If you don't like this method, use a tubular wrench or a metal pipe whose diameter matches the diameter of the rear bearing.
Having finished the work, all you have to do is assemble the assembly, following the steps in reverse order. You should start with the front cover of the generator, followed by all other components of the assembly.
If you carefully study the instructions, watch training videos, understand the structure and operating principle of the generator, replacing its bearings will become a fairly simple repair job for you, which will take no more than an hour of your time.
After completing the replacement, be sure to check the machine for noise. If everything was done correctly, the next operation to change the bearings will not be required soon.
Which generator is better to put on a VAZ 2110
VAZ 2110 factories install KATEK generators with a current of 80 A. The service life is 140,000 km, which is approximately 10 years of vehicle operation. Answering the question of which generator is better to install on the VAZ 2110, experts recommend products from Russian manufacturers.
What to consider when choosing
Generator Manufacturers
It is best for 2010 to purchase a standard generator from KATEK or KZATEtm Samara plant, and about 50% of owners do just that, according to statistics. They are reliable, cope perfectly with their functions, creating the necessary tension.
Among the foreign-made generators, we can recommend Bosch, Delphi and Denso, which are also reliable and popular.
Generators for VAZ 2114
The generator initially built into the 2114 is low-power, and if it also breaks down and you decide to purchase a new one, the question arises: which generator is better to install on the VAZ 2114? It is important here that the unit is more powerful, but there is no need to change the fastenings.
Installing these generators for 2014 usually does not cause problems, however, it will be necessary to replace the pulley, but it only costs about a hundred rubles and is not difficult to find.
Please note that a lack of charging voltage can occur simply due to oxidation of the battery terminals; keep an eye on them by cleaning them regularly.
Generator 2108
This device is often installed on both 2106 and 2107. This is due to its greater efficiency; it produces a charging current of 55 A, which is quite enough for most motorists. But, if your car has significantly more equipment, then it is better to choose something more powerful.
These generators are identical in terms of mounting, so there will be no problems with the installation itself. Of course, if you remember to remove the terminal from the battery. The fun starts when you connect. The whole point is that 4 wires are attached to the original device. There are only 3 for the “eight” one. This is due to the built-in voltage relay. To obtain a normal result, you need to insulate the black wire, and connect the rest as usual. When the generator is running, the light indicating the discharge will be on. This is a normal phenomenon with such a connection. Accordingly, it should go out when there is no charging.
In principle, you can already drive like this, but if you want to do everything as expected, you will have to make some more modifications. We remove the old relay and replace it with a regular power relay. Now the light will light only when the engine starts, and also at low speeds, which is quite acceptable.
When installing on a VAZ 2107, you only need to add a power relay.
Generators for VAZ 2115
VAZ 2115, created on the basis of the “nine”, adopted the main components and assemblies from it. Accordingly, there are also many problems with equipment. If the car has a carburetor engine, it can be equipped with a 55 A generator 37.3701, which differs from the above in the mounting method. However, this voltage is not enough for the constant use of modern audio systems, fog lights and other energy-consuming options. Which generator is better to install on a VAZ 2115 - car owners definitely recommend installing it with a power of at least 80 A. Now on the VAZ 2115, as well as on 2113-2114, three-phase 94.3701 with an output of 80 A are installed.
For more power, you can install a 90 A Priorov generator KZATE 9402.3701 in 2015, which is suitable for the mounting and pulley. A reliable unit will provide you with the necessary energy for any number of energy-consuming devices.
Summarizing the above, it can be noted that when buying a generator at a VAZ to replace a broken one or to increase power, it is better to choose Russian models, since they are most suitable in design and you will not have to carry out expensive modifications. In addition, you will always find the necessary
Source
Disassembling the generator VAZ 2107, VAZ 2105, VAZ 2104
generator, replacement and troubleshooting
What generator for engine 21126
Generator 37.3701. Clean and blow out the generator with compressed air. Lock the generator pulley with the clamp included in the set of tool 67.7823.9504, unscrew the pulley fastening nut and compress the pulley using a puller. Remove the key and tapered washer from the pulley. Tool kit 67.7823.9504 includes a regular puller and grip. The latter consists of two steel half-rings that are inserted into the pulley groove. The half rings have the same cross-section as the generator drive belt. On one side they are hinged, and on the other they are equipped with levers that are compressed with one hand when removing the pulley.
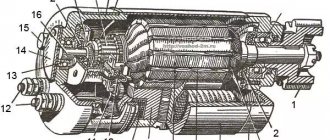
Parts of the VAZ 2107 generator - 37.3701: 1 - voltage regulator assembled with brush holder for generators produced since 1996; 2 - voltage regulator and brush holder for generators manufactured before 1996; 3 — terminal block for additional diodes; 4 — insulating bushings; 5 - rectifier block; 6 — contact bolt; 7 - stator; 8 - rotor; 9 — spacer sleeve; 10—inner bearing mounting washer; 11 — cover from the drive side; 12 - pulley; 13 - outer bearing mounting washer; 14 - coupling bolt; 15 — front rotor ball bearing; 16 — bushing; 17 — cover from the side of the slip rings; 18 — buffer sleeve; 19 — clamping sleeve; 20 - capacitor
Disconnect the wire from plug “B” of the voltage regulator. Disconnect the wires of the regulator and capacitor from terminal “30” of the VAZ 2104, VAZ 2105, VAZ 2107 generator and unscrew the screws securing the voltage regulator. For generators made before 1996, in order not to break the brushes when removing the brush holder, insert the blade of a screwdriver between the body of the regulator 2 and the brush holder and partially pull the regulator out of the generator, leaving the brush holder of the VAZ 2105 generator in place. After this, tilt and remove the regulator together with the brush holder from generator Remove the capacitor 20 by unscrewing the fastening screw. Unscrew the nuts of the coupling bolts 14 and remove the generator cover 11 and the rotor 8. Unscrew the nuts of the bolts connecting the tips of the diodes to the stator winding terminals and remove the stator 7 from the generator cover 17. Unscrew the nut of the contact bolt 6, disconnect from pads 3 plug wires of additional diodes and remove the rectifier unit 5.
Details of the front part of the G-222 generator: 1 - casing; 2 - voltage regulator; 3 - base; 4 — brush holder with brushes; 5 — generator cover from the slip ring side; 6 — plug block of the central output of the stator winding; 7 — terminal “15” of the generator (terminal “B” of the voltage regulator)
The G-222 generator is disassembled in the same order. To remove the voltage regulator, you need to unscrew the fastening screws and remove casing 1 assembled with regulator 2, base 3 and brush holder 4. Then, unscrewing the screws, disconnect the regulator, base and brush holder with brushes. Further disassembling the VAZ 2104 G-222 generator is similar to disassembling the 37.3701 generator .
Generator VAZ 2107, VAZ 2105, VAZ 2104
- – Technical characteristics of the generator
- – Generator troubleshooting
- – Checking the generator on the stand
- – Checking the generator with an oscilloscope
- – Generator rotor winding
- – Generator stator
- – Diodes of the generator rectifier block
- – Checking diodes at the generator
- – Generator voltage regulator
- – Generator capacitor
- – Generator disassembly steps
- – Generator assembly steps
- – Generator brush holder
- – Generator rotor bearings
- – Additional generator diodes
Design and electrical circuits of VAZ 2104, VAZ 2105, VAZ 2107
Diagnostics of electrical equipment for Lada 2105. Instructions for repairing electrical equipment: ignition systems, starter for Lada 2104. Operation of the generator, battery, purifier. Diagram of fret 2107.