I want to say right away that I will not describe in detail all the repair procedures for this device, but I will give the main ones that VAZ 2107 owners quite often have to perform. I’ll start with the necessary tools that will be needed to repair and disassemble the generator on the “classic”:
- Wrench size 19 - the ring one is more convenient
- Socket heads for 8 and 10
- Extension
- Hammer
Now below I will describe in more detail the disassembly procedure, and I will also analyze the dismantling of each part separately.
Complete disassembly into parts
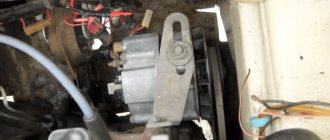
First, unscrew the 4 nuts that are located on the back cover of the device, and in the bottom photo they are very clearly visible:
Then we try to unscrew the pulley mounting nut with a 19mm wrench. Usually, it is very tightly tightened and it is quite problematic to do this with the generator removed, unless you clamp it in a vice. But there is a way out of the situation - you can press on the bolts from the reverse side, where we unscrewed the nuts, so that they rest against the impeller blades, thereby fixing it in a stationary state. Next, you can try to unscrew this nut, holding the generator stationary.
Now we take a hammer and, with light tapping, try to separate the generator into two parts, as is clearly demonstrated in the photo below:
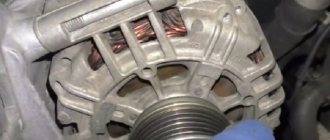
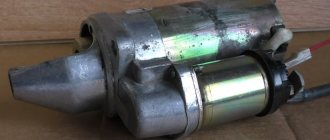
As a result, it should look something like this:
As you can see for yourself, there will be a rotor on one part, and a stator (winding) on the other.
Causes of malfunction and repair
Main reasons for repairs
So:
- The windings are burnt out;
- The brushes are worn out;
- The body is cracked;
- Bearings make noise (creak);
- Other reasons.
Attention: It is more convenient to replace the unit from below the car. To do this, you will need to unscrew the boot protecting the car. You will need a lift or inspection pit.
We make a withdrawal
How to replace a VAZ 2107 unit with your own hands:
- Disconnect the negative terminal from the battery;
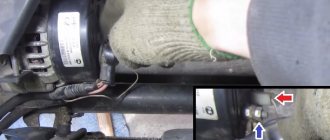
- Then disconnect the connector from the generator. (In the photo we previously removed the battery and thermostat);
Disconnect the connector
- Remove the insulation cover from the terminal. Using a 10mm wrench, unscrew the terminal and disconnect the wire;
Unscrew the terminal
- Loosen the generator mount, then remove the belt;
- Using a 17 key, unhook the adjustment bar;
- After unscrewing the lower fastening nut, remove the bolt with sleeve;
- We take out the unit;
We take out the unit
- We will perform the installation in reverse order;
- After installation, we adjust the belt tension.
Removing and Replacing the Rotor
It is very easy to remove; first we remove the pulley, removing it from the shaft:
Then remove the key:
And now you can easily remove the rotor of the VAZ 2107 generator, since it is easily released from the housing:
Now you can move on.
If there is a problem with the bearings or the belt is dirty
If the device slipping in the VAZ-2107 is caused by the slow rotation of the pulley, which depends on the serviceability of the bearings, it’s time to start repairing the latter. To do this, you will again need to use the instructions on how to remove the generator and how to disassemble it. If you are not confident in your abilities, you should not experiment; it is better to contact a service station.
Another possible breakdown is contamination on the belt. It is difficult to completely clean the part from dirt and dust, so experts recommend replacing the old belt with a new one.
Step-by-step video instructions on how to properly disassemble the VAZ-2107 generator are shown below:
Removing the winding (stator)
To do this, you need to unscrew the three nuts from the inside with a head, as shown in the picture:
And after this, the stator can be removed without any problems, since it is disconnected from the diode bridge:
If it needs to be replaced and you need to remove it completely, then of course you will need to disconnect the plug with the wiring, which is visible in the top photo.
How to change a bearing
During generator repair, the bearing should be checked for play and replaced if necessary. There are two bearings on it: rear 6201 (article - 180201) - 12x32x10, front 6302 (article - 180302) - 15x42x13. For this:
- Remove terminal 30 (nut 6);
- Unscrew two screws and remove the voltage regulator;
- The pulley nut is dismantled;
- The key is removed;
- The bearing lining is dismantled;
- With the help of a device (or without), the old bearing is pressed out and a new one is installed;
- The retaining plate is secured.
About replacing the diode bridge (rectifier unit)
Since after removing the winding, the diode bridge is practically free, there is almost nothing to say about replacing it. The only thing you need to do is push the bolts from the inside so that they pop out from the outside:
And the diode bridge has been completely removed and you can replace it:
After carrying out the required repairs to your generator, we reassemble it in the reverse order and do not forget to connect all the winding wires correctly.
↑ How to assemble a generator
The misalignment of the holes in the legs of the generator covers should be no more than 0.4 mm. Therefore, during assembly it is necessary to insert a special gauge into these holes. It is a stepped cylindrical mandrel having a diameter of 12 mm on one side and 22 mm on the other.
The conical spring washer of the pulley with its convex side should be in contact with the nut. Tighten the pulley nut to a torque of 38.4–88 N·m (3.9–9.0 kgf·m).
When assembling a generator 37.3701 manufactured before 1996 (with a dismountable regulator-brush holder assembly), in order to avoid breakage of the brushes, before installing the regulator with the brush holder in place, it is necessary not to completely insert the brush holder into the regulator, but only partially push it in and insert it into the generator in this form. After installing the brush holder in place in the generator cover, lightly press the adjuster and slide it into the generator.
Repair instructions for the unit of the seventh VAZ model
To solve the problem of overcharging, replacing a pulley, regulator or diode bridge, repairs are performed:
- First, the nut that secures the pulley itself is unscrewed; at this moment you need to hold the rotor so that it does not turn.
- The pulley must be moved to the side, the impeller is removed and the key with washers is removed. After dismantling the pulley, the regulator relay is disconnected; to do this, unscrew the fixing bolts in advance and also disconnect the block. The regulator is removed with the brush mechanism.
- After removing the regulator, unscrew the nuts securing the device cover. The cover is moved to the side, after which the sleeve is dismantled.
- Now you need to check the performance of the bearing. If you see that when you turn it, a gap appears, then change the element by unscrewing it with an 8-mm wrench. Of course, to replace it, you need to remove all the screws and fixing nuts.
- The next step will be to dismantle the rotor. As practice shows, performing this procedure without the use of auxiliary tools can be problematic. Therefore, immediately take two small bars and fix them at the edge of the back cover. Using a special drift (preferably made of soft metal), you need to knock out the rotor. If the cover is damaged during dismantling, you can try to process it using a grindstone.
- Check the rear bearing in the same way. If you need to replace the device, remove it from the rotor. It will be more convenient to use a puller for this.
- The next step will be to dismantle the diode bridge. To remove the diode bridge, it is necessary to unscrew the nuts securing the bridge block, as well as the terminals on the winding. Next, you can remove the stator mounting screws and dismantle the device. You need to carefully diagnose the integrity of the winding. If there is damage on it, for example, broken wiring or signs of burning, the winding is changed and rewound.
- Next, you need to remove another nut, after which the bridge can be removed without any problems.
- Use a screwdriver to unscrew the bolt securing the capacitor and pull out the element.
Alternator belt for VAZ 2107
"Seven" came off the assembly line of the Volzhsky Automobile Plant in the period from 1982 to 2012. Initially, the model was equipped with a drive belt of a currently outdated model, which had a smooth surface without any roughness. However, later VAZ 2107 began to be re-equipped to meet the requirements of the time, which led to the emergence of a new type of belt with teeth.
It should be emphasized that the most popular manufacturer of belt products for the domestic automotive industry is Bosch. For many years, the German manufacturer has been producing high-quality products that, both in size and service life, completely satisfy VAZ 2107 owners.
Among the variety of belts, these products are in constant demand in the car market
Alternator belt sizes
All parts used in the design of the car must have markings and manufacturer numbers. Design numbers and sizes of belts for the VAZ 2107 are specified in the operational documents for this model:
- 2101–1308020 (smooth surface), dimensions - 10.0x8.0x944.0 mm;
- 2107–1308020 (toothed surface), dimensions - 10.7x8.0x944.0 m.
In what situations is replacement necessary?
Wear of the element is characterized by such manifestations as cracks or tears in the canvas, worn teeth and uneven edges. If you ignore such a deplorable state of a very important element, it will come back to haunt you with overheating and boiling of the engine, independent operation of the battery, which will lead to its rapid discharge.
If the belt is severely worn, it also shows signs of noise to the owner - it begins to whistle, especially at low speeds. The next reason for a whistling belt may be water getting on its surface, which occurs due to worn-out pipes of the cooling system - antifreeze begins to leak.
Some belts - oak ones - whistle when the car starts in frosty weather, and after warming up the sound is lost. A weak tension is expressed by a whistle, but in this case it is quite easy to overtighten.
how to remove the generator
from a
VAZ
of the traditional model range.
More details: 2107
.html Subscribe!
