How to replace the generator on a VAZ 2113-VAZ 2115?
Note! We recommend that you replace the generator with exactly the same one (Similar), it just happens when people buy other generators and problems of this kind arise with them, for example, the generator is not suitable for this car and they cannot fix it (Mounts are in the wrong places), or it takes up there is too much space and cannot fit into the place where the original one stood before, so before removing the generator, take a look at its markings (it’s written right on it) and according to these markings and buy a new generator!
Removal: 1) You need to remove the generator through the bottom since it is convenient and there will be no difficulties in removing it, but for this the crankcase protection will need to be removed, otherwise it will interfere with removal (For information on how to remove the protection, read the article: “Replacing the protection crankcase on the car"), as soon as the protection is removed, be sure to remove the minus terminal from the battery, because if this is not done, then when you touch the wrench with the nut securing the plus terminal of the generator, a short circuit will occur and it will continue until until you remove the wrench from the nut (For information on how to remove the terminal, see the article: “Replacing the battery on a VAZ”).
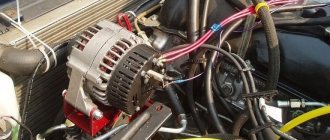
2) Now move the rubber boot to the side with your hand (This is shown in both photos below) and under it you will find a nut that secures the plus terminals to the generator (The nut is indicated by a blue arrow), you unscrew this nut and then remove both terminals as soon as the terminals will be removed, disconnect the wire block (Indicated by the red arrow) by pulling it with your hand with a little force and thereby disconnecting it.
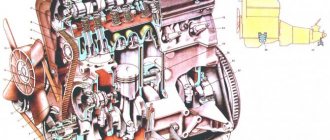
- VAZ-2110, generator: description, technical characteristics, maintenance and repair
3) Next, using a wrench or a socket wrench, completely unscrew the adjusting bolt, which for clarity is indicated in the photo below with an arrow. By the way, there is a washer under this bolt, so remove it from the bolt when you take it out.
4) Then unscrew the nut of the upper bolt that the generator itself holds on the bar (Indicated by the red arrow), after which remove the nut from the bolt and remove the bolt itself from the generator, while also removing the tension bar (Indicated by the blue arrow) which is located behind the bolt.
5) Well, finally, unscrew the nut of the lower generator mounting bolt (see photo 1) and immediately behind this nut the spacer bushing will be located, you will also remove it, as soon as it is removed, take something heavy (Hammer for example) and knock the bolt out of the generator, with one hand while holding the generator itself suspended (see photo 2), just if you don’t do this, then when the bolt is removed, the generator will fall to the ground (By the way, you need to hit with a hammer not with the metal part, but the handle is made of wood, there is simply a high probability of damaging the bolt if you knock with the metal part).
Note! As soon as you slightly loosen the nut of the lower bolt, remove the belt from the generator (Indicated by the red arrow), to do this, move the generator closer to the engine with one hand, and with the other hand, remove the belt from the generator roller (Roller indicated by the blue arrow) and let it just hang there, not preventing the generator from being removed at the same time!
Installation: The new generator is installed in its place in the same way as it was removed, just the whole procedure occurs in the reverse order of removal, by the way, after installing the generator, put a belt on its roller and adjust its tension, for more details on how to do this, read the article : “Replacing the alternator belt on a VAZ.”
Additional video: Using the example of a VAZ 2110 car, see how the generator needs to be removed, the whole procedure for removing the generator on front-wheel drive cars is almost the same, but this no longer applies to new cars such as Lada Priora, etc. , because on them the generator is removed a little differently.
21.09.2020
A generator is an important element in the design of any car. The unit converts mechanical energy into electrical current, providing resources to all machine systems. A generator breakdown is a serious problem that you won’t be able to drive for a long time; the battery will be discharged almost immediately. You can deal with the trouble if you know how to replace a VAZ-2114 generator and other AvtoVAZ cars.
How does the generator work on a VAZ?
Main details:
- Generator VAZ-2110. Design Features
- Brush holder with voltage regulator.
- Stator.
- Rotor.
- Fan with pulley.
- Distance ring.
- Bushings.
- Bearings.
How does the generator work on a VAZ?
With the help of the stator and the generating part, a 3-phase alternating current is generated, which 6 large diodes change to direct current, and the battery is charged.
The generator operates by rotating the crankshaft. The device is located under the hood, on VAZ cars - in the front part. Therefore, it is not difficult to remove the VAZ-2114 and other models generator.
Dismantling and disassembling the generator yourself
Repair of the VAZ 2115 generator is carried out as follows:
- First you should disconnect the terminals from the battery.
- Next, unscrew the nut from the contact screw; by doing this, you can disconnect the wiring.
- Then remove the screw that secures the strap tensioner and the two screws that secure the tension frame.
- Next, unscrew the nut, which is located to the right of the mechanism. You need to lift the part and remove the pin - you won’t be able to pull it out completely, so remove it as far as possible. To dismantle the unit, the pin will have to be cut, and during subsequent installation a new pin will be installed, only on the opposite side.
- After this, the unit is removed and disassembled. The tension screws are unscrewed, as well as the bolts that secure the phase winding and the capacitor device to the cover. If necessary, the capacitor element can be disconnected from the rectifier unit.
- The phase windings should also be disconnected directly on the block itself.
- Next, you need to unscrew four more tightening bolts, and then remove the back cover with the rotor mechanism and stator.
- Now the rotor should be clamped in a vice and disassembled, unscrewing all the necessary nuts and removing the pulley with the ring. All failed elements - voltage regulator, bearings and other components are replaced if necessary. After this, the unit is assembled and put into place.
Types of mechanical failures
Failure in the technical part of the generator - wear of the bearings, bending of the pulley (if it is not bent too much, the device will work with a whistling belt), failure of the fasteners.
Attention! Mechanical breakdowns appear after an accident; they rarely occur during operation.
Signs of damage:
- Unnatural noises when the generator is running.
- Voltage drop.
- The car drives faster, then slows down sharply when you press the gas pedal with the same amount of force.
Elimination of a simple breakdown - repair. If several parts fail on a VAZ-2113, 2114, 2115 or other Lada model, replacement is needed.
Originals, analogues, prices, articles
| Catalog item | Serial number | Price | |
| KATEK ELD-A-2114-90A (original) | BOSCH (9402.3701) (original) | From 3500 – 4000 | |
| 9402.3701 | FINWHALE 6РК-698-05 | 6202 2RS / 180202 | From 3500 – 4000 |
| KZATE 9427.3749 | Electromash 977.3701 | SKL 2114-6202 2RS | From 3500 – 4000 |
| 2114-3701010 (HORT) | KATEK 2114-3701010 | Contitech 6PK-1115 | From 3500 – 4000 |
| PRAMO-Electro 2114-3701984 | PRAMO- 3701953 | PRAMO-Electro 2114-3701747 | From 3500 – 4000 |
| *prices are as of July 2021 |
Operating principle of the electrical energy source
There are 8 coils installed in the GU housing. The material is copper, the connection method is “star”. The rotor is a steel shaft, on the back surface of which magnetic circuits are pressed, between which a winding is installed.
Excitation winding wires and copper-graphite brushes are soldered to the shaft rings. After the ignition is activated, the current from the battery passes through the brushes and winding, forming a magnetic field.
Thus, the rotor is driven, and the alternating current is converted into direct current through the coils.
On the back side of the GU there are two terminals marked “+” and “–”. Accordingly, the terminals with the indicated polarity are connected to the battery.
To rotate the PG you need a battery. When the actual voltage during operation of the unit is higher than the battery voltage, the generator will begin to supply power to the battery consumers. Thanks to this, the on-board network current is maintained within a specified range.
Characteristic reasons for the failure of the main control unit on the VAZ 2114 (2115)
- insufficient tension of the drive belt;
- contamination of contacts on rings;
- mechanical damage to the rectifier unit;
- excessive wear of brushes;
- jamming (freezing) of brushes;
- short circuit in the winding;
- power supply interruption;
- the voltage regulator is faulty;
- roller bearing wear;
- pulley fixation is loose;
- Fan blades are damaged.
Methods for troubleshooting generator VAZ 2114 (2115)
- carrying out preventive measures;
- replacement of the PG assembly (in a comprehensive manner);
- drive belt tension;
- centering the fan blades;
- installation of new brushes;
- replacement of the rectifier bridge;
- voltage regulator prevention;
- inserting a new roller bearing;
- replacing the fuse in the mounting block.
Types of electrical faults
The problem with the generator is that it stops producing current. The indicator on the dashboard lights up. Electrical faults lead to breakdown:
- The fuse or contacts have blown. Making a replacement is a matter of minutes. With contacts things are different.
- The brushes are worn out. You can change it yourself; you don’t need to buy a new device.
- The regulator relay has failed. You can repair it yourself or contact a professional.
- Diode bridge failure. Cannot be repaired, only replaced. To do this, you need to disassemble the generator; without experience, it is better not to carry out such work; it should be left to the experts.
Diode bridge failure.
- An open circuit in the stator or rotor due to a short circuit. Repairing is more expensive than purchasing a new electrical unit.
Signs to help detect an electrical problem:
- Generator VAZ 21099, VAZ 2109, VAZ 2108
- The battery indicator on the dashboard does not go out after starting the power unit or blinks.
- Burnt wire smell coming from under the hood (a serious problem that may not be related to the alternator).
- The appearance of sparks in the housing.
- Voltage drop.
- Constantly recharging the battery.
- The headlights are adjusted, they shine dimly, and when other sources of power consumption are turned on, they almost do not light up.
Generator connection diagram
Basic faults
The primary reason for the breakdown of generator brushes is their wear, which makes itself felt by a poor battery charge. You can detect a failed part by the following problems:
- voltage failures;
- the battery discharges quickly or does not charge at all;
- the headlights begin to burn much weaker or blink;
- instrument lights blink;
- There is not enough voltage for the electronics to operate and it turns off (radio tape recorder, for example).
How to remove a generator on a VAZ
On front-wheel drive Lada cars with an injector engine (with the exception of Vesta and Largus), the location of the device is the same. The fastenings are identical.
Removing the generator using the example of a VAZ-2115 with an 8-valve engine
Required tools:
- Keys for 8, 10, 13, 17, 19.
- Puller for convenience.
- Adjustable wrench.
- The head is 27 elongated.
Stages of work:
- Remove the terminal (−) from the battery (must be done before starting any work).
Disconnecting the terminal from the battery
- Unscrew the fastening bolt located below.
- Move the terminal protective cover (on the side) and unscrew the fixing element.
- Remove the top mounting bolt.
- Remove the belt from the pulley.
- Dismantle the device.
On a car with an 8-valve engine, you can do without a pit. The knot is taken from above. If the engine has 16 valves, it will be more difficult to remove.
On classic models (2101, 2105, 2106, 2107 and others), the generator is located under the hood; dismantling differs from front-wheel drive cars. The engine of the “classic” has a different location, which is why some peculiarities arise.
Removing the generator on a VAZ-2107
The same tool is needed. The process is as follows:
- For convenience, drive the car onto the overpass.
- Unscrew the terminal (−) from the battery.
- Remove the battery (you will need a 10mm key).
- Unscrew the top bolt with a 13 or 17 key (it differs on different models).
- Remove the protection from the bottom.
- Remove the belt.
- Remove the wires from the device.
- Bend the terminal protective cover (+) and unscrew it with a 10mm head.
- Using a wrench (19), unscrew the nut securing the stator and the unit mount.
- Remove the nut and remove the device from below.
After removal, you can begin repairing the generator. If key elements of the device fail, it is more economical to purchase a new one.
Work order
Before starting work, you must read the instructions in full on how to fix the problem. This will allow you to act confidently. You need to understand that the reason for the loss of functionality of the generator may be not only the failure of the brushes, but also the belt or relay regulator. It is possible that the entire generator set is worn out. Therefore, during repairs, you need to check the condition of all elements. First you need to prepare the car for work: remove the terminal from the battery to eliminate problems, and disconnect the plus from the generator.
Now you can start the main work:
- Unscrew the alternator belt mounting bolt.
- Move the unit towards the engine and remove the belt.
- Disconnect the tensioner bar, plug, and terminals.
- We remove the engine.
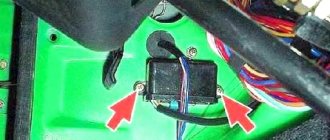
- Now you need to make the brush assembly accessible for work; to do this, you need to open the protective casing. It is secured with three latches.
- After unscrewing the two bolts, disconnect the wires.
- There is a nut on the right that also needs to be unscrewed.
- Now you need to raise the voltage regulator.
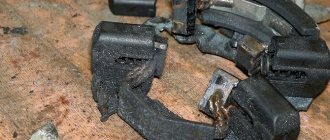
We remove the brushes of the VAZ 2114, 2113 or 2115 generator and check them. It often happens that they are completely over.
Be sure to check the stem at anchor. It is located at the point of contact between the shaft and brushes. If it is large, it needs to be sanded.
- Now you need to thoroughly clean the location of the brush assembly, clean the contacts, and check the reliability of the springs.
- Installation of new parts.
- Reassemble in reverse order.
Compare old and new brush lengths.
Also watch the video of replacing the VAZ 2114 generator brushes without removing the generator:
You can also proceed in the following order:
- We de-energize the battery by disconnecting the negative terminal.
- Disconnect the contacts.
- We unscrew the two fasteners located on the brush holder body.
- We remove the node.
- Inspect the structure for defects.
- Measuring the protruding part of the brushes.
- Installing new components.
- Installation of the unit in reverse order.
This option is relevant if you are absolutely sure that the brushes are the cause of the generator malfunction. After the work has been correctly completed, the following message appears on the dashboard.
Procedure for replacing the generator
If the electrical unit fails and repair is impractical, you must first find a replacement. It is recommended to buy a factory version that will fit the fasteners and terminals. Otherwise, the repair will be accompanied by changing the wires.
Replacement process for VAZ 2109-2115:
- Drive the car onto the overpass.
- Remove engine protection.
- Remove the (−) terminal from the battery.
- Move the protective cover away from the positive one, unscrew the fixing bolt and remove the terminal.
- Remove the wires (secured with a block).
- Remove the upper fastening element.
Upper mounting bolt
- Take off the belt.
- Unscrew the bottom bolt.
Bottom bolt
- Dismantle the device.
- Install a new unit so that the fasteners match.
- Secure with the lower and upper bolts.
- Install the belt (preferably a new one).
- Place the terminal, secure it, and return the protective cover.
Securing the terminals on the generator
- Connect the wire block.
- Adjust tension.
Attention! If you overtighten when adjusting the belt, the bearings will quickly fail. If the tension is weak, there will be no proper grip and the battery will not be able to charge.
To tighten, you need to turn the adjusting screw, which, when moving clockwise, is tightened, and when moved counterclockwise, it is loosened. It's easy to check - you need to gently press the belt so that it bends no more than 15 mm.
Replacement
The process of replacing old brushes with new ones does not take much time and does not require special knowledge. The only thing you need to prepare are the tools:
- socket wrench 13;
- flat screwdriver (ordinary);
- 8mm socket with ratchet.
Without removing the generator
If you are sure that the problem with the car breakdown is a malfunction of the generator brushes, then you can do without removing it.
- Turn off the negative terminal.
- Disconnect the wires.
- On the brush holder body, unscrew the two bolts holding it in place.
- We extract the structure.
- We check for damage and the size of the protruding part of the brushes (it must be at least 5mm).
- We install new elements and carry out installation in the reverse order.
With the generator removed
Poor charging of the car can be caused not only by the brushes, but also by the alternator belt. To eliminate this point, when replacing brushes, you should remove it to check the condition of the belt.
First, we dismantle the unit.
- We unscrew the bolt securing the generator belt.
Let's move on to the brushes
- Open the protective casing (cover).
Generator VAZ 2115
A generator of type 94.3701 is installed on cars - alternating current, three-phase, with a built-in rectifier unit and an electronic voltage regulator, right rotation (on the drive side).
The generator rotor 94.3701 is driven by a poly-V belt from the engine crankshaft pulley (on some VAZ-2111 engines - from a damper).
Table of contents
Replacement How to remove How to check Why it produces low voltage
Replacement
In order to remove the generator on the VAZ 2114 - 15, we need:
If everything is ready, then take step number one - remove the negative terminal from the battery.
Step No. 2 - first we unscrew the protection and boot under the car, on the right side (under the generator), you can do without it, but it will be more convenient to unscrew the lower bolts of the generator.
It is enough to unscrew a few bolts and lower the protection with the boot down.
Step No. 3 - weaken the tension of the generator belt, to do this, unscrew bolt 1 and loosen bolt 2.
Step No. 4 - press the generator to the engine and remove the generator belt
Step No. 5 - since we will be removing the generator completely, we will completely unscrew the belt tensioner bar 3 from the engine block.
Step No. 6 - remove the plug (female) and unscrew terminal 4 from the generator.
Step No. 7 - since the generator is attached to an axle at the bottom, a nut holds it there, this axle (essentially a long bolt) is usually difficult to pull out, it will be easier to unscrew not the axle, but the entire mount of the generator to the engine, there are 15 bolts there.
Step No. 8 - we take out the generator and unscrew the axle (the long bolt on which the generator itself sits), after which we slowly knock out the axle with a wedge (another unnecessary bolt).
That's it, the generator is free, now you can replace it with a new one.
Assembly occurs in reverse order.
You can tighten the generator belt with a pry bar by inserting it between the generator and the engine. Next, adjust the tension using bolt 2.
In this case, the belt tension should not be weak or too strong.
A weak tension will allow the belt to spin, while a strong tension can damage the generator bearing.
Usually the tension is measured by the deflection of the belt; it should not be more than 1-1.5 cm.
Instructions: which battery is better. What to do if the fuel pump fuse is on, the material is available at the link. How to remove the mounting block https://vz15-up.ru/lkt/montazhnyj-blok-vaz-2115.html#t3.
How to remove
You will need: keys “8”, “10”, “13”, socket head “17”, wrench.
1. Disconnect the wire from the “–” terminal of the battery.
2. Remove the engine protection.
3. Remove the generator drive belt (see “Replacing and adjusting the tension of the generator drive belt”).
4. Disconnect the block with the wire from terminal “D” of the generator.
5. Remove the protective rubber cover, unscrew the nut and disconnect the wires from the contact bolt (terminal “B+”).
6. Remove the tension bolt.
7. Finally unscrew the nut of the upper mounting of the generator.
8. Remove the tension bar.
9. Finally unscrew the nut of the lower mounting of the generator.
10. Remove the spacer bushing.
11. Holding the generator, remove the bolt securing it and remove the generator down
How to check
To test the generator we need an assistant and a regular tester.
First of all, turn on the ignition key and make sure that all the lights on the dashboard are on (alternator (battery), oil, brakes, handbrake, check engine, etc.). Next, we start the engine and look at the dashboard: A burning or dimly flashing “battery” light indicates a malfunction in the generator circuit. List of possible faults.
We warm up the engine to operating temperature (90 degrees) and turn on all energy consumers of your car. These are high beams, fog lights, heater at full power, heated rear window).
We connect the tester in voltmeter mode to the battery and ask a partner to rev the engine and keep the engine speed in the region of 3200-3500 rpm. A working generator at full load should show at least a voltage of at least 13V.
Conclusion: If the voltage is less than 13V, the generator belt may be loose (How to tighten the belt?), the generator circuit is faulty (mass oxidized, etc.), the voltage regulator is faulty, the brushes are worn out (How to replace the brushes?), or the generator itself is faulty.
4. Turn off all our energy consumers and re-measure the readings with a tester on the battery (We do all this at 3200-3500 engine speeds). The voltmeter readings should not exceed 14.7 V in this case.
Why does it show low voltage?
There is no winding excitation on your generator; the voltage drops as the battery discharges.
Simply put, no charging!
If you don’t want to poke them here and there, then everything needs to be inspected, preferably by a specialist in electrical equipment for the battery recharging system
Check both the excitation circuit itself and the battery separately, using a shortened circuit, without removing it from the car.
The reasons are simple:
Charging relay
Open winding excitation circuit.
fault in the diode bridge.
broken contact or circuit in one of the excitation windings.
Incorrect polarity of connection to the battery!
Replacing the generator on a VAZ 2115 can be easily done with your own hands, even in the yard. Before starting all work, you must remove the negative terminal from the battery. Then loosen the tension on the alternator belt and remove the belt. Then remove the tensioner bar and disconnect the wires from the generator. We unscrew the mounting bolts of the car generator and remove it. The entire replacement procedure will take no more than 20 minutes. For details of the replacement and difficulties that can be expected when replacing the generator on a Samara 2 VAZ 2115, see the video, detailed replacement instructions.
Like any part, the generator sooner or later becomes unusable. However, the breakdown of some parts does not interfere with the operation of the car, provided that the broken element is promptly replaced and repaired. And a failed car generator will not allow you to drive even 50-400 kilometers (depending on the battery and working devices) - the car will no longer drive. An injection engine will immediately start to malfunction and eventually stall; with carburetor cars, things are a little easier. Monitor the condition of the generator and, as necessary, either replace it with a new one or repair the installed one.
Note! You will need the following tools: a good set of wrenches, including wrenches, sockets, etc., two types of screwdrivers, a multimeter with an ohmmeter function, a special puller to remove the bearing from the shaft, a hammer and tubular mandrels (socket heads are suitable).
When to repair a generator?
A generator that has become unusable begins to supply current poorly and incorrectly to the vehicle’s on-board network, which causes problems with the electronics:
- at low speeds, the car's headlights shine dimly;
- Increasing speeds bring the light back to normal.
These symptoms indicate a malfunction of the generator or voltage regulator.
Another sign is that the generator is making noise: the generator bearings are out of order, they are not very difficult to replace and are inexpensive. We recommend disassembling and replacing the bearings as quickly as possible, otherwise it is possible that other parts will have to be changed due to bearings, for example, the stator suffers.
Disassembly
1) First you need to remove the generator; the article will help you understand the procedure: “Replacing the generator on a car.” Then remove the voltage regulator from the generator and the rectifier unit, the publication will help you with this: “Replacing the generator rectifier unit on a VAZ.”
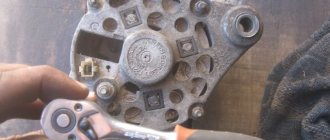
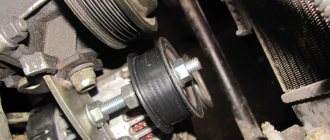
Note! The roller can be removed using an 8mm hex key. If you don't have one, try finding a flat-head screwdriver of the appropriate size. Be careful not to strip the thread when unscrewing the nut. The removal mechanism is as follows: a hex wrench stops the shaft with the installed roller from turning, and the roller fastening nut is unscrewed with a spanner (photo 1). Remove the unscrewed nut and its spring washer. By the way, this washer is of an unusual shape; examine it carefully: on one side it has a convex shape, and on the other it is flat. The convex part must be installed to the nut (photo 2).
2) We proceed directly to the repair. Use a marker or chalk to mark the two generator covers, noting their location relative to each other - you need to install them exactly as they were. Proceed to unscrewing the four bolts located around the circumference of the generator (photo 1). Next, use a flat-head screwdriver to separate both covers from each other (photo 2). Disconnect the cover located on the side of the slip rings (photo 3, rings are indicated by arrows). Now remove one of the important elements of the generator - the stator, by pulling it and removing it (photo 4).
Note! Be sure to check the removed stator for integrity; the condition should be acceptable, the inner surface (indicated by the arrow) without scratches - signs of touching the armature. The presence of marks and damage is a sign of faulty bearings or deformation of the generator cover.
3) Separate the cover from the rotor, and remove the rotor itself - simply grab the rotor with your hand and pull out the shaft (photo 1, the rotor shaft is indicated by a red arrow) from the bearing (indicated by a blue arrow). If the shaft does not pull out, screw the nut that previously secured the roller onto it. There is no need to install the roller, just screw on the nut. Then, having started to knock out the shaft, the rotor will not fly out of the bearing and will not hit the asphalt. Do not tighten the nut all the way, just screw it a little onto the thread. Using a hammer and a wooden spacer, knock the shaft with the rotor out of the bearing, controlling the effort. After removing the rotor, inspect the cover (photo 2). Pay special attention to the bearing; rotate it by hand: rotate the inner part in the direction where the rotor shaft was inserted. If you notice jamming, play, or rolling, replace the bearing. Take a screwdriver and remove the four screws securing the metal washer (photo 3), remove them from both sides of the cover. The bearing is knocked out using a hammer and a socket or mandrel of suitable diameter (photo 4).
Note! Check the cover for defects and if there is significant damage (large cracks, dents, etc.), replace the cover with a new one.
4) Let's move on to actually checking the generator. First, be sure to look at the contact rings (indicated by arrows in photo 1). The presence of marks, burrs, scratches is a sign that the rings need to be polished to a shine. This can be done using fine-grained sandpaper or a lathe. use the machine in extreme cases, for example, if nicks, marks and scratches cannot be removed with sandpaper. When working on the machine, erase the minimum layer of metal, and then sand it a little with sandpaper. Now take a multimeter and turn on the ohmmeter function on it. Check the resistance of the rotor winding by connecting the leads from the multimeter to the contact rings (photo 2). The infinity sign means that there is a break in the winding and the rotor must be replaced. Check whether the rotor winding is short-circuited to the housing: connect a multimeter to one of the rings, and throw the other lead onto the rotor housing (photo 3). The infinity sign in this case means that everything is in order and the winding does not short-circuit to the housing. Finally, check to see if the bearing on the ring side rotates easily (photo 4). The presence of play, wobbling, jamming during rotation, and rolling is a sign that the bearing is unsuitable for further use.
Note! Let's explain the bearing replacement procedure:
- be sure to stock up on a special bearing puller and press the bearing from the shaft (photo 1);
- install a new one;
- Find a mandrel (cap head) of a suitable diameter and hammer the bearing until it stops (photo 2).
By the way, try to choose a mandrel of such a diameter that it applies force only to the inner ring, indicated by the red arrow in photo 1).

