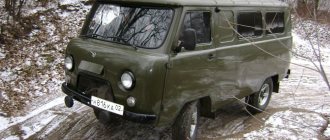
Despite the fact that Bukhanka is a fairly old car that has been on the market for several decades, starting in the 60s of the last century, the car still has many components. Moreover, each system requires appropriate care, timely maintenance and repair as necessary. Among the important components whose role becomes most noticeable in winter is the heater. It cannot be said that the stove on Bukhanka is somehow modern or highly efficient. Many complain about its low level of effectiveness. Moreover, this applies to the rear and front stoves to the same extent. Therefore, equipment is changed quite often. But it would not be amiss to study the structure and design of the Bukhanka oven equipment, as well as study the connection diagram of the electrical component, since the installation itself does not cause much difficulty.
Purpose and design
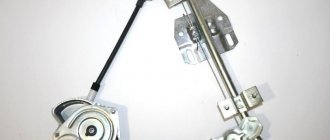
Before getting acquainted with the diagram of the UAZ Bukhanki stove, you should study the main functions and design features of this equipment. It is important to note that in the case of the Loaf, a pair of ovens is used, which are divided into a back and a front. Since most motorists drive alone or only with a front passenger, they pay most attention to the front system. As for the rear equipment, it is preferable to replace it with an autonomous heater, which copes with its tasks much more efficiently. The task of the heater on the Bukhanka is no different from the heaters on any other car. That is, here the system exists to maintain optimal temperature inside the vehicle. It is responsible for heating mainly in winter, and also works as a ventilation system, supplying air under the set due to the operation of fans and a motor. Currently, most Loaves are operated with the NAMI heating system, which is characterized by increased productivity and decent efficiency indicators. Structurally, there are 3 main components of furnace equipment. The loaf heater consists of:
- radiator;
- fan;
- a device designed to distribute air flows.
The heater faucet deserves special attention, allowing you to turn on and off the circulation of coolant through the furnace equipment, thereby switching from the heat supply mode to normal blowing of the interior with a fan. The stove system can operate in 2 modes:
- intake and supply of fresh air;
- recycling.
In the second mode, the temperature inside the cabin increases. To achieve an increase in temperature, it is necessary to close the air intakes, and then open the damper or heater tap. If the motorist only needs fresh air, then the manipulations are carried out in the reverse order. You need to turn off the stove tap and open the air intakes.
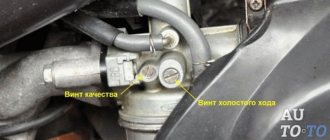
The corresponding control unit is responsible for controlling the furnace system. The adjustment is entrusted to the stove tap, which can become acidic, jam and leak. In this regard, it often has to be changed. Moreover, it is not uncommon that instead of a conventional automotive faucet designed for the UAZ Bukhanka, motorists use plumbing equipment assembled according to a special design using adapters. In practice, it works better, longer and more efficiently than a standard crane.
see also
Comments 21
I installed an electric pump from a gazelle, it’s not expensive, the problem went away immediately. Good luck
On the loaf, the stove is higher than the filler neck and is connected by a system of tees, and the pump tends to wear out over time. I advise you to connect in series and throw out everything old. First to the front and from there to the rear and there is no need to disdain the additional pump. I only recommend installing an additional pump at the outlet of the 2nd stove, so to speak, at the drain, since a lower temperature contributes to its long operation. Still, the problem is in the main pump. This is of course my opinion, but my experience in dealing with UAZ vehicles has not yet let me down, although...
look at the hose supply - the supply should go from bottom to top so that the air is expelled. To bleed, drive up a mountain so that the heater is below the level of the engine. those. if it’s a bobby, then it’s face up, if it’s a loaf, then it’s face down. and pump it with gases. I also threw out the electric pump. The original pump copes with two stoves.
You will pay attention to his UAZ. This loaf and a slide will not help in this case. In this case, you just need to turn it over
Does it make sense to put email. pump?
Air, definitely. But if a person doesn’t have an electric pump, then go up the hill and patiently do everything the guys advised. Good luck.
The easiest way is to use an electric pump embedded in the lower radiator hose: you turn it on and after 10 minutes everything is pumped, before this I suffered constantly
I have 2 stoves, and pumping them up a hill is quite difficult and time consuming. I did this: I connected the outlet hose from the second stove into the neck of one and a half bottles of mineral water, and inserted the hose from the compressor into the bottom of the same bottle (the one that sucks air into the compressor) and pumped out the air plug with the compressor. It turned out pretty quickly. ps I have a compressor from a refrigerator.
When the front heater starts to air up, you look for a steep descent, open the radiator cap and drive it at medium speeds. Usually, an air bubble pops up... With the same symptoms in the salon, you look for a steep climb and repeat everything... I converted it to parallel, such symptoms generally do not arise, even with a complete change of fluid. There may also be a hose separation, a break in the impeller on the water pump hub...
I connected two heaters in parallel, the cylinder head-faucet-tee - on the large circle there is a driver's heater, on the small circle there is a cabin heater, there are no additional pumps, I replaced the original valves with water ball valves, half-turn, in addition, after the tee, I installed another tap on the small circle to turn off the cabin one. Since the salt stove is higher than the radiator cap, the cabin stove is half the size. Before the start of the season, I unscrew the screws securing the cabin stove, open the tap to the cabin stove and lower it a little lower on the pipes. I remove the radiator cap and run at medium speed for 10 minutes. work. I top up the antifreeze, close the lid and put the stove back in place. ALL! This is physics - communicating vessels are a sore subject for stove heating with pipework in private homes.
Typical faults
The stove used in the heating system of the UAZ Bukhanka car is characterized by several breakdowns that owners often have to deal with. The result of malfunctions is the failure of the furnace equipment, that is, the stove ceases to perform its assigned functions. Heating stops, which leads to corresponding unpleasant situations during the winter period of operation of the Loaf. There are several main reasons why the stove on the Loaf may not heat:
- damage has appeared in the channels intended for the passage of heated or still cold air flows;
- antifreeze leaked;
- the stove tap is out of order;
- the system is dirty, which causes a decrease in temperature when heating the interior;
- a leak has formed in the heater tap;
- The valve intended for the engine of the heating system of the Bukhanka has burnt out.
If the system is completely out of order, it is not always rational or financially feasible to repair it. When the Bukhanka stove has served for a long time, and at the same time it works frankly poorly, the most correct solution would be to completely replace it.
Recommendations
Comments 22
in the lower pipe, make an insert with an outlet for the hose diameter, connect the stove outlet and the return line, I’ve been doing this for 8 years.
I’ve been fighting with the front for the second week now, I decided to take it to hell, install a radiator from MTZ and install a snail
I’ll be organizing something big this summer, otherwise I don’t have a garage.
Install GAZel pump pulleys - they are smaller in diameter, therefore the pump rotation speed is higher, the pressure is higher and pumpability is better. At the same time, do not forget to check the radiator cap for leaks and valve operation. Another option is an electric circulation pump, either GAZel or imported. The second one is more durable. I have the whole set installed, with a lift, a cabin-frame 10 cm, a converted front heater on a Mercedes-124 radiator and an interior heater from the BTR-70, air blows from the tidy vents with a temperature of 50 degrees at idle without turning on the electric pump and 65-70 degrees at pump turned on. True, the engine radiator is cooled not by a standard meat grinder, but by an electric fan. Try it. Good luck))) Happy upcoming holiday.
You built it powerfully! Thank you, happy upcoming!))
Both UAZ 3962 stoves do not work. Replaced them. I cleaned some of the hoses and cleaned the rest. I cleaned the metal tubes connecting the hoses. Today I cleaned the heater radiators under water pressure. Everything is clean. Water flows through the system freely. I start the engine and wait for the temperature to rise and hot water flows into the heater radiators. I waited for about 10 minutes. The temperature was 90 degrees. The thermostat had already opened and the water began to circulate. But it doesn’t fit to the stoves (the hoses are cold). I don’t know what else to do. Maybe air has formed there? If yes. then tell me how to kick him out. This morning I was driving 25 km to work, the heater in the cabin was on all the way, but only cold air was blowing. Maybe someone had such problems, tell me how to fix them. Thanks to everyone in advance.
Equipment replacement
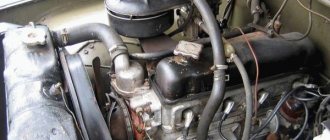
If you decide to replace the heater yourself, you should first familiarize yourself with the UAZ Bukhanka stove diagram to connect the electrical component. It is not difficult to install the equipment itself, securing it in the conventional engine compartment located inside the car. But even here you should adhere to certain rules and recommendations. The process will be considered using the example of using NAMI equipment, which has better performance and also boasts the presence of a cabin filter, which is not present in the standard Bukhanka heater.
- The first step is to drain the antifreeze from the system and also disconnect all existing wiring. To make it easier to reassemble and connect, you can write down all your steps or mark the wires, pipes and hoses;
- You need to disconnect the console from the shield, then remove the heating unit, remove the air intake flap, remove the seal and thoroughly clean all existing open recesses;
- Take measurements under the air filter, placing its housing against the surface. Next, make several mounting holes. Just don't use a drill with a diameter larger than 3.2 millimeters;
- At the installation site, apply a layer of high-quality automotive universal sealant that is resistant to moisture and sudden temperature changes. Make the layer large enough. Install the filter housing and secure it. The filter itself can already be inserted into its mounting slot;
- A new heater is being installed in the interior. It is fixed with studs, nuts and an M6 bolt. Secure everything as securely as possible;
- Then the console is installed, the entire structure is mounted on self-tapping screws;
- Then you can start connecting the control rod and fixing it;
- Connect all pipes through which antifreeze passes. For reliability, it is recommended to tighten them with clamps;
- Don’t forget about the channels that allow you to blow on the windows, avoiding them from fogging when the car is used in conditions of high humidity or precipitation. Every car should have windshield defrost. Be it a latest generation Mercedes or the good old Bukhanochka produced by UAZ;
- The installation is completed by connecting the electrical component. There is a connection diagram here that is worth considering separately.
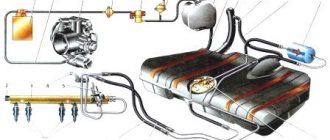
Diagram of the UAZ Bukhanka heating system
The embodied diagram of the UAZ Bukhanka heating system attracts special attention from the owners of this car when upgrading the car’s interior. After all, all car owners understand that the interior of this off-road car is very far from its foreign counterparts in terms of comfort, although this model was originally designed for use by special services, and what can one expect for such an affordable price.
Possible options for tuning the UAZ Bukhanka interior
As already indicated, the UAZ 452 car was created to meet the high requirements of specialized transport for the Ministry of Emergency Situations, military and medical services. True, this fact is absolutely not a statement that the performance of this car can be considered impeccable. That is why, when tuning the interior of the Loaf, not only the heating system is modernized, but also many other parts and elements.
First of all, when modifying the interior of the UAZ Bukhanka, most car owners replace the standard hard seats with more modern and soft analogues, since the basic seats can shake out the soul when moving, which is especially typical for off-road driving. Moreover, some craftsmen even integrate heated and electric chairs, for which the existing electrical equipment connection diagram is adjusted.
At the next stage, attention is paid to soundproofing the interior of the UAZ 452 and fixing the elements of the dashboard, however, before fastening the elements, the heating system of the Bukhanka is modernized, which will be discussed further. In terms of style, the interior can be decorated with leather, the dashboard can be decorated with wooden inserts or wood-look details.
Often, a variety of additional accessories appear in the interior of the UAZ Bukhanka, including shelves, glove compartments and ashtrays. The steering wheel is often replaced with a modern imported analogue with soft upholstery made of leather or other material.
Of course, there are other options for modifying the interior of this car, which depends on the imagination of the car owner, but one of the key aspects of tuning the interior is still the upgraded circuit of the Bukhanka heating system, since the standard heater simply cannot cope with its immediate responsibilities.
How Bukhanka's heating system can be upgraded
When the UAZ Bukhanka heating system diagram is being finalized, the following aspects must be taken into account.
The heater radiator should be located below the level of coolant present in the cooling system, so that this substance is pumped through it more efficiently and is always present in it. To do this, you can make the cooling system closed by integrating an atmospheric valve in the expansion tank cap. In this case, in the latter, the coolant level should always be higher than the installed heater radiator.
Air must be pumped with a less noisy centrifugal fan, which should be located along the air flow to the radiator. This approach will further reduce the noise level.
The air flow through the radiator must pass solely due to the pressure generated by the fan, and not through kinetic energy. In this case, the fan nozzle should not blow directly into the radiator honeycomb, since the air will pass unevenly through the radiator.
The temperature of the discharge air should be regulated by a damper that mixes cold and hot air flows, and not by a tap. When using a tap, the temperature will greatly depend on the operating mode of the power unit, and the damper can be used to regulate the ratio of both air flows.
The driver and passenger of the UAZ 452 will feel more comfortable when a higher temperature develops in the legs and lumbar region, and colder air should be present at face level to prevent drowsiness. To do this, the heating system circuit must be constructed in such a way that hot air is forcedly supplied to the feet and glass, and colder air must flow to the face, which can be achieved by additional selection of cold air masses between the radiator and the fan, as well as by means of an adjustable air mixing damper streams.
Oven radiator clogged
Unlike the main radiator, its stove counterpart is much more susceptible to scale formation, which is facilitated by the higher temperature of the antifreeze, which enters the heater directly from the engine. Deposits, thickening over time, lead to a decrease in the diameter of the honeycomb and the throughput of the radiator as a whole. The heat exchanger also becomes dirty on the outside, reducing the thermal conductivity of the device, which also impairs the heating efficiency of the air pumped by the fan. As a result, the air temperature in the area of the deflectors becomes less and less, which is especially critical during severe frosts.
The reasons for the formation of scale are both natural, objective in nature, and can also be a consequence of incorrect actions of the car owner (use of coolant of dubious quality, switching to water in the warm season, violation of coolant replacement technology).
You can diagnose a clogged stove radiator quite simply and reliably by looking at the state of the inlet and outlet pipes - if the second one is noticeably cooler, it can be considered an established fact that the reason why the stove on an UAZ blows cold is that its honeycomb is clogged. In this case, the heat exchanger will need to be dismantled for cleaning or replacement. Note that even thorough cleaning does not guarantee that after a certain time the problem will not appear again, and in a much shorter time. For this reason, most car owners prefer replacing the stove radiator to flushing it, since the cost of a new device is relatively low.
The dismantling process itself is not a highly complex procedure, does not require the use of special tools and can easily be done independently:
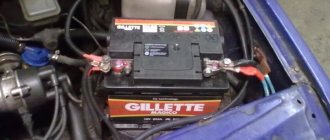
- remove the negative terminal of the battery;
- We drain the antifreeze from the cooling system into a pre-prepared container with a capacity of at least 10 liters;
- dismantle the UAZ instrument panel (all components of the heating system are hidden behind it);
- disconnect the electrical wiring connectors on the heater motor;
- unscrew the screws securing the air ducts to the heat exchanger and the heater air intake;
- unscrew the nut that secures the air duct to the instrument panel and remove the air duct;
- to gain access to the radiator, you need to unscrew the two screws of the plastic cover and pull it out;
- loosen the clamps of the underwater and outlet pipes of the stove radiator, disconnect the hoses (this must be done carefully - they will contain residual coolant);
- remove the heat exchanger.
After a thorough inspection, a decision is made on the possibility or advisability of repairs (soldering, cleaning, washing). A new or restored radiator is installed in its original place, all installation work is carried out in the reverse order.
Heating diagram UAZ 452
Heater UAZ "Loaf"
A car consists of many components. Each of them requires increased attention. Therefore, drivers must monitor the condition of their “iron horse”. The issue of preparing the car for the winter period is especially important.
Here, the presence of a well-thought-out heating system plays a vital role. Let's talk about it in the UAZ "Loaf".
Meaning:
This system is important, first of all, for maintaining normal temperature in the cabin at any time of the year, for ventilation of the air inside the car.
Most “loaf” models are equipped with a high-power heater “N-1” produced by NAMI.
Design:
The heater includes the following elements:
- Radiator.
- Fan.
- Special device for air distribution.
There are two main operating modes:
- When fresh air comes in.
- When recirculating flows.
The second mode implies increased temperature in the cabin. To do this, you need to close the air intake and then open the damper. In the first mode, the actions are performed in the reverse order.
A special unit controls the entire system. A tap is used for adjustment. A new design based on increased flow circulation and the use of fluid in the radiator allows the interior to warm up faster.
It is important to remember about glass blowing. Otherwise, this will lead to icing or fogging. The driver and passengers will feel discomfort.
If moisture gets in, it is removed through the air intake. A docking device is used here.
Breaking
Often, car enthusiasts are faced with cases when the heater (stove) does not perform its direct functions and does not heat. What could be the reasons?
- There is damage in the channels through which air passes.
- Antifreeze is leaking.
- The system is dirty, therefore the temperature is insufficient.
- The faucet on the stove was leaking.
- The valve responsible for protecting the engine has burnt out.
Shall we update?
How to replace a used stove with your own hands? What will you need for this? Everything can be done using the following algorithm.
- We drain all the antifreeze and disconnect all wiring.
- Disconnect the console from the shield. We remove the heating unit, the air intake hatch, remove the seal, and then clean the recesses.
- We try on the air filter, drill holes no more than 3.2 mm in diameter.
- Apply a large layer of sealant to the installation site. We install the housing and fix it. We return the filters from the cabin to their place.
- We install a new heater in the cabin, securing it with studs and M-6 nuts. We fix the node, then install the block console. We fix the entire structure with self-tapping screws.
- Next, we connect the control rod and secure it. We connect the pipes containing the antifreeze to the unit and secure them with special clamps. Then we install blowing channels for the glass.
- Finally, we connect the electrics, fill the system and check how it works. If problems occur, the entire system must be rechecked.
Airing the cooling system
Since the main coolant is antifreeze, a significant part of the malfunctions that cause the UAZ stove to blow cold air are associated with problems with coolant circulation along the main line. Among the many reasons of this kind, the appearance of air jams in the most problematic areas of the cooling system should be highlighted. Indeed, in the presence of a closed autonomous liquid-type system, any malfunctions in its operation, especially those associated with partial depressurization, often lead to the accumulation of air at the highest points of the line. A typical example is the appearance of air locks in household heating systems, which millions of Russians encounter every year.
On a UAZ SUV, this is one of the most common causes of deterioration in the performance of the stove. In most cases, this problem occurs due to antifreeze leaks, which is why it is so important to regularly monitor the level of coolant in the expansion tank. Ideally, this should be done simultaneously with checking the oil level, since the correct measurements are carried out on a cold power unit.
If it turns out that the level has dropped below the MIN mark, you should add coolant - otherwise the engine will overheat and the stove radiator will not receive enough heat. As a rule, a leak of antifreeze is accompanied by air entering the line. Normally, excess air should escape through the expansion tank, but in practice, depending on the location of the leak, some of the air may accumulate in high-lying elements, which leads to a noticeable deterioration in fluid circulation.
Fixing the problem is quite easy:
- after adding antifreeze, start the engine with the expansion tank cap screwed on;
- it is desirable that the front part of the car is raised - in this case, the RB will obviously be the highest part of the cooling system;
- We increase the engine speed several times by sharply pressing the accelerator pedal (up to 2500-3000 revolutions);
- excess air will escape, which will lead to a slight decrease in coolant level;
- add antifreeze and tighten the cap of the expansion tank.
If the antifreeze level decreases frequently or constantly, you should look for the leak and fix the problem. If the fluid drains relatively quickly, it will show up as a wet spot under the car. If it is slow, you should carefully inspect the engine compartment for wet and heavily soiled parts. These may be pipes with through defects, their connections, radiators, pumps and thermostats may leak. In all cases, the leak is eliminated by replacing damaged parts and components.
how to connect the stove. Grade:
#1 TEMA
- Guest
- Group: Users
- Posts: 7
- Registration: 14 January 07
- Thanked: 0
- Gender: Man
- City: Kyiv
- Real name: TEMA
- Car: GAZ-21
- Phone: 80683738591
- Age: 18
- Attitude towards authenticity: Serious alterations
#2 BOBA
- Guru
- Group: Users
- Posts: 272
- Registration: 28 August 06
- Thanked: 0
- Gender: Man
- City: Astrakhan
- Real name: Alexey
- Car: GAZ 21
- Age: 41
- Attitude towards authenticity: Supporter of modernization
Can I connect one pipe to the heater radiator from the tank (as an input) and the other from the pump (as an output). Exactly. And one more thing, where on the heater radiator is the inlet and where is the outlet? There isn't much difference.
And one more thing: if the partition between the heater radiator pipes is rotten, then the stove won’t heat up anyway!
Post edited by BOBA: September 29, 2008 – 08:40
#3 NoComments
- Red wheels