How to remove the front and rear bumpers on a Chevrolet Niva? simple job - Fix the Car!
The rear bumper of the restyled Chevrolet Niva model does not have many distinctive elements, but there are practical innovations.
The first thing that catches your eye is the horizontal insert in its upper part. Theoretically, it should serve for convenient loading or unloading of the trunk. But even if the owner doesn’t find any use out of it, it looks quite stylish. When the trim is painted in body color, the insert remains black. The rear bumper, like the front, has a lower part made of black plastic. The imitation buffer protection is also a license plate bracket. The air intake slots, even if they are not functional, give the car a semblance of GT styling.
Changing the described device installed on the rear of a Chevrolet Niva is also quite simple. It is worth noting the fact that recommendations like “unscrew three screws” will not be enough here, since the front and rear buffers differ significantly from each other in design. For example, there is no radiator grille, and parts of the bumper are attached differently. As a result, more effort will have to be spent on dismantling work.
The rear bumper on the Niva is removed as follows:
- De-energize the Chevrolet in the same way as when removing the front bumper.
- Use a screwdriver to unscrew the screws holding the bumper trim to the body, as well as the nuts that secure the mudguards.
- Remove the cover fastening screws located at the top.
- After holding the clamps, remove the elements that reflect light.
- Using a 10mm wrench, unscrew the nuts on the Chevrolet Niva that secure the structure under the license plate and the reflective elements.
Removing the rear bumper on a Chevrolet Niva
- Remove the nuts located on the bottom of the Chevy rear bumper beam trim.
- Disconnect the wiring responsible for the license plate illumination.
- Moving the trim to the side, remove the wiring harness through the body hole.
- Remove the trim, unscrew the upper and lower bolts with which the beam is attached to the Chevrolet Niva body. Remove the rear beam.
Installing the rear bumper is done in the reverse order.
05.12.2017
The bumper of any car sometimes has to be dismantled. This circumstance is due to the fact that this structural element is subject to frequent damage during an accident.
In addition, performing various types of repair work also requires a similar procedure, since it creates obstacles to access to various components and assemblies of the machine during their repair.
It will also need to be removed if the car owner decides to carry out tuning and replace the standard device with a non-standard one. That is why he must know how to remove the front bumper on a Chevrolet Niva.
Chevrolet NivaBumper repair
The bumper on a Chevrolet Niva needs to be removed when it needs repairs (painting, putty) or replacement. Before dismantling it, you need to know that this part is made of plastic. This means that it requires careful handling and can be easily scratched. In the Chevrolet Niva, like any other car, it is possible to remove the front and rear bumpers. To carry out the work you will need:
- key 10*12;
- hammer;
- Screwdriver Set;
- grinder (required if the fasteners are rusty).
And also interesting: Body of Niva VAZ 21213, 21214, 2131 Lada 4×4
It is best to remove the structure with your own hands when the car is standing in a pit. Car service centers also use lifts for convenience. Self-conducted dismantling of the structure takes up to half an hour.
In order not to get confused in all the fasteners and not to lose them, draw up a diagram of the location of screws and nuts on the structure, indicating their size and quantity - this way you will carry out installation work faster.
Fastening the front bumper of a Chevrolet Niva in the license plate area
How to remove the front grille for models before 2009
If you just decide to clear a clogged radiator, change the hood lock elements, or clean the radiator, then for models up to 2009, the front grille is removed separately. For this purpose, you don’t need to put in a lot of effort, but just perform a couple of steps:
That's all! Next, the planned repair, or change, is carried out.
Tuning the front of the Niva Chevrolet
Every driver dreams of tuning his own car. When the suit is already a little boring and you would like some configurations. This is possible in our time, if earlier drivers of an ordinary Niva 4x4 for modernization themselves came up with and did this tuning work themselves, then at the moment it is much easier. Ready-made tuning parts are already on sale, all that remains is to purchase and install them. What are the advantages of ready-made tuning parts:
Thus, a finished modernized part sometimes costs more than a basic one, depending on whose creation, alas, it is better than homemade art that can get lost on the road.
Tuning from BERTONE
Tuning for Shniva, which she received from the Western company Bertone. This tuning is installed both as a kit and in separate parts. Let's take a closer look at what configurations Shniva received from modernization. — the space between the bumper and the radiator grill has disappeared; — the efficiency of air ducts on a refreshed version of the grille, which allows for better cooling of the car engine; — the headlights have also been changed; the front surface of the headlight unit is made of glass, which allows you to avoid scratches on plastic coatings, but increases the possibility of its destruction. Inside the headlight there is a lens for close beam, which allows for better illumination of the road, especially on rainy nights. — the foglights also received an update, the glass received a reinforced coating, which allows the service life of the PTF to be increased. These are the main types of front end tuning from Bertone that make this model stand out.
Home tuning Shnivy grille
Tuning of radiator grilles is carried out at home, the main thing is not to overdo it and our client remains to comply with the conditions so as not to violate the functions listed above. For this purpose, buy a new frame or use your own one. The popular tuning now is miniaturism. A special mesh for modernization is purchased, cut to the size of the original cladding and attached to the back with small screws. A Chevrolet badge is glued to the galvanized outside.
Then all that remains is to install the grating in the area; for this purpose it is necessary to stick it, or, in other words, place it on the sealant. Glue is applied to the lower part and applied to the hood. After a few days, the sealant will dry and the modernized grille is ready.
Step-by-step instructions for removing the bumper on a Chevrolet Niva
Removing the front bumper. Lift the hood of the car, disconnect the negative terminal from the battery, remove the license plate.
Remove the radiator trim.
Unscrew the four bolts 4 (Fig. 8-10) of the upper fastening of the front bumper 3 and the four nuts of the lower fastening, unscrew the screws 1 and 5 of the side fastening.
Disconnect the wiring harness connectors from the fog lights.
Remove the front bumper.
Install the front bumper in reverse order.
Removing the rear bumper. Open the tailgate of the car, remove the left arch and side panel trim.
Disconnect the license plate light wiring harness connectors from the rear accessory wiring harness.
Unscrew the bolts 7 (Fig. 8-10) around the perimeter of the rear bumper 8.
Unscrew the four nuts 9. Unscrew the four screws 5 and remove the bumper.
Install the rear bumper in reverse order.
Rice. 8-10. Removing bumpers: 1 - screw; 2 — front bumper beam; 3 — front bumper; 4 - bolt;
5 — screw for the side fastening of the bumper;
The front bumper on a Chevrolet Niva car is removed to replace it in case of deformation or due to temporary wear, as well as when performing other work in which its presence will interfere with the progress of their work. Prepare a standard set of tools and perform the following sequence of actions:
- Dismantle the front wheels, then turn off the power to the car by disconnecting the minus terminal from the battery.
- Open the hood. Remove the radiator trim.
- Next, use a Phillips screwdriver to unscrew the front and rear screws securing the headlight trim.
- Remove the decorative headlight covers.
- Using a ten key, unscrew the upper screws securing the bumper trim.
- Remove the registration number and unscrew the screws located under it.
- Also unscrew the screws located at the bottom of the buffer.
- If fog lights are embedded in the bumper, then disconnect the block with the power wires from them.
- Next, unscrew the bolt securing the trim to the car body.
- We disengage the fog lights from the beam so that they do not interfere with further dismantling of the buffer.
- And we remove the decorative buffer of the front bumper, namely from its beam.
- Unscrew the remaining screws and nuts securing the beam to the body.
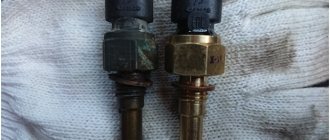
- Remove the outside temperature sensor from the beam bracket.
- And we remove the beam.
At this point, the repair work to remove the front bumper on the Niva Chevrolet has been completed. Make the necessary repairs, then install in the reverse order.
05.12.2017
Also interesting: How to make a reinforced bumper for a Niva
In addition, performing various types of repair work also requires a similar procedure, since it creates obstacles to access to various components and assemblies of the machine during their repair.
It will also need to be removed if the car owner decides to carry out tuning and replace the standard device with a non-standard one. That is why he must know how to remove the front bumper on a Chevrolet Niva.
The bumper of any car sometimes has to be dismantled. This circumstance is due to the fact that this structural element is subject to frequent damage during an accident. In addition, performing various types of repair work also requires a similar procedure, since it creates obstacles to access to various components and assemblies of the machine during their repair.
Front grille and its purpose
So, its main purposes on Shnivy are:
The front grille consists of three parts: a facing with a Chevrolet badge, a special protective mesh located in the background, and fastenings to the structure.
Removing the front bumper together with the grille for models with Bertone
The removal principle is quite simple, you need to unscrew the fasteners and remove the front end. But let’s talk about this in a little more detail, because there are cases - “it seems like I unscrewed everything, but it won’t come off!” To avoid such situations for novice drivers, a detailed description of the sequence for removing the Shnivy bumper is provided.
How to remove the front grille for Shnivy models after 2009
Now, if there is a need to replace the front bumper depending on the situation, then this can be done easily. First, let's look at the sequence of disassembling the front end into individual parts. Sequence of disassembling the front bumper components. 1) The lower cover is removed. 2) The mounting brackets on the cover must be removed by unscrewing two screws. 3) First, remove the top mesh, which is secured using twenty latches, and then the cover itself. It is held in place by 6 latches and the cover is removed. 4) We begin to remove the fog lights on the left and right sides. The headlights are secured with three screws; under the PTF there are two screws securing the lower bumper mesh. 5) The lower mesh is secured with 17 latches; by disconnecting them you can remove it. The bumper is practically disassembled into parts; if it is necessary to replace a damaged part, this can be done in the reverse order of removal.
Replacing the emblem. If there is a need to replace the Chevrolet badge, you can carefully remove it. To do this, you will need a thin fishing line, which is launched under the emblem and slowly drawn until it is completely removed. The emblem can be replaced with a new one or a different badge of the car brand can be installed, which is currently very popular, especially when modernizing the exterior of a car.
How to remove the front grille for models before 2009
If you simply decide to clear a clogged radiator, replace the hood lock elements, or clean the radiator, then for models up to 2009, the front grille is removed separately.
To do this, you don’t need to put in a lot of effort, but just perform a couple of steps: That’s all! Next, the planned repair or replacement is carried out.
Tuning the front of the Niva Chevrolet
Every driver dreams of tuning his car. When you are already a little tired of the appearance and would like some changes. Everything is possible these days, if previously the drivers of a regular Niva 4x4 for modernization themselves came up with and did this tuning work themselves, now it is much easier. Ready-made tuning parts are already on sale, all that remains is to purchase and install them. What are the advantages of ready-made tuning parts:
Thus, a finished upgraded part sometimes costs more than a basic one, depending on whose production, but it is better than homemade art that can get lost on the road.
Tuning from BERTONE
Tuning for Shniva, which she received from the Western company Bertone. This tuning is installed both as a kit and in separate parts. Let's take a closer look at what changes Shniva received from modernization. – the space between the bumper and the radiator grill has disappeared; – the efficiency of the air ducts on the updated version of the grille, which allows for better cooling of the car engine; – the headlights have also been changed; the front surface of the headlight unit is made of glass, which makes it possible to avoid scratches on plastic coatings, but increases the likelihood of its destruction. There is a low beam lens inside the headlight, which improves road illumination, especially on rainy nights. – the fog lights also received an update, the glass received a reinforced coating, which increases the service life of the PTF. These are the main types of front end tuning from Bertone that this model can boast of.
Home tuning Shnivy grille
Tuning the radiator grille can be done at home, the main thing is not to overdo it and comply with all the conditions so as not to disrupt all of the above functions. To do this, you can purchase a new frame or use your own one. Popular tuning today is minimalism. A special mesh for modernization is purchased, cut to the size of the original cladding and fastened with small screws on the back side. A Chevrolet badge is glued to the galvanized outside.
After this, all that remains is to install the grille in place; to do this, you need to glue it or put it on a sealant. Glue is applied to the lower part and applied to the hood. After some time, the sealant will dry and the modernized grille is ready.
Insulation for the front radiator compartment
Relevant in winter, because without insulation of the radiator grille in severe frosts it will cause the engine to warm up quickly and, accordingly, will save fuel. An uninsulated car engine quickly cools down in the cold and therefore, leaving the car even for 10 minutes, there is a risk that you will have to warm up the engine again. So, of course, it will be a big plus for the car if you install insulation in the radiator area. To do this, you need to purchase a special insulation coated with foil on both sides; this coating protects the engine well from frost. The insulation must be glued to the grille from the inside. It is also important to secure it well so that it does not come off under the influence of the air flow and stick to the surface of the radiator. They also sell ready-made insulation materials that are attached to the radiator grille from the outside of the car; their installation is even easier than the previous option.
If the engine overheats, you can always remove the insulation at any time. When the ambient temperature rises, the insulation is removed before the onset of the next cold weather.
Thus, the Chevrolet Niva has excellent parameters and there are many types of tuning parts for it that can be purchased on the Internet after looking at the photo and selecting fasteners. Car tuning these days is no longer considered a luxury, it is meant to innovate the car and provide individuality and stand out from the crowd. And each driver himself selects the types of modernization for his car according to his character. Good luck with your design decisions for upgrading and repairing your car!
Source
Remove the radiator grille Niva Chevrolet video
In order to dismantle the buffer from the car, you do not need any special devices, however, it is recommended to carry out the work using a lift or inspection pit.
Removing the bumper may be required for repair work and tuning.
To dismantle the bumper, no special tools or knowledge are required. It is enough to have a good Phillips screwdriver, keys/sockets for 8, 10, 13 and 12, a knife, and a can of WD-40 penetrating lubricant would also be useful in case some bolt gets rusted.
If the aerosol doesn’t help, then we’ll use an angle grinder. It is most convenient and correct to carry out the operation on a viewing hole or on a lift, since you will often have to unscrew the screws from below the car.
Next we follow the action plan.
- We hang up the two front wheels and remove them.
- Open the hood and disconnect the negative cable on the battery.
- Now you need to remove the dust and dirt mudguard from the wheel arch on the right and left; you can only remove its front part.
The fender liner bolts are indicated by arrows.
Removing the decorative bumper trim.
Two screws securing the bumper under the license plate.
Two bolts securing the front bumper from the bottom.
Tell me how to remove the radiator grille on a restyling, without unnecessary problems "removing the bumper"
05.12.2017
Category: Chevrolet
04/18/2019 · : to the entry How to remove and replace the headlights on a Chevrolet Niva yourself (video) disabled · Reading time: 2 min
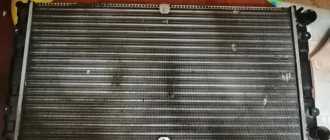
One of the most important elements of the cooling system is the radiator. It is a heat exchanger in which the temperature of the antifreeze is reduced and returned to the engine for further heat removal. The cycle continues as long as the engine is running.
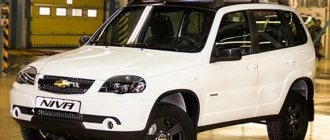
The front bumper on a Chevrolet Niva is removed if certain repairs are needed, but it interferes with their implementation; if the bumper itself requires replacement, painting, putty or was damaged as a result of an accident. The bumper is a delicate part because it is made of plastic. Therefore, during dismantling it is necessary to act very carefully so as not to scratch or cause a crack/chip of the bumper.
Installing a winch on a Chevrolet Niva - DIY car repair
body and external tuning of Chevrolet Niva (VAZ). Installing a niva winch bracket on a Chevrolet Niva
And also interesting: Liquids used and filling volumes Niva VAZ 21213, 21214 and 2131 “
The license plate is mounted and the car, complete with winch, is ready to overcome new obstacles and road surfaces. Thirdly, the location is inconspicuous. Therefore, it makes sense to compensate for the lift with a shock absorber with increased travel.
We’re also figuring out where to place the supports for the air conditioner radiator. In general, after many fittings, manipulations and alterations of the A/C radiator mounts, we drill new supports for the A/C radiator. Mark the holes for the hawse. Let's stop at this stage for now. Here the scheme has been worked out and tested more than once. Reinforced springs taking into account the additional weight of the winch and elevator.
A duralumin spacer under the upper ball joint, moving the mounting point of the standard shock absorber. We make a pattern and mark holes on the wing.
Since the corrugation included in the snorkel kit is quite large in diameter, you will need to cut some of the amplifiers again.
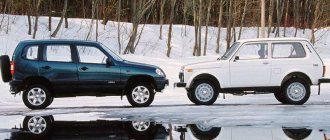
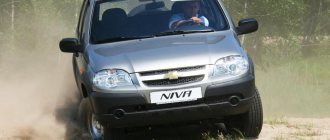
Restyled Niva-2009
The launch of the first Chevrolet Niva model occurred in 2002. Until 2009, about 300,000 cars rolled off the assembly line. Market analysis showed that the product of the united company “GM-AvtoVAZ” won the hearts of Russian consumers, but it was impossible to stop there. Although the “experience” of the new Niva was practically insignificant compared to the number of years that representatives of the classic family lasted in production. The company's management decides to modernize the model by changing the interior. They decided to leave the technical part without any major changes.
Removing the front bumper
To dismantle the front bumper, follow the following algorithm:
- Disconnect the negative terminal from the battery to de-energize the Chevrolet (required so as not to short-circuit the electrical network).
- Remove the Niva wheels. This will be needed to provide access to the screws holding the front bumper.
- Remove the radiator trim by unscrewing the 4 screws. Be careful not to damage the radiator.
Removing the radiator grille on a Chevrolet Niva
- Using a Phillips screwdriver, remove the trim on the headlights without touching the optics.
- Using a 10mm spanner, unscrew the top bolts securing the beam.
- Remove the license plate from the Chevy and remove the screws underneath it.
- Turn off the fog lights. To do this, you will need to disconnect the terminal block, unscrew the bolts, and remove the headlights so that they do not interfere with the removal of the buffer.
- Remove the fasteners and the bumper itself.
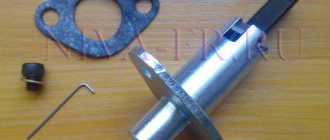
- Don't forget to remove the temperature sensor located in the beam - it can be easily damaged. After this, you can dismantle the beam itself.
Before you start removing the bumper on a Chevrolet Niva, you need to study all the design features of this structural element of the car. The fact is that it is made of 90% plastic. Such plastic may be reinforced in some cases, but not in others. It all depends on what kind of restaling the manufacturer carried out on the Chevrolet Niva.
Before starting dismantling, it is necessary, in order to avoid electric shock, to remove the battery terminal. In order not to experience difficulties in finding fasteners during work, it is worth preparing their diagram in advance indicating the exact number of fastening elements. If you prepare for the work in advance, they can be completed within half an hour.
Read news about the new Niva
- LADA Niva Travel from RUB 747,900. – Prices and configurations – AutoHERMES Volgogradsky Prospekt: LADA dealer in Moscow
- How to remove scratches on bumpers made of plastic and other materials with your own hands
- Polishing a car body from scratches with your own hands: technology and materials
- FROST car air conditioners // Online store // Prices // Air conditioners for cars Lada VAZ, VolksWagen Polo, Daewoo Matiz
- Power bumper for Niva: buy or make it yourself
- How to make a power bumper for a Niva with your own hands
- How to make a reinforced bumper for a Niva
- Do-it-yourself power bumper for NIVU
Insulation for the front radiator compartment
This is vital during the cold season, since without insulation, radiator grilles in severe frosts will determine the rapid warming up of the engine and, accordingly, will save fuel. An uninsulated car engine quickly cools down in the fresh air, so leaving the car even for 10 minutes risks having to warm up the engine again. What you will need is no secret; it will be an advantage for the car if you install a heat insulator in the radiator area. For this purpose, you need to purchase a special heat insulator with a foil coating on both sides; this coating perfectly protects the engine from frost. The heat insulator must be glued to the grille from the inside. It is also important to fasten it well so that it does not break off under the influence of the air flow and does not stick to the surface of the radiator. They also sell ready-made heat insulators that are attached to the radiator grille on the outside of the car; their installation is even easier than the previous option.
If the engine overheats, you can always remove the heat insulator whenever it is convenient for you. When the temperature of nature rises, the heat insulator is removed before the onset of subsequent cold weather.