Engine tuning and adjustment
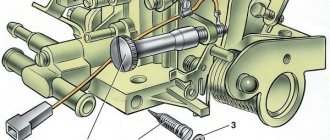
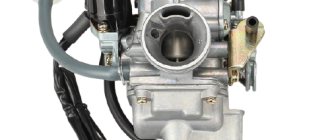
Precise adjustment plays an important role in successful carburetor repair. If you don't already know how to adjust the carburetor on a scooter, then it should be noted that this process consists of three main parts: adjusting the idle speed, adjusting the mixture quality (using a screw or needle) and adjusting the fuel level in the float chamber.
Idle speed adjustment
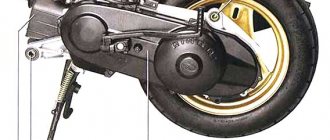
Idle adjustment is performed after fixing the scooter on the central stand, which will provide unhindered access to the adjusting elements of this device. A prerequisite for effective adjustment is to warm up the engine, after which you can begin direct adjustment. First of all, find the special adjusting screw that is present in any unit. By tightening this screw, you will increase the speed, and by unscrewing, you will decrease it. Once the scooter has warmed up well (10-15 minutes should be enough), use the indicated screw to ensure stable operation of the motor at idle.
We adjust the quality of the mixture with a special screw
Setting up the carburetor on a scooter also involves performing one more type of adjustment - adjusting the quality of the fuel-air mixture
It is very important that it matches the proportions specified by the engineers when developing the scooter. An excessively lean mixture will cause the vehicle to overheat or lose power, while a too rich mixture will result in increased fuel consumption and carbon deposits in the combustion chamber.
As in the previous version, a special adjustment screw will help you make the adjustment, and if it is not provided for in the design, then you can use a needle, but more on that a little later. By turning the screw clockwise, you will enrich the fuel mixture, and by turning it counterclockwise, on the contrary, you will lean it. The sequence of actions performed is as follows:
1. The scooter warms up for 10 minutes, after which the engine must be turned off.
2. Then tighten the screw clockwise until it stops.
3. Then unscrew it again 1.5 turns back, that is, counterclockwise.
4. Start the power unit and turn the screw another 1/3 turn, allowing the engine to run in this mode for another 2 minutes.
5. If the speed increases, you should unscrew the adjusting screw another ¼ turn counterclockwise, leaving the engine to run for 2 minutes.
6. The previous step is repeated until the speed begins to drop (before each change in the “command” the engine must be allowed to run for 2 minutes). If the speed begins to drop, tighten the screw clockwise ¼ turn.
Thus, you can achieve stable engine operation at any permissible speed. Ideally, the motor should work well with the mixture quality adjustment screw unscrewed by 1.5-2 turns, but due to wear of parts, the specified range may vary slightly. The scooter should accelerate smoothly, and any jerks during normal operation of the vehicle are completely eliminated.
We adjust the quality by moving the needle
If you are really interested in how to properly adjust the carburetor of a scooter, then you should consider the possibility of adjusting the quality of the fuel mixture using the throttle needle. Some scooter models do not have a screw by design, but this does not mean that you will have any difficulties during the adjustment process. When the needle is raised up, the fuel mixture becomes richer, and lowering it causes the fuel to become leaner.
Adjusting the fuel level in the float chamber
You can check the fuel fluid level in the float chamber using a transparent tube located at the very bottom of the carburetor. The adjustment process itself is simple. First you need to unscrew the oil screw, lift the tube up (in the opposite direction from the carburetor) and check the fuel level.
It should be noted that in the case when the carburetor has not been washed for a long time, there are all signs of clogging of its channels and jets, especially if fuel with an octane rating lower than that recommended by the manufacturer was used, then before performing the adjustment it is worth eliminating the inconsistencies, otherwise the the work will only give a temporary effect. In general, adjusting the carburetor on a scooter is not a very difficult task, but it is still necessary to have basic knowledge of the design of this type of vehicle.
Subscribe to our feeds on Facebook, Vkontakte and Instagram: all the most interesting automotive events in one place.
Exhaust system
The exhaust system serves to remove exhaust gases from the engine cylinder, as well as reduce exhaust noise to the permitted level. The exhaust gases leaving the cylinder have a high temperature and are under excess pressure. If they immediately enter the atmosphere, their expansion will be accompanied by loud noise. A muffler is used to reduce it.
The “saxophone” muffler is the hallmark of Nexus scooters.
>> Power supply system. Engine.
Supply system
Fuel and combustible mixtures
To operate the internal combustion engine, a combustible mixture consisting of finely atomized and evaporated fuel mixed with air enters its cylinder. The fuel used in modern scooter engines is motor gasoline with an octane rating of at least 93 (for scooters with two-stroke engines, oil is added to gasoline; this was discussed in more detail earlier). The octane number of gasoline characterizes the fuel's resistance to detonation - explosive combustion of fuel in the cylinder under high loads.
Fuel pump (Honda).
Fuel tank
It stores a supply of fuel; its volume in 50 cc scooters usually does not exceed 5 liters. Fuel tanks are made from plastics, which have almost replaced the steel that was used until recently. The tanks are located in different places. These used to be mounted directly under the front of the seat, but most modern scooters have a helmet storage bin located here. Therefore, the tank is moved to the “tail” part of the scooter, lowered below the luggage capacity or placed in the front part. There is a special hole in the tank cap through which air enters the tank as fuel is consumed. On many scooters, the tank lid is sealed, and the internal volume of the tank communicates with the atmosphere through special tanks with activated carbon, which absorbs gasoline vapors.
Fuel pump
It is not used on all scooters, since on most models the fuel tank is located above the engine and the fuel flows by gravity through a hose into the carburetor.
Automatic fuel tap: 1 - fitting to which vacuum is supplied; 2 — fuel supply fitting; 3 — nut for fastening to the tank; 4 - fuel filter.
On scooters with four-stroke engines, the fuel pump is electrically driven. Scooters with two-stroke engines are equipped with vacuum-driven fuel pumps - similar designs are widely used on outboard boat motors. They use the pressure pulsation that occurs in the crank chamber when the piston moves.
Fuel tap
It is a mandatory part of the power system, since it prevents fuel from leaking through the carburetor when stopping in the event of a leak in its float valve.
On motorcycles and older models of scooters (motor scooters), manually operated fuel taps were used. Such a tap has three positions: “3” or “Off” - closed; “O” or “On” - fuel comes from the main volume of the tank; “P” or “Res” - fuel comes from the reserve volume of the tank. When stopping for a long time (for example, at night), the driver closes the tap. When starting the engine, it turns it to the normal “open” position. If the engine stalls while driving, the driver switches the tap to the “reserve” position and drives to the nearest gas station. Usually the volume of the “reserve” is such that you can drive 20-30 km on it.
Diagram of an automatic fuel valve: 1 - membrane; 2 — valve body; 3 - fuel tank; 4 — fuel supply fitting; 5 - locking needle; 6 — control channel (communicating with the inlet pipe).
The engine power supply system of the vast majority of scooters includes: a fuel tank, a fuel tap, a fuel filter, a carburetor and an air filter. In some cases, the fuel system includes a fuel pump. Modern scooters with large engine displacement use a fuel injection system.
Detonation is an undesirable and dangerous phenomenon; it causes overheating and destruction of parts of the engine cylinder-piston group. The higher the octane number, the higher the compression ratio the engine can have. This means, in accordance with the theory of internal combustion engines, it will work more efficiently, its efficiency and power will be higher.
A fuel pump is required for those scooter models in which the fuel tank is located under the saddle or floor, below the carburetor.
Air filter location (shown by arrow).
Modern scooters are equipped with automatic fuel taps, which, as the name suggests, do not require any action from the driver. This valve opens only when the engine starts, and closes immediately when it stops. On modern scooters, the operation of the valve is controlled by the vacuum in the intake manifold (between the carburetor and the cylinder). When starting and operating the engine, the vacuum acts on the membrane of the fuel valve, which, overcoming the force of the spring, lowers the shut-off needle associated with it and ensures the flow of fuel.
There is usually a strainer in the line in front of or inside the fuel valve that prevents dirt from entering the carburetor. The second fuel filter - a replaceable paper one - is often cut into the hose connecting the tap and the carburetor. For safety reasons, clamps or retaining rings are placed on the ends of the connecting hose.
Air filter with foam filter element: 1 — housing cover; 2 - filter element; 3 - limiter; 4 - body.
Air purifier
Serves to clean the air entering the carburetor from dust and other foreign particles. The air cleaner is an important part of the scooter that ensures the longevity of the engine. In addition, the air cleaner plays the role of a muffler for intake noise. The air cleaner consists of a housing with a cover and an air filter. Modern scooters use two types of filters: paper and polyurethane foam (foam). Until recently, the metal mesh filters that were used, which required regular washing and did not guarantee fine air purification, have fallen out of use. Paper filters are disposable, i.e. they are replaced at every maintenance. Foam filters allow repeated washing and subsequent impregnation with special oil.
Recently, so-called zero-resistance filters, which are a type of mesh metal filters, have become somewhat widespread. However, they are installed only during tuning.
Whatever air filter is used, regular cleaning and monitoring of its condition is necessary, and, if necessary, replacement. If the filter is faulty, solid dust particles enter the engine, causing accelerated wear of the piston, cylinder bore, connecting rod bearings and crankshaft. An excessively dirty filter impedes the flow of air, enriching the fuel mixture, reducing power and increasing fuel consumption.
Main metering system of a spool carburetor: 1 - throttle spool: 2 - mixing chamber; 3 — conical spool needle; 4 — sprayer of the main dosing system; 5 - float chamber; 6 — main fuel jet; 7 - air channel.
Carburetor
This device, as part of the power supply system, prepares and doses the combustible mixture, which then enters the cylinder. Its design is quite complex; it includes several fuel dosing systems.
Float chamber
Its purpose is to maintain the fuel level at a constant level, since the amount of fuel supplied along with the air depends on this. In addition, it is necessary to stop the fuel supply when the engine is stopped.
Detailing of the throttle valve assembly: 1 - valve needle; 2 - throttle valve; 3 — cover gasket; 4 - cover; 5 — spool spring; 6 — needle lock.
A float with a valve attached to it, usually a needle type, maintains a constant fuel level. When the chamber is empty, the float and needle are lowered, and fuel can flow freely into the chamber from the tank. After filling the chamber with fuel to a certain level, the float rises and, acting on the needle (directly or through a lever), raises it, stopping the fuel supply. The fuel level is adjusted by bending the lever that controls the valve or by installing shims under the valve seat. Often such adjustment is not provided at all - it is ensured by precision manufacturing of parts.
Types of carburetors
The simplest carburetor is capable of preparing the optimal air-fuel mixture in only one engine operating mode, with constant load and speed. For any transport engine, including a scooter, both of these parameters are constantly changing, and there is also the problem of cold start. Therefore, the carburetors used on scooters are much more complex. Modern carburetors have a main metering system, starting, idle and transition systems, as well as mixture correction systems to obtain maximum power. To control the engine operating mode, a throttle valve is installed in the carburetor, connected by a cable to the “gas” handle on the steering wheel. With its help, the amount of air-fuel mixture entering the cylinder is regulated. There are two types of carburetors used on modern scooters: spool-type and so-called constant vacuum (CV). The latter are used primarily on scooters with four-stroke engines.
The conical spool needle has grooves (1) that secure the split washer (2). By moving the washer, the composition of the mixture can be adjusted.
AIR/FUEL MIXTURE
. As was experimentally established at the beginning of the 20th century, the fuel-air mixture burns most efficiently when the weight ratio of the components is 1:15. When the proportion of fuel is higher, the mixture is called rich, less - lean. Running the engine on rich mixtures increases power, while running on lean mixtures increases efficiency. Too rich mixtures do not burn completely in the cylinder, and poor ones lead to engine overheating, flashes and pops in the carburetor.
THE SIMPLE CARBURETOR
. Consists of two chambers: mixing and float. The mixing chamber is formed by a diffuser - this is the name of the channel, the cross-section of which in the middle is smaller than at the ends. As air passes through the diffuser, its speed in the middle increases, and the pressure drops below atmospheric pressure. The mixing and float chambers communicate with each other and the fuel channel (nozzle), in which a part with a calibrated hole is installed - a nozzle. The vacuum formed in the diffuser causes the fuel to flow out of the atomizer in the form of small drops, which are then crushed and evaporated in the air stream, forming a combustible mixture.
Main parts of a spool carburetor: 1 - automatic starting enrichment; 2 — carburetor body; 3 — float; 4 — float chamber cover; 5 — fuel jets of the main metering system; 6 — heating element; 7 - throttle with dosing needle.
The length of the nozzle is chosen such that the fuel level in the float chamber is 1-2 mm below the upper edge of the nozzle. This prevents spontaneous fuel supply when the engine is not running.
Spool carburetor
In it, the throttle valve (spool), moving, changes the cross-section of the diffuser. In this way, the amount of air passing through the carburetor and, consequently, the engine speed are regulated. A cone-shaped needle is rigidly connected to the spool, tapering downwards and entering the sprayer. The main fuel jet is installed on the other side of the atomizer. All these parts form the main metering system of the carburetor.
Main metering system of the CV type carburetor (position corresponds to full load): 1 - diffuser; 2 - membrane; 3 - spring; 4 - spool; 5 - dosing needle; 6 - rotary throttle valve; 7 - sprayer; 8 — main fuel jet; 9 — float; 10 - float shut-off valve.
When you turn the throttle handle, the needle moves along with the spool, and, due to the fact that its diameter at the bottom is smaller than at the top, when the spool and needle are raised, the cross-section of the fuel channel increases. By changing the position of the cone needle relative to the spool, you can slightly adjust the composition of the mixture: enrich it by raising the needle, or, conversely, deplete it by lowering it.
CV type carburetor
In constant vacuum carburetors, the movement of the “gas” handle is transmitted not to the spool connected to the metering needle, but to the rotary throttle valve located closer to the carburetor outlet. This damper, like the spool of the carburetor discussed above, regulates the amount of air passing through the carburetor. The diaphragm chamber above the spool communicates with the carburetor mixing chamber.
Adjusting screws for the idle speed system: 1 — “quantity” screw; 2 - “quality” screw.
Thus, the movement of the spool (and with it the fuel-metering needle) is controlled by the vacuum in the intake tract. At low loads, when the rotary throttle valve is closed, the vacuum in the mixing chamber (and therefore in the cavity above the membrane) is small, and the spool together with the needle is lowered under the action of a spring. Under heavy loads, when the throttle valve is open, increased vacuum is transferred to the cavity above the membrane and raises the spool along with the metering needle. The advantage of this type of carburetor is that the spool maintains a constant vacuum in the sprayer area, ensuring an optimal ratio of fuel and air in the working mixture.
As the throttle valve opens (the spool rises), the main metering system comes into operation, ensuring the required mixture composition throughout the entire range of engine operation.
Idle system of spool carburetor (a) and CV type (b): 1 - throttle valve (spool); 2 - fuel channel; 3 — mixture “quality” screw; 4 — jet of the idle system; 5 - throttle valve stop (spool valve) - “quantity” screw; 6 - air channel.
Idle system
When the scooter is standing still or coasting without a load (the gas is released), the carburetor must ensure that the engine operates at a minimum stable speed. In the simplest carburetor, this task is difficult to complete, since the vacuum with the spool almost completely closed in the area of the fuel supply channel is so small that it is not able to ensure the flow of fuel required for engine operation through the nozzle. However, in another place of the carburetor, behind the spool, closer to the cylinder, the vacuum is higher, and there is a small channel to which air and fuel are supplied. Several of these channels form the idle system that all carburetors have. It includes idle air and fuel channels, a fuel jet and adjusting screws for the optimal amount and composition of the fuel mixture at idle. One screw, called the mixture “quantity” screw, rests its end against the spool, preventing it from completely lowering. The other screw, called the mixture “quality” screw, with its conical end partially blocks the air supply channel to the idle system. Since fuel comes from the float chamber through a different channel, when the “quality” screw is tightened, the proportion of air decreases and the mixture entering through the idle system becomes slightly richer. To fix the adjusting screws from spontaneous rotation, springs or plastic bushings are used.
Cold start system
When starting a cold engine, a rich mixture is required for normal combustion. This is due to the fact that in this case most of the fuel settles in the form of drops on the cold walls of the cylinders and intake channels and the combustible mixture turns out to be too lean to ignite. Another carburetor system enriches the mixture when starting a cold engine - the cold start system.
Design of the injection system of Ditech two-stroke engines. GASOLINE, FUEL PUMP, PRESSURE REGULATOR, INJECTORS, COMPRESSOR, MICROPROCESSOR.
In the simplest scooter carburetors of yesteryear, a float stopper was located in the float chamber cover. When its rod was pressed, the float was forcibly lowered (recessed) and the fuel level in the float chamber became higher than permissible. This resulted in forced fuel supply from the atomizer into the intake manifold. Some of the gasoline flowed out through the drainage hole in the float chamber.
Recently, mixture fortifiers of various designs have been used. They represent an additional fuel channel, which opens only on a cold engine, or (less often) an air damper, which creates a higher vacuum at the nozzle and increases the amount of fuel supplied through the nozzle. The operation of the manual mixture enricher is controlled by the driver: to do this, when starting the engine, he presses the lever located on the left of the steering wheel, which, through a cable, controls the enricher damper. The most common are automatic starting enrichment units with a heating element. In such designs, when starting a cold engine, the enricher shut-off needle is retracted, the cross-section of the fuel nozzle is completely open, and the air-fuel mixture is enriched. After starting the engine, current from the generator flows to the heating thermoelement. After a certain time, sufficient to warm up the engine, the working fluid of the element expands and, acting on the enrichment needle, closes the fuel channel.
Scooters are often equipped with an electric heater, activated by a temperature sensor at a temperature of about +5 ° C and below. In addition, some scooters (for example, Yamaha BW's) are equipped with the non-automatic enricher described above in addition to the automatic one. In this case, the driver himself decides which enrichment system to use.
On modern scooters, manual enrichment is rare. Typically, automatic devices are used that allow the driver not to think about what to do when starting a cold engine.
Fuel injection systems
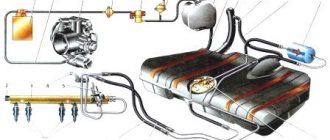
Carburetors of modern scooters are quite complex and sophisticated devices. However, today they are being replaced by electronically controlled fuel injection systems. Such systems include an electrically driven fuel pump (usually submerged in the fuel tank), a fuel accumulator, a check valve and drain line into the tank, a distribution pipeline (for two-cylinder engines), an electromagnetic injector, an electronic control unit connected to a number of sensors (opening throttle valve, coolant temperature, crankshaft speed, oxygen content in the exhaust pipe, detonation, etc.).
Injection system: a - general view; b - location of the nozzle; 1 — electromagnetic injectors; 2 — fuel manifold; 3 - pressure regulator; 4 — electronic control block; 5 - fuel pump; 6 — fuel tank; 7 - fuel filter; 8 — inlet valve; 9 — intake manifold.
Recently, Italian scooters have appeared with the Ditech fuel injection system into the cylinder of a two-stroke engine. Only air with atomized oil added to it in the inlet pipe to lubricate the parts of the cylinder-piston group and the crankshaft bearings enters the crankcase of engines with this system through the reed valve. Next, the oil-air mixture enters the cylinder and combustion chamber through the purge windows. Some of the air is compressed by a mechanically driven supercharger and supplied to an additional injector. A fuel pump located in the tank supplies gasoline to the injector, which is no different in design from those used in conventional four-stroke engine injection systems. The jet of injected fuel is picked up by compressed air in an additional injector and directed into the combustion chamber. The injection system provides a very fine atomization of fuel. The chamber is filled at such a speed that the engine can operate without interruption up to a crankshaft speed of 12,000 rpm. In addition, an engine equipped with the Ditech system is 40% more economical than a two-stroke engine of comparable power and even outperforms a four-stroke engine in this parameter, while meeting the most stringent exhaust gas emissions standards.
A malfunction of the scooter's fuel system may be indicated by poor operation of the device's motor. The user may also notice a strong loss of power; the vehicle can no longer move with its previous strength and does not gain the required speed. In addition, serious fuel consumption is visible, without any reason. All this signals the user that the scooter’s fuel system requires repair or complete replacement. To eliminate all problems, in most cases, it is enough to simply remove the broken parts and install new ones. If you are looking for where to buy new scooter fuel systems
at a competitive price without overpayments, we advise you to visit our online store. There is always a wide range of products for scooters of all models and brands. We offer products with good price-quality ratio. By ordering from us, you get the opportunity to upgrade your scooter parts to new ones without putting a big hit on your pocket and ensure your safety on the road.
Buy fuel systems for scooters
You can do it online without leaving your home. Our consultants are always happy to help you choose a model that will match the type of your scooter and its characteristics.
Adjusting carburetor settings
UAZ 3909 Hunter Logbook Synchronous carburetor K-88A from Zila
Adjusting the carburetor on a scooter consists of several stages, which include: adjusting the idle speed, adjusting the mixture quality and adjusting the fuel level in the float chamber.
Setting up the carburetor of 2t and 4t scooters has no fundamental differences, except that on some carburetor models there may be no screw for adjusting the mixture quality and therefore the mixture quality has to be adjusted only by adjusting the needle and float in the scooter carburetor
Idle speed adjustment
Carburetor 2-stroke scooter (Honda Dio)
Carburetor 4-stroke scooter
1 — idle speed screw, 2 — mixture quality screw
1 — mixture quality screw, 2 — fuel inlet fitting, 3 — fitting for draining fuel from the float chamber, 4 — float chamber plug screw.
Adjusting the mixture quality
The quality of the mixture is a very important point when adjusting the carburetor, since with a lean mixture the engine can overheat and lose power, and with a rich mixture carbon deposits will form in the combustion chamber.
We adjust the quality of the mixture using the adjusting screw. The mixture becomes richer if we turn the screw clockwise and becomes leaner when we turn it counterclockwise.
The adjustment diagram looks like this:
- Warm up the scooter for 10 minutes, turn off the engine,
- Tighten the screw fully clockwise,
- Unscrew 1.5 turns back counterclockwise
- Start the engine and turn the screw back another 1/3 turn. Let the engine run for 2 minutes.
- If the speed increases, then unscrew the screw another 1/4 turn counterclockwise. We also let the engine run for 2 minutes.
- Repeat the previous step until the speed starts to drop (remember to let the engine run for 2 minutes before each change)
- If the speed begins to drop, then screw the screw clockwise 1/4 turn.
This ensures stable engine operation at any permissible speed. Ideally, the engine should work well with the mixture quality adjustment screw unscrewed by 1.5 - 2 turns. However, due to wear and tear of engine parts, this range may change. If your scooter’s carburetor does not have a screw for adjusting the mixture quality, then the adjustment must be made only by adjusting the position of the carburetor needle. Raise the needle - the mixture becomes richer, lower the needle - the mixture becomes leaner.
You can tell by the carbon deposits on the spark plug that the quality of the mixture has been incorrectly adjusted. If the carbon deposits on the candle are black and there is a lot of it, the mixture is too rich. If the carbon deposits are almost white, the mixture is too white.
Adjusting the fuel level (in the float chamber)
The fuel level in the float chamber can be checked using a transparent tube located at the bottom of the carburetor. In order to do this, you need to unscrew the butter screw and lift the tube towards the top of the carburetor. Now we check the fuel level with the scooter engine running. It should be located just below the protruding skirt at the point where the float chamber cover is attached to the carburetor.
If the level is low or, as is more often the case, too high, then it is necessary to remove the cover and adjust the timing of the locking game by bending the needle holder (a small tendril) in a very small range.
It is worth remembering that if the carburetor malfunctions or its internal elements are dirty, adjusting the carburetor may only temporarily solve the problem.
This is the whole principle of setting up a carburetor on a Chinese and Japanese (Honda, Suzuki, Yamaha, etc.) scooter. Now you can independently repair and adjust the carburetor on 2t and 4t scooter engines with a volume of 50 and 150 cubic meters.
What does a scooter consist of?
Scooter variator belt sizes
Belt sizes for popular scooters (Honda, Yamaha, Kymso, etc.)
Engines on Chinese scooters
Article review of engines that are installed on Chinese scooters and mopeds, for example 139QMB or 1P39QMB engines
Scooter fuel system
The structure and main components of the fuel system of a 4T scooter.
Scooter gearbox - device
A gearbox is a mechanism that transmits and converts torque, with one or more mechanical gears. Scooter gearbox.
The working principle of a four-stroke scooter engine
The design of a four-stroke scooter engine, as well as its advantages.
Scooter carburetor design
At first glance, a carburetor looks like a complex device, but with a little theory, it will be easier for you to adjust it. The first thing you need to know is at least the basics of the principle of operation of the carburetor and its main controls and adjustments. The throttle handle on the steering wheel is directly connected to the air damper and the metering needle attached to it. Air passing through the carburetor will pick up fuel from the fuel chamber.
Adjusting the fuel level in the float chamber.
How to clean a carburetor with your own hands
You can check the fuel level in the float chamber using a transparent tube located at the very bottom of the carburetor. Unscrew the butter screw,
lift the tube up opposite the carburetor and check the fuel level
Please note that the fuel level must be checked with the scooter engine running, and the tube should always be located above the carburetor. The fuel level should be just below the cap curb
If there is little, or usually a lot, remove the cover and adjust the moment of operation of the locking needle by bending the needle holder in very small ranges.
It should be noted if the carburetor has not been washed for a long time and there are signs of contamination of its channels and jets, if gasoline has been or is being filled with an octane rating lower than that recommended by the manufacturer (for example, A-80), if the installed jets and other parts do not correspond to those recommended by the factory parameters, then before adjusting the carburetor you need to eliminate all this, since further adjustment will only be temporary and you will not achieve the desired result.
How to adjust the carburetor on a scooter yourself
139Qmb manual russian
Its adjustment begins with maintenance:
- the device must be removed, purged and cleaned of contaminants, the channels and jets are recommended to be washed with gasoline, and any remaining contaminants must be removed by blowing with compressed air;
- if the rubber pipe has already “acquired” cracks, then they can be covered with sealant;
- all contamination of the air filter should be removed or replaced with a new one;
- the exhaust system must be inspected and cleaned;
- Assemble the cleaned device and install it in place.
The performance of a scooter engine largely depends on the quality of the fuel mixture. The engine overheats, operates incorrectly and loses power with a lean mixture, while a rich mixture provokes excessive fuel consumption, carbon deposits and fuel overflow. You can check the operation of the carburetor by the color of the removed spark plug - if it is black, this indicates that the fuel mixture used is too rich, and white indicates a lean mixture; their quality will have to be adjusted during tuning. The brown color of the spark plug indicates normal fuel quality; in this case, the mechanism does not need adjustment.
To adjust you need:
- Screw the fuel mixture quality bolt (FMC) first all the way, then unscrew it up to 0.5 turns, while the idle speed is set to the middle position;
- start the scooter - if the equipment does not start or the speed is low or high, then increase it (at low speed) or reduce it (at high speed) by setting the idle speed;
- gradually unscrew the KTS bolt until the engine reaches maximum idle speed and tighten it again by 0.25-0.5 turns;
- start the engine and drive - if there are interruptions and dips when starting to move, then you need to tighten the KTS bolt again by 0.25 turns.
When the bolt is turned clockwise, the mixture becomes richer, and when turned counterclockwise, it becomes leaner. If excessive fuel consumption is detected, the spool needle moves down one notch and the adjustment is carried out from the very beginning. If there is a shortage of fuel, on the contrary, the needle moves up one notch and the adjustment procedure is repeated again.
Correctly configured operation of the engine system of any vehicle should ensure smooth operation, without jerks or dips. A specialist will tell you how to most accurately adjust the carburetor on your scooter, however, we hope that our recommendations will help you cope with this simple job yourself.
Carburetor structure
It is worth noting that the location of the carburetor is also different in different scooter models. Therefore, before you start adjusting it, you need to thoroughly study all the components and assemblies of your vehicle, their characteristics and location. The structure, in contrast to the location, of the carburetor is approximately the same.
The carburetor includes the following components:
- Venturi tube;
- valve with needle;
- float chamber;
- idle system;
- starting enrichment;
- spool;
- accelerator pump.
Venturi tube
So, the first element of the carburetor, called the Venturi tube, plays the most important role in its operation. This part is characterized by a diameter that varies throughout the entire length of the tube. This is due to the fact that it narrows towards the center, after which expansion follows again. It is the narrowest point of the tube that is intended for the air flow to pass through it.
The characteristic narrowing of the tube contributes to the formation of low air pressure, which is aligned to the point of expansion of the tube. If another smaller tube with gasoline is placed inside this tube, then the gasoline, on its way to the low-pressure zone, will begin to leave the small tube, spraying and evaporating, interacting with the air flow inside the large tube.
Flap with needle
The valve with the needle is installed directly in the center of the Venturi tube described above. It is necessary in order to regulate the amount of mixture that enters the combustion chamber. This adjustment is carried out by pressing the gas. However, the damper cannot operate without a needle. It is this that determines the volume of fuel entering the engine. So, when the pilot presses on the gas, the damper begins to move, thereby raising the needle, due to which the required amount of gasoline is supplied. In a word, the harder you press on the accelerator pedal, the more the damper opens, and, accordingly, the more fuel enters the combustion chamber.
Float chamber
To prevent the engine from stalling, it must be constantly supplied with fuel, a certain amount of which must be in the tube. For this purpose, a float chamber was invented, the operation of which is carried out on the principle of a toilet tank. Those. There is a float inside the chamber that moves to its lower part immediately after the gasoline level in the tube drops. Thus, the displacement of the float ensures the opening of a special valve through which fuel enters. After filling, the float rises, thereby closing the valve. This ensures a continuous and correct supply of fuel.
Idle system
The idle system in the carburetor is responsible for idling. However, its work is carried out not only at idle, but also at low speeds. In the case of idle speed, fuel is supplied through another channel of the carburetor, which is located behind the limiter. The idle system consists of:
Screw system
It is responsible for the volume of air that passes through the entire system, thereby regulating the quality of the mixture entering the combustion chamber. By tightening and unscrewing this screw, the pilot can adjust the amount of air. Accordingly, the less air volume enters the system, the tighter the screw is tightened, and vice versa. It turns out that when there is a lot of air, the fuel is leaner, when there is little, it is richer, since it contains more gasoline than air.
Special channel
The fuel mixture leaves the carburetor through it. This channel is closed by a special valve at the moment when the carburetor throttle valve opens
The valve is an important part because it prevents the system from negatively affecting the operation of the scooter's power unit at high speeds
Jet
Responsible for configuration.
It is worth noting that the carburetor idle system is its most vulnerable part. In this regard, faulty jets with a small cross-section are often the cause of carburetor malfunction. This is due to the fact that they are prone to clogging very quickly.
Thus, knowing the structure and principle of operation of the carburetor, you can begin to adjust it.
4t scooter carburetor design
The carburetor, the device of which we will consider today, has a very advanced and at the same time complex design. To ensure driver convenience, efficiency and stable engine operation, several additional systems and modules were introduced into the carburetor design. This carburetor model (pictured) is installed on most Chinese 4-stroke scooters with a volume of 50-80 CC.
Let's start studying the operation of the carburetor with the accelerator pump
The accelerator pump is activated only when the throttle is sharply opened, when sharp acceleration needs to be achieved from the scooter, the carburetor systems have some inertia and cannot respond to the throttle in a timely manner, so to avoid failure when the throttle is sharply opened, the designers have implemented The carburetor is an additional module that injects a portion of fuel at the right moment, which allows you to smooth out the characteristics of the engine during dynamic acceleration.
Disassembled accelerator pump
Acceleration pump drive
Accelerator pump channels
General structure of the carburetor
Carburetor without top cover
Idle fuel quantity (quality) screw
The “quality” screw is assembled, when reinstalling the screw, follow the correct order of installing the O-rings, first install the spring, then the aluminum washer and the rubber O-ring.
To ensure greater engine efficiency, an idle cut-off system was introduced into the carburetor; this system turns off idle when it is no longer needed, which ultimately has a positive effect on the overall efficiency of the engine.
In the carburetor, to control the operation of the idle air shut-off system, there is a special channel through which the vacuum is transmitted to a membrane which, using a rod, opens or closes the valve, thereby turning off or turning off the idle air system.
Source
Carburetor setting 139qmb
The mixture prepared by the carburetor, depending on the ratio of gasoline and air, can be rich, enriched, normal, lean and lean. I listed them in descending order of the percentage of gasoline (that is, a lean mixture contains the least gasoline and the most air). The engine cannot operate normally on rich and lean mixtures - they are too far from the optimum. The mixture with the maximum amount of gasoline on which the engine can still operate without interruption is called enriched. Accordingly, with a minimum - depleted. The middle between them is conventionally considered normal. Notice the nuance? The composition of the mixture is not tied to numbers - so many grams of gasoline per liter of air, but to the operation of the engine. That is, this is to some extent a relative parameter. For example, a mixture that is rich for a cold engine will become rich for a hot engine.
The composition of the mixture, logically (well, since it consists of gasoline and air), can be adjusted either by changing the amount of gasoline supplied or the amount of air sucked in. But to achieve maximum power, you need to give the engine the opportunity to suck in as much air as possible, and to match this amount, select such a proportion of gasoline so that the mixture turns out to be normal or slightly enriched.
There is a proboscis on the front of the filter cover through which air is sucked in. And at its end there is a plug with four holes. It was needed for the break-in period, and after the break-in is completed, it can be removed. We pull it out. The next thing that is in the way of air entering the engine is a foam filter. You can't remove it, but you can reduce the resistance. To do this, you need to wash it in a certain way. We prepare a mixture of motor oil and gasoline in a ratio of 1:10, wash the filter in this mixture, then squeeze it forcefully in your fist without twisting it, put it in to dry for about five minutes (not in the sun), then put it back. With this method of washing, the filter has low resistance and at the same time retains sufficient filtering properties. We increased the amount of air. Now we need to increase the amount of gasoline.
It is adjusted by a needle on the air damper (spool). The higher the needle is raised, the more gasoline. The needle rises with the spool, and its position relative to the spool can also be changed. The spool is located under a plastic cover in the center of the carburetor, the needle is inserted into a hole in the bottom of the spool, it can be removed with tweezers. But first, the lid. In its center there is a protrusion (pin) on which the spool spring is fixed. But with such a length (about 20mm), it also makes it difficult to lift the spool all the way up, which is quite justified during break-in and is completely unnecessary after it. To fix the spring, 6 - 7 mm is enough. We bite off the excess. The photo shows the cover with a pin up to
And here she is after:
Now nothing prevents the spool from rising to its maximum limit.
The last object of adjustment is the needle. In the carburetor of GX scooters, it does not have adjusting grooves, so it can be raised by putting on washers of appropriate thickness, for example from M2.5 fasteners. The maximum by how much it makes sense to raise it is 1.5 mm, in increments of approximately 0.25 mm.
The photo shows a needle with two textolite washers of approximately 0.5 mm each:
Now you can move on to fine tuning. To begin with, place a 0.5mm washer under the needle stop, assemble, and close the carburetor
and start it up. Let's warm up. If the engine runs smoothly, but when accelerating it changes its tone to a hoarse tone (dr-dr-dr instead of oo-oo-oo, this is working through a stroke) - the mixture is rich, you need to lower the needle, that is, put a thinner washer. To clarify, insert a plug into the proboscis. It got even worse - as if the mixture was rich. And if the engine operates with dips, especially noticeable at high speeds, and after the dip there is often a jerk (oo-oo-bu-bubu-oo!) - the mixture is poor. Let’s clarify again with the plug: it’s better with her - just like she’s poor. Raise the needle. Finally we find a position in which there are no symptoms of either a rich or lean mixture.
And the last thing is idle speed adjustment. This is done on a warm engine. We start it, release the gas and use the quality screw (it’s on the side, see the last photo of the article) to achieve the maximum increase in speed. Then use the quantity screw to reduce the speed to the minimum stable and again
we use the quality screw to raise them to the limit (in principle, this second iteration may not be needed). That's it, the carburetor adjustment is complete. You can go for a ride. You will see that your dynamics have improved and your maximum speed has increased by 3 or even 5 km/h.
The structure of the scooter and its main components.
The structure of the scooter from the point of view of the organization of its main components can be viewed using the figures below.
The scooter is controlled, as a rule, by three elements: acceleration - 1) throttle; brake - 2) rear and 3) front. Of the two steering handles of the scooter, the gas handle is on the right. Brakes on both sides; rear and front - on the right or on the left, each manufacturer decides for himself how to arrange it.
In addition, the steering panel (so to speak) contains sensors, control buttons and switches (see picture). Usually like this: on the left - horn (1), turn signals (2), low/high beam switch (3); on the right is an electric starter (4), lights on/dimensions/off (5), and sometimes a stop button-switch (you can use it to turn off the engine without turning off the ignition, but you won’t start it until you turn it back on) (6). The number 7 indicates the throttle cable tension regulator. My scooter also has buttons to control the electronic clock. Sensors include a speedometer, sometimes a tachometer, a fuel level sensor; on two-stroke engines there is almost always an oil level sensor in the oil tank, light indicators, and turn signals. Also, scooters with hydraulic brakes usually have a “brake reservoir” (8) on the handlebars, which is used to determine the brake fluid level. I don’t think there’s any need to explain why there’s an engine in a scooter. The scooter can be equipped with a two-stroke or four-stroke engine - depending on this, the scooter device can be supplemented with additional components, for example, an oil pump for a two-stroke engine. (Well, diesel, rotary and jet engines are not yet installed on scooters. At least not commercially
Source
Adjustment
The carburetor of a scooter can be located in different places. It depends, first of all, on the brand of the scooter. For example, on the Honda Dio-35 this element is located on the left side, closer to the rear wheel. A throttle cable and a fuel hose lead to it. Everything is clearly visible and you won’t have to look for the carburetor for long.
Adjusting the scooter carburetor is necessary in the following cases:
- The engine does not start or it takes a long time to start;
- The equipment loses its former dynamics and acceleration;
- With unstable idle;
- When the scooter engine speed is too high;
- With increased fuel consumption;
- When black smoke appears from the muffler.
The adjustment should be made with the engine warm. But before starting it, it is recommended to rinse and thoroughly clean the carburetor. First of all, the idle speed is adjusted, then the mixture quality is adjusted and the fuel level is adjusted.
The idle speed is adjusted using a screw. This adjustment will come in handy if the scooter has been sitting idle for a long time. After it, the carburetor will seem to gain a new life.
- If you need to increase the speed, the screw must be tightened.
- To reduce the speed, unscrew it.
We remind you that the adjustment is carried out after warming up the engine for at least ten minutes!
Adjusting the mixture quality
Adjusting the quality of the mixture is also very important. It is recommended to always adjust it according to the factory proportions. If the mixture is too lean, the scooter will often overheat and lose power and dynamics. On the contrary, if the mixture is too rich, fuel consumption will increase and carbon deposits will accumulate in the chamber more often.
This parameter is adjusted using a special screw or by moving the needle in the throttle valve. Often adjustment is carried out in the second way, since the screw responsible for this parameter may be damaged or simply missing in this model.
- Clockwise ? the mixture becomes richer.
- Counter-clockwise ? depleted.
In the case of a needle:
- Does the needle rise? enriches itself.
- Does the needle go down? depleted.
The most noticeable results can be achieved by combining these two adjustment methods.
Again, before making adjustments, the scooter engine must be warmed up for several minutes, and the carburetor must be clean inside.
The quality of the mixture is correctly adjusted in the following cases:
- The scooter began to accelerate smoothly;
- While driving, there are no failures in engine operation;
- There are no jerks;
How to find out the degree of enrichment of a mixture using a candle
- What if the scooter's spark plug is black and has a lot of carbon on it? mixture is too rich.
- If the spark plug of the scooter is white and looks like it’s brand new? mixture is too lean.
Level setting
The fuel level is adjusted after checking. At the very bottom of the scooter carburetor there is a transparent tube, by which you can determine the level.
- Unscrew the butter screw;
- We lift the handset up;
- Checking the level;
- If the level is just below the carburetor cap curb, everything is fine.
- If not, then adjustments are made: The cover is removed;
- The tendril of the needle, which acts as a locking mechanism, is bent. This type of tuning must be done in very small ranges.
Let us remind you once again that the carburetor must be clean during adjustment. It is necessary to fill only with fuel with the octane number recommended by the manufacturer, and the jets and other parts must be standard, and not homemade or removed from the carburetor of another scooter.
https://youtube.com/watch?v=a0rMb8efxkM
Adjusting the carburetor on a scooter
Timely and correct maintenance of a vehicle is the key not only to its long life, but also to its proper operation and safety. In addition to the fact that there are certain conditions under which vehicle maintenance should be carried out, regardless of the presence of specific malfunctions (for example, long downtime, cold season, mileage and much more), there are also certain “symptoms” that indicate urgent the need for maintenance. This rule applies to absolutely all motor vehicles, including scooters.
It is worth saying that the key to the proper operation of all scooter mechanisms is the proper functioning of the carburetor.
Absolutely every scooter owner should have an idea of how to adjust it. If a beginner has never had the opportunity to adjust a scooter, then for help you can turn to experienced mechanics, relevant literature and advice on the Internet.
First of all, you need to know what exactly a carburetor is and what it is intended for. First of all, it is the place where the fuel mixture is prepared by mixing gasoline and air. It is this fuel mixture that is subsequently supplied to the engine cylinder. If the carburetor is set correctly, the scooter will have the appropriate speed and power, as well as correct and economical fuel consumption. All this, in turn, ensures a safe ride for the pilot.
