Windshield wipers with pause on UAZ 31512.
The task was to pause the wipers of the UAZ-31512 car while maintaining the standard switch, electric motor (lower location) and using pause relays sold in stores. We started by studying the electrical circuit diagrams of VAZ cars, but they contained so many errors and were so undetailed (like all car diagrams) that it was impossible to understand how the pause worked.
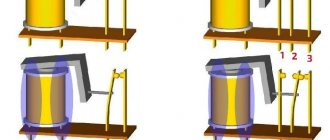
After that, we purchased a “penny” pause relay (RS-437B), deciding to disassemble it and see how it really works. A diagram of it was drawn up, after which, having understood how it works (you apply plus to red, minus to ground, periodic pulses come out to blue +), at 12 o’clock on Sunday my father and I decided to install it.
By 8 o'clock in the evening, the above-mentioned relay and the wiper motor had died under torture, but we already had a wiring diagram for the electric motor and the principle of operation of the wiper switch (in the off position, red and brown are connected, speed 1 - white and brown, speed 2 - white and yellow), and also a negative experience in connecting a relay, expressed in the following problems: 1) When you turn on any speed of the electric motor, a voltage of +12 or more volts is present at the output of the other. 2) The additional turn works only in the off mode. 3) In the original version of our scheme, when you try to turn on the rotation at the 1st speed, when you turn on the 2nd speed, both speeds are turned on. 4) There is a minus on the contact group for additional rotation (electrodynamic brake) that does not fit into the pause scheme due to the short circuit that occurs. 5) An engine without an electrodynamic brake with a pause relay stops only at 1st speed. 6) The pause relay requires additional heating during additional rotation to synchronize the start of the timing. 7) The colors of the 1st and 2nd speed wires in the factory circuit are reversed, plus the rest of the wires change color as they go from the switch to the engine.
On Monday, taking into account all the negative experience and the fact that the morning is wiser than the evening, they drew the final diagram, and in the evening they implemented it in the car. As relay P1, we used the RS-507B relay (it seems to be an intermediate relay of the GAZ starter), the letter K on it indicates the coil terminals, KZ, B and C - the terminals of freely open contacts. During assembly, there is no need to cut the wiring harness - all changes are made under the motor adjustment cover.
Procedure:
- Remove the electric motor assembly with the mounting plate.
- Open the plastic door cover.
- In the place where the 3 purple wires meet, unsolder them from the turn-on contact, without disturbing the connection between the wires, and carefully insulate them.
- Solder the wires for connecting P1 and PB1 according to the diagram (approximate wire length 40 cm), the minus can be taken from the purple wire.
- Ensure reliable installation and insulation.
- Install on the car.
In our version, we secured relay R1 (RS-507B) to the right of the backlight switch, in the existing holes with M6 bolts, relay RV1 (RS-437B) was placed in place of the emergency vibrator, the right ear (with ground) under an M6 bolt, the left ear under a bolt with metal plate. If necessary, the time delay is adjusted within reasonable limits by bending the fastening of the bimetallic plate in PB1. They decided to throw out the emergency vibrator, since running the engine on a vibrator can destroy a good engine in a few minutes - it is better to carry a spare switch with you.
The entire work including disassembly, research, development, testing, installation took 24 man-hours for 2 people.
How to install a variable pause wiper relay
Having appreciated all the advantages of a relay with pause adjustment, many motorists are wondering how to install it on their car and is it even possible? There are three ways to add this feature if your vehicle doesn't have it.
Selection of necessary parts from the same machine, but in a more “rich” configuration.
Often on foreign cars in the simplest equipment there is no windshield wiper pause adjustment, but this function appears in other equipment. Most often, it is enough to change the windshield wiper relay and steering column switch, and not necessarily with new ones. You can pick up the necessary parts at a dismantling shop.
Replacing the installed relay with a relay with an adjustable pause.
On the secondary market, there are quite a lot of ready-made solutions for replacing the standard windshield wiper relay, modified, with the ability to set a pause between sweeps of the blades within a fairly wide range (for example, from 0.5 to 45 seconds). Moreover, the advantages of this solution include the fact that the installation of such a relay is carried out in a standard place and does not require modification of the wiring or alteration of the steering column switches. True, most often such offers are designed for domestic cars.
Wipers for UAZ Bukhanka
Windshield wipers on UAZ loaf (the full name of the part is windshield wiper blades) is an element of the windshield and rear view glass cleaning system.
The main purpose is to provide the driver of the vehicle with a normal view of what is happening on the road in situations where visibility is reduced due to rain or snow - when turned on, the wipers clear a sufficient area of the windshield or rear window for this.
Wiper circuit
The diagram of the windshield cleaning system of the UAZ loaf contains the following elements:
- steering column switches;
- windshield wiper relay;
- wiper motor;
- windshield wiper blades.
The wiper circuit depends on which motor is used - on the Internet you can find many connection options for motors with six contacts. For circuits that involve a motor with four contacts (old style), it is more difficult to find the correct connection option.
When using standard parts to create a glass cleaning system, you can use a book that describes connecting electrical appliances in a UAZ loaf.
If the components used differ from the factory ones, you will have to find a diagram of the wipers on the Internet on motorist forums.
Connecting wipers
To include an element in the car system you will need:
- A power wire is led from the battery to the ignition switch;
- Power is supplied from the switch to the wiper motor;
- From there the wires are connected to the switch;
- The switch and motor are connected to the wiper relay, from where commands are transmitted using buttons on the control panel.
This diagram is simplified; some loaf models will require the use of other connection options. There is also the possibility that several existing designs will have to be combined to create a working system.
Loaf wiper sizes
The parameters of the standard windshield wiper blades are 33 centimeters. This length allows you to clear the field of the windshield that is quite suitable for viewing the situation on the road, but it is still not enough. You can install new blades with a longer length, but the standard wiper blades limit this increase to a maximum of 3 centimeters.
Based on the assessment given by the owners of the loaf, to get the best view of the road from the windshield, it is worth completely replacing both the wipers themselves and their crutches, installing larger parts.
buhanka-uaz.ru
Features of the UAZ 452 electrical circuit
The electrical circuit of the early version of the minibus has its own characteristics related to the purpose of the vehicle. The equipment was supplied to the army and various government agencies. The car could only fall into private hands after being written off. Because of this, the electrical circuit was extremely simple; additional devices were not provided by the factory (except for ambulances).
Electronic components
The wiring is built according to a single-wire circuit; the car body and the crankcases of the units are used as the negative pole. Operating voltage 12 V, all equipment is designed to use direct current. The battery is located behind the back of the driver's seat and is covered with a standard ebonite cover on top. Removing the battery is only possible after the driver's seat is tilted forward.
The electrical equipment included a G12 DC generator equipped with two current-collecting brushes. The device provided a maximum current of no more than 20A at an operating voltage of 12-15V. The PP24-G2 regulator was installed separately from the generator, on the wall of the engine compartment.
Due to the low corrosion resistance of the body, it was necessary to regularly inspect the connection points of the negative terminal from the battery. But the connection points of various equipment are also susceptible to destruction. These same problems were inherited by modern “Loaves”.
Engine compartment
Access to the upper part of the power unit for servicing the ignition system is only possible from inside the bus. On top there is a removable metal casing covered with a layer of heat and sound insulating material. There is no separate lampshade for lighting; for work in the dark, a portable lamp or ceiling lantern is used.
View of the engine after removing the hood
Passive safety
Passive safety at the time the minibus was created was assessed as sufficient. Despite the absence of deformation zones, the driver and front passenger had a good chance of a successful outcome in a frontal accident. But from a modern point of view, passive safety in a car is completely absent. The increase in driving speeds has led to the fact that in the event of a frontal impact, the driver and passenger at least receive severe leg fractures.
On the latest versions of cars produced after 2014, an electronic anti-lock braking system began to be used, which improved braking performance. Until this point, the design of the car lacked any electronic means of passive safety.
External optics
Features of external optics:
- The headlight wiring design uses a mechanical-type central switch that distributes electricity to consumers. The unit was borrowed without changes from the previous generation SUV GAZ 69.
- Lighting elements were borrowed from other UAZ and GAZ vehicles. In turn, the equipment is standardized for Soviet-made cars. This ensured the interchangeability of components and simplified machine repairs.
- The front sidelight with a transparent lens has one double-filament lamp, which is also a turn indicator and a side signal.
- The back of the minibus has round lights with a red lens. Inside there is a two-filament lamp for the brake signal and turn signal (one filament) and the side light (the second).
- There are no side turn signals.
Nuances of electrical equipment
- Ignition. This system consists of different elements - a distributor, a coil, spark plugs, through which the charge is transmitted.
- Safety block. This unit is a set of safety devices designed to protect the electrical circuits of installed devices and electrical equipment.
- . The washer system consists of windshield wiper blades, a trapezoid, an electric pump, an expansion tank, a gearbox and other components. The main purpose is to ensure high-quality cleaning of the windshield.
- Acoustics. Its presence is not relevant for all vehicles. The acoustic audio system includes a car radio, speakers, and an antenna adapter.
- Rear window heating system.
- Optics.
The operation of any circuit involves the use of a battery, as well as a generator device.
The first is used to provide power to all equipment when the engine is turned off, and the second is used to power the battery, as well as power electrical devices when the engine is running (the author of the video is the Protect Your Interests channel).
What is included in the electrical circuit?
What features do automotive electrics have on old cars produced by the Ulyanovsk Automobile Plant?
Electronic components
The electrical circuit of the UAZ 452 itself is quite simple - single-wire.
- The vehicle body is used as the mass.
- Any electrical equipment of the old-style circuit on a UAZ 409 or other model, as well as actuators, are equipped with a negative terminal, which is connected to the car body. According to experts, in general this scheme is imperfect.
According to the operating instructions for electrical equipment, the driver must periodically diagnose the condition of the integrity of the contacts. We are also talking about their oxidation. If the driver notices the presence of oxidation on the terminals, he should treat them using fine-grained sandpaper.
Engine compartment
In this case, the engine compartment is located directly in the passenger compartment in accordance with the design of the car.
Access to the electrical circuit and other mechanisms and assemblies is made from the interior, as a result of dismantling the cover, which:
- Designed to protect the motorist and passenger from exhaust gases entering the cabin.
- Allows you to protect the car interior from the penetration of dirt and dust.
- Performs the function of an additional heating device, in particular passively, as a result of heating.
Engine compartment of an AUZ car
Passive safety
The very design of the domestic Loaf with the absence of a hood at first raised many questions in terms of the safety of the driver and passengers. As a result of several dozen crash tests that were carried out back in the early 70s of the last century, it was revealed that the car is no less safe when compared with other domestic cars. As the results showed, in the event of an accident, both the driver and passengers of the car have a good chance of avoiding injury in an accident.
Wiper malfunctions and their elimination
Motor device
If the windshield wiper does not work, it is quite possible that the electrical power wires of the gearbox are damaged or the tips in the connection blocks have oxidized. The problem can be solved by replacing the wires and cleaning the tips.
If the windshield wiper switch is damaged, it needs to be replaced.
It often happens that the motor brushes get stuck. The cause may be a dirty collector, which should be cleaned in time.
The wipers will not work if the wires are broken. For the brushes to work properly, you need to solder the wires, clean the fuse contacts, and replace the armature or gear motor.
If the wiper does not operate intermittently, the switch and relay should be checked and replaced if necessary.
It is important to understand whether there is a short circuit on the contact post. The reason for the incorrect operation of the windshield wipers may be the gap between the relay breaker contacts that does not meet the standard.
The wipers do not stop intermittently. Perhaps the breaker winding in the relay has burned out; the cam of the gear motor gear does not bend the limit switch spring. For the wipers to work properly, you need to bend the plate.
If the brushes do not return to their original position, you can try to clean the switch contacts and bend the spring plate.
The gear motor works, the brushes do not move. Replace the gear or tighten the crank nut.
troubleshooting
On any domestic car, problems periodically arise in the operation of electrical equipment. If you notice that the UAZ wiring is not working correctly, you need to diagnose it and check all the elements. If there are any malfunctions in the operation of electronic devices, first of all you need to check whether the fuses in the mounting block have burned out. If everything is fine with these elements, but the equipment still does not function, for example, if we talk about optics, then you need to check whether the light bulbs are working. If the lamps themselves are working, it is necessary to test the electrical part using a tester (the author of the video about testing car wiring is Ramil Abdullin).
If the Loaf refuses to start at all, you need to do the following:
Wipers UAZ 469, 31512, 31514
Drawings of brackets for installing lower wipers UAZ 31512
Almost immediately after buying the car I installed lower wipers. 3 operating modes: - controlled pause (from 3 to 20 seconds) - 1 speed - 2 speed Attached the electric motor without drilling extra holes in the body. Many UAZ drivers eventually bother with moving wipers from top to bottom and are faced with the age-old question: how to install? I am posting to the public drawings and photographs of bracket templates, with which you can install the wiper motor WITHOUT DRILLING THE BODY. Everything fits into the factory holes under the dash behind the chart stick.
Actually, the markings themselves are on the panel in front of the windshield.
I marked myself according to this scheme. I installed lower wipers on other UAZs using the same scheme. But it turns out there is great discord between UAZ and UAZ! The value of 335 mm (from the left arm to the windshield frame mounting bolt) turned out to be floating on all cars! We start marking from the RIGHT LEASH, i.e. from a distance of 500 mm from the lower right bolt of the windshield frame.
The brush holder leash should be at an angle of 90 degrees. to the plane of the windshield. Otherwise, if we install one of the leashes incorrectly, we will have an uncleaned area on the windshield on the side opposite to the inclination of the leash.
Drawing of brackets for mounting the wiper motor
Be very careful about marking and drilling the holes indicated in the drawings. They may differ slightly up or down - this is an UAZ, after all.
Actually, photos of bracket templates:
A bracket that is attached to two standard holes in the right hood hinge.
A bracket that is attached to two standard holes in the right hood hinge.
A bracket that is attached to two standard holes in the right windshield defogger pipe.
A bracket that is attached to two standard holes in the right windshield defogger pipe.
On some UAZs I installed the Volga-UAZ wiper motor, on others - from the VAZ-2108/09 (in particular for the UAZ-469BG with an additional heater). For the Zhiguli electric motor, only an adapter bracket is made for the above brackets.
The wiper arms also need brackets. Here folk art has stepped far forward, coming up with a great variety of options: 1. Through a spring bushing cut at an angle 2. A piece of profile pipe, with one flange cut out on the narrow side and a drilled hole. 3. From plywood, twisted with screws or glued.
These options are easy to manufacture, but have a significant drawback - while working on the leashes, the force is very high and, with their small area, they bend the shelf in front of the windshield. In turn, the bent shelf prevents the wipers from working correctly, causing the mechanism's rods to jump off the leads with its kink.
But because A UAZ car is made of real iron, then the brackets for the leashes should also be made of iron.
I took a different path, more difficult, but reliable. I cut out two plates measuring approximately 100x100 mm and bent them to the shape of the body under the windshield frame. I drilled holes in them for the leash. Then he welded a piece of metal pipe (the internal diameter should be slightly larger than the outer diameter of the leash) and a small platform to prevent the leash itself from rotating around its axis...
Below is a schematic drawing:
Bracket for wiper arms
Accordingly, for connection we use the electrical circuit of the installed electric motor. The operating mode of electric wipers is identical.
You will have to jump around the car, but at the end of the day we have almost all the glass cleaned... Yes, I forgot to add - for this we need an installed SOLID windshield.
Lower wipers UAZ 469
I've had the lower wipers included with the donor for a long time. About 3 years ago I was going to install everything, as well as a vacuum with upper pedals.
First, I went to the garage to see how the lower wipers are installed on a government-owned UAZ, took a couple of photos and measurements
I drilled holes according to the measurements I made. As a thrust platform (from the factory), I used a UAZ spring bushing, cutting off as much as necessary.
Wiring diagram for the windshield wiper motor on the UAZ Bukhanka
Wiring diagram for the windshield wiper motor on the UAZ Bukhanka
Control unit of the automobile anti-theft system VAZ 21214 diagram diagram of the connection of the windshield wiper motor on the UAZ loaf.
Reviews and questions part 1 gas stove does not heat up 31029 electric throttle Audi electric throttle Audi Only we have a complete catalog of video descriptions of car tuning site map.
Boxer 3 this topic was created to facilitate the search for faq in the boxer 3 selection section Home page of the console website org read the main news of the gaming industry.
Everything you need to know about the engine video tutorials prices repair spare parts UAZ interior UAZ body UAZ which car is better to buy with metal and plastic.
A matter of habit, it still steers better than a stock UAZ v dudin Kaliningrad 10 52 16 09 2010 Welcome to the music portal disco org queen English rock band.
What is different and the same on the 15 Volga suspension in the steering wheel or without steering wheel versions Printable version of the topic, click here to view this topic in normal format.
Management scheme of the mountain-tourist complex
Transfer case diagram for UAZ
Quickly write a block diagram of an algorithm
Electric diagram UAZ 220694
Category: UAZ schemes /
vikont.sytes.net
Features of electrical equipment
So, what features does the UAZ 452 electrical wiring diagram have? At the time of the start of production, the most difficult moment for the engineers and designers of the enterprise was the search for the highest quality elements and components.
In particular, we are talking about parts for the vehicle lighting system, as well as ignition, which is especially clearly seen in how the car’s cabin is filled:
- control elements for various transport systems;
- control devices for monitoring the condition of components and mechanisms.
External optics
At that time, designers had to resort to many freelance solutions in order to establish mass production of cars.
- The UAZ electrical circuit includes an optics switch, which was borrowed from the GAZ 69. By the way, the latter is the predecessor of the Bukhanka.
- In addition, almost all the optics were borrowed from the GAZ 64 - these are lights, etc.
Ignition system
Upper wipers on UAZ
Drawings of brackets for installing lower wipers UAZ 31512
Almost immediately after buying the car I installed lower wipers. 3 operating modes: - controlled pause (from 3 to 20 seconds) - 1 speed - 2 speed Attached the electric motor without drilling extra holes in the body.
Many UAZ drivers eventually bother with moving wipers from top to bottom and are faced with the age-old question: how to install? I am posting to the public drawings and photographs of bracket templates, with which you can install the wiper motor WITHOUT DRILLING THE BODY. Everything fits into the factory holes under the dash behind the chart stick.
Actually, the markings themselves are on the panel in front of the windshield.
I marked myself according to this scheme. I installed lower wipers on other UAZs using the same scheme. But it turns out there is great discord between UAZ and UAZ! The value of 335 mm (from the left arm to the windshield frame mounting bolt) turned out to be floating on all cars! We start marking from the RIGHT LEASH, i.e. from a distance of 500 mm from the lower right bolt of the windshield frame.
The brush holder leash should be at an angle of 90 degrees. to the plane of the windshield. Otherwise, if we install one of the leashes incorrectly, we will have an uncleaned area on the windshield on the side opposite to the inclination of the leash.
Drawing of brackets for mounting the wiper motor
Be very careful about marking and drilling the holes indicated in the drawings. They may differ slightly up or down - this is an UAZ, after all.
Actually, photos of bracket templates:
A bracket that is attached to two standard holes in the right hood hinge.
A bracket that is attached to two standard holes in the right hood hinge.
A bracket that is attached to two standard holes in the right windshield defogger pipe.
A bracket that is attached to two standard holes in the right windshield defogger pipe.
On some UAZs I installed the Volga-UAZ wiper motor, on others - from the VAZ-2108/09 (in particular for the UAZ-469BG with an additional heater). For the Zhiguli electric motor, only an adapter bracket is made for the above brackets.
The wiper arms also need brackets. Here folk art has stepped far forward, coming up with a great variety of options: 1. Through a spring bushing cut at an angle 2. A piece of profile pipe, with one flange cut out on the narrow side and a drilled hole. 3. From plywood, twisted with screws or glued.
These options are easy to manufacture, but have a significant drawback - while working on the leashes, the force is very high and, with their small area, they bend the shelf in front of the windshield. In turn, the bent shelf prevents the wipers from working correctly, causing the mechanism's rods to jump off the leads with its kink.
But because A UAZ car is made of real iron, then the brackets for the leashes should also be made of iron.
I took a different path, more difficult, but reliable. I cut out two plates measuring approximately 100x100 mm and bent them to the shape of the body under the windshield frame. I drilled holes in them for the leash. Then he welded a piece of metal pipe (the internal diameter should be slightly larger than the outer diameter of the leash) and a small platform to prevent the leash itself from rotating around its axis...
Below is a schematic drawing:
Bracket for wiper arms
Accordingly, for connection we use the electrical circuit of the installed electric motor. The operating mode of electric wipers is identical.
Size of brushes on UAZ and type of fastening
The lower wiper blades on UAZ are 350 mm long. It corresponds to the length of the windshield wipers on Zhiguli and Volga cars. Type of brush fastening - ТЗ
Please note that adapters are not always included
To improve the quality of glass cleaning, you need to install nozzles on the lower wipers. Water will flow from both sides - top and bottom. To prevent these tubes from breaking, you should use silicone.
Cleaner brushes
The windshield washer hose has a tee - a valve to keep water from flowing back into the reservoir. The valve in the tee can be made with a drill. When you press the washer switch, you need to wait until the water starts flowing. This drilling procedure will help speed up the process.
To prevent clogging of the jets, you can install a fine gasoline filter in the washer. The time it takes for water to appear will increase, but the jets will not become clogged.
By installing the lower windshield wipers of a UAZ 469 car, you can pause them while maintaining the technical characteristics: standard switch, electric motor, pause relay, purchased at any auto store. The work plan will be as follows.
- Remove the electric motor from the mounting plate.
- Open the plastic lid of the door.
- At the moment of convergence, unsolder the 3 purple wires from the contacts and insulate the wires. Remember not to destroy the integrity of the connections between the ends.
- Solder the connection wires P1 and PB2, take the minus wire from the purple end.
- Carry out high-quality insulation and installation.
- Install the unit on the car.
Car diagram - UAZ 3151
Diagram of all electrical equipment on UAZ 3151 and 3153
1 – front lamp; 2 – headlight; 3 – fog lamp; 4 – sound signal; 5 – generator; 6 – engine compartment lamp; 7 – coolant temperature indicator sensor in the cylinder block; 8 – sensor for warning light of emergency overheating of coolant in the radiator; 9 – signal lamp sensor for emergency condition of the hydraulic brake system; 10 – oil pressure indicator sensor; 11 – sensor for emergency oil pressure warning lamp; 12 – EPHH control microswitch; 13 – spark plugs; 14 – sensor-distributor; 15 – electric motor for windshield washer; 16 – electromagnetic valve EPHH; 17 – carburetor solenoid valve; 18 – ignition coil; 19 – battery; 20 – ground switch; 21 – starter; 22 – additional resistance; 23 – side turn signal repeater; 24 – fog lamp switch; 25 – cigarette lighter; 26 – cigarette lighter fuse; 27 – emergency vibrator; 28 – transistor switch; 29 – electronic control unit EPHH; 30 – windshield wiper motor; 31 – starter relay; 32 – fuse block; 33 – brake signal switch; 34 – direction indicator switch; 35 – alarm switch; 36 – turn signal switch; 37 – plug socket; 38 – body light switch; 39 – body lighting lamp; 40 – wiper and washer motor switch; 41 – heater fan electric motor; 42 – heater fan motor switch; 43 – heater resistor; 44 – heater motor fuse; 45 – ignition switch; 46 – thermal fuse; 47 – central light switch; 48 – foot light switch; 49 – voltmeter; 50 – oil pressure indicator; 51 – warning lamp for emergency oil pressure; 52 – coolant temperature indicator in the engine cylinder block; 53 – warning lamp for emergency overheating of the coolant in the radiator; 54 – fuel level indicator; 55 – signal lamp of direction indicators; 56 – warning lamp for emergency condition of the hydraulic drive of the brake system; 57 – signal lamp for turning on the parking brake system; 58 – sound signal button; 59 – signal lamp for turning on the high beam headlights; 60 – speedometer; 61 – fog light switch; 62 – parking brake system warning lamp switch; 63 – reverse light switch; 64 – fuel level indicator sensor in the right tank; 65 – fuel level sensor switch; 66 – fuel level indicator sensor in the left tank; 67 – rear lamp; 68 – license plate light; 69 – reversing lamp; 70 – trailer socket; 71 – rear fog lamp
Windshield wiper UAZ loaf
A windshield wiper is an important part of any car, ensuring the windshield is clean in any weather. To repair it if problems occur, you need to know a lot.
What features does the UAZ loaf windshield wiper have?
A working loaf windshield wiper consists of a blade position switch, the blades themselves, a motor, a relay, a mode switch and a windshield washer reservoir.
The windshield wiper blades installed on UAZ by the manufacturer are small - only 330 millimeters, which is why they clean an area that is insufficient to obtain a good view. If necessary, the brushes are easily replaced.
To get a better view from the front in winter and autumn, when the glass quickly gets dirty, many owners of loaves change not only the blades, but also the wiper crutches - the standard part does not allow the installation of blades longer than 360 millimeters.
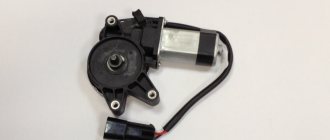
The loaf windshield wiper motor often requires replacement due to problems that arise (complete inoperability or the inclusion of one mode, which causes the glass to be cleaned slowly).
Finding a working part is easy - many people use windshield wiper motors from other cars. You can get rid of problems by connecting the motor directly to the brush switch harness, but this option for fixing problems with the motor does not always work.
You need to connect the windshield wiper to the UAZ loaf using the electrical circuit diagram
During the connection process, special attention should be paid to the steering column harness - if any of its components are inoperative or the harness itself is non-standard, this will result in problems with connecting the electronics
Test the wires before installation to determine if they are in working order. After assembling the motor electronics, connect the brush switch and the brushes to it. Check the entire structure for any malfunctions.
The windshield wiper is connected according to the following scheme: power is supplied from the battery to the ignition switch and the wiper motor (one wire, power is supplied from the switch directly to the engine).
The motor is connected to the wiper switch and relay. The relay is also connected to the switch, and a wire goes from the switch itself to the windshield wiper pump.
The circuit suitable for connecting a windshield wiper in a UAZ loaf may differ depending on the year of manufacture of the car, but the main elements remain the same.
The loaves use a standard barrel-shaped windshield washer switch with a button (part number 452-5205072). It is installed not under the steering wheel of the car, but on the dashboard. When connecting, a diagram corresponding to the part is used.
The windshield wiper drive is otherwise called a trapezoid. It is necessary to ensure the movement of the brushes and clean the glass from dirt.
If during the repair a decision is made to install a new type of trapezoid, then it is necessary to check which holes for which motor the windshield wiper drive you are purchasing has - some models do not fit the standard motor.
buhanka-uaz.ru
Blog about UAZ
There are a lot of different relays in the UAZ Hunter, most of them controlling the headlights, turns and windshield wipers are located in a visible place on the left side of the front panel on the driver's side. However, there are two relays located in the engine compartment, about which only a few lines are written in the official operating manual, this is the main relay and the electric fuel pump relay of the engine management system.
Meanwhile, the serviceability and performance of these two power relays directly determines whether you can even start the car’s engine or not, since through the relay, the main ECU supplies power to all actuating electric mechanisms and sensors of the system, which have a rated supply voltage of 12 Volts, and the electric fuel pump relay supplies voltage to the electric fuel pump of the fuel supply system and to the heating circuit of the oxygen sensor.
The main relay and the electric fuel pump relay are installed in the engine compartment on the front panel above the engine, to the right of the vacuum brake booster, when looking along the vehicle. Both relays are exactly the same, with the same catalog number 90.3747-10, and have no visible external differences.
Relays are four-contact, electromagnetic type with normally open contacts, designed to control power circuits up to 30A. You can distinguish them externally by the following feature: thicker wires with a larger cross-section are suitable for the main ECU relay block.
Structurally, the power relay 90.3747-10 consists of an insulated base with four pressed-in pins and an electromagnet coil mounted on it with an armature and a movable spring-loaded rocker contact, and a plastic housing pressed along the contour of the base. The relay is connected to the wiring harness using four-pin sockets.
Relay parameters 90.3747-10.
— Power supply range: 8-16 Volts — Nominal voltage: 12 Volts — Control current: no more than 0.2 Ampere — Operating voltage: no less than 8.0 Volts — Release voltage: 1.5-5.0 Volts — Maximum current in the power circuit: 30 Amps — Active winding resistance: 80+-10 Ohm
Fuses for power circuits of the engine electronic control unit (ECU).
Next to the main relay and the electric fuel pump relay, two blade fuses are attached to additional blocks. 10 ampere, red - to protect the ECU power circuit coming from the ignition switch, and 20 ampere, yellow - to protect the ECU power circuit coming from the battery, the electric fuel pump power circuit and the oxygen sensor heating circuit.
The need for protection and periodic maintenance of the relay.
The location of the main relay and the electric fuel pump relay in the engine compartment is very contradictory; on the one hand, there is good access to them, and on the other, they are constantly exposed to condensation or rainwater that penetrates through the gap between the body and the rear of the hood. The relays are practically recessed in thick sound insulation and are screwed directly through it with their brackets to the panel.
Water and condensation flowing down the sound insulation end up on the pads, relay and fuse contacts, which begin to quickly corrode and, accordingly, do not provide good contact or even fail. To protect and reduce the negative impact on relays and fuses, it is advisable to somehow move them away from the sound insulation, for example, by taking longer screws and re-fastening them through thick rubber washers, or even by making some kind of protective casing for them.
In any case, these relays, along with the fuses, must be removed at least once a year and their contacts must be cleaned of any corrosion that has arisen; this will directly affect the operation of the engine, you will feel it immediately, especially when it is idling.
Diagnosis of faults associated with the main relay and the UAZ Hunter electric fuel pump relay.
Error codes for the engine management system with the Mikas 7.2 ECU associated with the main relay and the electric fuel pump relay, other external signs of malfunction of them or their electrical circuits, troubleshooting methods, as well as analogues and options for replacing the main ECU relay and the UAZ Hunter electric fuel pump relay are discussed in detail in the following material.
Installing wipers on a UAZ from top to bottom
. I drilled holes, cut off the motor mounts from the old one and welded them onto the new one. You can move it to the bottom, but it’s painstaking. The stove box needs to be replaced, and cooking is not convenient. If you need photos, write where to send them.
1. The upper wipers sweep a smaller surface, the mechanism on the outside is rotting, no, you simply can’t do an intermittent mode, you can’t put a shelf above the windshield for a radio + speakers or a walkie-talkie. 2. When moving downwards, there is no need to change the box (it wrinkles slightly in place). You can cook it, but it is not necessary. Two gimmicks - make a bracket for mounting the motor and new wiring.
They also sweep, only from the top (depending on the length of the leash and the wiper) Why reinvent the wheel? Everything is put in its original place, fortunately there is a stamp in the frame. The frame will rot faster than the mechanism
They also sweep, only from the top (depending on the length of the leash and the wiper) Why reinvent the wheel? Everything is put in its original place, fortunately there is a stamp in the frame. The frame will rot faster than the mechanism
-1. The lower ones are two orders of magnitude better. The upper ones are cleaned from above where visibility is needed, and the lower ones on the other side. There is no need to look at your own hood.
1. The upper wipers sweep a smaller surface, the mechanism on the outside is rotting, no, you simply can’t do an intermittent mode, you can’t put a shelf above the windshield for a radio + speakers or a walkie-talkie. 2. When moving downwards, there is no need to change the box (it wrinkles slightly in place). You can cook it, but it is not necessary. Two gimmicks - make a bracket for mounting the motor and new wiring.
. in the upper position, it seems to me that there are more advantages.. the intermittent cutting really gets established.. as well as the shelf (I can show you.). When driving in snowfall, there are no snowdrifts under the brushes. And the fluid consumption is much less.. BUT this is my opinion.
. in the upper position, it seems to me that there are more advantages.. the intermittent cutting really gets established.. as well as the shelf (I can show you.). When driving in snowfall, there are no snowdrifts under the brushes. And the fluid consumption is much less.. BUT this is my opinion.
I had the upper ones - they turned sour a couple of times (I went through), once (the car was parked for 3 months, the axle soured, I turned it on until I realized that the wiring and the switch had melted. When driving through the forest, the branches cling to the trapezoid. I converted them to the lower ones. German brushes are suitable - they clean better, better visibility especially to the left into oncoming traffic and down to the right for parked cars, fluid consumption is 5 liters for autumn+winter+spring in the city, turning on/off is more convenient, the whole mechanism inside does not rot, instead of a motor there is a shelf + radio. snowfall creates snowdrifts under the brushes, but this does not prevent them from working.
UAZ 2206 Nafanya › Logbook › Installation of three wipers
I decided to improve visibility on my Loaf during precipitation by modifying the wipers. The idea, as well as a detailed plan for installing three wipers on the Loaf, was taken from the respected Alexander Zediyarov zediyarov (here is the link www.drive2.ru/l/5512386/). I purchased a motor drive from a VAZ-2110, levers from Hunter, and also two trapezoids from him.
Further around the place I began to look for somewhere to shove the motor, under the dashboard, above the passengers’ feet, that’s it. I found a plate five, drilled out the central hole, as well as three holes for mounting the motor. You just need to bring the plane of rotation of the motor rod into the plane of rotation of the wiper rod. I decided to do this by placing a piece of 20x40 profile pipe under the plate, and screwed the pipe itself with M6 bolts with a hex head into the amplifier, just where there were two nuts from the factory. To fix the plate to the pipe in the opposite part, I also drilled holes 10 mm into which I inserted two furniture bolts with a round head, having previously cut off the head so that they fit into this pipe. Then I attached the plate. It is still held on by bolts, but then I will weld the entire structure with a semi-automatic machine.
Having installed the wiper axles, I began to connect the rods. It’s good that after measuring them according to Alexander’s example, he still made them adjustable. Subsequently, this helped a lot, since each UAZ is unique, then with the dimensions that Alexander gave, the driver’s wiper ended up behind the dead center, at the point of no return, and experimentally I had to shorten the thrust itself. As a result, everything works smoothly and visibility has improved by 300 percent!
