In this mobile sandbox with survival elements, players can create not only various machines and weapons, but also vehicles. At the moment, the most popular is the motorcycle or chopper, since it is easier to assemble compared to other equipment and all the parts for it are already available. However, you should not think that this will be easy - you will need to spend a lot of time searching for all the spare parts. If you have difficulties with this, then you can read our guide on how to create a motorcycle in Last Day on Earth: Survival.
What is required to create a motorcycle in Last Day on Earth: Survival
First of all, we note that you will need to open the motorcycle drawing. You can do this after reaching level 6 - you will have to spend 2 crafting points. After this, you can find out what parts you need to find to assemble your own motorcycle. In total, you will have to find over 100 different spare parts. Their list can be found below:
- 20 engine parts;
- 10 wires;
- 2 wheels for a motorcycle;
- 30 bolts;
- 10 bearings;
- 20 rubber parts;
- 30 units of scrap metal;
- 1 motorcycle handlebar (cog, fork);
- 1 motorcycle gas tank;
- 4 basic backpacks.
You will also need to create a motorcycle frame on the floor of your shelter. To do this, the floor must have a 2nd level. The structure itself will occupy an area of 2 by 2 meters in the room. To build it you will need 5 bolts, 5 iron ingots and 10 pine boards. In general, you will need a lot of materials and now we will tell you where you can get them.
How to find parts for a chopper - where to look for the gas tank
Engine parts are items of medium rarity that can be used to craft not only a motorcycle, but also an all-terrain vehicle (ATV). They don't often appear in locations with a green danger level, so we recommend looking for them in the Bravo or Alpha bunkers. They then drop from crates dropped as humanitarian aid. If you don’t feel short on money, you can buy a box of spare parts in the in-game store for gold coins, which can be purchased with real currency.
Wires (cables) are widespread items that can be easily found in boxes located in locations with a green danger level.
Motorcycle wheels - you can try to find them in chests located in locations with a yellow danger level, but with 100% probability they are found in the Alpha bunker on the 1st lower level in the last room. If you don’t feel short on money, you can buy a box of spare parts in the in-game store for gold coins, purchased with real currency.
Bolts are another fairly common material, often found in boxes located in locations with a green danger level. If you want to speed up getting them, we recommend visiting areas with a yellow or even red threat level.
Bearings - you will need these parts to assemble not only a chopper, but also other equipment, including an all-terrain vehicle, a truck and a helicopter. They cannot be called rare, since they often fall out of boxes in green locations, but we still advise you to visit yellow regions or try to get to the humanitarian cargo.
Rubber parts - along with bearings, they are universal spare parts used to create a wide range of various devices. However, they are much less common, so collecting 20 units will take a lot of time. As a rule, they can be found in locations with a yellow threat level. They are also found in the Bravo bunker and in the crash sites.
Scrap metal may seem useless at first glance, but in fact it has a lot of useful properties. First, it can be smelted into iron ingots. Secondly, it is necessary for crafting vehicles. You will need 30 units of scrap metal. Fortunately, it is quite easy to find - you just need to open boxes and chests in locations with a green threat level. Plus large amounts of scrap metal can be found on the corpses of other survivors.
Motorcycle handlebar - it will not be easy to find this item, since at the moment it is found in only one place - on the 1st lower level of the Alpha bunker. However, you can also purchase it in the store for real currency. True, the likelihood of the steering wheel falling out of the box is not very high.
The motorcycle gas tank is another rare item that was introduced along with the lower levels of the Alpha bunker. As you probably already guessed, you will have to look for it there. Unfortunately, it is generated randomly, so on your first playthrough of the underground structure it may not be there at all, so go through it several times.
Basic backpacks are simple items to craft. You can create them already at the initial levels. To do this, you will need ropes (dropped from ordinary zombies) and plant fibers (obtained from bushes in almost any location).
Having obtained all these parts, you can begin assembling the motorcycle, which is a very useful vehicle that allows you to quickly move around various locations without spending precious energy. True, you won’t be able to drive it off-road or cross rivers.
The most famous chopper manufacturers
The most popular chopper is, of course, the legendary Harley Davidson. Owning an American chopper is every biker's dream. It is worth noting that Harley motorcycles have been popular for several decades, and have long become a household name for a good bike. If we talk about other manufacturers, then Honda choppers are quite good, especially Honda, VT 750 DC Black Spirit, VT 1300 CXA Fury and other motorcycles in this line.
Recently, mini choppers have begun to appear. This is the same chopper, but in miniature. Of course, the technical parameters of a mini chopper will be slightly behind those of its larger brother, but you don’t need to have a license to ride such a miracle.
How and for what you can use a motorcycle
After all work on the chopper is completed, options for refueling the vehicle, painting it, and storing items in it will appear in the motorcycle menu. These sections are named as follows: "Repainting", "Luggage" and "Pour/Pour".
On the global map, in addition to the “Run” and “Walk” options, you will see the inscription “Drive”. It will allow you to move to certain locations as quickly as when using running, but energy will not be wasted. But gasoline will begin to be consumed. A motorcycle tank can hold 200 units of fuel. After arriving at the location, your motorcycle will be parked not far from the place where the character appears on the screen.
Repainting a motorcycle
To paint a chopper a different color you will need a template and paints. You can find the scheme in the 1st lower level of Bunker Alpha. There are currently 10 different motorcycle colors in the game, but this number will likely be increased in the future.
How to refuel a motorcycle
You can both pour and pour gasoline from the chopper. To add fuel, place gasoline (canister) or a bottle of gasoline in the desired slot and select the “Fill” option. If you want to pour out fuel, place an empty bottle in the slot and select the “Pour out” option (there must be an empty slot in your luggage).
- From one can of gasoline you can get 25 units of fuel for a motorcycle. The canister itself disappears when used.
- One bottle of gasoline can give you 10 units of motorcycle fuel. After using it, one empty bottle will appear in the chopper's luggage.
The fuel level of a motorcycle can be viewed either in its menu or on the map screen (displayed as an additional panel near the energy scale). You can find gasoline in other motorcycles, which are common decorations - just pour it into empty bottles.
Baggage
The motorcycle has 3 free slots for storing various items. It is not suitable for transporting a large number of things, so always take a backpack with you. However, until the appearance of the all-terrain vehicle, the chopper remains the best vehicle in the game.
I picked up the fork stays from a Chinese scooter, they work smoothly, don’t “snot” and there is already a bracket for attaching the disc brake caliper. I lengthened the fork using an old Voskhodov one. I connected everything with homemade adapters and added a third crossbar to reduce twisting.
I bought the 17″ front cast wheel in a store, but I had to make the rear one myself. I bought a 14″ spare from a foreign car, cut out the inner part, leaving only the rim. Then I cut out three large spokes from 5mm sheet metal with a jigsaw and welded them to the rim in a wooden slipway. The assembled wheel together with the 150/70–14 tire weighs almost 15 kg. I ordered the hub and a few other parts from turners.
The rear pendulum was made of a rectangular profile, on four bearings. Beautiful and high-quality welds are the work of my friend, a self-taught welder.
I assembled the frame in parts: first I welded the back part, then, securing it to a wooden slipway, I welded the front part.
I cut the gearbox and brake levers from sheet metal. I made the machine for the rear foot brake from a hand brake from a scooter. It is quite enough to block the heavy rear wheel.
I decided to make the gas tank and wings from fiberglass, since it is too difficult to “hollow out” them from metal without special tools. To make the tank, I glued blanks cut from dense foam plastic with glue for ceiling tiles. The resulting “boob” was cut with a knife and processed with sandpaper until it was given the desired shape.
Then, layer by layer, polyester resin and fiberglass were laid out (7 layers in total). Between the layers I glued a filler neck, a drain valve and two brackets for attaching the tank. After sanding, I poured acetone into the tank through the neck, which dissolved all the foam in a few minutes. The result is a lightweight and durable 9-liter tank. Working with fiberglass is labor-intensive and dirty, the resin has a strong smell, so it’s better not to try it without a respirator.
I made the wings using the same principle. The headlight was sculpted from universal putty with a frame made of steel wire. The reflector and glass were taken from a car fog lamp.
I did the electrical work myself. I had to fiddle around to hide the wires in the frame and handlebars. The brake light and dimensions are LED. The instrument panel was taken from an Alpha moped and slightly modified.
The frame was painted black. The tank, fenders and headlight are metallic red with the addition of pearlescent sparkles. I applied the drawing, varnished and polished.
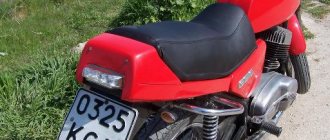
I installed a homemade removable back case over the rear fender. I decorated the side covers with leather bags, which I sewed from an old jacket. I hung a mini-case made from an old thermos on the front of the frame. It holds a couple of candles and a half-liter bottle of gasoline. The result was a practical mini-chopper, which I called Nomad (“Nomad”).
| SPECIFICATION | |
| Construction | Andrey Petrov, Velikiye Luki |
| Name | |
| POWER UNIT | |
| Chinese clone of the 50 cc Honda “super cab”. 4-speed Gearbox, clutch in oil bath, ch. transmission - chain. | |
| CHASSIS | |
| Duplex steel frame, made in-house. Front suspension – telescopic fork; rear suspension - pendulum with two hydraulic shock absorbers. Brakes are disc, 2-piston calipers front and rear. Front tire 2.75–17, rear 150/70–14. | |
| OTHER | |
| The instrument panel is from an Alpha moped, modified. The tank, fenders, headlight are homemade, fiberglass. The seat trim and panniers are homemade (plastic, leather). Dry weight 85 kg, length – 2150 mm, seat height – 640 mm. | |
Choppers were originally options that were converted for street racing. However, later they began to be mass-produced and they became a separate type of motorcycle transport.
The first of them appeared in the thirties of the twentieth century. But the biker movement became truly popular after the war. Since a large number of identical motorcycles were produced, some originals wanted to stand out, and they began to create exclusive models.
Engine
There will also be several options to choose from: you can put in order and boost the original engine, or install an imported or automobile one. For building a classic chopper, the K-750 engine is very popular, because... it has an old school design and look and gives a classic look to the motorcycle design.
This is a low-speed, low-speed classic engine with horizontal cylinders, time-tested and quite reliable. But the engine also has its disadvantages: it is low-power and unsuitable for boosting due to the design of the gas distribution mechanism. This engine has a low compression ratio (about 8:1), designed for low-octane (AI-76/80) gasoline.
It will not be possible to increase it by reducing the volume of the combustion chamber, because the engine is bottom-mounted, and the valve pusher rods are located at an angle relative to the head and the cylinder itself.
Also, if the height of the valve mechanism relative to the engine crankcase changes, the geometry of the structure is disrupted and it will not work correctly.
In addition, the K-750 engine has other disadvantages, therefore, among budget options in a more powerful version than the K-750, late-production Dnepr and Ural engines are more popular: they are much more amenable to boosting, and it is easier to find spare parts for them.
The power system is being redone: Japanese carburetors or a fuel injection system are installed - it all depends on the work budget.
Also, “ZAZocycles” - custom choppers with an engine from the Zaporozhets car - have recently become popular. This is due to the fact that the ZAZ engine is a V-shaped, four-cylinder, air-cooled, and has a relatively low weight (95 kg).
The engine is massive and cheap, all spare parts are available for sale. You can find it at almost any metal warehouse, because... The cars themselves are becoming more and more outdated every year, which is why they are simply sold for scrap.
Such an engine can be purchased either in good condition after repair ($100-150), or at the price of scrap metal at a metal acceptance site.
The Melitopol Motor Plant produced 2 engine options: MeMZ-968 with a volume of 1.2 liters and a power of 40-55 hp. (depending on modification), and MeMZ-966 with a volume of 800 cm3 and a power of 30 hp. MeMZ-966 is 7-10 kg lighter than MeMZ-968, but 968 is more popular due to its volume and power, so it is installed more often, even despite its greater weight.
Also MeMZ-968 is considered more widespread. These engines are more reliable than motorcycle engines and the parts cost less - another reason why they have become so popular.
A big-budget option is an engine from an imported motorcycle, or a small-volume car engine.
Although there are custom monsters with tank engines, and an option from a customizer from the city of Vladimir - “War 5000” with a GAZ-53 engine. 8-cylinder V-shaped 5-liter monster with a capacity of 200 hp. accelerates to 200 km/h.
There are essentially no restrictions here. There are even options with piston aircraft radial engines.
Recently, horizontal engines from old Subaru with volumes of 1.3, 1.5 and 1.6 liters have been gaining popularity among boxers. These engines are compact, weigh about 80-90 kg, equipped with a water cooling system, and they are much more powerful than the above options, not counting, of course, imported motorcycle engines and various tank monsters.
However, their price is higher (about $600-1000), and they are more expensive to repair. Due to the high power, problems arise with a standard transmission if the box and gearbox from an old motorcycle remain in the design.
Gearbox parts often fail, and a lot of time has to be spent on modifying and testing the gearbox. The cardan shaft is manufactured new; the standard one cannot withstand such loads.
Chopper: characteristic features
What distinguishes the chopper most from other motorcycles is its elongated and high handlebars. The rear wing is deep and absent, and some do not have the front wing either. Another insignia is the wide rear wheel or, more correctly, the Great Wide Wheel. That's what bikers call him.
Choppers have a small tank and a characteristic low landing. Driving fast is not for them. Therefore, there is no smell of aggressive dynamics here. This motorcycle is a status motorcycle and is designed for maximum comfort, and not for high-speed rallies.
You can also note soft shock absorbers and high torque, when you can calmly, without straining, drive at high speeds. Its closest “brother” is considered to be the cruiser.
History of creation
In the first half of the 20th century, Schwinn began producing a new class of city bicycles - cruisers, which stood out for their extravagant design. They were not designed for fast driving, but for comfortable riding along park alleys and embankments, enjoying beautiful scenery.
With the advent of chopper motorcycles in 1950, inspired by the stylish image of the motorcycle version, amateur cyclists began to modify their two-wheeled equipment to transport bikers. Enthusiasts installed an original seat (sometimes with a backrest) instead of a regular saddle, installed wide wheels, modernized the fenders, and more. The homemade chopper made from a bicycle looked stylish and extraordinary, while the owners, shockingly riding along the city streets, slowly pedaled their custom bike and caught the admiring glances of others.
In 1963, a new era in the bicycle industry began with the production of the first bicycle choppers by Schwinn. All this is thanks to the professionalism of brand designer Al Fritz, who developed a unique model of two-wheeled transport and convinced management of the cost-effectiveness of the solution. As a result, chopper bikes became a trend among fans of outrageous cycling, and the company expanded production.
On a note! Bicycle lovers, who liked exclusively exclusive versions of two-wheelers, built a chopper with their own hands , tuning the bike in every possible way.
"Ural": do-it-yourself chopper
This motorcycle is far from a cheap pleasure. But you can’t forbid living beautifully; you want to be outrageous! Therefore, converted choppers appear on our roads, which are not only not inferior to factory vehicles, but are also clearly individual and original.
The easiest way to make a chopper from the Ural. It already has everything you need. You just need to work on the rear wheel and lengthen the handlebars. Anyone who understands technology can implement these tasks. They often make choppers not only from Ural, but also from Dnepr, Izha and Minsk. Everything necessary is borrowed from VAZ or ZAZ.
The rest depends on imagination and possibilities. Today you can also purchase chrome parts: fenders, exhaust pipes or trims - and turn an ordinary Ural into a completely exclusive thing.
Chopper bikes
7 minutes Author: Mikhail Skvortsov 205
At a quick glance, you might think that the illustration depicts a motorcycle. Only after two or three seconds does one realize that this is another type of bicycle. A very unusual option, especially for those who see such a bike for the first time. Meanwhile, such bikes have existed for quite a long time, have undergone changes and modernization, and have become widespread among their fans.
The chopper bike is a kind of prototype of the Choppers series motorcycle, a powerful and passable urban giant. The model is very interesting both in appearance and “functionality”: on it the cyclist will feel himself, the road and the environment in a completely different way. Quite intriguing, so we need to take a closer look at the intricacies of this bike.
Frame
This part is very important on any motorcycle, because the type and appearance of the vehicle depend on it. For a chopper, the frame is slightly lengthened and widened for the rear wheel.
At the rear, the length is usually increased by five to fifteen centimeters, depending on the bike itself. Ahead, the need to lengthen arises in order to obtain an “American landing”. Then the control of the brake system and gearbox is transferred to the rod located in front of the engine. But in the case of, for example, the Ural Wolf, this will not be necessary, since it has already implemented exactly this design.
It is best to use the rear wheel no wider than two hundred and ten millimeters so that you do not have to move the driveshaft.
Classic or fashionable surroundings?
Custom bikes with an original frame without additions are considered classic. However, cyclists who want to emphasize their individuality and stylish image prefer to ride bike choppers, which are equipped with various accessories. Eg:
- Often there are specimens with a frame with a design that imitates a gas tank with a company logo;
- the bike is equipped with pneumatic shock absorbers, a system of lights, a bicycle basket, and music systems are installed;
- High-speed modifications with a cassette transmission or planetary hub are also popular;
- if it is a chopper electric bicycle , the electric motor installed on the frame is tuned to fit the gas tank;
You may be interested in the Sports Tourist Bicycle: features of the model
On a note! You can find examples with an electric motor, camouflaged as a stylish bicycle bag.
Other improvements
Sometimes cups are installed under the tapered bearings, the seat line is lowered (if the frame has been lengthened), the front pipes are lengthened, and so on.
If it is necessary to weld pipes, first of all you need to achieve the strength of the seam. Therefore, it is advisable to practice beforehand in order to learn how to work with electric welding.
A problem may also arise with the evenness of the frame. This needs to be taken very seriously and only after the wheels are rolling, you can cook it.
If inconsistencies appear at the assembly stage, you should not resort to a sledgehammer. Failures happen quite often, but it is best to be patient and ensure that the original actual assembly matches the prepared drawing.
As a last resort, you can leave the work in the hands of professionals. Then the stylish “Ural Chopper”, the photo of which you see, will be at the finish line too.
How to build a chopper?
This question was probably asked by everyone who rolled out his grandfather’s Ural from the garage or bought a used Japanese one. After all, a chopper is a one-piece motorcycle, not mass-produced, but many people want to become the owner of such a bike. Making a chopper is a complex and never quick process, and the donor can, in principle, be anything, from the aforementioned Soviet Ural to a sportbike, if desired.
Of course, the canonical chopper is equipped with a V-shaped twin, and is most often made from a serial cruiser (we will keep silent about the British with their in-line twins on Triumphs; this is a topic for a separate article). What is needed so that the result of our work can be proudly called “chopper”?
Let's start with landing. No “legs under you”, legs should be extended forward! If the design does not initially provide for this, then we make “leg extensions”, also known as forward control, for which you will have to move the driver’s footrests, the gearbox foot and the rear brake pedal. You can either come up with something of your own or purchase a ready-made kit somewhere in an American online store. But we are not looking for easy ways, right?
Next comes the fork. It must be long! But not too much, otherwise your motorcycle won't be able to turn. In addition, if you are already extending the fork (the easiest way to achieve this is by installing spacers made from stainless steel pipes), take care to make new yokes. This is necessary in order not to change the tilt of the engine relative to the ground. If you neglect this and simply lengthen the fork, the angle of the motor will change, and it can more or less quickly die from oil starvation, since it will not be properly lubricated.
It would be nice to put the rear wheel wider. Just don’t put on a car wheel—car tires have a square profile, while motorcycle tires have a round profile. Thus, a motorcycle with a rear wheel from a car will turn very poorly. In the case of a chain or belt driven rear wheel, the width of the rear roller will be relatively easy to play with, although you may have to make a different pendulum. If you have a cardan drive, then you cannot do without overcooking the frame.
It is also worth paying attention to the steering wheel. This is, of course, a matter of taste, but on a canonical chopper it should be high. This, however, is the simplest part of tuning - the steering wheel and racks are easy to make to order or buy ready-made ones, and increasing brake lines, wiring and replacing cables is not difficult for a more or less trained person.
The gas tank on a chopper is traditionally small in volume and teardrop-shaped. You can choose a suitable one, but most often they take some old tank, wash it, cut it and digest it.
The suspension on the first choppers was “dry”, the so-called “hardtail” (English: “hard tail”), which means, in fact, the complete absence of rear suspension. Doing this is not recommended due to the real chance of causing problems with the spine, which will then have to be painful, long and expensive to treat.
The rest is a matter of taste. Backs, wings, coloring... There are so many people, so many opinions. Let us only venture to note that the radical chopper is of little use for our conditions. In addition, driving without normal light optics and a front brake is simply dangerous.
December 2, 2011
I bought the 17″ front cast wheel in a store, but I had to make the rear one myself. I bought a 14″ spare from a foreign car, cut out the inner part, leaving only the rim. Then I cut out three large spokes from 5mm sheet metal with a jigsaw and welded them to the rim in a wooden slipway. The assembled wheel together with the 150/70–14 tire weighs almost 15 kg. I ordered the hub and a few other parts from turners.
I bought the 17″ front cast wheel in a store, but I had to make the rear one myself. I bought a 14″ spare from a foreign car, cut out the inner part, leaving only the rim. Then I cut out three large spokes from 5mm sheet metal with a jigsaw and welded them to the rim in a wooden slipway. The assembled wheel together with the 150/70–14 tire weighs almost 15 kg. I ordered the hub and a few other parts from turners.
| SPECIFICATION | |
| Construction | Andrey Petrov, Velikiye Luki |
| Name | Nomad |
| POWER UNIT | |
| Chinese clone of the 50 cc Honda “super cab”. 4-speed Gearbox, clutch in oil bath, ch. transmission - chain. | |
| CHASSIS | |
| Duplex steel frame, made in-house. Front suspension - telescopic fork; rear suspension - pendulum with two hydraulic shock absorbers. Brakes are disc, 2-piston calipers front and rear. Front tire 2.75–17, rear 150/70–14. | |
| OTHER | |
| The instrument panel is from an Alpha moped, modified. The tank, fenders, headlight are homemade, fiberglass. The seat trim and panniers are homemade (plastic, leather). Dry weight 85 kg, length - 2150 mm, seat height - 640 mm. | |
Latest improvements
If you manage to weld a high-quality frame, then you can assume that most of the work has already been done. The only thing I wanted to add was the angle of the front fork. We do not recommend tilting it more than thirty-three degrees. This value is the most optimal for choppers, because the greater the angle of inclination of the front fork, the worse the motorcycle will handle. In our opinion, 28-30 degrees will be more than enough to make the motorcycle look like a real chopper from the Urals, and at the same time handle well.
The last stage is the final assembly of the motorcycle. The engine and other main mechanisms are installed on the frame. The front wheel and handlebars are finally in place and we can see for the first time what our bike looks like after the rework. But in general, the frame is not the only thing that can be done with a Ural motorcycle.
True motorcycle enthusiasts can put all their soul and money into their custom motorcycle, and end up with a Ural Chopper that will delight them for a long time. Installing and reworking the exhaust system, upgrading the fenders, seats, lighting fixtures are just a small part of what can be changed. When modernizing the appearance, you can fully express your imagination or borrow ideas from ready-made choppers.
Source
Frame making
Step 7: First Stage
To cut the frame, it must be turned over and secured.
After some actions, the carriage became closer to the front of the bike. Now the frame needs to be lengthened.
We set aside the double top tube, which will look good on a chopper.
It is better to make a mock-up of the future frame before starting assembly in order to correctly place the wheels and determine the desired height of the frame. To do this, it is enough to support the carriage and lengthen the frame using thin pipes.
In the variant under consideration, the top tube turned out to be located a little low, so it had to be bent so that the saddle was at the required height. This must be done carefully so as not to break the pipe.
Well, if this happens, welding will help correct the situation.
If the design is satisfactory, you can move on to the next step, in which the frame is lengthened using steel pipes placed in the gap between the carriage and the two pipes running from the seat tube down.
This is where you will need a model to measure the length of two pipes. Because the angle of the down tube changed, it was necessary to make a bend near the bottom bracket. A pipe bender was used for this.
For now, the seat tube remains dangling, not secured to anything, so that’s what needs to be addressed.
We will again use the cardboard as a template to make another plate of sheet steel, which will be welded to the top of the horizontal pipes under the seat tube.
So the strength of the connection between the new two pipes and the rear ones will be increased. After this, the seat tube is welded to the plate.
The top tube was left dangling.
Another plate made of steel, and a socket made with a grinder in the seat tube, into which it must be inserted and welded, thus increasing the strength of the connection and reducing the load on the weld.
All that remains is to weld the two upper pipes to the steel plate, and they will stop hanging around.
Step 8: Stage two of making the frame
All that remains is to strengthen the frame structure. This can be done using another steel pipe, welding it between the carriage and the top pipe. This makes it possible to change the location of the seat tube, which is currently directed towards the rear of the frame.
Again, using the template, we make a plate and weld it to our pipe: lightly at first, and after selecting the angle, finally. The pipe should not touch the carriage axle. It should not go deep into the carriage.
This is what a finished frame looks like, made in-house for a chopper.
Step 9: How to make a saddle for a chopper?
A plank structure is suitable. In order to make it soft, we use foam material, and for aesthetics we use leather.
The two boards are fastened together using bolts. In the bottom you need to drill two holes through which the seat will be attached to the plate. It must be securely fixed using bolts and nuts.
A construction stapler will help secure the upholstery material with staples.
The leather is also stapled to the seat.