Legality of homemade brake lights
The rules regarding car tail lights do not contain any detailed data on the spectrum of light color, focus, etc., there are only geometric rules for the distribution of light on the car, generally defined colors and a precisely defined range of visibility.
In the end, commercial LED lamps are often too overloaded, they have too small limiting resistors, because the manufacturer thinks that when he puts 3 or 4 diodes in a row, it is already almost 12V and puts a tiny resistor accordingly. Consequently, the likelihood of problems with headlight failure increases.
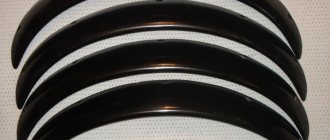
Manufacturing of diode rings
To create taillights with your own hands, you need the same epoxylin and strong glue. The basis is diode rings or tape. The body will be made from small and large reflectors, which can be found on the hardware market. The last element is the paint, which the motorist likes best. Most VAZ 2114 owners choose chrome paint.
- Diode rings must be installed in cylinders, which are best made from tin cans.
Coffee or canned food cans are suitable for this. Processed tin can - They must be carefully cut out so that at the end something similar to a well appears. There should be two of them - internal and external. If a coffee can can serve as the basis for an external well, then the internal one can be made from an ordinary 0.5 liter plastic glass and then painted.
- Now simple Soviet cataforts should be installed in the internal wells.
They should provide illumination according to the standard scheme: turn signals - orange, reverse - white, fog lights - red. After this, extra elements may remain from the large catafort, which will look great inside the module. The rest of the space can be decorated with any LED ring. Decorated wells look impressive, but you can’t see what they were made of - The next procedure is to install the reflectors and LED rings. In order for them to hold securely, it is necessary to make stiffening ribs, as an option - epoxylin.
- You can put additional lighting on the plexiglass and secure it with epcosilin.
As a result, you should get such tuning yourself. Detailed visual aid for installing LEDs in VAZ optics:
Color film
Another budget option for tuning car optics is a color film sticker. This method does not require significant financial costs and a lot of time. You should prepare in advance:
- sharp knife and hair dryer;
- marker and rubber squeegee;
- soap solution and napkins;
- tint film of the desired shade;
- headlight installation tool.
Tuning headlights with color film
As in previous cases, it is recommended to dismantle the optics, clean, rinse and dry. Further work is performed in the following order.
- Placing the color film on the headlight and marking the contours of the workpiece.
- Cutting out the part along the marked lines.
- Degreasing the glass surface.
- Removing the protective film layer.
- Applying soap solution to the headlight.
- Gluing the workpiece and smoothing it out.
- Installation of optics in a regular place.
Tuning headlights with color film
To avoid the appearance of air bubbles and/or folds, the film should be smoothed with a rubber squeegee, which is done slowly, while simultaneously heating the surface with a hairdryer.
Step-by-step assembly instructions
To assemble a diode tail light with your own hands, you can use various instructions. Let's consider the simplest and cheapest option for making such a lighting installation with your own hands, based on the use of an LED ring. For this we will need the following materials:
Cree LED Reversing Light
- red diodes with a diameter of 5 mm (64 pieces). You can take medium brightness;
- for stops – 20 LEDs with increased brightness;
- resistance (120, 150 and 270 Ohms);
- 12 V power supply – needed for testing;
- a can of matte black paint;
- 4 pieces of plastic. They should be even;
- 4 voltage stabilizers, which will be used for dimensions.
Tools you will need:
- screwdriver;
- glue gun;
- wire cutters;
- knife;
- heat shrink;
- soldering iron;
- tester;
- technical hair dryer.
Step-by-step instructions for assembling the lantern are as follows:
- We cut off the glass from the old headlights. To do this, it must be constantly heated with a hair dryer;
- Next, we take out the light diffusers and paint the reflectors black;
Headlight without diffusers
then from a piece of plastic we form a platform for placing LEDs in it and implant the LEDs into it;
Prepared plastic platform
- We solder the leads from the standard headlight sockets to the LEDs and connect them to check that the light sources are connected correctly;
- We solder stabilizers into the electrical circuit;
Soldered circuit elements
We put a reflector painted black on top of the diodes;
we install all the components of the lamp in place;
Reinstalling the LED backlight
DIY LED headlights
- After that, glue the headlight glass back onto the sealant. The sealant takes a couple of days to harden;
- Next, we remove the bumper and under it we find the guides with which the headlight is held on it;
- carefully screw the headlight into place, having first connected all the wires.
Finished tuning result
The steps described above must be repeated for all lights that are located at the rear of the vehicle.
Connecting LEDs to car wiring
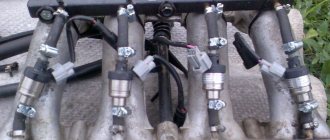
All three headlight segments are mounted on a common board made of 1.5 mm thick fiberglass, cut to a shape that exactly matches the contour of the rear headlights. After testing several types of LEDs, Super Flux (with lens) with 80 degree beam angle, 5mm diameter and 20mA current was applied.
The diodes themselves are mounted on a universal board with current stabilization based on resistors, instead of a special driver, and this thing looks a little careless, only it is hidden between the reflector and the diffuser, so only the geometrically correct configuration of the modules is important.
The three panels are connected in parallel and powered directly from the car's 12V wiring using an adapter simulating a lamp base (made from a burnt out light bulb).
The design of the panel itself is 4 LEDs connected in series (horizontal lines), each line has its own resistor (180 Ohm / 0.25 W) limiting the current. The lines are connected in parallel - everything is powered by a rectifier diode connected to the positive wire.
Weaker parking lights are implemented by supplying power from a second rectifier diode in series with a 390 ohm/0.5 W resistor.
Everything draws current in the 0.5A range (a regular light bulb is about 2A). The diodes operate under ideal conditions - a voltage of 2.2 V and a current of 20 mA are almost nominal recommended values. Now the durability of the entire lamp will depend only on the reliability of the LEDs themselves. The use of a limiting resistor of 300 - 470 Ohms for each LED makes its operation essentially eternal, since the permissible current will not be exceeded, even when the voltage increases abruptly to, for example, 18 V, which is already a definite malfunction of the car. When there are several LEDs in series across this resistance, there is even more confidence in longevity.
This may not be a perfect solution, but with a well-functioning auto voltage regulator and a functional battery, voltage spikes should not exceed 14.8 - 12.8 = 2 V or 0.5 V per diode.
Do-it-yourself round taillights for a VAZ 2110
This article will be of interest to those who decided to replace the rear lights on a VAZ 2110. For those who have another car, this will be an excellent example for such a homemade product.
Today we will look at how to make round headlights, like those on legendary sports cars. Unfortunately, for the VAZ 2110 there are no such kits so that they can be installed, so here you have to do everything yourself. There are several options for how to make such headlights. The easiest way to do this is by remaking the standard VAZ lights. But in order to do everything efficiently and beautifully, you will need to put in a certain amount of effort and spend some money. Let's consider each modification option separately. Option 1. Reworking the standard VAZ taillights For such a modification you will need 56 red LEDs 5 mm in size. That is, there are 16 LEDs for each brake light size. You will also need to buy 8 LEDs for yellow turn signals.
The author decided to arrange the inner circle for turns, and the outer one will work as dimensions.
Creating dimensions
First, the LEDs will need to be mounted on any round platform. Due to the fact that the rear lights of the “dozens” cannot be disassembled, the author had to break the rear part. Then you can drill holes and install a round platform with LED diodes in them.
How to make brake lights:
Here the author decided not to use a platform, but simply attached the diodes in a circle on the wire. In the headlight, you also need to drill holes in the same way and then insert diodes in a circle. Since the diodes are inserted with some effort, the author did not use additional fastening for them. And finally, the headlights are painted to match the color of the car. This work took only 3 days.
Fine for LEDs and LED lamps in automotive optics
Another way to create round flashlights It is unlikely that you will be able to buy such optics for tuning in a store today, but they sell elements that will allow you to make it yourself.
Those car enthusiasts who purchased taillight masks noticed the following feature: 1. Such a mask does not have fastenings to the body and for installing optics; 2. In order to hermetically install the modules into the mask, you need rubber seals under them; 3. And yet, the holes in the mask for installing modules need to be improved.
Using universal rear round headlights In tuning departments you can still find such elements as universal round headlights. They come in several types. They are distinguished by quality, price and manufacturer.
In the first case, you can purchase the Pro-Sport kit, it is the cheapest, but has one drawback. Incandescent lamps are used here, and this leads to heating and, as a result, deformation. In this regard, everything will have to be modified, namely, changing incandescent lamps to LEDs, and this is investment and labor.
There is also a Hella kit, it costs twice as much, but is of higher quality. These headlights also shine much longer.
It is also important to note that these headlights are 2mm larger in size
At the end of all the work, we get round headlights that are perfectly integrated into the car without gaps. Everything looks like these headlights were installed from the factory. In the photo you can see what the shape of the rear mask looks like after modification.
Below is a collection of cars that have had round headlights installed.
Conclusion
In conclusion, we can say that you won’t be able to buy a ready-made kit for such tuning in a store. In any case, the car and the headlight will have to be modified for a quality installation. Regardless of the chosen tuning method, be it installing diodes in existing headlights or installing universal headlights using putty, in any case the car will become unique. Source
Become the author of the site, publish your own articles, descriptions of homemade products and pay for the text. Read more here.
Advantages of LED optics
LED lamps in automotive optics
Of course, the head lighting in any vehicle should be universal - the driver will not change the angle of the lamp every time if necessary to switch the light. If the driver is doing tuning or simply wants to improve the road lighting of his car, you can opt for xenon. But xenon lamps are an order of magnitude more expensive and they will never have the same luminous flux as many diode light sources.
Below we will briefly consider the advantages characteristic of LED light bulbs:
- Thanks to the use of several dozen sources, the driver will be able not only to improve visibility of the roadway, but also the side of the road. Any diode headlight, be it low beam or fog lights, has 45% more space coverage. As for the coverage angle, everything depends solely on the optics installed on the car.
- If the settings of the right and left lights are different (we are talking about ordinary halogen lamps or xenon), the right headlight will in any case illuminate the space worse. This is because it will rest against the asphalt in order not to blind drivers of oncoming cars. As for diode light bulbs, they do not have such a drawback.
- Another advantage of diode bulbs for cars is selectivity. Each individual diode unit allows, when properly configured, to illuminate a certain section of the road in front of the vehicle. Accordingly, controlling a headlight divided into several sectors will be simpler. Moreover, unlike xenon, the driver will not have to use servos for this, the cost of which is already quite high; only current will be enough for this.
- Service life. As you know, LED lights have a longer service life compared to other light sources. The minimum service life of diode elements is 100 thousand hours. It should also be noted that diode bulbs are not afraid of vibration, as well as breakdowns in the suspension, which also helps to increase the service life.
- Device availability. Diode light bulbs can be purchased at any store at an affordable price. As for the cost of control devices, it all depends on the experience and knowledge of the car enthusiast who will install the car diodes with his own hands.
Designation of vehicle optics
Today, many global manufacturers are engaged in the production of diode light bulbs with different colors and illumination range. We are talking about both head lighting and rear optics. This indicates that LED technology has already been tested and can today be used for self-installation on a car.
Taillight tuning
Today there are many options for improving rear optics. The simplest and most affordable of them are: shiny stickers, powerful light bulbs with tinted film, LEDs and overlays. Let's take a closer look at these methods of tuning a car.
- Stickers can hardly be called a stylish or unique way to add originality to taillights. Most likely, this is children's fun that no one takes seriously.
- Powerful light bulbs are usually installed with a tinted film that darkens the diffuser. Such modernization of optics is completely ineffective and is fraught with bad consequences. More powerful lamps create additional load for the generator and lead to overheating of the wiring. The consequence of such modernization may be that the rear lights do not light up completely.
- LEDs are the most original way to give your car a stylish and presentable look. It allows you to implement various unique design solutions at minimal cost with maximum efficiency.
- Overlays are the most common and affordable tuning option for any car model. Today you can buy various types of ready-made kits, but standard standard kits are not particularly original and do not always look impressive on a car. More unique can be taillight covers made with your own hands using fiberglass and epoxy glue.
Rear lights VAZ 2106
Each of the two rear lights of the “six” is a unit consisting of several lighting fixtures that perform separate tasks.
Rear light functions
Rear lights are used for:
- designations of vehicle dimensions in the dark, as well as in conditions of limited visibility;
- indicating the direction of movement of the machine when turning, turning;
- warnings to drivers driving behind about braking;
- lighting the road surface when reversing;
- car license plate lights.
Taillights perform several functions at once
Rear light design
The VAZ 2106 is equipped with two rear headlights. They are located on the rear of the luggage compartment, just above the bumper.
Each headlight consists of:
- plastic case;
- lantern dimensions;
- direction indicator;
- brake light;
- reversing lamp;
- license plate light.
The headlight housing is divided into five sections. In each of them, except for the middle one, there is a lamp installed that is responsible for performing one or another function. The body is closed with a diffuser (lid), made of colored translucent plastic, and also divided into five parts:
- yellow (turn indicator);
- red (dimensions);
- white (reversing light);
- red (brake warning light);
- red (reflective).
1 — direction indicator; 2 — dimensions; 3 — reversing lamp; 4 - brake light; 5 — number plate illumination
The license plate illumination is located in the inner protrusion of the housing (black).
Application of LED in cars
LED products have not bypassed the industry of cars and accessories for them. Each subsequent generation of cars had more and more LED light sources in its configuration.
Initially, they were installed to illuminate the dashboard and display on it, interior lighting, and light when opening doors. When it was possible to achieve high brightness readings, they began to be installed as side lights, brake lights, and DRLs. The pinnacle of development was LED low beam/high beam lamps. The special design of the luminous element, power supply, and cooling made it possible to achieve this goal.
LEDs have advantages over incandescent lamps:
- Lights up instantly;
- consume low current;
- provide a bright luminous flux.
Unfortunately, LEDs are very demanding on the stability of the supply current. While driving, the on-board voltage can vary from 13 to 14.7 volts, depending on the engine operating mode.
Tail light tuning options
LED overlays, diode rings for lights, individual LEDs and powerful light bulbs in a darkening film - tinting are very popular. Each option for decorating optics deserves attention:
- LED overlays.
Among VAZ car owners, this is the most popular and inexpensive tuning for headlights. Nowadays you can find a huge number of overlays, but among motorists, diode overlays that were made by hand are more valued. Drivers adhere to this opinion due to the fact that ready-made options most often do not look original, and choosing a suitable option for 2114 is very difficult. LED overlays can be made from two main materials: epoxy glue and fiberglass. Standard set of LED overlays - Diode rings. Tuning appeared not so long ago; it is a complete replacement of taillights with hand-made products. To make diode rings, you need to have experience working with electronics.
- Powerful lamps. This type most often comes with a tint film, since the pure glow is too bright, and the tint perfectly captures the light. In some cases, powerful lamps look impressive, but they have a number of disadvantages: high load for the generator, increased fuel consumption, overheating of the wiring. For the VAZ 2114, such tuning is quite doubtful, since the engine does not have much power.
- Separate LEDs. The most creative option: here you can use your imagination and various design solutions. The downside is the waste of time on developing the “drawing” and editing. In this case, it will be more profitable to buy LEDs separately.
UAZ 31512 EA › Logbook › LEDs in the rear lights
Recently I accidentally found out that all my rear lights only have turn signals. I thought about LEDs in the stopari even with the last car. And since opportunity and desire coincided successfully, I decided to assemble my own taillights using diodes.
I’ll say right away: it took 110
(one hundred and ten) cm of tape.
I use the punched card as a pattern for the backing.
It can be seen that a couple of pieces on the edge are soldered strangely and glow so-so (I shorted them by accident :).
I thought I'd score. But UAZDao didn’t let me make a mistake: 10. If in doubt, redo it! Unscrew it twice and three times, file it, lubricate it, tighten it, paint it and change the gasket. For perfection is unattainable, but one should strive for it.
Resoldered. Ugly, but uniform. The central one also glows strangely, but that’s how it is from the factory.
We have to turn again to the great book: 18. However, in the search for perfection, do not strain yourself too much - you will strain yourself and become despondent. For it is said: “If Beauty saves the world, then I don’t care about nerves...”
I used LED strip packaging as a substrate.