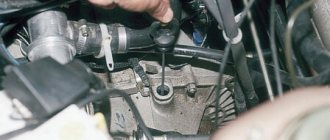
When to replace
All transmission units (manual transmission, transfer case, both axles) are serviced simultaneously.
The first time, according to the service book, this must be done after driving 45 thousand kilometers, the next replacement of transmission fluids is carried out when the speedometer shows an indicator of 105 thousand kilometers, then every 60 thousand km. mileage To avoid them for as long as possible (driving 300,000 km on a Niva with regular scheduled maintenance is not a problem), it is recommended to change the oil in Niva axles 2121, 21213, 21214 and other modifications every 50 - 60 thousand kilometers, and when operating the car mainly in difficult conditions - after 30 - 40 thousand.
How to change the lubricant in the transfer case
Under normal conditions, changing the oil in the Chevrolet Niva transfer case should be carried out at least once every 60 thousand km. In difficult conditions, this procedure can be carried out more often. After the mileage of 120 thousand km is exceeded, it will be necessary to start changing consumables more often. This will need to be done every 45 thousand kilometers.
When deciding on the frequency of lubricant replacement, it is worth considering many factors, including the conditions of use of the vehicle. If the car often drives on country roads, then dust and dirt may accumulate in its components.
As a result, the transfer mechanism, as well as other vehicle components, may no longer function normally. In addition, moisture can penetrate into the lubricant from the environment. This may also not result in the best consequences. In addition to being protective, lubricating fluid also performs a cleaning function.
It is better to replace the “consumables” in the transfer case after the car has driven at least 5 km. It is important that the lubricant warms up. This way it will be more fluid.
To carry out the work you will need a lift or inspection hole. Immediately prepare a container to drain the old fluid and rags to remove smudges. You will also need a key for 12 and a syringe for refilling.
Niva 2131 how to fill oil into the rear axle housing video
Home » Articles » 21214 Niva oil change in transfer case
For any vehicle, the importance of timely replacement of lubricants cannot be overestimated. Oils used in components and assemblies subject to friction at high speeds significantly reduce their overheating and wear, helping to extend their service life.
Among such components, one cannot fail to note the transfer case, which is equipped with all-wheel drive vehicles.
note
Both old Niva cars and models under the Chevrolet brand, produced since 2002, need no introduction - these are one of the most popular all-wheel drive vehicles in our country, which have earned the love of motorists for their unpretentiousness, ease of maintenance and low cost.
What is especially pleasing is that the vast majority of maintenance operations on a domestic SUV can be performed independently, without turning to the help of specialists or a car service center. In particular, this also applies to changing the oil in the Niva transfer case - a procedure that does not require special professional skills or special tools.
Also interesting: Niva 4x4 jungle camouflage - Auto Magazine
The oil in the Niva transfer case should be checked every 10 thousand km.
07.12.2017
The Niva 21214 car is distinguished by its increased cross-country ability on roads. The car has an engine that has a volume of 1.7 liters, which complies with Euro-4 standards.
The transmission system includes a transfer case with a crankcase ventilation system. All components on the VAZ 21214, just like on the VAZ 21213, are characterized by a long service life.
It is important to take proper care of the automotive system and select high-quality oil for the Niva.
The Niva SUV (VAZ 2121), which has all-wheel drive and is equipped with a manual transmission, is capable of producing 75 horsepower.
HomeVAZ 2110 Niva 2131 how to fill oil into the rear axle housing video
Filling volumes for a VAZ 21214 car
It’s one thing to buy a car, and another to know and understand what to do with it: what to protect it from, when to “feed” it, how to operate it. No matter what kind of car you own, sooner or later you will need to refuel it. Today we will talk about the filling volumes of the VAZ 21214 and what to fill where.
First of all, let's talk about the fuel tank. Its volume in the VAZ 21214 is 42 liters (including reserve). Fill with gasoline with an octane rating of 91 to 93.
The fuel supply system is necessary to power the car engine, as well as its cleaning and storage.
The volume of the cooling system is 10.7 liters, which also includes the interior heating system. Fill in coolant whose freezing point is not higher than minus 40°C.
Cooling system - devices that provide supply of cooling medium to heated engine parts and removal of excess heat, i.e. maintaining the engine within the required thermal limits.
Engine lubrication system - 3.75 liters. It is necessary to select a specific oil, depending on the ambient temperature.
-20°С +40°С SAE 15W-40
-25°С +45°С SAE 10W-40
-30°С +45°С SAE 5W-40
-25°С +35°С SAE 10W-30
-30°С +35°С SAE 5W-30
The main task of the lubrication system is to reduce friction of mating parts. It also provides cooling of engine parts, protection against corrosion, removal of wear products and carbon deposits.
The filling volume of the gearbox housing is 1.35 liters, the transfer case housing is 0.75 liters, and the front axle housing is 1.15 liters. and rear axle housing 1.3 l. To fill these units, gear oils with a quality level corresponding to API GL-5 and a viscosity of 75W-90 are suitable.
Choosing the right gear oil
All Niva transmission components are filled with the same mineral oil at the factory. During maintenance, they usually fill in the same oil, and not always of good quality. This fluid is really good, but only for the break-in period of a new car. When driving 10 - 15 thousand km.
It is recommended to replace mineral water with semi-synthetic water, which has better performance characteristics. Synthetic lubricants for Niva axles are not the best choice, since in hot weather their viscosity is so low that the chances of oil seal leakage increase. In severe frosts, the mineral water thickens so much that both changing gears and moving the car becomes very difficult until it warms up.
The viscosity of transmission oil for Niva 2121, 21213, 21214 is 75W90. You can fill in any mineral or semi-synthetic transmission fluid with the appropriate characteristics. At the same time, 1.3 liters of oil is poured into the rear axle of the Niva of all modifications, and 1.15 liters into the front axle. The oil volume in the Niva's rear axle is slightly larger, since this is, by definition, the main drive axle, and the load on it is generally slightly higher.
And also interesting: What kind of oil to pour into the transmission, transfer case and axles of Niva Chevrolet || Oil for taiga fields
Changing the bearing
We prepare the bit, hammer, sealant and a special puller for the retaining rings, after that:
- Removing the wheels
- We take out the retaining ring from the bearing, to do this we take a wooden spacer and knock the bearing off the shaft with a hammer
- The wheel has an inner CV joint from which the oil seal must be removed
- We lubricate the working edge of the oil seal, and apply sealant to the outer part.
- We take a hammer and press the oil seal back into place, after which we install all the parts back.
The Chevrolet Niva front axle gearbox must be removed if repairs or replacement are necessary. In order to carry out all the necessary actions you need to have special equipment and certain skills. If the work is carried out in a garage, you may not achieve the desired results. Therefore, if you do not have experience in replacement, then it is advisable to contact specialists for a special service.
Low oil level or dirty oil
If the dipstick indicates that the oil level is low, touch the end of the dipstick with two fingers and feel the texture of the oil. If the oil is clean, you can add new oil through the funnel. If the oil is large, it must be changed as soon as possible.
The oil in the picture looks black and grainy, it's time to change it
Checking the oil level in the car. a simple task that only takes a few minutes to complete. Knowing how to check your oil will help you make sure your engine is lubricated properly.
Clean the dipstick and reinsert it
Once you find and remove the dipstick, clean it with a rag and insert it back in. Make sure the dipstick is inserted all the way.
Warm up the car
Check the oil while it is warm. This is a great time to check your oil. this is after a quick trip to the local market or neighborhood.
Here's the entire procedure on video to see how easy an oil change can be:
Read the user manual
If you're completely unfamiliar with what's under the hood of your car, you'll find a detailed description of where your dipstick is located in your owner's manual.
Open the hood
Pull the handle located inside your vehicle, usually on the driver's side door, and press the lever located under the center of the hood. Make sure your car's hood is securely fastened.
There's no point in being embarrassed if you don't know how to open the hood. Watch this short video to get a hint:
Turn off the car
Make sure you turn off the car before starting the oil checking process.
Replacing transmission fluid
To change the oil in the front axle, you need to prepare the following tool:
- A set of keys
- Hexagon
- Container where we will drain the liquid
- Big syringe
It is advisable to drive a little and warm up the chassis, since it is better to replace it with a hot one, after which:
- We find the front gearbox of the Niva Chevrolet and unscrew the drain plug and drain the waste fluid into a container prepared in advance
- We take a syringe and pour new transmission fluid into the filler hole, pour until it is filled to the desired level. After this, you can screw the lid back on.
Sources:
https://newniva.ru/masla-zadnego-mosta-niva.html https://avtoarsenal54.ru/obsluzhivanie/zamena-masla-v-perednem-mostu-niva-21214.html https://fenix72.ru/ raznoe/kak-pomenyat-maslo-v-perednem-mostu-nivy-shevrole.html
VAZ 21213: oil change in all units
Filling with oil
Many car owners are faced with the task of having to perform maintenance on their car.
At the same time, some perform the maintenance with their own hands and enjoy the repairs, and at the same time save their money, some prefer to spend money (so as not to get dirty and mess around) and take the car to a car service center, blindly trusting their iron horse to strangers.
And, by the way, changing the oil of the VAZ 21213, as in other models, is a responsible process and the service life of all components of the car directly depends on its correct and timely implementation! The replacement process is simply elementary, it doesn’t take much time, and anyone can do it themselves.
Changing the oil in the Niva 21213, 2121 gearbox
According to the recommendations of the VAZ manufacturer, the oil level should be checked after every forty to sixty thousand kilometers, but practice shows that it is better to do this at least twice as often. If, during inspection, you find that the oil is dirty and smells of burning, this means that it needs to be changed immediately. This procedure is easy to carry out yourself. Changing the oil in Niva 21213 is done in exactly the same way as in 2121.
Changing the oil in the gearbox.
The entire operation must be carried out in the inspection hole, and before the operation you need to drive eight to ten km so that the oil warms up.
If you are changing the oil for the first time, the first thing you need to do is find the filler neck. It is located on the left side and may not be immediately noticeable due to the gimbal. Do not confuse it with the technological plug, which is located on the right.
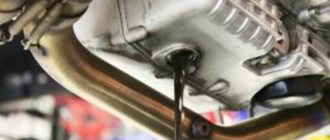
Having found the neck, take a 12mm hex and unscrew the drain plug.
Place a container near the neck and let the oil drain.
Next, clean the plug magnet from dirt and metal particles and screw the plug back on.
Now take the 17 key and unscrew the filler plug.
Then, using a special syringe, fill the oil to the bottom edge of the hole and tighten the plug.
All.
By the way, sometimes it happens that the box becomes clogged with metal shavings or the seals begin to leak. In such cases, you just need to add oil.
Sequence of actions for changing the oil
Draining the old oil and filling in new oil in the front and rear axles of the Niva is a generally similar procedure, but differences still exist due to the design features of the domestic SUV. Changing the oil in the Niva's front axle is carried out simultaneously with changing the fluid in the gearbox; in any case, you will not need other tools and materials, including:
- a special technical syringe (or a funnel of suitable size and geometry);
- hex wrench 12;
- 17 mm spanner (working with a socket wrench will be extremely inconvenient and ineffective);
- rags, container for draining waste.
The drain hole can be found on the lower plane of the front axle, the filler hole is located on its side wall.
The procedure for changing the oil in the Niva's front gearbox:
- Place a container prepared in advance under the drain hole.
- When the filler plug is unscrewed, the draining process occurs noticeably faster, so first unscrew it.
- Unscrew the drain plug with a hexagon.
- We wait until the old lubricant flows out (this takes an average of 15 minutes).
- We screw the drain plug into place, having previously cleaned it and the seat from dirt and old oil.
- Fill in fresh transmission fluid in a volume equal to the amount of waste (this is a little more than a liter).
- We tighten the filler plug.
And also interesting: Chevrolet-Niva hood deflectors in Balashikha, buy inexpensively in the online store with delivery | 40NOG
To change the oil in the rear axle of a Niva, you will need the same tool, since both the drain and filler plugs are the same. However, the procedure itself is practically no different, with the exception of the location of the gearboxes:
- place a suitable container under the drain hole;
- use a hexagon to unscrew the drain plug located at the bottom of the rear gearbox;
- drain the old lubricant (this will take a total of 10 - 15 minutes);
- thoroughly clean the plug itself and the area around the drain hole with a rag;
- we screw the plug into its regular place, but without fanaticism;
- Unscrew the filler plug located in the middle of the rear axle using a 12mm wrench;
- fill in fresh lubricant in a volume equal to the collected one, use for this either a technical syringe or a funnel with a connected hose;
- if the liquid does not reach the lower edge of the filler hole, add it until it begins to spill;
- clean the filler plug together with the seat from drips and dirt, tighten the plug;
- Usually, when changing the oil in the rear gearbox, they unscrew and clean the breather, put it in place, replacing the gasket if necessary.
As you can see, pouring new oil into both the front and rear axles of the Niva is a simple procedure. And, as already noted, it is carried out together with the replacement of lubricant in the gearbox and transfer case during TO-4, TO-8 and so on.
Read news about the new Niva
- Changing the oil in the Niva Chevrolet transfer case: which transmission oil is better to pour into the box and axles, volume in the gearbox, do-it-yourself replacement
- Front axle. VAZ 21213, 21214 (Niva)
- Replacing the drive gear oil seal of the front axle VAZ 2121 Niva 2131
- Quantity of oils and fuel liquids VAZ 4×4 2121 Niva
- How to remove a brake drum on a Chevrolet Niva
- Hard or soft brake pedal. What is the reason and what to do
- How to bleed the brakes of a Niva Chevrolet
- Rear disc brakes
Replacing the oil seal
If an oil leak appears, the oil seal most likely needs to be changed. To replace, you will need a standard set of tools, a hammer, a torque wrench and a screwdriver. After the tool is prepared, do the following:
- Turn off the engine and turn off the gear
- We take and drain all the liquid from the crankcase and disconnect the front driveshaft from the flange drive gear reducer.
- From where the axle gear engages, we remove the body of the internal hinges
- We determine where the resistance to rotation of the flange nut occurs and change the oil seal.
- We put everything back in its place in reverse order.
