Repairing auto parts yourself is a responsible task that should be taken as seriously as possible. Sometimes a faulty spare part takes the driver by surprise, forcing him to spend a lot of time and money searching for a good service station, but there is an alternative solution to the problem; this requires a small amount of knowledge and a set of tools.
When repairing Appendix 4. filling volumes, l VAZ “OKA” 1111 1988-2008, you need to be extremely careful and not neglect the little things. To get acquainted with the issue, car enthusiasts often use various Internet portals dedicated to auto parts. Some of them use narrowly focused forums. But, as a rule, only generalized information is provided there, which is known initially. Where can you find a reliable source that offers really useful things? Our portal is open for this 24 hours a day. Online mode allows us to help clients at any time convenient for them. Moreover, a mobile version has been developed that is available to everyone.
A detailed description of such a unit as Appendix 4. refueling volumes, l VAZ "OKA" 1111 1988-2008 has a good structure with thematic headings. In addition, there is always the opportunity to familiarize yourself with the intricacies of installation. There are often situations when a driver is confident in his abilities, but when he gets down to work, questions begin to arise. Thanks to our portal, such moments can be easily avoided. The site is a database that is updated regularly. By using it as a support during repair work, the car enthusiast receives a serious advantage. Each of the articles has reliable support, tested in practice.
In addition to the repair manual, the owner of a personal car will be able to prevent a lot of breakdowns that occur due to the human factor, thanks to the information located on the site. Users are presented with a lot of useful recommendations for proper operation, which will help significantly extend the life of the unit and avoid many negative consequences.
Online support is an excellent and most convenient way to obtain the necessary information. Another significant plus is that articles are written for people. We understand that the reader will do everything with his own hands, and we try to make it as convenient and efficient as possible. Use the resource at any time of the day and find the answer to any question you may have regarding cars.
What kind of oil to fill in the engine oka 11113
The VAZ Oka car was designed quite a long time ago, so the design of this small car is relatively simple, which allows car owners to carry out all maintenance and repair work themselves.
One of the most important types of maintenance for the Oka power plant is changing the oil, especially in winter. Technologically, this operation is easy to perform and does not require any special skills or knowledge. It is only important to observe the frequency of work and clarify what kind of lubricant should be poured.
When to change, what and how much to fill
Changing the oil in the Oka engine versions 1111 and 11113 according to the manufacturer’s recommendations must be performed at every scheduled maintenance. The frequency between services is 10 thousand kilometers. But you shouldn’t strictly follow the frequency, and replace the lubricant a little earlier, after about 8-9 thousand kilometers.
Car enthusiasts may notice that replacement should be carried out quite often. But here it is worth understanding that the power plants for the Oka were developed a long time ago, so you should not expect high performance indicators from them.
The exception is the Oka modification 11116, equipped with a Chinese power unit. This engine has a more usual lubricant change frequency - 15 thousand km.
The next important criterion for this operation is the type of oil. In this matter, small car engines are not particularly “whimsical”, and they can be filled with mineral and semi-synthetic oils with a viscosity of 5W-40, 10W-40, 15-W40, that is, the most common options. As for manufacturers, it’s a matter of taste and the engine can be filled with either Lukoil or Rosneft, or Mobil, Mannol, ZIC.
When replacement is required
One of the key advantages of Oka cars of various modifications is their low cost. The machines are very cheap to maintain and do not require the use of expensive spare parts and consumables. But when choosing frankly low-quality parts, certain difficulties may arise. Therefore, when servicing and repairing, try to use the optimal consumables so that the machine can operate confidently, for a long time and reliably. To maintain engine performance, you should change the engine oil on time. The manufacturer's recommendations are taken into account here. The operating manual for Oka cars (versions 1111 and 11113) states that the engine fluid should be changed every 10 thousand kilometers, or every 6 months. Consider what comes first.
But there is an important amendment that provides for operation in difficult conditions. These include:
- short regular trips, the range of which is no more than 6 kilometers;
- short trips up to 15 kilometers in sub-zero temperatures;
- driving a car with frequent stops;
- regular trips accompanied by idling;
- operating the vehicle at minimum speed due to city traffic jams and heavy traffic;
- driving on dusty, unpaved, hilly roads;
- trips around the countryside, etc.
Stages of work
The operation is performed on a warm engine, so the best option is to do everything after the trip, allowing time for the engine to cool down a little.
Next we do this:
- Open the hood;
- We twist the oil filler cap (it is located on the cylinder head valve cover);
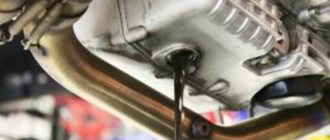
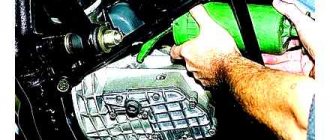
- We climb under the car (this is what the hole is for);
- We find the drain plug on the pan;
- We tear off the cork and slowly turn it out (we hold the prepared container in our other hand). If the pan is still hot, it is better to wait until it cools down;
- Having completely unscrewed the plug, quickly replace the container. We wait time for the lubricant to drain as much as possible (10-15 minutes);
- We wrap the plug in place and tighten it;
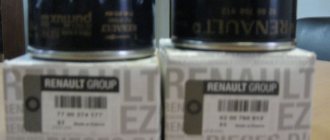
- Use a puller to dismantle the filter element (if there is no device, then simply pierce the housing with a screwdriver and use it as a lever to tear off the part);
- Before installing a new filter component, fill it with lubricant and be sure to lubricate the seal (rubber ring);
- We mount the filter in place and tighten it by hand;
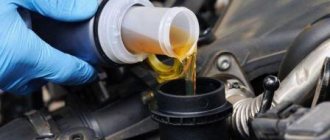
- We fill the engine with new lubricant (we do this in stages - first fill in 2 liters, wait until the oil drains, bring it to the desired level, guided by the dipstick);
- Replace the oil filler cap;
After a short period of time (1-2 hours), we re-check the level to make sure that it is within the normal range; if necessary, we adjust it.
Replacement with flushing
The replacement sequence is described above if the same oil is poured into the engine as was previously used.
But some owners, for various reasons, have to switch to another brand of lubricant. And in this case, it is recommended to carry out the replacement with pre-washing. This operation is simply a two-stage lubricant change.
Its essence is this: after draining the lubricant, fill the engine with flushing liquid (but preferably with oil that will be filled) and change the filter. Next, we start the power unit, give it time to run (15-20 minutes), drain everything and pour new lubricant into the motor, and also change the filter element.
Therefore, if you plan a shift with flushing, you should stock up on double the amount of oil (5 l) and two filters. In this case, you can take the cheapest one filter, since it will only work for 20 minutes.
| Year | Viscosity SAE |
| all season from +25 to -25 °C | winter from -35 to 0 °C | summer from 0 to +35 °C |
To purchase a suitable oil, you will need to name the SAE viscosity index
and acceptable -
API oil quality
for a diesel or gasoline engine. (Manufacturer's choice at your discretion).
For example:
for the VAZ 1111 Oka gasoline engine (1st generation) 1990, all-season mineral oil 10W-30 with SG quality is suitable, and for models of 2007, for the cold season, semi-synthetic 0W-30 SL is suitable.
History of VAZ 1111/11113 engines
The engineers who developed the Oka car faced a rather difficult task - to make a compact and affordable vehicle, made from common components and with good maintainability. Similar requirements were put forward for the engine - it had to be simple, reliable and easy to repair in the event of a breakdown outside specialized service stations with qualified personnel.
In the first versions of the Oka, the developers used a two-cylinder power unit from Daihatsu Quore with 30 horsepower. Several prototypes were made with this engine. But, although the engine had a well-functioning and reliable design, they refused to copy it, since the foreign power unit required high quality engine parts and assembly standards. In addition, copying required assembling engines from scratch and mastering the corresponding technical process, and this would make the car unacceptably expensive and seriously delay the production of serial samples.
Then the engineers turned to existing engine solutions in the domestic auto industry.
Interesting: the choice of engine was influenced by the launch of the VAZ-2108 on the assembly line of the Togliatti plant.
The G8 engine was already fully developed, so to equip the new compact youth car, it was decided to create a two-cylinder engine based on the G8 engine, which at that time was the main one in VAZ production. Through a series of technical manipulations, the 1111 engine was obtained, which they began to equip the Oka with.
Procedure for changing oil for transmission and engine
Changing the engine oil
The automaker determines what kind of oil should be poured into the engine. The motor can be filled with Lukoil-Lux and Novoil-Synth. For transmissions, a good option is Rolst oil fluid.
The algorithm by which you can change consumables is as follows:
- Open the oil filler cap. It is located on the part that protects the cylinder head.
- Carefully, since the lubricant is very hot, open the drain cover located on the crankcase pan. Don't forget to install a container underneath for used motor oil.
- Remove the oil filter using a tool. If there is no key and you cannot remove the filter element manually, use a screwdriver. It is better to punch the oil filter closer to the bottom. After this, close the drain lid.
- Pour fresh oil into the oil filter (about half full).
- Lubricate the O-ring. Install the new oil filter onto the engine fitting. Do this manually without using the key.
- Pour in as much motor oil as required. How much lubricant to pour depends on the car model. It is possible to check the volume of petroleum product being poured using a pointer. Screw the cap into the part that protects the cylinder head.
- The engine oil change has come to an end. Start the power unit and let it idle for a couple of minutes. The indicator that indicates emergency lubricant pressure should go out a few minutes after starting the engine. Turn off the engine and check the oil volume. If it is not enough, top up.
Replacing transmission lube
You need to change the gearbox oil as follows:
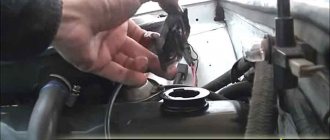
- Remove the rubber cap installed on the breather and wash it.
- Use a screwdriver or wire to clean the cap and put it back.
- Unscrew the lid of the drain hole, placing a basin under it in advance. Wait until all the oil product has drained. The four-liter basin should contain all the old grease.
- Remove the oil dipstick from the hole in the rear transmission cover.
- Pour fresh consumables into the oil filler neck. Don't forget to put a funnel in the hole.
- Check the oil volume. If necessary, top up.
The lubricant must be drained immediately after turning off the engine, while it is still hot. If the engine has cooled down, start it and warm it up to eighty degrees. Usually the drain lasts no longer than a quarter of an hour.
Basic faults
In the early days of the 1111/11113's existence, Oka owners often complained about increased annoying vibration and noise from the engine compartment. The noise was especially loud when the engine was warming up; the balancer shafts mentioned above were to blame for it. This phenomenon worries car owners, but is not considered a malfunction. The engine may also be noisy due to too large valve clearances. The problem is eliminated by adjusting them. Vibration is a design feature, since the engine only has two pistons. A fairly common problem with engines is burnout of the cylinder head gasket. Its main reasons:
- factory production flaws, when the gasket was manufactured with inaccuracies;
- Incorrect tightening of the cylinder head, in which the gasket is not fully compressed.
If the motor is repaired, the seal is replaced and cannot be reused.
Important: if there are burrs on the new gasket, it is also not recommended to install it in the engine.
The Oka 11113 engine may have difficulty starting “hot” after a short stop. The reason for this is the layout of the engine compartment and problems with the fuel pump diaphragm. In a hot VAZ 11113 engine, fuel vapors are formed, including in the cavities of the fuel pump, and this unit is not intended for pumping gases and can “fail” when starting the engine before it cools down. The aperture can be changed.
Important: if a problem with the motor occurs on the road, you can simply place a damp cloth on the pump as a temporary measure. This will cool the unit somewhat and allow you to get to the place where the diaphragm can be replaced.
Other possible problems:
How much oil to pour into the eye and how to do it correctly
Many drivers are interested in how much oil to fill in the Oka. Of course, this question mainly concerns those who use a VAZ-1111 car and its other modifications. Or those whose loved ones (for example, someone from the older generation) bought such a car.
The Oka car manufacturer recommends the use of certain types of oils.
Oka's car has a lot of modifications. Not all of them went into mass production, but several hundred samples were still sold. Depending on which of them you are dealing with, you can accurately determine the engine size. For example, the first Oka cars (VAZ-1111 and similar) have a crankcase filling volume of 2.5 liters. What is a crankcase? This is the name of a car part that protects its most important parts. This is a gearbox, various engine parts that are in motion, etc. The crankcase not only protects, but also lubricates those machine parts that are in motion.
Oka trucks, which were invented relatively recently (in 2007), need to be filled with more oil, of course. About 4 liters. It is equally important to do it the right way. Let's consider the rules for pouring oil into a passenger car. According to the manufacturer's recommendations, you need to use certain types of this liquid. Let's consider, as an example, how to change it for a VAZ-1111 car.
VAZ 1111 | Technical fluids and filling volumes
Technical fluids and filling volumes
| Liquid name | Engine | Filling volume, l | Purpose and brand of recommended liquid | Maintenance interval |
| 1.2S | 3,2 | API SL (ILSAC GF-III) | ||
| Engine oil | 1.4S/1.4D/1.5S | 3,75 | SAE10W-30 |
Low temperature areas: SAE 5W-30
* To ensure optimal performance of your vehicle, always use only the recommended automatic transmission fluid.
What kind of liquid should I fill in and how should I do it?
Lukoil-Lux and Novoil-Sint oils are suitable for lubricating the Oka car engine; for the gearbox housing - Rolst and TM5-9P transmission oils.
The Oka car manufacturer recommends the use of certain types of oils. For example, for the fuel tank - AI-91 and 95 gasoline; to fill the engine lubrication system with Lukoil-Lux, Novoil-Sint and the like. For the gearbox housing - transmission oils "Rolst", "TM5-9P" and others of the same type.
The procedure for changing the oil (if we talk specifically about the engine) should be as follows:
- Unscrew the plug from the hole called the filler hole. It is located on the cover, which, in turn, protects the cylinder head.
- As carefully as possible (the engine fluid is very hot), you should unscrew the drain plug located on the crankcase. It is important to place some kind of container under it before this and drain the liquid that has already been used.
- Then you need to unscrew the oil filter using a special wrench. What if you don’t have such a key and it’s impossible to borrow it from anyone or get it in any other way, but you can’t unscrew the filter by hand? A good option would be to try to unscrew the filter with a screwdriver, if you use it as a lever. The filter should be punched as close to the bottom as possible. Then the drain plug needs to be screwed into the crankcase.
- Fill it with new engine oil to approximately half the capacity of the oil filter. This must be done before installing the oil filter.
- After this, it is necessary to lubricate the o-ring of the new filter (that is, the oil filter) with engine oil, preferably the desired brand. Then screw the new oil filter onto the engine fitting. This must be done by hand, without the help of any tools.
- Then you should fill in as much of this oil liquid as necessary. It has already been said that the exact size of the required quantity depends on the Oka modification used. You can control how much of it has been placed in the engine using a pointer. Then you need to wrap the plug into the cap that protects the head.
- The last step is to start the engine and let it idle for a short amount of time. Ideally, the lamp indicating that the oil pressure is not normal should go out a couple of minutes after the engine has been started. Then you need to stop the engine, then check whether the oil level is sufficient. If there is not enough, add until there is as much as needed.
And if you need to change the oil in the gearbox, the algorithm is given below.
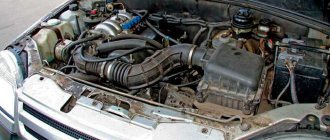
VAZ 1111 engine - features and design
The 650 cc engine 1111 is “half” of the 2108 engine. To create it, they simply took half of the engine and cylinder block, since it was easier and cheaper to develop equipment for such a solution than for a new unit. Thus, the 1111th is a two-cylinder in-line petrol carburetor engine, with 2 valves per cylinder and an overhead camshaft configuration.
1111 assembled:
Main characteristics of the Oka engine:
- power - 30 forces;
- torque - maximum 44 Nm at 3400 rpm;
- recommended fuel is gasoline with an octane rating of 92;
- cylinders: 2;
- type of food – carburetor;
- valves – 4;
- fuel consumption – about 4.7 liters per 100 km;
- engine cooling – liquid;
- engine environmental standard: Euro-0.
volume – 649 cubic meters. cm.;
How to change engine oil in a gearbox
To change the oil in the gearbox, you will need the oil itself, a screwdriver, a funnel, and a 17mm wrench.
If you need to change the engine oil in the gearbox, you will need the following: the oil itself, a screwdriver, a funnel, a 17mm wrench. The procedure is as follows:
- Before changing the oil, you need to remove the rubber cap from the breather (this is the name of the device through which the container communicates with the atmosphere to maintain the required level of pressure) and wash it.
- Using a screwdriver or wire, you need to clean the cap of the hole in the breather, and then install it in place.
- Unscrew the oil drain plug, first placing a container under it. Wait until it drains completely, then tighten the plug.
- Remove the oil level indicator from the hole in the rear cover located in the gearbox.
- Then new oil should be poured into the hole located under the pointer. It is important to insert the funnel first.
- Check oil level. If necessary, top up to the required level.
Service
This section includes not only changing the oil, but also adjusting the clearances in the valve mechanism.
The first step is to talk about the simplest thing, changing the engine oil. To do this you will need the following tools:
- key to 17;
- small container for waste liquid;
- new oil;
- screwdriver.
Before starting work, you need to turn off the car engine and install supports for the wheels. This is necessary for safety, so that no surprises happen during work.
Change of oil
If you want to completely change the oil type (if the oil type remains the same, then the following steps are not necessary):
- first flush the entire system with flushing oil;
- To do this, you need to pour in a little liquid to the lower mark and start the engine from the Oka. Experts recommend letting it run for 10 minutes. During this time, a special liquid will pass several times throughout the entire system and collect all the slag.
- After this, you can drain it and replace the oil filter. This is necessary to ensure that the new oil does not receive unknown substances while passing through the filter.
- Engine oil should be filled to the top mark, to the maximum. Next, wait about 10 minutes and add engine fluid if necessary.
- Turn the filler cap and remove it;
- Remove the drain plug under the car engine. This is necessary so that the old oil is drained into a special container;
- Screw the plug back;
- It is worth remembering that the oil is very hot during draining. Next, you can unscrew the oil filter and put it aside. It won't be needed anymore;
- To unscrew the filter, it is better to use a special wrench;
- Fill the filter cavity with new oil to the middle;
- Do not forget about lubricating the o-ring, which is located on the filter;
- Fill the filler neck with new engine oil to the maximum and screw on the cap;
- We start the engine and let it run for a few seconds. During this time, you can check for leaks and oil level. If necessary, it can be increased.
Gap adjustment
To compensate for the expansion of parts during operation, the designers provided a special gap between the valve stem and the cam itself. If the gap increases, the valves may not open, and if the gap decreases, they may not close. This needs to be monitored almost every day.
You only need to check the gap on a cold engine when all parts are in standard condition. The minimum clearance of the intake valve should be 0.2 millimeters, and the exhaust valve 0.35 millimeters. If this is not observed, the Eye's engine will operate unstably, with some noise and whistling.
The valves must be counted from the camshaft belt: the 1st and 4th valves are exhaust, and the 2nd and 3rd are intake. It is worth noting that the order of adjustment is not important. That is, adjustments can be made in any order.
For this job you will need a 10mm wrench, a set of screwdrivers, feeler gauges and tools for adjusting the gaps. If you cannot turn the crankshaft, you can use the following advice. Engage fourth gear and drive the vehicle very slowly until the cam is in position.
Remove the air filter; Cover the carburetor with a special rag so that nothing gets in there; Unscrew the cylinder head cover; Turn the crankshaft several times using a special wrench. To simplify this action, you can engage the gear and remove the spark plugs; The marks on the alternator pulley and the front cover must match. If this does not happen, then you have not fully rotated the wheel. During this step, you can begin adjusting the car valves
It is worth paying attention to the fact that there are two marks on the cover. You only need to focus on the long mark; Next, measure the thermal gap using a flat feeler gauge
These values can be written down in a notebook and compared with the nominal values in a special manual; Attach a special device to the lid; Put on the washers and turn them; Press the lever and push the pusher down. Insert the clamp under the camshaft so that the protrusion fixes the pusher; Next, you can pry the adjusting washer and remove it. Record the thickness of the washer; We calculate the thickness of the new washer using the formula: H = B + A - C, where H is the thickness of the new washer; B - thickness of the old washer; A is the value of the measured gap; C—nominal clearance; We install it in the pusher and perform the actions in the reverse order; Rotate the crankshaft 360 degrees and adjust the thermal gap; We install the parts in the reverse order so that the Oka engine is in its previous condition.