Reasons for dismantling the power unit
Engine removal is carried out for various reasons. Often, to carry out repair and restoration operations, but if the motor is old and cannot be repaired, it is removed to install a new one. Let's consider and describe the main reasons why it is necessary to remove the power unit:
- Wear. This is the most common reason for engine dismantling. Wear leads to the fact that the engine requires restoration, which most people know as a major overhaul. So, the engine is removed from the car and then disassembled.
- Cracks in the cylinder block caused by mechanical damage. In this case, the unit must be removed from the vehicle to replace the unit.
- A traffic accident often leads to deformation of the body, which cannot be eliminated without dismantling the main power unit. Of course, repeatedly, when major damage occurs, the body itself, as well as its structural elements, suffers.
- Other reasons, the elimination of which will require removing the engine from the car.
After considering the immediate reasons for removing the engine from the vehicle, we can move on to considering the processes of removing the engine from the car.
Removing the motor
Many car enthusiasts ask the question: how to remove the engine? The installed engine can be removed from the car at a car service by professional specialists or with your own hands in your garage. So, dismantling it yourself will take approximately 8-10 hours.
But, if the vehicle has a lot of electronics and the power unit is equipped with it, then it is not recommended to carry out the operation yourself, but rather turn to professionals. So, let's look at the process of removing the engine on the simplest versions of cars.
Installing a new engine
Having put the old unit aside, we proceed to install the new one. The procedure is in the reverse order to how the engine was removed.
Based on photographs taken in advance, we connect the electronics, if you don’t remember how it was installed. Some novice drivers install a video camera and record the entire replacement process, in which case you can see where they made a mistake.
After connecting all the electronics, you will need to refill all the fluids, of course, buy new ones before doing this, since the old unit is not worth using. If the engine is completely new, then there should be a service book with it, which indicates what fluids should be filled and in what quantities. If the unit is used, then it is worth taking a closer look at what fluids were used before. After filling all the fluids and connecting all the electronics, carefully check that nothing is leaking from the engine, since by connecting the electronics incorrectly or tightening the bolts incorrectly, the engine may fail and the whole work will have to be started all over again from the very beginning, not to mention the lost money on the engine .
How to remove a gasoline engine
Removing a gasoline engine, for example VAZ or ZMZ models, is quite simple. The first recommendation is that this process should be carried out with 4 hands, since it will be difficult for one person to do it. So, let's consider the sequence of actions for removing a VAZ-type unit:
- For more comfortable operations and less time, it is recommended to carry out the process on a lift, pit or overpass. Also, it is necessary to collect tools, namely: a set of keys, screwdrivers and sockets, a hoist or winch, and containers for draining liquid.
- The first thing you need to do is remove the battery and also unscrew its shelf. At the same time, you can remove the air filter housing, as well as the air ducts.
- The second stage is draining all liquids. To do this, you need to remove the motor protection (if any), and, placing containers under the drain necks, unscrew the plugs. For a standard engine, coolant (10 liter container) and engine oil (up to 6 liter container) are drained.
- After the liquids have been removed, it is worth starting to disassemble the unit to dismantle it.
- In the first stage, it is necessary to remove the generator, starter, all drive belts, and battery wiring.
- Now we begin to remove the elements of the cooling system: thermostat, water pump, expansion tank, coolant system pipes.
- Next, we dismantle the ignition system - spark plugs, wires, distributor, injector.
- After this, we disassemble the fuel system, namely, remove the carburetor or fuel rail with injectors, power supply pipes, and intake manifold.
- Another important step is dismantling the cylinder head. First you need to remove the camshaft pulley. After unscrewing the bolts, remove the valve cover, and then the cylinder head itself.
- We hook the motor to the winch and firmly fix it.
- Unscrew the gearbox from the engine. In this case, the clutch should remain on the power unit.
- We unscrew the nuts securing the pillows and lift the engine, carefully removing it from the engine compartment.
- Reinstalling the motor is carried out in the reverse order.
This is how, at first glance, it is easy and simple to dismantle the motor, but as practice shows, not everything is so easy. In the case of engines where there are many wires, you have to disconnect them from the sensors. Well, when the motor has too much wiring, then you should turn to professionals.
How to remove an old car engine
To make it more convenient, first of all you should remove the hood of the car, since it will be easier to remove the unit and we will not scratch the hood itself. Now you should disconnect all the wires from the engine. First, remove the terminals from the battery, then disconnect the switch. Make sure that all wires are disconnected from the engine.
The next step is to drain all fluids from the unit, such as oil and coolant. If your car has a lot of electronics installed, you should be careful, as the sensors may work and you will have to buy new ones. In the worst case, all electronics will become blocked and become completely unusable.
After draining all the fluids, go under the car and disconnect the exhaust system, transmission mechanism and gearbox. Now the most important point, we determine how we will remove the engine, there are two ways, the first is to pull it up using a winch and roll the car away. We fix the winch above the engine so that it is tensioned, unscrew all the engine mounts to the car frame and raise the engine or lower it under the car. Sometimes you can use a lift in another way: lower the engine onto a tray and lift the car on the lift. The latter method is much more convenient, but it is not always possible to find a lift.
How to remove a diesel engine
Dismantling the diesel heart of the car is carried out by analogy with the gasoline one. The difference is that diesel power units are often equipped with a turbine, which must be removed before dismantling the fuel system.
Another difference is the injection system itself. So, instead of an injector, a diesel engine has a high-pressure fuel pump, which is usually located on the cylinder block itself. It's not that difficult to remove, but you shouldn't forget about it because it weighs down the engine.
Often, especially on older diesel products, the body also houses the oil and gasoline fine filters. They must be removed after draining the lubricant.
Many auto repairmen recommend removing the exhaust manifolds from the power unit, which get in the way when the engine is removed from the engine compartment. If we talk about diesel engines installed on trucks, this is done to reduce the weight of the product.
Conclusion
How to remove the engine from a car? Removing a power unit from a car with your own hands can be simple and at the same time difficult, since it all depends on the type of power unit, as well as the presence of heavy electronics.
In the case of VAZ, GAZ, UAZ engines, they can be easily removed, but with foreign-made engines, everything is much more complicated. Therefore, most manufacturers recommend contacting specialists who can help remove the motor and repair it.
On these machines, VAZ 2101 to 2107, the principle of engine removal is the same. If you decide to remove the engine yourself at home, without any equipment, and don’t know how to do it correctly, then this article is for you.
The engine has to be removed to overhaul it, or to replace it with another engine.
You look at the engine and the first feeling is that it is difficult to remove the engine from the car, but in fact everything is very simple, two men can easily remove the engine themselves at home and also put it in place. I will give an example of removing an engine from a VAZ 2106, although this principle is suitable for VAZ2101 to 2107.
The engine can be removed entirely, but this is much more difficult, or you can remove it without the head, this is much easier. If you decide to repair the engine yourself, then the second option is preferable, since you have to disassemble the engine anyway and why drag out the extra weight. I will describe the removal of the engine with its partial disassembly, in the engine compartment of the car.
The reason for removing the engine was that the splines on the oil pump drive gears on this six were torn off, and the driver drove on without oil pressure, and the engine jammed.
Removing an injection engine from a car without disassembling
To remove the injection engine from the car, you need a lifting device with a lifting capacity of at least 300 kg and slings (chain).
Installing the injection engine on the car
Install the engine and all removed parts in the reverse order
On these machines, VAZ 2101 to 2107, the principle of engine removal is the same. If you decide to remove the engine yourself at home, without any equipment, and don’t know how to do it correctly, then this article is for you.
The engine has to be removed to overhaul it, or to replace it with another engine.
You look at the engine and the first feeling is that it is difficult to remove the engine from the car, but in fact everything is very simple, two men can easily remove the engine themselves at home and also put it in place. I will give an example of removing an engine from a VAZ 2106, although this principle is suitable for VAZ2101 to 2107.
The engine can be removed entirely, but this is much more difficult, or you can remove it without the head, this is much easier. If you decide to repair the engine yourself, then the second option is preferable, since you have to disassemble the engine anyway and why drag out the extra weight. I will describe the removal of the engine with its partial disassembly, in the engine compartment of the car.
The reason for removing the engine was that the splines on the oil pump drive gears on this six were torn off, and the driver drove on without oil pressure, and the engine jammed.
Engine removal sequence
Immediately remove the hood of the car so that it is not in the way.
Photo. The arrow shows which nuts need to be unscrewed to remove the hood.
After removing the hood, drain the coolant; to prevent the liquid from draining onto the ground, place a basin under the engine.
Photo. The arrow shows the bolt that must be unscrewed to drain the coolant from the engine block.
Photo. Now we remove the air filter, disconnect the choke cable, remove the throttle levers, the gas line from the carburetor, the valve cover, and disconnect the radiator pipes from the block.
Photo. Unscrew the muffler and remove the stove pipe.
Photo. Unscrew and remove the camshaft, distributor and head.
Photo. Unscrew and remove the heater pipe and the starter.
Photo. Remove the radiator.
Photo. Remove the fuel line from the fuel pump, and the plug from the oil pressure sensors, and unscrew the nuts from the engine mounts, they are shown by the arrow.
Photo. Now unscrew the box from the engine, two bolts on top are marked with an arrow, and two on the bottom, the bottom bolts can be unscrewed with a 19mm spanner. You can crawl up from below on the left and right sides of the car. And don’t forget to unscrew the bolts from the box boot.
Photo. Pull the engine off the cushions by swinging it left and right and place belts or rope under the cushions.
Now everything is ready to remove the engine without the box; you can insert a pipe under the belts or rope and use it to pull the engine out. But it’s easier to pull out the engine in a different way, climb straight onto the car, but don’t stand on the wings themselves, but put your feet in the corners where the wings connect, grab the belts with your hands, and lift the engine, jerk forward, usually the engine immediately comes out of the gearbox. It rarely happens that the engine does not immediately come out of the box, you pull and swing it to the sides and the engine comes out of the box.
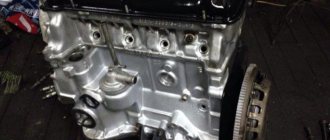
Photo. Removed engine from car.
Removing and disassembling the engine from a VAZ 2107. Video
Gorobinsky S.V.
How to remove the engine
VAZ?
So let's start, how to remove a VAZ engine? First of all, let's decide why to remove the engine from the car. This is usually done during major repairs, damage to parts of the crank mechanism and other malfunctions in which the engine needs to be removed.
To work, we will need professional tools and a lifting device to remove the engine from the engine compartment. If the latter is not there, then invite your comrades to help you remove the engine
VAZ.
First, carefully remove the hood. In order to save time and nerves during its installation and subsequent adjustment, you need to mark the places to which the canopies are screwed, to do this, take a black marker and draw a black stripe around the perimeter of the canopy.
After applying the marks, holding the hood, remove the spring and unscrew it.
Now we need a couple of blankets or bedspreads. We cover the front fenders with these blankets so as not to damage the paint.
Now let's get to work. The first thing to do is drain the coolant. If there is water in it, then simply pour it into a container and take it outside, and if there is antifreeze or antifreeze, then you need to take a small watering can with a hose and a canister. unscrew the plug in the cylinder block and drain the fluid.
It is better not to drain the radiator; there is always a clogged tap there and attempts to unscrew it lead to damage to the radiator, so it is better not to touch it. We add the rest of the liquid by unscrewing the lower radiator pipe. After draining the liquid, unscrew the pipes and remove the radiator.
Using a screwdriver, release the clamp and remove the fuel supply hose. We definitely lift it up.
Review of how to remove a VAZ 2106 engine
I’ll explain the words, if you have questions, ask, I’ll answer everyone Subscribe to the channel please!!! Need 100...
ICE theory: How to remove the engine?
Lectures on the topic “Theory of ICE” Group “Theory of ICE” VKontakte: .
We go to the other side of the engine compartment and unscrew the exhaust pipe from the exhaust manifold.
Be careful, the nuts that secure the downpipe are made of a soft alloy (brass) and excessive force can damage the edges. Also, be careful if there are ordinary metal nuts, they can stick to the studs and when unscrewing, you can break the stud. Recovery is very nerve-wracking :)
After disconnecting the terminals from the battery, remove the starter. To do this, take a 13mm wrench and unscrew the three bolts. And we take out the starter itself.
Now, in order to remove the VAZ engine, we need to unscrew it from the gearbox. The top two bolts can be easily unscrewed using Chinese socket wrenches bent to the side. Unscrew the two top bolts.
We arm ourselves with a screwdriver and release the clamps on the heater radiator pipes, and also remove the accelerator pedal linkage.
We disconnect the choke cable from the carburetor and lower ourselves into the inspection hole.
First of all, remove the clutch slave cylinder. Remove the spring and use a 13mm wrench to unscrew the two bolts. Take him aside so as not to interfere. Attention. Do not accidentally press the clutch pedal, otherwise you will also need to sort out the slave cylinder.
Now all that remains is to unscrew the bottom two bolts that secure the gearbox to the engine.
Now, we have come to the final stage of how to remove
VAZ engine. After the above operations, we just need to unscrew the engine from the support pads. Using a 17t socket, unscrew the nuts from both pillows.
We place a jack under the gearbox and lift it a little so that the engine mounts come out of the studs of the support pads.
We hook the engine with belts and lift it slightly with talc. We put the box in first gear and lift the engine out of the guides. As soon as the engine comes off, remove it.
Well, that’s probably all, here we showed how to remove a VAZ engine.
- How to remove a VAZ engine
- Disassembling the
VAZ engine. Part 1 - Disassembling the VAZ engine. Part 2
- Disassembling the VAZ engine. Part 3
- Replacing the cylinder head gasket for a VAZ 2109
- Replacing the air filter on VAZ cars
- Replacing the cylinder head gasket VAZ 2106-07
- Replacing the VAZ 2109 pump
Many car enthusiasts, taking into account the price of a VAZ car and the possible cost of repairs in a car repair shop, are thinking about how to remove the VAZ 2114 engine with their own hands.
This article is intended specifically for thrifty and independent car owners, in which we will figure out how to remove the engine, install it back, what options for this procedure exist and how to check the compression after the repair. In addition, we will look at how to do this yourself without involving other people.
Jpg" alt="Engine VAZ 2114″ width="960″ height="540″ class="lazy lazy-hidden size-full wp-image-4733″ srcset="" data-srcset="https://vazremont. com/wp-content/uploads/2018/01/foto-1-4..jpg 300w, https://vazremont.com/wp-content/uploads/2018/01/foto-1-4-768×432. .jpg 660w" sizes="(max-width: 960px) 100vw, 960px">
REMOVAL OF THE ENGINE
Remove the engine and transmission assembly by lowering it from the engine compartment. It is more convenient to remove the engine from the car mounted on a lift.
Before disconnecting hoses and electrical wires, we recommend that you mark them so as not to mix them up during assembly.
You will need: keys “10”, “13”, “17”, “19”, extension with cardan joint, socket heads “13”, “17”, “19”, “22” , “24”, wrench, screwdrivers (two), mandrel for centering the driven clutch disc, pliers, hoist or other lifting device, slings (strong rope).
1. Disconnect the wires from the plus and minus terminals and remove the battery.
3. Drain the coolant from the engine cooling system (see “Replacing the coolant”).
4. Remove the air filter with the intake pipe hose (see “Removing and installing the air filter”).
5. Unscrew the mounting bolts and remove the engine crankcase protection.
8. Turn the throttle drive sector all the way and disconnect the throttle drive rod from it.
9. Remove the two bolts securing the throttle linkage bracket. Move the bracket to the side without disconnecting the rods from it, so that it does not interfere with engine removal.
10. Unscrew the fastening nut and remove the tip of the engine “mass” wire from the stud on the clutch housing.
11. Unscrew the two fastening nuts and remove the tips of the “mass” wires from the studs securing the rear cover of the cylinder head.
12. Disconnect the block with wires from the coolant temperature sensor by squeezing the plastic clip.
13. Loosen the clamps and disconnect the radiator inlet pipe, the throttle body inlet hose from the outlet pipe, and disconnect the radiator inlet hose from the thermostat.
14. Disconnect the heater radiator outlet hose and the cooling system filling hose from the water pump inlet pipe (see “Replacing the cylinder head gasket”).
15. Disconnect the wire from the coolant temperature gauge sensor (see “Replacing the cylinder head gasket”).
16. Disconnect block A with wires from knock sensor B or remove the sensor by unscrewing the nut that secures it and removing the sensor from the stud, leaving it on the wiring harness.
17. Disconnect the block with wires from the low-voltage terminal of the ignition module by pressing the plastic latch.
18. Disconnect the block with wires from terminal “D” of the generator. Sliding the rubber boot, unscrew the nut and disconnect the wires from the contact bolt (terminal “B+”) of the generator.
19. Disconnect the wire from the oil pressure warning light sensor.
20. Loosen the clamp and disconnect the brake booster hose from the receiver fitting.
21. Disconnect the wiring harness connector from the throttle position sensor.
22. . and the idle speed regulator by squeezing the plastic latches.
23. Unscrew the fastening nuts, holding the hoses from twisting with a second wrench, and disconnect the fuel supply hoses A and drain B from the fuel pipes (the fuel supply hose is marked with paint). Note.
24. . that there are o-rings installed on the fuel pipes. After disconnecting each hose, remove the O-ring from the tube (replace any torn or loose rings).
Removal and installation of the VAZ 2114 engine
There are several typical circumstances after which removing the VAZ 2114 engine becomes an absolute necessity. The most common of them are body repairs and the need for major repairs of the engine itself (its replacement).
Before carrying out repair work, it is necessary to prepare in advance:
- A set of tools – a set of standard keys found in any car will do.
- Lift.
- If the lift is difficult, you will have to find a garage with an inspection hole, an overpass and a winch or three assistants.
- You also need to worry about the coolant and oil in the crankcase, which need to be completely drained.
The standard engine removal algorithm is as follows:
- Remove the crankcase shield, having first unscrewed the fasteners.
- Unscrew the clamps and remove the muffler receiver.
- We move under the hood and unscrew the muffler, and then disconnect the vacuum brake booster.
- While there, we remove the mass from the crankcase.
- Disconnect the cooling system.
- Disconnect the central wire of the coil and remove the block with the supply wires.
- Disconnect the fuel supply.
- Disconnect the clutch drive at the gearbox.
- Disconnect the starter (do not forget to number the wires and tie them into a bundle; doing this in advance will avoid subsequent problems during reassembly).
- Take the power wires aside, also tying them into a bundle.
- We repeat these steps with the generator, not forgetting to mark the wires.
- Unscrew the fastenings on the air damper rod and move it to the side.
- We remove the throttle cable clamp and remove the return spring, after which we dismantle the cable itself.
- We twist the bracket mount and remove the cable holder.
- We turn off the economizer; to do this, remove the contacts of the temperature, oil and coolant sensors, and then turn off the block itself.
- We loosen the clamps, and then disconnect the wires and pipes of the heating system.
- We go down under the car where we turn off the speed traction and the speedometer.
- Disconnect the power supply elements for the reverse lighting.
- Unscrew the fastenings of the lever extensions.
- We unscrew the body extension bolts and remove them so that they do not interfere (they do not need to be removed).
- We unpin the ball joint fastening, and then remove it from the steering knuckle (to carry out this action you will need a special puller, or the help of several comrades).
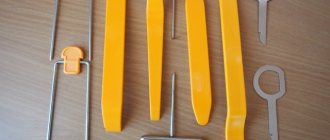
- Disconnect the wheel drives. They must be carefully removed from the connectors of the box. To do this, you will need a thin flat object; ideally, it should be a special mounting blade, but it can be replaced. It is also necessary to screw the plugs into the box, but they can also be easily replaced with old CV joints.
- At this stage, it is necessary to fix the engine in weight; to do this, stretch a thick cable or chain through the beam above the hood and fix it in a tight manner.
- After this, you can safely twist the fastenings of the power support, first from the rear, then from the front right and finally from the left.
- We place an old tire, wooden boards or other lining under the “heart” of the car and lower the entire power unit onto it.
- We lift the car and pull out the engine from under it.
Data-lazy-type=”image” data-src=”https://vazremont.com/wp-content/uploads/2018/01/foto-2-4.jpg” alt=”Removing the crankcase and muffler protection” width =”605″ height=”179″ class=”lazy lazy-hidden size-full wp-image-4734″ srcset=”” data-srcset=”https://vazremont.com/wp-content/uploads/2018/ 01/foto-2-4..jpg 300w» sizes=»(max-width: 605px) 100vw, 605px»>
Data-lazy-type=”image” data-src=”https://vazremont.com/wp-content/uploads/2018/01/foto-3-5.jpg” alt=”Remove the air filter and vacuum” width =”603″ height=”172″ class=”lazy lazy-hidden size-full wp-image-4735″ srcset=”” data-srcset=”https://vazremont.com/wp-content/uploads/2018/ 01/foto-3-5..jpg 300w» sizes=»(max-width: 603px) 100vw, 603px»>
Data-lazy-type=”image” data-src=”https://vazremont.com/wp-content/uploads/2018/01/foto-4-5.jpg” alt=”Removing the mass and cooling system” width =”604″ height=”173″ class=”lazy lazy-hidden size-full wp-image-4736″ srcset=”” data-srcset=”https://vazremont.com/wp-content/uploads/2018/ 01/foto-4-5..jpg 300w» sizes=»(max-width: 604px) 100vw, 604px»>
Data-lazy-type=”image” data-src=”https://vazremont.com/wp-content/uploads/2018/01/foto-5-3.jpg” alt=”Disconnect the power supply” width=”606 ″ height=”175″ class=”lazy lazy-hidden size-full wp-image-4737″ srcset=”” data-srcset=”https://vazremont.com/wp-content/uploads/2018/01/foto -5-3..jpg 300w" sizes="(max-width: 606px) 100vw, 606px">
Data-lazy-type=”image” data-src=”https://vazremont.com/wp-content/uploads/2018/01/foto-6-3.jpg” alt=”Fuel supply shutdown” width=” 602″ height=”174″ class=”lazy lazy-hidden size-full wp-image-4738″ srcset=”” data-srcset=”https://vazremont.com/wp-content/uploads/2018/01/ foto-6-3..jpg 300w" sizes="(max-width: 602px) 100vw, 602px">
IMPORTANT!
When you disconnect the fuel pump, do it with two 17mm wrenches, otherwise you will simply break the tube.
Data-lazy-type=”image” data-src=”https://vazremont.com/wp-content/uploads/2018/01/foto-7-1.jpg” alt=”Disconnecting the starter” width=”602 ″ height=”176″ class=”lazy lazy-hidden size-full wp-image-4739″ srcset=”” data-srcset=”https://vazremont.com/wp-content/uploads/2018/01/foto -7-1..jpg 300w" sizes="(max-width: 602px) 100vw, 602px">
Data-lazy-type=”image” data-src=”https://vazremont.com/wp-content/uploads/2018/01/foto-8.jpg” alt=”Generator shutdown” width=”601″ height =»179″ class=»lazy lazy-hidden size-full wp-image-4740″ srcset=»» data-srcset=»https://vazremont.com/wp-content/uploads/2018/01/foto-8 ..jpg 300w" sizes="(max-width: 601px) 100vw, 601px">
Data-lazy-type=”image” data-src=”https://vazremont.com/wp-content/uploads/2018/01/foto-9.jpg” alt=”Removing the throttle cable” width=”606 ″ height=”179″ class=”lazy lazy-hidden size-full wp-image-4741″ srcset=”” data-srcset=”https://vazremont.com/wp-content/uploads/2018/01/foto -9..jpg 300w" sizes="(max-width: 606px) 100vw, 606px">
Data-lazy-type=”image” data-src=”https://vazremont.com/wp-content/uploads/2018/01/foto-10.jpg” alt=”Disconnecting the heating system” width=”604″ height=”173″ class=”lazy lazy-hidden size-full wp-image-4742″ srcset=”” data-srcset=”https://vazremont.com/wp-content/uploads/2018/01/foto- 10..jpg 300w" sizes="(max-width: 604px) 100vw, 604px">
Data-lazy-type=”image” data-src=”https://vazremont.com/wp-content/uploads/2018/01/foto-11.jpg” alt=”Loosening the guy bolts” width=”606″ height=”180″ class=”lazy lazy-hidden size-full wp-image-4743″ srcset=”” data-srcset=”https://vazremont.com/wp-content/uploads/2018/01/foto- 11..jpg 300w" sizes="(max-width: 606px) 100vw, 606px">
Data-lazy-type=”image” data-src=”https://vazremont.com/wp-content/uploads/2018/01/foto-12.jpg” alt=”Removing the ball joint and wheel drives” width= »606″ height=»177″ class=»lazy lazy-hidden size-full wp-image-4744″ srcset=»» data-srcset=»https://vazremont.com/wp-content/uploads/2018/01 /foto-12..jpg 300w" sizes="(max-width: 606px) 100vw, 606px">
Data-lazy-type=”image” data-src=”https://vazremont.com/wp-content/uploads/2018/01/foto-13.jpg” alt=”Removing the engine mounts” width=”606 ″ height=”176″ class=”lazy lazy-hidden size-full wp-image-4745″ srcset=”” data-srcset=”https://vazremont.com/wp-content/uploads/2018/01/foto -13..jpg 300w" sizes="(max-width: 606px) 100vw, 606px">
At this point, engine dismantling is considered complete; after repair work, it is installed in the reverse order. The only exception is that the power mount fasteners are tightened in the same order in which they were twisted, starting from the rear.
Removing and installing the engine.
Removal and installation of the engine may be required on any car after a certain mileage, for example, for its complete disassembly and proper overhaul. In this article we will look in detail at how to remove the engine from the engine compartment without resorting to the services of a car service and what you will need for this.
Any power unit consists of the engine itself and the gearbox. And power units are divided into front-wheel drive and rear-wheel drive. Removing and installing the power unit involves disconnecting the drives and attachments from the power unit, which remain on the vehicle.
Of course, it is impossible to describe in one article the removal and installation of engines of all cars, and this is not necessary, since some little things are not so significant. But some nuances that differ when removing the engine, depending on the drive (rear-wheel drive or front-wheel drive), will still be taken into account in this article.
It is most convenient to remove and install the engine using a hydraulic crane (for example, like in the photo), but not everyone has such a luxury, but only in well-equipped car repair shops. Most often, in garage workshops, they use an ordinary manual hoist, and if there are a lot of not frail assistants (at least four), then it is quite possible to remove the motor using a pipe and a strong rope. However, it is still better to look for a hoist, since most medium-sized engines weigh at least two hundred kg, and even more with a gearbox.
On most cars, it is quite possible to remove the engine along with the gearbox, which also does not hurt to inspect and at least replace the seals. But if the engine has a large displacement and there is not enough space in the engine compartment, then on some cars it is still advisable to remove the gearbox (read more about how to remove the gearbox in this article). In addition, after removing the gearbox, it will be possible to check the clutch and its release bearing
Below is an example of dismantling the power unit (engine and gearbox) of the most common front-wheel drive VAZs, but the procedure for working on foreign cars is almost the same. And on rear-wheel drive classic cars, instead of disconnecting the ends of the drive shafts (CV joints), you will simply need to disconnect the driveshaft from the gearbox (how to do this is described in detail here) and remove the gear shift lever, that’s all the difference. Well, of course, you will need to disconnect all the wires, the clutch drive, and this is all inspected and done on the spot, nothing complicated even for beginners.
I still advise beginners, before starting work, to prepare a camera, or at least a mobile phone, to film the sequence of actions. Pictures or videos will help you later assemble everything correctly in the reverse order without any problems.
Below we will describe the sequence of actions for removing the power unit, which is suitable for most cars. And there will be almost no photos, since the attachment may be slightly different on different machines and there is no point in publishing photos of the parts of a particular machine, it is better to take your own photos - this will be much better and clearer for beginners.
Removing and installing the engine - operating procedure.
We remove and install the power unit of front-wheel drive vehicles in the following order:
- We jack up (hang) the front part of the car (only for front-wheel drive cars), place the car with the front end raised on the racks, and brake the rear wheels with the handbrake. It is also advisable to install supports for the rear wheels.
- Remove the engine crankcase protection, if there is one, and open the hood.
- We drain the coolant, first remembering to open the heater (stove) tap, opening the radiator or expansion tank cap (so as not to create a vacuum) and then unscrewing the drain plug from the bottom of the radiator and in the engine cylinder block - drain the antifreeze or antifreeze.
- We unscrew the drain plug in the engine sump and drain the engine oil from the engine (more about this in the oil change article).
- Unscrew the clamping bolt of the negative terminal of the battery and remove the terminal from the battery pole post.
- We disconnect the wire terminals from the generator and starter, as well as the oil pressure sensor terminals, from the coolant temperature sensor, from the carburetor solenoid valve, from the air flow sensor, crankshaft sensor and camshaft sensor, as well as ground wires and other wires, if they are connected to engine.
- We also disconnect from the ignition distributor (distributor) the low-voltage wires and the high-voltage wire that goes to the ignition coil. If you have an injection car, then disconnect all the wires and tubes from the fuel rail and from the fuel pressure regulator.
- We remove the air filter by disconnecting the filter hose from the intake manifold (to remove the hose, of course, loosen the clamps).
- Disconnect the crankcase ventilation hose from the cylinder head cover and other hoses, if any (for example, the warm air supply hose from the warm air intake). After removing the air filter, cover the carburetor with a plate that protects the carburetor diffusers from dirt.
- We disconnect everything that comes to the carburetor (or to the fuel rail of an injection engine): fuel supply hose, econometer tube, vacuum hose, air and throttle valve (gas supply) drive cables.
- We disconnect the rubber pipes of the cooling system from the engine and its head, as well as the hoses (tubes) going to the car heater (stove).
- We disconnect all the wires and the clutch drive cable from the gearbox (or the hydraulic hose, if the clutch drive is hydraulic, place a container under the hose for hydraulic (brake) fluid).
- We disconnect the rod from the gearbox (by unscrewing the clamp holding it), which connects it to the hinge (selector) of the gear selection rod.
- Disconnect the exhaust system from the engine exhaust manifold.
When using a hoist, hook the hooks of the hoist cables to the special rings (eyes) that are attached to the motor head and to the gearbox (one of the eyes is shown in the photo below - the bolt for securing the eye is indicated by an arrow).
Next, you should disconnect the tips of the internal joints of the front wheel drive shafts from the side gears of the gearbox.
To do this, first unscrew the bolts securing the braces 29 of the front suspension arms (see the figure below), loosen the nuts securing the braces to the suspension arms 22 and then turn the braces so that they do not interfere with the removal of the engine (power unit - engine together with the gearbox).
Now you need to disconnect the ball joints 21 of the front suspension arms from the steering knuckles. All these operations can be clarified in more detail in the article about replacing the CV joint of a front-wheel drive car (the article is here), since all operations are similar to those described above.
After what has been described above has been done, you can remove the ends of the internal joints (CV joints) of the drive shafts of the front wheels of the car from the semi-axial gears of the box.
To do this, it is advisable to use a special puller, or by striking (through an aluminum spacer (punch)) on the body of the internal hinge. Next, we move these shafts to the side so that they do not interfere with removing the power unit.
Having disconnected and moved the shafts to the sides, you should fix the side gears with technological mandrels (or homemade plugs) so that they do not fall out of the gearbox holes when removing the power unit from the engine compartment.
Now all that remains is to unscrew all the bolts securing the engine mounts (see figure on the left) and the box to the car body, give tension to the hoist cables and get ready to remove the engine (removing the power unit from the engine compartment). I advise you to check again whether all wires (terminals) are disconnected from the engine and gearbox.
If you have the luxury of a rolling hydraulic crane (as in the photo at the beginning of the article), then roll it to the front of the car and pull out the crane beam so that its end is located approximately in the center of the motor head. The hoist hook should also be hung strictly in the center of the motor.
Having hooked the cables (or chains) of the lifting device onto the eyelets, we begin to slowly tighten the cables and remove the power unit from the engine compartment. At the same time, we monitor the exit of the gearbox from its tunnel, trying to ensure that the gearbox does not touch the body (tunnel) - at the same time, we move the engine slightly forward.
For those who have the luxury of a car lift, the engine can be removed by lifting the car, while the motor will be lowered onto a trolley or a metal table of suitable height by loosening the hoist cables.
After lifting the engine above the engine compartment, roll the hoist or hydraulic crane away from the front of the machine and lower the power unit onto the trolley. In this case, be sure to place wooden blocks under the engine crankcase so that the weight of the unit does not put pressure on the generator drive pulley and flywheel. But it is still advisable to immediately mount the engine on a special stand (tilter) for mounting the engine (read how to make one with your own hands here), which will make it much more convenient to work with the engine.
After repairing the engine, install the power unit in the reverse order of removal. After installing the engine and connecting all the attachments, you will need to fill the brake fluid into the clutch reservoir and bleed it. You may also need to adjust the carburetor.
That seems to be all. I hope that removing and installing the engine will not seem such a difficult operation for beginners, and if you do everything slowly and remember (photograph) each action, then everything will definitely work out, good luck to everyone.
If this article is useful to you, please share it on social media. networks by clicking the buttons below. Thank you.
RќСЂР°РІРёС‚СЃСЏ
Without removing the gearbox
If there is no pit, overpass and friends, you will most likely have to figure out how to remove a VAZ 2114 engine without a box. You can perform this procedure yourself, and you will not need any special physical activity. Part of this procedure will not differ in any way from the general algorithm, so we will focus only on the differences.
To prepare a working base you will need bricks and a jack. It is necessary to smoothly lift the car and place brick by brick under the front wheels, having first secured the rear wheels so that the car does not roll.
The key differences between the methods begin when you completely free the motor head from the wires connected to it:
- Remove the pulley and muffler.
- We remove the head itself with the camshaft - here it is important to pay attention to the bolts. If they are hexagonal, you will be able to remove the head together with the camshaft, if not (they come in the shape of an asterisk), then you will inevitably remove them separately.
- Now we unscrew the front pulley, first turning on the fifth speed and placing a brick on the brake.
- We unscrew the generator and go directly to the gearbox, on which there is a nut and three bolts.
- Unscrew the crab and put it aside.
- We fix the engine and lower it onto the prepared cushion.
Data-lazy-type=”image” data-src=”https://vazremont.com/wp-content/uploads/2018/01/foto-14.jpg” alt=”Homemade support for engine removal” width=” 600″ height=”445″ class=”lazy lazy-hidden size-full wp-image-4746″ srcset=”” data-srcset=”https://vazremont.com/wp-content/uploads/2018/01/ foto-14..jpg 300w" sizes="(max-width: 600px) 100vw, 600px">
BE CAREFUL!
Sometimes the engine does not want to fall off the box on its own, in order to fix this you will have to gently push it with a crowbar.
When you put it back together, don't forget to secure not only the engine, but also the box itself with rope. To carry out reassembly without removing the box, you will need an assistant.
How to remove the engine from a car?
At home, there is usually no professional lifting equipment, so you will have to rent it or make it yourself.
Do-it-yourself goose for removing the engine
This is a simple mechanism that resembles a gooseneck. It makes it possible to move the engine away from the engine compartment. It may have a rotating design that allows you to remove the engine without moving the machine.
The heavy internal combustion engine is simply transferred to a workbench located next to the car. In fact, it is a universal garage crane. The rack rests on long “legs” located under the engine compartment to prevent it from tipping over. A cable and a winch are used for lifting.
The gander is used both in garage conditions and in small services.
DIY engine removal lift
As a rule, this is a rolling crane, the lower part of which is placed under the front bumper. A smooth platform is required; on uneven ground, removing the engine using such a device is problematic. The lift operates using hydraulics or a tensioning mechanism like a winch. The device is simple: a stand with rolling supports, and a movable boom on which the motor is suspended. You can make a lift with your own hands from a channel or a square professional. pipes.
If there are strong wheels on supporting legs, you can quickly roll out the lift with the motor and move it to the repair area.
Do-it-yourself winch for removing the engine
Applicable if the car is being repaired in a solid stone garage. The most inexpensive tool that can be used to remove an engine. A chain or cable is used to pull it out.
There are two design options:
- A transmission mechanism with a drum that is suspended from the ceiling.
- The winch is fixed to the floor, and a pulley is fixed under the ceiling.
Features of removing various motor designs
Longitudinal arrangement.
As a rule, such internal combustion engines are removed without a gearbox, although exceptions are possible. The radiator needs to be removed.
Transverse arrangement.
The motors are compact and easy to lift vertically. The gearbox remains on the engine.
Hybrid systems and electric vehicles.
Internal combustion engines in such machines take up little space or are absent altogether. Electric motors can be built into the wheel drive or integrated into the transmission. Due to their small size, their dismantling is not difficult.
All types of internal combustion engines are installed on supports. In frame structures, the attachment points are located on the frame; in cars with a monocoque body, there is usually a subframe.
Removal
Remove the hood.
Remove the battery, engine mounts and drain the coolant.
| Rice. 3.27. The sequence of removing components and assemblies when removing the engine from the car: 1 – wire of the negative terminal of the battery; 2 – air filter; 3 – fuel line; 4 – return fuel line; 5 – throttle valve drive cable; 6 – speedometer drive cable; 7 – clutch cable; 8 – wire connecting the engine to ground; 9 – vacuum brake booster hose; 10 – three-way power steering valve and bracket; 11 – heater hoses; 12 – fan and radiator; 13 – expansion tank and washer reservoir; 14 – generator; 15 – air conditioning compressor; 16 – power steering pump; 17 – drive shafts; 18 – gear shift rod (manual transmission); 19 – rod extension (manual transmission); 20 – flexible connections of the exhaust gas system, mounting bolts and nuts; 21 – torsion bar limiter for engine mount; 22 – power unit assembly |
Remove the air filter (Fig. 3.27).
Disconnect the fuel supply and outlet pipes from the fuel pump.
Disconnect the air and throttle valve actuators.
Disconnect the speedometer drive cable.
Disconnect the clutch cable (manual transmission) or control cable (automatic transmission).
Disconnect the vehicle ground wire from the gearbox.
Disconnect the brake booster hose.
Remove the plugs from the vacuum switches and remove the bracket.
Disconnect the hoses from the heater.
Remove the plugs from the traction relay and vacuum sensor (if equipped) and unscrew them from the firewall.
Disconnect the wiring connectors from the engine.
Disconnect all other electrical connectors in the engine compartment.
Disconnect the wire from the ignition coil.
Disconnect the evaporator hoses from the tank (if they are provided for in the design).
Disconnect the radiator hoses, disconnect the connector from the radiator fan motor.
Remove the radiator.
Remove the expansion tank and washer fluid reservoir.
Remove the generator and air conditioning compressor from the bracket (if provided by the design). Move the compressor to the side, being careful not to damage the hoses (they are under high pressure), and secure it with a piece of wire.
Raise the front of the car and place it on stands, remove the front wheels and mudguards.
Remove the power steering pump (if provided by the design) along with the hoses, move it to the side and secure with a piece of wire.
Drain the gearbox oil.
Disconnect the front stabilizer link and push or pull the drive shafts out of the transmission. To fix the position of the differential gears, instead of the drive shafts, insert special plugs or internal constant velocity joints of the drive shafts into the gearbox.
On models with a manual transmission, disconnect the shift rod and rod extension from the transmission.
Disconnect the exhaust pipe from the muffler.
Remove the rubber plug and mudguard, unscrew the bolt and remove the hinge assembly. Remove the timing belt covers.
Attach the lift arms to the engine.
Disconnect the engine from the suspension mounts.
Slowly and carefully lift the engine; during lifting, an assistant should move the engine forward from the muffler studs and move the electrical wiring to the side.
After lifting the engine from the engine compartment, lower it onto a platform suitable for further work. Remove the gearbox and differential assembly from the engine. Fix the engine in a vertical position or install it on a stand.
Installation
Install the gearbox and differential assembly onto the engine.
The front of the vehicle must be in a raised position to allow access from below during installation.
Hang the engine exactly above the engine compartment, carefully and slowly moving it into position.
Further work is carried out with two assistants. The first directs the power unit so as not to damage the main brake cylinder with the gearbox and so that the engine engages the muffler studs, and the second holds the power unit so as not to damage the power steering pump when lowering.
Further installation is carried out in the reverse order of removal.
Separating the gearbox from the engine
Automatic transmission
Remove the starter.
Remove the bolts securing the articulated shaft bracket. The driveshaft must remain inserted into the transmission, otherwise the differential may fall into the transmission housing.
Remove the gearbox from the engine. Have an assistant hold the joint shaft. Do not allow the transmission to rest on the input shaft, otherwise it may be damaged.
When installing, first ensure that the clutch disc is centered correctly. Apply lubricant to the input shaft splines.
Install the transmission onto the engine, again having an assistant hold the drive shaft. If the input shaft does not fit into the splined flange of the clutch driven disc, lightly rotate the crankshaft or transmission input shaft until the splines align. Until the box is completely seated, rest it on the block so that the weight of the box is not taken up by the input shaft.
Tighten the bolts securing the gearbox to the engine and the bolts of the hinge shaft, install the starter.
How to remove the engine
VAZ?
So let's start, how to remove a VAZ engine? First of all, let's decide why to remove the engine from the car. This is usually done during major repairs, damage to parts of the crank mechanism and other malfunctions in which the engine needs to be removed.
To work, we will need professional tools and a lifting device to remove the engine from the engine compartment. If the latter is not there, then invite your comrades to help you remove the engine
VAZ.
First, carefully remove the hood. In order to save time and nerves during its installation and subsequent adjustment, you need to mark the places to which the canopies are screwed, to do this, take a black marker and draw a black stripe around the perimeter of the canopy.
After applying the marks, holding the hood, remove the spring and unscrew it.
Now we need a couple of blankets or bedspreads. We cover the front fenders with these blankets so as not to damage the paint.
Now let's get to work. The first thing to do is drain the coolant. If there is water in it, then simply pour it into a container and take it outside, and if there is antifreeze or antifreeze, then you need to take a small watering can with a hose and a canister. unscrew the plug in the cylinder block and drain the fluid.
It is better not to drain the radiator; there is always a clogged tap there and attempts to unscrew it lead to damage to the radiator, so it is better not to touch it. We add the rest of the liquid by unscrewing the lower radiator pipe. After draining the liquid, unscrew the pipes and remove the radiator.
Using a screwdriver, release the clamp and remove the fuel supply hose. We definitely lift it up.
Review of how to remove a VAZ 2106 engine
I’ll explain the words, if you have questions, ask, I’ll answer everyone Subscribe to the channel please!!! Need 100...
ICE theory: How to remove the engine?
Lectures on the topic “Theory of ICE” Group “Theory of ICE” VKontakte: .
We go to the other side of the engine compartment and unscrew the exhaust pipe from the exhaust manifold.
Be careful, the nuts that secure the downpipe are made of a soft alloy (brass) and excessive force can damage the edges. Also, be careful if there are ordinary metal nuts, they can stick to the studs and when unscrewing, you can break the stud. Recovery is very nerve-wracking :)
After disconnecting the terminals from the battery, remove the starter. To do this, take a 13mm wrench and unscrew the three bolts. And we take out the starter itself.
Now, in order to remove the VAZ engine, we need to unscrew it from the gearbox. The top two bolts can be easily unscrewed using Chinese socket wrenches bent to the side. Unscrew the two top bolts.
We arm ourselves with a screwdriver and release the clamps on the heater radiator pipes, and also remove the accelerator pedal linkage.
We disconnect the choke cable from the carburetor and lower ourselves into the inspection hole.
First of all, remove the clutch slave cylinder. Remove the spring and use a 13mm wrench to unscrew the two bolts. Take him aside so as not to interfere. Attention. Do not accidentally press the clutch pedal, otherwise you will also need to sort out the slave cylinder.
Now all that remains is to unscrew the bottom two bolts that secure the gearbox to the engine.
Now, we have come to the final stage of how to remove
VAZ engine. After the above operations, we just need to unscrew the engine from the support pads. Using a 17t socket, unscrew the nuts from both pillows.
We place a jack under the gearbox and lift it a little so that the engine mounts come out of the studs of the support pads.
We hook the engine with belts and lift it slightly with talc. We put the box in first gear and lift the engine out of the guides. As soon as the engine comes off, remove it.
Well, that’s probably all, here we showed how to remove a VAZ engine.
- How to remove a VAZ engine
- Disassembling the
VAZ engine. Part 1 - Disassembling the VAZ engine. Part 2
- Disassembling the VAZ engine. Part 3
- Replacing the cylinder head gasket for a VAZ 2109
- Replacing the air filter on VAZ cars
- Replacing the cylinder head gasket VAZ 2106-07
- Replacing the VAZ 2109 pump
Engine removal may be necessary after a certain mileage on any vehicle to repair or replace it. In this article we will look at the entire process of removing the engine from the engine compartment without using the services of car services.
All power units consist of an engine and gearbox. The process of removing the unit includes disconnecting the drives and removing the linkage, which remains on the vehicle.
It is impossible to describe the process of removing all brands of engines in one article. Let's look at the main points without touching on the minor nuances of each individual model.
It is convenient to remove and install any engine using a hydraulic crane or winch mounted on the ceiling of the room in which this process is carried out. Most engines without a gearbox weigh over 200 kg, and even heavier with a gearbox.
It is advisable to remove the engines on most cars together with the gearbox. The gearbox most likely also needs to be repaired and seals replaced.
Below we will look at the process of removing the engine along with the gearbox of the most common VAZ model. The work procedure is almost completely similar to removing engines from foreign-made cars.
Beginners are usually advised to prepare a camera before starting work to record the sequence of actions.
Extraction from the top
If you have a good winch or 3-4 reliable assistants, then there is no better solution on how to remove the engine from the VAZ 2114 through the top. This method differs from removal through the bottom in that it eliminates the possibility of damaging the engine itself or the car. The most important factor in the success of this operation will be your accuracy.
Jpg" alt="Removing the engine through the top" width="600″ height="404″ class="lazy lazy-hidden size-full wp-image-4747″ srcset="" data-srcset="https://vazremont .com/wp-content/uploads/2018/01/foto-15..jpg 300w" sizes="(max-width: 600px) 100vw, 600px">
The procedure for removing the engine from the top must be carried out as carefully as possible. It is important to take into account everything that can affect the engine falling off its mounts. Moreover, if you do everything correctly, this method will be the least labor-intensive. At its core, this procedure is no different except for removal from removing an engine without a gearbox.
Compression test, troubleshooting
One of the main reasons for engine repair is decompression. Actually, the troubleshooting itself must be done every 30 thousand km, combining it with valve adjustment.
Signs of the need for early technical inspection of the engine are:
- power surges;
- increase in fuel consumption;
- engine tripping.
Data-lazy-type=”image” data-src=”https://vazremont.com/wp-content/uploads/2018/01/foto-16.jpg” alt=”Compression measurement” width=”480″ height =»457″ class=»lazy lazy-hidden size-full wp-image-4748″ srcset=»» data-srcset=»https://vazremont.com/wp-content/uploads/2018/01/foto-16 ..jpg 300w" sizes="(max-width: 480px) 100vw, 480px">
If you experience similar symptoms, you need to do the following:
- Check the starter and charge the battery.
- Find a compression gauge and warm up the car.
- Remove the spark plugs and fuel supply hose.
- Insert the compression gauge into the spark plug socket of the first cylinder and depress the accelerator.
- We turn the key in the ignition and turn the starter for 10 seconds, watching the device, it must be interpreted as follows: a. if the pressure stops at 0.8 mPa and then stops growing or does so slowly, then the cylinder head is broken or there is a leak in the valve; b. if it just grows slowly, it means that the rings have exhausted their service life (by the way, this fact can be checked by adding oil and measuring again, if the pressure returns to normal - the rings are 100% to blame).
IMPORTANT!
The normal pressure in the VAZ 2114 engine is 1.0 MPa in the standard configuration and 1.4 MPa on an eight-valve engine.
After the procedure is repeated for all cylinders, it is necessary to analyze the records. So, in a working engine, compression should not fall below 1 MPa and should not have a spread between the cylinders of more than 0.2 MPa. Otherwise, you will have to repair the engine.