Technology and features of car tire repair
Pneumatic tires on car wheels appeared in 1895. Tires with tubes have been used for a long time. At the end of the 20th century, tubeless tires, which have a number of advantages, became widespread. Currently, manufacturers install just such tires on the wheels of their cars. Modern automobile tires have high strength and a number of other positive qualities that increase the stability and controllability of the car on the road. However, as a result of wear or puncture, they become unusable and then tire repair is needed.
Design features
The technology for restoring tires depends on the design features of the tires. They differ in many ways, but the main differences are as follows:
- tires, inside of which a car rubber tube is placed;
- tires without a rubber tube inside, this design is both a tire and a tube.
In addition, tires are distinguished:
- cars,
- trucks,
- tractors and special equipment.
Tires are also divided into:
- radial and diagonal;
- winter, summer and all-season;
- wide-profile and low-profile;
- road, cross-country, universal and quarry.
Tire retreading
Repairs on the road
If the failure of tires is not associated with increased tire wear, then damage to tires on cars mainly occurs due to punctures and cuts. Less commonly, due to manufacturing defects, a “hernia”—a swelling in the side of the tire—may form.
Most often, car tire repair is done in special auto repair shops, which have a common name - “tire fitting”.
However, there are situations in which repairs are only possible with your own hands. This is especially true for drivers making long intercity trips.
Experts recommend that car owners always keep a kit for repairing tubeless tires in the trunk, which, in addition to tools, includes special glue and harnesses.
This kit allows you to quickly repair tubeless tires on the track with your own hands, with the exception of a severe side cut or repair of a hernia on the wheel. In addition, the practice of operating cars over long distances suggests that when traveling intercity, especially in deserted areas, it is good to have one, or even better, two cameras of the required size.
There are situations when the kit does not save you and there is no other option but to re-flare the tires on your wheels yourself, installing tubes in them.
Tire repair
The technology for restoring car tires from a puncture or side cut in a tire shop has long been developed and can be done in different ways, among which the most famous are:
- express repair;
- one-step method with hot vulcanization of the patch;
- two-stage - with cold vulcanization of the plaster;
- repair of hot vulcanization chambers.
A tire cannot be repaired if:
- it has severe damage beyond acceptable parameters;
- cord threads are visible, and they are torn or otherwise deformed;
- there are cracks on the tread or side part up to the cord;
- There is noticeable wear on the side down to the cord.
You can repair a tire with your own hands; the technology for this process has also been proven.
Puncture or small cut - we repair it ourselves
In order to repair a puncture or side cut no larger than 3 mm, you need a special kit for repairing tubeless tires. If such a kit is not at hand, then you can get by with special glue and strands.
- Before you begin repairing a tire side cut or puncture, you must bleed the air from the wheel.
- Determine the location and nature of the cut or puncture and remove the foreign object from the hole.
- Take an awl from the kit to prepare the hole. Apply glue from the same kit to it.
- Rotating as the clock progresses, insert it into the puncture hole with a smooth movement.
- The tool must enter with force into a puncture or side cut of the tire. You also need to remove it by rotating in the same direction. Repeat entry and exit several times, ensuring that the glue covers the inner surface of the cut or puncture.
- Before installing the harnesses, leave the awl in the damaged area so that the glue is able to secure the harness well.
- Remove the protective film from the harness to the length required for routine repair of the tubeless tire. Place the end without film into the insertion awl, making a short end 20 mm long. Apply glue to the awl and the harness at the junction.
Using sealant
The second method of repairing a tubeless tube with your own hands is carried out using special sealants in the form of a spray. We buy a can of this product at the market (the kit includes a tube with a tip for screwing onto a nipple) and take it with us. Please note that you should only purchase products from well-known brands, otherwise a low-quality sealant will not cope with the task.
Video: Testing tire sealant! Repairing a punctured wheel on the road.
The puncture is sealed with sealant as follows: first, remove the element that punctured the tire (if it is not visible, then there is no need to look for the hole). Next, the damaged wheel must be jacked up. Using a tube with a tip, we connect the can with the nipple. We inject all the available sealant inside the tire, and then rotate the wheel several times so that the sealant spreads evenly over the inner surface. We wait a couple of minutes for the product to fill the hole and thicken, thereby plugging the existing hole.
How to seal a tubeless camera at home
How to seal a tubeless tire at home?
Today, many modern passenger cars have tubeless wheels. The reason for this is that tubeless tires have many advantages that tubeless tires do not have. Among these advantages are:
– Installing tubeless wheels on the rim is not particularly difficult;
– Tubeless tires have a lower cost due to the lack of tubes;
– Compared to tube tires, tubeless tires are lighter;
– In case of a puncture, tubeless wheels can be easily repaired yourself.
It is worth noting that the last advantage is especially important. Indeed, cases of unexpected unpleasant situations on the roads associated with punctured tires are not so rare. In this article I would like to talk about how to identify a malfunction, as well as what to do after it is discovered - in general, how to seal a tubeless camera at home and on the road.
Lump or hernia
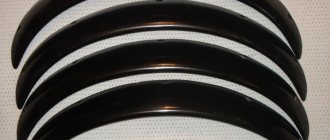
A bulge on the wheel, called a bump or hernia among drivers, is the most common defect in the sidewall of a tire. It appears due to hitting an obstacle or after falling into a hole, often at high speed. The threads of the sidewall carcass are easily damaged by an impact, and the tire at this point can no longer withstand the load and air pressure - swelling appears. A small bump sooner or later turns into a big one, and driving with such a defect is dangerous - the wheel can shoot out at any moment. At high speed, this can lead to loss of control, flying off the road and overturning.
Some types of hernias are repairable, although this is a temporary measure. No patch can restore factory hardness. Ideally, replace the tire.
Special cord patches can extend the life of a tire with a hernia, even if swelling appears on the tread. The sidewall is a different story. If the swelling appears at a distance of more than 40 mm from the side, it can be repaired. If not, the wheel definitely needs to be replaced. Blisters on low profile tires are most often beyond repair.
To make driving as safe as possible with a repaired bump, insert a camera. This is an inexpensive and reliable solution. On our market you can find cameras made in China and Russia, the latter are a little more expensive, but also of better quality.
How to seal a tubeless tire?
First of all, I would like to note the ease of use of modern tubeless tires - in the event of a puncture, the tire does not deflate immediately. It follows that if an unexpected malfunction occurs, the car owner can always get to a car service center. This outcome is more preferable, since in any case, the help of a qualified specialist is more effective than doing the repair yourself.
Before you start repairing a tubeless tire, I would recommend making sure that there really is a problem. To do this, you need to lift the car using a jack, and then inflate the wheel. Inspect the tire - look, spin it, try to find a puncture. If you were unable to find a puncture, and the pressure inside the tire remains at a normal level, you should tighten the valve and continue driving the vehicle. If possible, visit a tire shop.
Repairing a puncture using a tourniquet - simple instructions
“It’s annoying to puncture a tire: the damage is minor, but you can’t drive anymore, first you need to somehow get to the nearest tire shop,” many people argue in such a situation. In fact, you can do without the help of a workshop. If the front wheel is damaged, you don’t even need to remove it. The rear will still have to be done, but this will be the most difficult stage in the repair process.
To repair a wheel, you will need a soap solution in a spray bottle (a mixture of shampoo and antifreeze liquid that is not afraid of cold, it is better to prepare in advance and take it with you). You will also need: a file for cleaning the puncture site, a tourniquet, a mandrel for its installation and scissors.
Sealing a tire
If you decide to seal a tubeless tire yourself, or it’s simply too far from where you are to get to a tire shop, then here are instructions on how to seal a tubeless tire at home and on the road.
First of all, you should make sure that you have a simple kit, which is a kind of first aid for tires. The simplest such set includes:
– A special needle with an eye;
– Impregnated bundles;
Do not forget that the repair of tubeless wheels should be carried out quite carefully and carefully. First look at the direction of the screw, then try to understand and establish the angle of the hole in the tire. After completing this action, pull out the screw and insert an awl into the resulting hole at the same angle. Do every action as carefully as possible. The steel threads that stick out from the hole should be pulled out.
Take a specially impregnated rope and coat it with glue. Using an awl, insert this bundle into the hole, while turning the awl itself 90%, and then sharply remove it. The tourniquet should remain inside the hole, where it should be shaped like a loop. It’s worth noting right away that you shouldn’t skimp on the harness; follow the rules. Using scissors, cut the end of the bundle, preserving the ends at 2-3 mm.
Wait for the glue to dry. After waiting for this, inflate the tire with air to the required pressure level.
That's all the instructions on how to seal a tubeless camera at home or on the road.
Side hole damage
We should not forget about tire damage such as side holes. Such faults also exist, and they are usually quite large in size. If you have such a problem to seal a tubeless tire yourself; you can only contact a tire shop, and if the hole width exceeds 5 mm, then there is a high probability that even specialists will not be able to repair the tire. Therefore, it is always worth having a spare tire with you.
When sealing a tubeless camera, you can also use a tightening spray. This spray is quite effective in case of minor damage, which allows it to be used for repairing tires.
In order to make repairs with this spray, you should pour it inside the tire, in the place where there is damage, and then inflate the wheel. The spray will spread over the entire wheel and at the same time fill the punctured hole. We should not forget about removing objects that caused the tire puncture.
In general, this spray is quite convenient, but at the same time it has one drawback - in the event of further repair of the tire at a tire shop, you will also have to pay to remove the applied composition.
Side cut
Eliminating a side cut is a serious operation, therefore, as in the case of a bump, you will have to go to professionals. You need cord patches, fortunately nowadays they are available in different sizes and with different numbers of layers. And if you do it wisely, you cannot do without special tools and vulcanization.
A cut, by the way, cannot be healed in all cases. If the rupture is located in the tire shoulder area, it is unlikely that anyone will undertake to repair it, since no guarantees can be given here. However, our Kulibins take on even the most difficult cases, cutting out parts of the sidewalls from tires and even weaving the cord themselves.
Low-profile tires can be repaired, but are more difficult. It is easier to repair a tear in the sidewall on tires with a medium or high profile.
Sometimes a cut is confused with a pluck. This is when the outer layer of the sidewall gets caught on something sharp, causing a tear, but the frame itself remains intact. There is nothing wrong with this, although drivers at tire repair shops are successfully trying to get drivers to repair the cut, and they charge accordingly.
If a piece of rubber remains on the sidewall, then glue it with regular superglue (101st). If it comes off, it’s better to cover it with raw rubber and vulcanize it. It is not recommended to leave the pluck bare, since the tire frame, often consisting of a metal cord, will quickly corrode.