The steering mechanism in the Lada Granta consists of such a list of components and systems when the failure of any of the elements will not allow the driver to further operate the vehicle. Any malfunction that appears must be corrected immediately. In some cases, you just need to adjust the steering rack.
The steering mechanism of the Lada Granta has a rack and pinion design. This unit is quite reliable, but is not without an unpleasant feature - the appearance of a characteristic knock over time. You may also find information on how to tighten your steering rack useful.
Signs of backlash
If, while driving your car, you begin to notice such unpleasant phenomena as knocking, excessive vibration, spontaneous deviation from the trajectory, this may be the cause of play in the steering. According to traffic rules, the total play of a working car should not exceed 10 degrees. But even smaller values create certain inconveniences and discomfort. Even the smallest backlash tends to develop into a big one. Agree, it’s not normal when on an almost flat road you have to constantly turn the steering wheel left and right. With a large backlash, this is already called “catching the road.”
Preparatory actions, dismantling unnecessary parts
To remove the crankcase protection, you need to unscrew 4 screws located in one row near the bumper. Also, unscrew two screws having a standard size of M6x16. In some configurations, the protection consists of two parts, but in this case they are attached only with self-tapping screws. These words are illustrated by the following photo:
First, unscrew the “10” screws, and then the two “18” screws. In the second case, there will be more screws (eight).
Now let's look at how to remove the battery. First of all, disconnect its terminals. Then, you need to move the additional fuse box to the side. In general, actions are performed according to the photo:
You also need to remove the mounting platform itself, for which you unscrew 4 screws. You will need a 13mm wrench, as well as a 10mm spanner. We will repeat the entire sequence again:
Just in case, here is a look at the fuse box mountings:
Mounting screws are located under the casing
Causes of backlash and detection methods
There are four main reasons for the appearance of play in the steering. They arise as a result of wear and tear of parts during long-term use of the vehicle. For example, over time, gaps form and increase in the steering rod joints of the front wheels. Their presence and size can be determined visually or tactilely by probing with your fingers the parts that are connected by these hinges. In this case, someone must turn the steering wheel sharply, either left or right. Both parts must move synchronously. Check alone by moving the steering rod in the longitudinal direction with your hands. There is no play if it moves with the bipod. If there is even a small gap, the hinge must be replaced.
The second reason is increased wear or misalignment of the engagement of the roller and the “worm”. When turning the steering wheel sharply, a knock is heard in the steering mechanism. The defect is also detected when shaking the steering gear bipod with your hands. Action: adjust or replace parts.
Knocks and squeaks when turning the wheels, as well as when rocking the pendulum arm up and down, indicate wear on the bushings or the axle of this very pendulum arm. Try tightening the nut on the axle. Worn parts require replacement.
Finally, the fourth reason is that the fastening of the pendulum arm bracket or crankcase has become loose. You just need to tighten the appropriate nuts and bolts.
It remains to add that with proper operation of the car and care for the steering elements: periodic lubrication, timely detection of defects and elimination of emerging play, all mechanisms will last a long time and will not require unexpected costs for their replacement.
Steering is an integral part of any car. Thanks to this unit, the vehicle can change the direction of its trajectory. The system consists of many elements. The main component is the steering rack. Its backlash is unacceptable. About malfunctions and signs of breakdown of this mechanism - further in our article.
Steering wheel tuning on Lada Granta
There are few options for upgrading the steering wheel on the Lada Granta. The most popular of them is installing a sports version. Such a steering wheel will not only make the interior more attractive, but will also increase the comfort of control, especially if it is selected correctly. You can install a multi-steering wheel, but only if the configuration is maximum, in other cases there will be nothing to control with its help.
The sports version must be injury-proof, that is, in the event of an accident it must be deformed without causing damage to the driver. Among the shortcomings, it can be noted that although there is an airbag in the standard steering wheel, the sports one does not have it. You can also modify the steering wheel by installing braid. More advanced ones install a heating thread under it.
To install the sports steering wheel, you will need to carry out the following operations.
- Align the front wheels straight (you can drive a little forward and back so that the trajectory is straight).
- Disconnect the battery terminals by de-energizing the vehicle's on-board network.
- The airbag control module must be disabled (if the Granta equipment is equipped with it). If you do not turn it off when removing the factory steering wheel, it may shoot out.
- Remove the steering wheel and install a horn on the adapter. The wiring must be stored in the adapter; to do this, carefully inspect all contacts.
- Connect the adapter to the shaft, but do not secure it with a nut.
- A sports steering wheel is installed on the adapter and secured with special screws.
You cannot throw away or sell the factory product; the sports version will raise questions when passing inspection.
Characteristic
The steering has several functions:
- Increases the effort applied to the steering wheel.
- Transmits torque to the wheels through the drive.
- Automatically returns the steering wheel to the neutral position.
The main component of this mechanism is the gearbox. It has its own gear ratio (this parameter is different for each car). At the moment, a rack and pinion steering mechanism is used. Previously, manufacturers used a worm and screw assembly.
Comments 24
The warranty no longer applies. For this reason, remove and disassemble. We did it the first time and made a mistake during installation. Then a familiar mechanic fixed everything without removing it. The steering wheel became better than the factory one, a little more informative. A caprolon bushing, a disc spring, and a small repair kit were installed. If it can be tightened, then it’s better to do it first. Some craftsmen lie, this is allowed from the factory. If the rack has never been tightened, then most likely it should be removed.
the bushing didn't help? Hm
It’s simple, the 2190 rack on the driver’s side of the body has ebbs with ears, for which the rack is screwed to the body, but the Kalinovsky rack does not have these ears, there the rack is pressed through a clamp to the engine shield.
The 2190 rack does not have ears (I had one on Kalina). The regular one was 3.1. There was also a sports one with an index of 18. With ears, most likely the 92nd and it doesn’t cost that little. We have about 9 thousand.
I also have a 15 year old with eur. installed with article number 21920-3400010-00
thanks, I ended up with the same one
Don't be foolish and don't trust the service. There are repairs for 200.0 rubles. Just change the plastic bushing.
Can you be more specific about where it is... I have some kind of knocking noise in the cold winter (everything is fine in the summer). How does it warm up, does it?
are you talking about part number 1?
see bzh-no need to change the rack, it’s better to tune it
Look at the article number on your rack, take it off and you will see yours exactly.
This is the most accurate option. What is the mileage on the rack? I saved myself by replacing the repair kit and the bellows, and everything was ok.
it started knocking at about 60-63 thousand, and today it’s almost 73 miles. stays shorter)
I wouldn’t change it, 73 is not a big value for it, the bushing with the stop have worn out and that’s all, tightening it up will help for a week, or even a couple of days. Replace the repair kit and continue riding. At the service center they should change everything to a new one, no problems for them, no one wants to change the repair kit, it’s f...ing necessary, so they say that a new one needs to be installed, we know this, we’ve been through it more than once.
— The steering needs to be replaced, — Which steering? What exactly ?
So maybe first we should look at the bushing on the steering mechanism?
the service condemned the rake completely
Look at the bushing yourself. And then you will think whether to change the rack or not - even 73,000 km is not an indicator. Because if the service has “sentenced” the rack, then most likely the counter part also requires replacement. And this can already affect the steering mechanism assembly.
The steering mechanism in the Lada Granta consists of such a list of components and systems when the failure of any of the elements will not allow the driver to further operate the vehicle. Any malfunction that appears must be corrected immediately. In some cases, you just need to adjust the steering rack.
The steering mechanism of the Lada Granta has a rack and pinion design. This unit is quite reliable, but is not without an unpleasant feature - the appearance of a characteristic knock over time. You may also find information on how to tighten your steering rack useful.
Symptoms of a problem
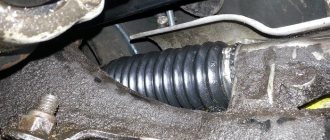
How to determine that the steering rack is faulty? Backlash is not the only sign. So, when turning the steering wheel, the driver applies more effort than required. Of course, there are some nuances here (after all, there are drives with and without an amplifier). So, on a hydraulic steering system, you will notice a characteristic pump hum. Sometimes this is accompanied by leakage of working fluid from the tank. As for mechanical drives, the turning sound will remain the same. However, the steering wheel will become noticeably tighter. This is the first sign that the steering rack has failed. Play during wheel rotation can occur on both types of drive - mechanical and hydraulic. Another reason is a leaking rack seal. In this case, characteristic streaks will be visible on the assembly, as in the photo below.
Lyrical digression
In Lada Kalina, the steering rack never makes a knock when we are talking about a new car. This is also true for the break-in period. Let's say in your case this is not done. Then, do not try to repair anything, but go straight to the dealer. According to reviews, the defect in question is covered under warranty, and most car dealers do this: the steering rack assembly is replaced with a new one.
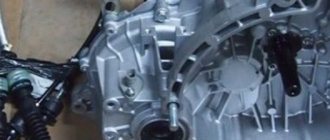
This is what the replacement unit looks like, the rack assembly
There is a logic here. At the factory, adjustments are made correctly (this is true in 99.9% of cases). If a defect appears, the dealer replaces the assembly without expecting that adjustment will solve the problem. The owner does not need to hope for this either. The choice is yours.
Why does backlash form?
In most cases, this problem is related to the condition of the road surface. After all, every unevenness is absorbed not only by the suspension, but also by the steering mechanism. So, with frequent driving through potholes, play in the steering rack shaft is observed. Much depends on your driving style. To save the rack as much as possible, you need to brake well in front of the pits. But this does not guarantee that backlash will not appear soon. Driving over speed bumps, concrete joints and other irregularities simply ruins the rack. The load on the gearbox increases tenfold. After 10-15 years, steering problems appear on the car. By the way, upon reaching this period, foreign car manufacturers recommend changing the rack. But the problem is that it is very difficult to find a new part for such an old car. But repair kits don’t always save the day. How to eliminate play in the steering rack? One of the surest ways is the so-called tightening of the steering mechanism. Of course, this will not increase the gearbox life. However, for a while you can forget about the constant jerking of the steering wheel and drive in comfort.
Making adjustments yourself
You can access the adjusting nut from the engine compartment, but to do this you will need to remove the battery, as well as the battery mounting pad. It is better to drive the car into a pit and then remove the crankcase protection (engine mudguard). If you look from under the bottom, the required element is immediately visible:
You need to turn this nut
And when you open the hood, you can feel the nut, but not see it. Its location is marked in the figure:
To make adjustments, place the key here
Before adjustment, remove the rubber cap from the recess. Its appearance is shown in the photo:
Remove the cap and install the key
If it is not entirely clear what exactly needs to be done, it is better to contact the service. The key is installed in the recess and then rotated 10-15 degrees.
When looking at the rack from above, turning the key clockwise corresponds to unscrewing it. The handle of the key comes from the center of the car - which means tightening is being done. By the way, the latter is true provided that the handle faces forward.
How is the steering rack tightened?
Backlash that is higher than normal can be reduced by adjusting the gear mechanism. To do this, tighten the corresponding screw. It is located in the end cap of the rack. For convenience, use a pit or overpass. As a last resort, you can use a jack (in any case, we need access to the rack from below the car). So, set the front wheels straight and start tightening.
Disassembling the steering column
The first step in disassembling the column is to remove the protective casing; to do this you need to cut the plastic clamps. Next, take a special key No. 17 and unscrew the thrust nut, carefully remove the installed retaining rings, then the spring. After this you can knock out the rack stop. Remove the boot and the existing seal installed on the drive gears. Take the second special wrench No. 24 and unscrew the nut that holds the ball bearing - carefully remove the gear.
There is now nothing holding your rack in the housing, so you can carefully remove the right side. Having freed up some space for yourself, try to remove the drive gear bearing. This can be done using a prepared puller. Be sure to check the removed bearings for play. If there is one, then the bearings must be replaced. It is imperative to replace the support sleeve - it has a cylindrical shape and is located in the steering housing. It is quite easy to get it out - take a screwdriver and pry it off.
Underwater rocks
What problems may a motorist encounter when performing operations to tighten the steering mechanism? The first is the rotation angle. The tighter the rack is tightened, the lower the degree of rotation of the front wheels. Accordingly, the maneuverability of the vehicle decreases. The second point is the effort required to rotate the steering wheel. The tighter the nut is tightened, the tighter the steering wheel. This is especially noticeable on cars with a mechanical drive type (these are domestic “tens”, “trainers” and foreign cars of the early 90s). As for cars with hydraulic booster, the load on the pump increases. The fluid pressure inside the system will increase. The hose or cuffs may leak. If you feel that the steering wheel has become very tight and is difficult to return to the neutral position, you need to loosen the nut. It is not recommended to ride on a heavily tightened rack. This will entail wear and tear on a number of other elements.
Removing the steering gear
If a knock does occur, the car owner will have to dismantle the mechanism. It is more convenient and faster to carry out this work when the vehicle is on a lift. To carry out the work you will need the necessary tools, which in this case include:
- socket wrench or socket wrench 13;
- flat screwdriver;
- durable knife;
- special 24mm wrench for the steering rack;
- hexagon 6 with wrench.
Before starting work, the battery is disconnected, thereby taking the necessary safety measures. At the initial stage, you need to first loosen the bolts securing the front wheels. The wheels themselves should be left in the “straight” position before lifting the car onto the lift. Next, the steering wheel driveshaft is disconnected from the rack and pinion drive shaft.
Steering column assembly
This process should begin by installing a new needle bearing. Before installation, generously lubricate the seat with Fiol-1 grease. Next, press the ball bearing onto the drive shaft. The next element is the support sleeve. Install it into the control unit housing. After this, you need to fill the inside of the column with lubricant and you can insert the steering rack into it.
Mount the drive gear, secure it with a nut and do not forget about the retaining ring. Put on a new boot. After this, all you have to do is install the stop in place and secure it with a locking ring and nut. OK it's all over Now. After these steps, all you have to do is adjust the entire control unit and then put on the protective cover.

