MALFUNCTIONS OF THE ELECTROMECHANICAL CORRECTOR
An electric drive system is much more reliable than a hydraulic corrector, but it is not without its drawbacks.
Possible malfunctions:
- breaking off, chafing of wires, formation of oxides in connectors;
- wear of electric motor elements;
- burnout of circuit elements (for example, due to overvoltage in the machine’s on-board network or moisture entering the control unit housing). Faulty resistors can cause the corrector to operate incorrectly or only within a limited adjustment range. Often the problem is wear of the resistive tracks, which causes contact chatter. The ECU will constantly try to equalize the voltage, as a result of which the microcircuit elements fail due to overheating.
We will consider the process of diagnosing the electromechanical forced-action headlight range control. Diagnosing complex faults in automated systems that use ride height sensors requires much more specialized technical training.
CIRCUIT DIAGRAM
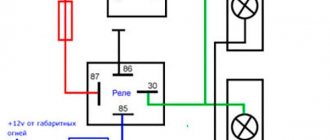
Before starting diagnostics, you should study the electrical diagram for connecting the gearmotors on your car.
Most often, 2 typical connection schemes are used:
- with 5-wire gearmotor connector. This connection method can be found not only in standard systems, but also in kits for installing an electrical corrector with your own hands (for example, EMKF 11);
- with a 3-wire connector for gearmotors (most often found on modern cars). Accordingly, one of the contacts will be “ground”, the second will be a constant “+”, and the third will be a signal wire.
Despite the different pinouts, the electric headlight corrector works on most cars according to a similar principle. The operating principle is based on a constant comparison of the voltage across two variable resistors. One of the resistors is connected to the headlight range control switch on the dashboard, and the other to the actual position sensor of the electric corrector rod. Comparing voltages with a differential amplifier allows you to realize voltage equalization in the event of a mismatch error. Thus, turning the switch on the dashboard causes the headlight range control motor to extend by a fixed distance.
CHECKING POWER WITH A MULTIMETER
If you have not previously encountered diagnostics of electrical appliances, we recommend that you read the instructions for using a multimeter. The first thing you need to check is whether there is a constant “+” at the gearmotor connector and whether there is a “ground” on it. Also, in direct current measurement mode (DCV), connect the positive probe to the signal wire, and the negative probe to the ground pin.
When turned off, the voltage is minimal, while when the switch is rotated it should be from 3 to 10 V. Before checking, you must turn on the low beam headlights.
If “–” or “+” does not come into the chip, the same operation should be carried out with the connector connected to the control unit in the car interior. If power leaves the ECU chip, but does not reach the connector, then the problem is a broken wiring. If there is no power to the gearmotor at the connector, you should check the “ground” and “+” of the control unit itself. A situation where power comes to the unit, but the ECU does not react in any way to changing the position of the switch, indicates a malfunction inside the headlight range control unit.
What does a hydraulic corrector consist of and how does it work?
The hydraulic device, thanks to which you can adjust the angle of the light beam from the interior, consists of the following main parts:
- master cylinder located under the dashboard;
- working cylinders, one on each headlamp;
- tubes connecting the above devices.
Hydrocorrector of Lada Granta headlights
In addition, there is a mode switch on the instrument panel, with which the driver changes the pressure in the master cylinder.
The hydraulic corrector system is closed and at the same time sealed (normal). The changed pressure is transmitted through the tubes to the working cylinders. This leads to a change in the position of the pistons and the rods connected to them. They use a special lever mechanism to influence the angle of rotation of the reflector. This is the operating principle of the hydraulic headlight adjuster for the Lada Granta.
Switch for adjusting the headlight beam angle
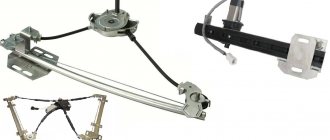
The electric corrector differs in that the desired position of the lampshades is ensured by mechanisms powered by on-board electricity. Their operation is not affected by changes in ambient temperature, so they are much more reliable than hydraulic devices. Their only “minus” is the cost, which is several times higher.
Electric headlight corrector for Lada Granta
Replacing a hydraulic corrector with an electric one
If you still want to install a more reliable electrical device, there should be no difficulties with installation - everything will fit without problems. What should be done:
- Remove the used hydraulic device as described above.
- Disconnect the negative terminal from the battery.
- Electrical mechanisms are installed in the places where the working cylinders stood. It's a good idea to replace the O-rings.
- The positive wire is connected to terminal “20”, the negative wire is connected to ground.
- The wiring is attached where the connecting tubes were, or is wound to a common electrical wiring harness.
- All that remains is to put the negative terminal on the battery and check how the electric headlight range control works.
That's it, quick and easy. And your Lada Granta not only has a brand new headlight level control, but also works. So now you can load the trunk to capacity - there will be no problems adjusting the angle of rotation of the lampshade.
Is it possible to repair the Lada Granta hydraulic corrector?
If one or both headlights stop responding to turns of the adjustment knob, you need to think that the hydraulic device has failed. There may be several reasons:
- jamming of the working cylinder (one lamp does not turn);
- depressurization of the system due to failure of sealing elements;
- depressurization due to damage to connecting pipes.
Recommended literature on repair and maintenance of Lada Granta:
LADA GRANTA / 2190 from 2011 onwards, / 2191 from 2014 onwards, petrol, repair manual More details LADA GRANTA / 2190 sedanan / 2191 liftback, petrol, from 2011 onwards, repair manual More details LADA GRANTA / 2190 petrol from 2011 onwards, maintenance manual More detailsLADA GRANTA / 2190 petrol from 2011 onwards, repair manual, operating instructions More details
In the last two cases, both reflectors do not rotate. In most cases, they “fall”, that is, they occupy the lowest position.
Adjusting the hydraulic corrector rod
Manufacturers of headlight correctors for the VAZ 2114 are very similar to the headlight correctors for the Lada Grant; they also did not provide for the possibility of repairing the closed hydraulic system itself, as well as its individual elements. In this case, you can only replace the device. Attempts to repair the hydraulic corrector still take place. However, these are rather temporary measures (screwing in self-tapping screws instead of a working rod, for example). They make it possible to install the lampshades in one working position. We are not talking about adjustments from the cabin here.
So, if the owner of a Lada Granta wants to have a working headlight adjustment system in his car, he will have to start replacing the hydraulic corrector. Whether to install a hydraulic device again or prefer an electric corrector is a matter for the owner. Both options are possible, so let's consider each.
Adjusting the Lada Granta headlights is required if you do not have enough factory light settings. Do you have to turn the hydraulic corrector to maximum? It's time to adjust the headlights. We’ll tell you how later.
Replacing a hydraulic corrector with an electric one
When the driver notices that one or even both headlights do not respond to control, the symptom indicates that the device is not working. Common reasons:
- the working cylinder is jammed, one of the lamps does not turn;
- depressurized due to wear of sealing components;
- the rod and lever of the actuator are not fastened tightly enough;
- the connecting tubes are damaged, which caused a loss of tightness.
Violation of integrity leads to the fall of reflectors on both sides - they end up in the lowest position.
There are several ways to deal with the problem that has arisen on the Lada Granta:
- replace the hydraulic regulator with an electric corrector;
- fill the working cylinders with antifreeze;
- replace faulty cylinders with plugs for headlights;
- install self-tapping bolts, fixing the reflectors.
Plugs or bolts will make the system functional but unregulated. Filling with antifreeze allows you to adjust the position, however, the measure still remains temporary, since then a full replacement will be required.
In order to replace the hydraulic corrector for headlights on a VAZ 2110, you need to stock up on a wrench with a 21 and half hour head. The actions are performed in this order:
- The adjustment knob is removed (you need to pull it) on the dashboard. Under it there will be a nut 21, which should be unscrewed. This releases the master cylinder and can be removed.
- We open the hood and find headlights and working hydraulic mechanisms installed on top. On each one you need to release the latches, turn the cylinders counterclockwise and remove them.
- Disconnect the tubes (most often they are secured with clamps with a screw clamp). Now all the elements of the system located under the hood need to be brought into the cabin through an opening closed with a pliable seal.
- Install all elements of the new Lada Granta hydrocorrector. The sequence is reversed.
If you still want to install a more reliable electrical device, there should be no difficulties with installation - everything will fit without problems. What should be done:
- Remove the used hydraulic device as described above.
- Disconnect the negative terminal from the battery.
- Electrical mechanisms are installed in the places where the working cylinders stood. It's a good idea to replace the O-rings.
- The positive wire is connected to terminal “20”, the negative wire is connected to ground.
- The wiring is attached where the connecting tubes were, or is wound to a common electrical wiring harness.
- All that remains is to put the negative terminal on the battery and check how the electric headlight range control works.
That's it, quick and easy. And your Lada Granta not only has a brand new headlight level control, but also works. So now you can load the trunk to capacity - there will be no problems adjusting the angle of rotation of the lampshade.
Do-it-yourself adjustment of Lada Granta headlights
Let's look at what you need to quickly and step-by-step adjust the head light on a VAZ 2190:
- a room with a flat wall at a distance of at least five meters from the car;
- a Phillips screwdriver or a six-point hexagon;
- tape measure or long ruler;
- weight equal to yours to place on the driver’s seat (a person of your build or 2-3 bags of plaster - cement - the neighbor’s).
Step-by-step adjustment of low beam headlights on Grant
First , we park the car opposite a flat wall at a distance of 5 meters from the headlights to the wall. Only on a flat surface .
Second , we measure the height from the low beam bulbs to the ground. We mark it on the wall opposite each headlight - this is the upper limit of the light beam.
Third , we retreat down 35mm. and make another mark. For what - shown in the figure.
When do you need to adjust headlights on a Grant?
The main motive for working with headlights is insufficient road lighting. There are many reasons for this:
- From the factory the car comes with a low beam adjusted for the driver's weight of 75 kg . This is a universal setting - if your weight is different, you need to adjust it immediately after purchase;
- the hydraulic corrector has failed - when it breaks, the headlights either shine crookedly or are not adjusted at all;
- Driving over bumps and potholes over time leads to changes in the settings of the light beam;
- buying a car second-hand - it is not known exactly how the lights were set up by the previous owner.
Adjustment
There are 2 types of settings:
- Lamb - left, right.
- Plastic white nut - up, down.
You need to rotate it through the hole shown in the photo.
To do this, you will need a long hex wrench with a ball on the end, since the hole does not coincide slightly with the location of the nut. Therefore, the ball will help turn the key at a certain angle. You can use a hexagon with a small cardan, size H6.
We insert it into the indicated hole, get into the nut and rotate it. First, adjust the low beam of the left headlight. It is recommended to do this on the road with an oncoming car. The beam of light must be raised up so that it does not hit the windshield of an oncoming car. Otherwise, your headlights will blind the driver.
The light should fall approximately at the level of the bumper with a small margin in height. If there are passengers in the rear seats, the car will sit down and the beam of light will rise. For this you need a headroom.
How to turn on near or far
The light switch on the Grant is located below the left of the steering wheel - similar to the tenth family.
Switching the handle clockwise gives the headlight and low beam modes.
To turn on the high beam:
- turn the light knob to the extreme right clockwise - the low beam will turn on;
- push the left steering column switch forward (the one that controls the turn signals);
- your high beam will light up - and a blue headlight icon will appear on the panel - keep an eye on it so as not to leave the car with high beam when it is no longer needed.
This icon indicates that the high beam is on.
What is a hydraulic corrector and how does it work?
The hydraulic headlight corrector is installed on the Grant from the factory. This device adjusts the headlights higher or lower depending on the vehicle's load.
You need to adjust it yourself - there is no automatic setting.
The corrector control is located under the light switch handle. Position 0 corresponds to a car with one person - the driver.
Principle of operation:
- the handle controls the hydraulic corrector cylinder;
- the cylinder regulates the pressure in the flexible tubes that go to the pushers;
- pushers are installed in the headlights - the higher the pressure in the tubes, the stronger the liquid inside the pusher presses on the rod;
- the position of the rod deeper/further is responsible for adjusting the headlight higher/lower.
The operating principle of the hydraulic corrector is clearly shown below:
Visual representation of the headlight hydraulic adjustment system
What to do if the hydraulic corrector is broken
Have both or one headlight stopped responding to the hydraulic corrector? Most likely your pusher is broken .
If you want to fix the pusher, there are two ways .
Table 1 . Options for repairing the headlight range control pusher.
Option 1 – barbaric.
No further adjustment.
Link to a detailed description of the second method with comments here.
A corrector kit costs about 700 rubles - it may be easier to replace it
How to replace a hydraulic corrector with an electromechanical one
Do you want to replace the hydro with an electric corrector (EMKF)? The process is simple, as there are ready-made solutions from the factory.
To replace, you only need straight hands - depending on the manufacturer of the EMKF:
- dismantle the old hydraulic corrector;
- We install a new corrector control unit in place of the cylinder - we run the wiring according to the instructions;
- we pull the wires through the elastic band along which the hydro pipes went;
- We put the regulators in their standard places in the headlights.
step by step from personal experience here.
Operating principle of the device in Grant
- The corrector cylinder must be controlled using the handle.
- The cylinder is responsible for regulating the pressure in the hoses extending to the pusher.
- The pushrods are located in the headlights. The higher the pressure rises in the tube, the more dynamically the liquid presses on the rod (located in the internal compartment of the pusher).
- The main position for adjusting the headlights is the position in which the rod itself is located.
When the corrector on the Grant is damaged (one headlight does not respond to it), the pusher should be put in order. It is the malfunction of the latter that mainly provokes the breakdown of the entire device. There are 2 ways to repair a pusher. With the first, no further adjustment is provided. To implement this technique you need to do the following:
- remove the damaged pusher from the headlight;
- warm up the pusher hose (which gives greater flexibility), and then remove the pusher from it;
- tighten the self-tapping screw from the side of the hose (you need to tighten it at an angle, since the level of protrusion of the rod directly depends on the depth of tightening of the screw);
- adjust the length of the screw to obtain the desired result.
To work on adjusting the headlights, you need to prepare the tool in advance:
- 6 mm hexagon or Phillips screwdriver;
- a sheet of chipboard 3x3 m or a vertical flat panel made of another material;
- tape measure or long ruler;
- a couple of crayons;
- several newspapers.
Let's summarize
- Adjusting the headlights of a Lada Granta requires five meters of space, a machine, a Phillips screwdriver and a tape measure;
- to turn on the light in the trunk, turn on the low light and open the trunk;
- You can repair the hydraulic corrector yourself, or you can buy a new one for up to a thousand rubles.
Even more articles about the repair and maintenance of Grants are here.
Welcome! Hydrocorrector for headlights - it appeared a very long time ago in the VAZ car line and it all started with the classics, later it switched to front-wheel drive, was installed on the VAZ 2109, VAZ 21099, etc., in fact it is a very convenient thing, which is difficult to do without In such a situation, when the car is heavily loaded, thanks to it, you can direct the headlight beam up or down without leaving the car, this is especially useful when the rear of the car is loaded, for example, they put a lot of food in the trunk and the rear part sat down a little, thereby the headlights start to shine not forward, but upward, blinding other drivers, so to prevent this from happening, a hydraulic headlight corrector was invented, by turning the handle of which, the headlight beam can be directed downward, and thus it will no longer blind anyone.
Note! To replace the headlight hydraulic corrector, you will need to stock up on: A wrench and a socket “21”; if you don’t have a wrench, you can also use an extension cord instead!
Summary:
Where is the headlight hydrocorrector located? One end of the corrector is brought out into the car interior (it has a button that needs to be rotated, so the tip of the hydraulic corrector is installed behind it), and with the other ends (it is divided into two parts) it is brought out into the engine compartment, where the first end is connected to the left headlight, and the second to the right headlight, for clarity, in the photo below the red arrow shows its connection to the headlight, and the blue arrow indicates the control button, under which the headlight hydraulic corrector itself is located.
When do you need to change the headlight hydrocorrector? If it fails, it must be replaced, due to which it will stop adjusting the headlights (One headlight) and therefore the operation of the car will deteriorate, in addition, the headlight may completely fall off (Everything will most likely happen, that is, for example, your headlights were always set to the number “2” on the hydraulic corrector, after it fails, regardless of what number the headlights are set to, they will fall to the very bottom at “0”) and look at the very bottom at the road and finally the hydraulic corrector when exiting faulty, we recommend that you inspect it, namely, check all the hoses coming from it (From the passenger compartment), as they say, from and to (Completely) and if during the inspection you find places where liquid is leaking (It should not leak from the hoses under any circumstances, even drip, if it leaks, then it has become unusable), then it must be replaced.
Replacing a hydraulic corrector with an electric one
If you still want to install a more reliable electrical device, there should be no difficulties with installation - everything will fit without problems. What should be done:
- Remove the used hydraulic device as described above.
- Disconnect the negative terminal from the battery.
- Electrical mechanisms are installed in the places where the working cylinders stood. It's a good idea to replace the O-rings.
- The positive wire is connected to terminal “20”, the negative wire is connected to ground.
- The wiring is attached where the connecting tubes were, or is wound to a common electrical wiring harness.
- All that remains is to put the negative terminal on the battery and check how the electric headlight range control works.
That's it, quick and easy. And your Lada Granta not only has a brand new headlight level control, but also works. So now you can load the trunk to capacity - there will be no problems adjusting the angle of rotation of the lampshade.
Higher education: secondary specialized. Specialty: Auto mechanic. Good knowledge of the design of foreign-made passenger cars. Work skills: replacing the timing belt of the cylinder head, chassis wheel alignment and maintenance. Repair…
1 comment
Vitaly says: Thanks to the author, it’s very interesting and informative, I’ll look at something with one headlight on Bedakuril in the near future.
How to replace the headlight hydraulic corrector on a VAZ 2190?
Removal: 1) Removing the corrector is easy and difficult can arise only with pulling it out, this is all done as follows, first remove the cover of the mounting block by hand, which is attached to four latches (see photo 1), as soon as the cover is removed, you need to move will be to the working cylinders of the corrector (these are the ones that are located on the headlight) and both will have to be disconnected; they are disconnected by pressing the latch (there is a latch on each cylinder that secures them to the headlamp unit) and turning counterclockwise and then pulled out (see photo 2) , after which you again need to move to the salon and there you need to remove the headlight range control handle by pulling it (see photo 3) and behind the handle, unscrew the headlight range control nut located behind the handle with a socket wrench (see photo 4) and after that you can remove the range control from car.
2) The hydro-corrector of the headlights is removed by leading it into the car interior, that is, at the beginning, as shown in the small photo, the hose seal is brought out into the cabin (Indicated by a red arrow) and behind it the hoses with the working cylinders are brought out and thereby the headlight range control is removed from the car.
Installation: The new hydraulic headlight corrector is installed in exactly the same way; it is inserted through the passenger compartment and thereby brought out into the engine compartment, where the working cylinders of the corrector are connected to the headlight unit, while the hole in the engine shield is closed with a hose seal and the other end (which is in interior) is inserted into the hole and then tightened with a nut, while the headlight range control knob and the mounting block cover are installed in their place.
Additional video clip: You can clearly see the process of replacing the headlight range control in the video below, using the example of a car such as a VAZ 2110; the replacement procedure is not particularly different on a Lada Grant or on dozens.
| |
| Option 2 – humane . We return the corrector to full working condition. |
|
Raising the headlight with replacing the hydraulic corrector
Any replacement process consists of two obvious phases: removing the old unit and installing a new one. To replace the corrector in a Lada Granta car, you will need a 21 key and a so-called ratchet.
Removing the headlight hydrocorrector in the Lada Granta includes the following steps:
- First, remove the adjustment knob (this is done manually from the interior where it is located), and unscrew the nut inside.
- Then, in the engine compartment, remove the cover of the mounting block (it is secured with 4 clips).
- We dismantle the main cylinder of the hydraulic corrector, then remove the working cylinders. This is done by releasing the clamps and then turning the cylinders counterclockwise.
- Slightly loosen the clamps on the hoses (tubes) and carefully tighten the hydraulic corrector tubes into the cabin. First, the seal is pulled out, and then the hoses themselves with the cylinders.
Installation of a new hydraulic corrector occurs in the reverse order:
- We insert the cylinders of the new hydraulic corrector from the passenger compartment into the engine compartment and attach them to the headlight block.
- We close the hole in the shield with a tube seal, insert the hose into the hole and secure it with a nut.
- We put the cover on the mounting block (under the hood) and the headlight hydrocorrector control knob (in the cabin) in their original place.
If, instead of the old hydraulic corrector, an electrically driven corrector is installed, the procedure will be as follows:
- We install new electric drive mechanisms in place of hydraulic cylinders.
- We connect the positive wire of the electrical mechanisms to terminal “20”, and set the negative wire to ground.
- We install the appropriate wiring in place of the connecting hoses.
To control the operation of the corrector, you need to connect the terminal to the negative of the battery.

