No matter how hard you try to care for your car, not a single car owner can avoid damage to the paintwork. This is an evil that we can only come to terms with. Moreover, the risk of troubles does not depend on the age of the car; sometimes just leaving the car dealership is enough to arrive home and see a couple of chips that have appeared. It's a shame when almost nothing depends on you in this matter.
But you shouldn’t panic right away, because if you pay attention in time, the problem can still be eliminated with minimal financial costs. You shouldn’t rely too much on the reliability of a galvanized body, especially since the quality of such coatings is now far from perfect. As they say, you know who takes care of the best. For this reason, it is better to start repairs right away, because in 1-2 months the situation can change dramatically, and only for the worse.
The photographs above show the consequences of untimely repair of chips.
What is the difference between chips and scratches and other damage to paintwork?
Car repair is in many ways similar to medicine; before starting treatment, you need to make a correct diagnosis, otherwise all subsequent actions will not only not give the desired result, but will also cause additional harm. All this is true for body repairs associated with the restoration of paintwork, the work of a master is somewhat reminiscent of the work of a dermatologist.
To make a correct diagnosis, it is necessary to understand the symptoms of the disease and its signs. Therefore, we will begin the review with the most common damage to the paintwork. If you imagine the overall picture, the paintwork defects that occur most often look like this:
In most cases, you have to deal with the following coating defects:
- Cobwebs, holograms - represent multiple scratches, scratches, the depth of which does not exceed 1-2 microns. They are noticeable only from a certain angle, are not felt under your hand, but are quite annoying, especially on dark surfaces.
- A standard scratch damages only the varnish layer or the top part of the acrylic auto enamel coating. They are already more noticeable, sometimes you can catch them with your fingernail, but they don’t really spoil the appearance of the car, though only if you don’t look closely.
- Deep scratches can no longer be ignored. They are highlighted by changing the color of the coating, sometimes even the primer is visible. By the way, such scratches are the most difficult to deal with - there seems to be no reason for repainting, and polishing does not always help.
- Scratches with corrosion are in most cases the consequences of the carelessness of the owner of the car. Just remember how many times she shouted to you about the problem that had arisen. Yes, yes, in most cases this is how it all turns out, a cobweb, a little deeper, a little stronger, and already 2-3 months after the trip to the forest, red stripes began to appear on the body of the beloved car.
With all kinds of scratches, we forgot about chips. In essence, these are the same damage to paintwork, but they differ in shape and damaged area. Have you ever looked at the Moon through a telescope? So, chips under a microscope are in many ways similar to them.
If the scratch is a narrow strip of different depths and lengths, then a chip is already a full-fledged stain that cannot be removed with one stroke of a pencil or marker. A special difficulty is presented by the torn edges of the damage, it seems that these are traces of a real bombing.
What to do if your car already has chips?
Ideally, it is necessary or done (depending on the amount of damage).
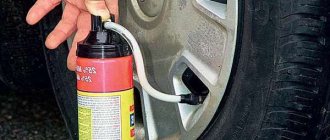
But if the pebbles attacked only one part and in small quantities (5-10 chips), then it is advisable to purchase the magic “R-stop” product, which does not require rinsing. Just one drop of P-Stop can penetrate deep into the rust and stop the corrosion process. Today it is one of the best anti-corrosion agents. After treating the chips with R-stop, you need to let it soak in and dry (about 15 minutes), then apply paint to the chips. By the way, it’s easy to choose paint by color in any car dealership or car market, because it’s sold in 20-gram corrector pencils.
If you want to make the chips less noticeable, then they will need to be dripped several times (until they are completely covered with paint). This may take several days as the layers of paint need to dry. Approximately, if you drip in the morning and evening, within 2-3 days the chip will be filled, even with metallic paint. All that remains is to polish the part with a polishing machine () or.
You can also fill the chip with automotive putty. To do this, you should purchase the smallest package. It’s even better if the putty is already available. You need to take just a little bit of hardener, otherwise the mass will harden very quickly.
When applying the putty, remove the excess with a hard rubber spatula. It is advisable to remove it around the chip before it hardens. This is best done with a cotton swab dipped in alcohol.
The best quality chip repair involves spot painting. You can, of course, paint with a small brush, but then there is no guarantee that after polishing the repair will be completed perfectly. It is better to paint with a spray can or spray gun (airbrush).
Spot painting involves performing a circular transition. The procedure in this case is as follows:
- Sand the putty and the area around it with a radius of several centimeters;
- You need to remove the gloss from the varnish with 2000-grit sandpaper;
- Degrease the chip and prime it;
- Apply the first coat of paint, trying to extend as little as possible beyond the chip. If you paint metallic, you will have to stretch the transition by several centimeters;
- Maintain a 15-minute technological break and apply a second layer of base;
- Apply two layers of varnish (with a break), without reaching gloss;
- Wait a few days and polish the chipped area and the matted varnish around with pastes.
If everything is done correctly, then, provided the shade of the paint matches, there will be no trace left of the chip. However, in the case of metallic, the stain may remain noticeable. Then you need to try to choose a better paint or stretch the transition over a larger area.
The car body is a part that requires care and careful handling. Sloppy driving, poor quality roads and other factors often cause defects in the paintwork of a car. The appearance of small chips in the paintwork requires repair because it spoils the appearance of the car and causes further damage. For this reason, drivers sometimes need information on how to remove chips on the car body.
No car owner is insured against damage to the paintwork. In addition to careless driving, chips on a car appear for the following reasons:
- unfavorable weather conditions - hail, temperature changes;
- road covered with crushed stone;
- insects crashing into a car at full speed;
- carelessness of others, physical damage;
- improper car washing.
The car owner does not notice the formation of small paint chips. Only a careful examination of the body after the trip and cleaning the car of dirt helps to find possible defects. If they are detected, it is advisable to repair the body as quickly as possible. Leaving minor damage unattended can have consequences.
Microdamages violate the integrity of the paintwork and cause further corrosion, and an increase in the defect area will make repairs expensive. While waiting, the situation will worsen when the body begins to rust. Damaged paint will not be able to prevent the oxidation of the metal. In this case, the car body will require lengthy and costly professional repairs.
The main reasons for chipping
With the same scratches, everything is very clear - tangential contact with foreign objects. But the appearance of chips is possible for a number of reasons. Let's go in order:
- The most common option is chips resulting from impacts from small stones flying from under the wheels of the vehicle in front or even your own car. For Moscow, with its dense road traffic, this reason can be called the leading one, especially in cases where a truck carrying soil, stones, crushed stone, sand or other bulk materials partially loses them from the body for various reasons. The whole thing crumbles onto the road surface and this section of the road becomes very unpleasant for almost everyone - the scattered stuff flies out from under the wheels with all the ensuing consequences.
- The second possible reason is climate impacts. Of course, hail the size of a chicken egg is still rare, but sometimes ordinary pieces of ice falling from the sky are enough. By the way, this also includes chips that appear when clearing snow and ice with a regular scraper, so think about it before preparing your car for a trip in the winter after an overnight stay in an open area.
- Nature is distinguished not only by precipitation, it decided to finish off your car with flora and fauna. It’s not worth talking about the possibilities of cones and other objects falling from trees, everything is clear here, once even Mishka could not withstand such a blow. But for some reason many people forget about encounters with insects. The organic acids that make up these small bodies corrode the top layer of paintwork, causing a kind of burns. As a result, the thickness of the protective varnish decreases. Exposure to bird droppings also falls into this category.
- The cause of chips can also be poor-quality body repairs. If the technology for leveling the surface with putty is not followed, rubbing it wet leads to the fact that over time this layer shrinks significantly. As a result, the strength of the coating decreases, which is why chips form at the slightest external influence.
Generally speaking, damage of this type occurs due to impacts from stones and other foreign objects, but the prerequisite for the appearance of chips is often a decrease in the strength of the paintwork itself.
Car body protection
The problem of protecting the painted surface of the body from chips and scratches is very relevant. After all, everyone wants to preserve the original appearance of the car, but small details on the road surface make it difficult to do this.
Painting can even be ruined at the car wash, where if all the rules are violated, it can be easily washed off along with the dirt. Quite a lot of means of protection have been developed, but not all of them are effective.
Many people believe that polishing is enough to protect the car from scratches, but this is not the case. The coating will wash off faster than the paint itself.
However, there is still protection, just from dirt particles. If you still think that polishing is an excellent protection against mechanical stress, even from stones, then you are wrong.
The so-called “muzzle” can also be considered an ineffective means of protection. Over time, sand and dust get underneath it, which periodically eats away small holes.
Plastic deflectors also cause harm over time for the same reasons, even though the device initially performs its function.
The above means do not provide the desired result, but more effective means for providing body protection are still available on the market.
One of them is a “liquid cover” , which has a certain composition.
After applying it to the body, according to the rules specified by the manufacturer, a long-awaited protective coating appears on the surface, which looks like a film.
If you do not follow all the technological aspects of application, then it will not be able to fulfill its purpose.
Once you've driven through bad sections of the road and it's time to remove the protective layer, you can easily remove this layer without damage or marks on the surface.
Another reliable means of protecting car paint from road gravel in this case is armoring film. Just be prepared to pay much more for it than in previous cases.
The film is transparent, so you may not notice it on the car. Experts often give recommendations regarding this particular protection option, and some manufacturers even use it at the factory.
This lenka will last for several years. The service life depends directly on the operating conditions of the car, driving style, and usual speed.
Over time, you will be able to remove it, but this must be done carefully; it is better to contact a specialist.
The most common options for car body protection have been presented to you. You can evaluate all their advantages and disadvantages yourself.
After weighing all the recommendations, you will come to the right decision and choose the best protection option for your vehicle.
What kind of chips will most car owners have to deal with?
As with scratches, chips differ from chip to chip. We can clearly classify 3 main types of such coating damage:
- chips that affected only the top layer of varnish or acrylic enamel to a depth of no more than 1-2 microns;
- defects that have already damaged the base paint, partially affecting the primer layer;
- damage that reached the metal and caused rust.
The most difficult thing to deal with is the last type of chips; unfortunately, you often have to simply repaint the damaged body part; there is no talk of any gentle types of repair.
How to remove small and deep defects with your own hands
Small and shallow scratches can be removed using regular polish. Circular lines and stains visible on the surface of the metal indicate low-quality and improperly carried out polishing. Eliminating such defects is as easy as shelling pears - an abrasive polish does not harm the paintwork and allows you to obtain a perfectly smooth and even surface.
A low-abrasive polish can handle more serious defects. With its help, you can eliminate visually invisible scratches that are easily tactilely felt.
The car body after treatment with an abrasive polish looks more presentable, but it is easy for a beginner to overdo it with pressure or choose the density of the composition
In case of serious cuts and damage, use varnish, paint and wax. They allow you to level the surface, hiding scratches. The varnish applied over the paint fixes it.
Varnishes and paints used to process individual body elements are presented in the form of small bottles with a brush. The product is applied in a thin layer to the damaged area and perfectly seals the defects. However, it is worth knowing that varnishes and waxes are temporary means that hide scratches and do not eliminate them.
How to remove scratches by polishing by hand or with a machine
Minor scratches, visible only on a freshly washed and dry car, can be removed by regular surface polishing. Deeper defects that did not touch the primer layer are corrected using abrasive polishing. Such pastes remove the top layer of the coating, which makes defects invisible against the general background. These products are applied either manually using intense circular movements or using polishing machines.
If there is no tool, do all the work yourself
Restorative polishes are colorless and do not leave marks on the surface. The main requirement when processing the body is that the paste should not dry out, otherwise it will scratch the paintwork.
The polishing machine that will be used to eliminate body defects can be anything - the most important thing is that it can change the speed. Instead of such a tool, you can use a screwdriver or drill with a special attachment. The following foam pads should be used with the polishing machine:
- white is used together with coarse abrasive pastes for rough polishing;
- orange has medium hardness and is used with fine abrasive pastes;
- black is the softest, used mainly with protective abrasive pastes.
The circles can be of other colors; usually the approximate hardness is written on their body
In addition to a polishing machine and special wheels, you need to stock up on sandpaper and pastes.
Before polishing the car body, the foam circles are wetted - they must be damp. The paste is applied to the car body, not to a polishing wheel. After this, you need to polish the car body with a machine. It is better to move the tool in a horizontal direction with a slight approach to already treated areas. Scratches from the body can only be removed after heating the varnish.
Other DIY options
Polishing a car body helps to cope only with minor defects. If the damage has affected the primer layer, then it is removed using special pencils. They form a film on the damage and come in two types: wax and gel.
- Wax crayons are a lot like drawing crayons. They simply paint over the body defect, and wipe off excess wax with a soft cloth. This method of removing scratches is the cheapest and most short-lived.
- Gel pencils are more like pens or felt-tip pens. When using them, the composition is “pumped up” to the writing tip and applied to the chip or scratch. Excess product may begin to flow down the surface. The defect elimination procedure is carried out several times until the scratch completely disappears.
Pencils are not suitable for deep scratches
- Deep and wide cracks can be removed using special corrector kits. They include a bottle with a special product, car polish, several wipes and a degreaser. Such kits are manufactured by car companies, and their components can be purchased separately.
What is the danger of even small chips?
But do not underestimate the danger of surface damage; rely on the durability of the coating and the reliability of body protection by phosphating or galvanizing. Even the destruction of the surface layer of varnish will be a harbinger of future troubles. Especially when it comes to multi-layer coatings such as metallic, mother-of-pearl and similar ones.
The thickness of the varnish layer determines the appearance of such paintwork; when this indicator changes, the light plays differently on the surface, which is why even a small spot becomes more noticeable. But this is only the visual part; the other side of the coin, which concerns the resistance of the base paint to external influences, is much more dangerous.
Unlike acrylic auto enamel, the base of such coatings has less mechanical strength and is subject to rapid destruction under the influence of various factors, including ultraviolet radiation. Sunlight, deposits of salts and organic matter will inevitably lead to the destruction of the base paint, and then it’s not far from exposing the metal and the appearance of rust. We had to deal with cases where the process of formation of corrosion foci took place at a literally explosive pace. Literally within a week, the minimal chip blossomed with such good saffron milk caps.
Based on this, make it a rule - if you see even minor damage to the varnish, immediately take independent measures or contact a specialist.
Types of paintwork defects:
- surface scratch;
- web of cracks;
- fresh chip;
- metal corrosion (cannot be eliminated independently).
- deep chipping with rust formation.
Minor scratch
A type of surface damage that does not affect the underlying paint layer. Such defects often occur after a mechanical car wash. To avoid this, cover the surface of the car with polish. In addition, unfavorable environmental factors lead to the formation of scratches (if you do not have a garage). Daily use of personal vehicles also damages the coating. But we can’t give up transport, can we?
You can eliminate surface scratches with a soft artistic brush for working with enamel. In case of a minor defect, a restoration pencil will solve the problem; it costs no more than 200 rubles.
Fresh chip
Unlike a scratch, this is a deeper defect in the paintwork, affecting the metal or primer layer. It surpasses small cracks in terms of the area of the damaged surface.
Local cosmetic repairs will help eliminate fresh, shallow damage. The choice of work technology depends on the number of defects:
- numerous chips require grinding and puttying, applying a primer, as well as a new layer of paint on the damaged car parts;
- if the damage is local (for example, caused by a stone hitting the hood of a car), a small brush, polishing paste, or paint will help deal with it.
Deep chip with rust
This is a type of defect when not only the primer suffers, but also part of the car body is deformed. It is necessary to deal with it immediately after its appearance, since a noticeable depression is fraught with serious consequences in the form of body corrosion. It also causes paint to peel due to moisture entering the crack. The winter season is especially dangerous for cars with deep chips: water that gets into the grooves freezes, destroying the material.
If the damage to the paintwork is significant, you need to solve the problem step by step:
- Prepare the work area (clean off dirt, rinse).
- Apply a layer of primer to the damaged area and wait for the material to dry completely;
- Carry out grinding work in the damaged area;
- Apply paint and varnish the surface.
Note: voluminous damage of noticeable depth in any case needs to be treated with P600 and P800 sanding paper to smooth out the edges of the damage and clean the working surface from micro-debris.
The entire part with local damage, even deep, does not need treatment. It is better to use local painting with a gradient: a smooth color transition to disguise the defect.
What technologies are used for repairs?
The key to successful coating repair will be the correct determination of the depth of the existing chip; the choice of available repair technology depends on this indicator. Before you begin diagnosing the condition of the paintwork, the car should be thoroughly washed, and areas with possible damage should even be degreased. This is due to the fact that salt deposits accumulating in chips visually change their depth, and this becomes the reason for choosing the wrong repair method.
There are a number of signs that allow you to determine the degree of damage even by the appearance of the coating:
- a surface chip in the varnish will not change the color of the paintwork; in some cases it is visible only from a certain angle and cannot be felt at hand;
- deeper damage affecting the base already leads to a change in color, and in the case when the chip has reached the soil, this layer clearly shows through with a different shade;
- With defects that reach the metal, everything is very clear; usually you don’t have to wait long for rust to appear in such chips.
Once you have determined the depth of the existing damage, you can start tearing your hair out, or just take your willpower and start thinking about further repairs.
Features of removing surface chips
It is believed that any chips cannot be dealt with by polishing. But this is not a completely objective opinion, especially if we are talking about minor damage to the varnish. Of course, it makes no sense to fight scratches with protective polishes, but restorative (abrasive) polishing may well give results. Let us repeat - this method is only suitable for chips whose depth does not exceed a couple of microns.
The point of such polishing is to remove the varnish to the entire depth of the damage. That is, we do not remove the chip, but adjust the thickness of the varnish coating to it. Previously, such work was carried out using sandpaper with a constant reduction in its grain size to P2000–4000 and even finer. But with the advent of professional sets of polishing pastes with different abrasiveness, it is possible to polish the coating with such damage faster and easier.
To work, you will need a polishing machine, a set of gels or pastes, and discs of varying hardness. Please note - you should not try to get a normal result when polishing with an angle grinder; it is not intended for such work. Due to the high number of revolutions without the possibility of adjustment, we can guarantee that in 90% of cases you will simply wipe the varnish down to the base, as a result of which you will have to repaint.
The main damaged layer is removed using the coarsest paste and the hardest disk available. When working, it is necessary to control the surface temperature; there is a considerable risk of overheating the coating, which will entail a serious change in color.
After the chip goes away, all that remains is to remove the risk that appears on the paintwork. This procedure is performed according to a similar scheme in 4-5 passes with a constant decrease in the abrasiveness of the paste and the hardness of the wheel. When working with dark coatings, final polishing should be done using anti-hologram paste.
How to deal with chips that have affected the base
In this case, no amount of polishing will give the desired effect, but you won’t have to completely repaint the body part; you can get by with spot repairs. Its essence lies in the layer-by-layer restoration of all layers of the coating. The technology practically replicates retouching deep scratches, but there are certain nuances.
To prevent the chip from being noticeable after repair, and to ensure reliable protection of the base and metal from external influences, the following work will have to be done:
- The damaged area is thoroughly cleaned of accumulated dirt, salt deposits, and organic matter, followed by degreasing.
- First of all, you will need to carefully smooth the edge of the chip, which often sticks out in different directions, like the crater of a real volcano.
- The main task of such repairs is to accurately restore the thickness of each coating layer. They start with soil, and it is better to use a composition based on epoxy resin, it is more durable and will more reliably protect the metal from moisture.
- After the soil has dried, paint the damaged area. It is worth paying attention to the fact that most paints and varnishes shrink significantly, so the layer should be a little larger.
- After drying the restored base layer, it should not differ in appearance from the main coating. If necessary, the area is cleaned a little without damaging the adjacent areas of the paintwork.
- The varnish coating is restored in a similar way; in most cases it has to be laid in several layers, followed by drying of each.
It is possible to remove minimal differences in the repaired area with the help of finishing polishing, which should be done only after the varnish has completely polymerized and gained strength.
The most difficult repair cases
Now we will talk about removing chips to metal that has already shown signs of rust. Simply touching up such damage will not be enough, because corrosion processes will continue under the restored coating. Therefore, the main task during repairs of this scale will be to prevent the spread of rust and protect the metal.
The most effective repair technology for such chips is local or complete repainting of the damaged body element. Unfortunately, other methods will not provide the required degree of protection. The general scheme of work in such cases will be as follows:
- the damaged area is cleaned down to the metal, sparing no expense in removing paint in areas adjacent to the chip;
- to ensure complete removal of corrosion foci, the cleaned area is treated with a rust converter or covered with etching primer;
- epoxy primer or compositions with the addition of zinc are used as a protective coating; they have proven their effectiveness in such situations;
- the dried soil is ground, or even wet, to form a groove that will provide better adhesion to subsequent layers of coating;
- the base paint is applied in several layers with a gradual increase in the coverage area, thus forming a transition that allows smoothing out minimal color differences;
- They form a transition in the varnish in the same way; if a discrepancy in shade still remains, treatment with a special primer will help, which blurs the boundary of the repair area and the main paintwork.
At the final stage, standard polishing is performed using protective compounds. Good results are achieved by means such as liquid glass or nanoceramics.
Should you trust advertised miracle remedies?
If you have already monitored the topic of removing chips on paintwork, then you have definitely come across laudatory reviews of various pencils, markers, and entire sets of tools for combating such damage. Moreover, they are all as inexpensive as possible, but extremely effective.
Let’s say right away that all information posted on the Internet should be taken critically, especially such obviously advertising information. Practice has shown that the effectiveness of most of these wonderful chip removal products tends to zero. Yes, they can still give a short-lived effect when removing small scratches, but they are no longer able to cope with a large area of damage characteristic of chips.
The only option when it makes sense to use such means is to provide at least some protection before normal repairs. It should be understood that such a coating on a chip will wash out much faster than on a scratch. For this reason, you should not delay visiting the service.
Let us also note the fact that we were just talking about normal original formulations produced by serious companies. And if you come across a miracle pencil of unknown origin, then there is no talk of any effectiveness of such protection.
Spray can - painting technology
This method is suitable for getting rid of medium-sized chips. To eliminate defects with your own hands, you need to prepare: an acid primer in an aerosol can; a can of paint for cars; a primer for filling cavities; putty; varnish; enamel; scotch-brite; sandpaper; polishing paste and a stiff brush.
Step-by-step instruction:
- Clean the work area. Do not perform any work until dry.
- Using sandpaper, remove the layer of old paint and primer from the damaged surface.
- Remove rust with a converter and a stiff brush. Then reapply the converter, rinse with clean water and dry.
- Use putty to level each indentation. Sand the top with sandpaper.
- Treat the area around the recess with Scotch Brite (matting).
- Degrease and prime the work area.
- After the primer has hardened, apply a second coat of primer. Wait for the primer to harden. Sand any remaining unevenness with sandpaper.
- Apply a layer of acrylic primer to fill small cracks as much as possible.
- Cover the work area with three layers of toner primer, choosing a shade close to the color of the paintwork. Paintwork requires heating the paint canister to 36 degrees, followed by shaking the composition. It is necessary to shade the paint using arcuate movements.
- To fix the result, use varnish.
Chips along the edges of body parts - it would be better not to appear
One of the most unpleasant types of chips, which is difficult to treat. The edges of the hood and trunk lids, doors, and wheel arches are the most dangerous areas of the body in this regard. When chips appear in these areas, rust spreads almost like lightning. But restoring the coating here will be problematic due to the constant shock loads when opening and closing, and the flow of sand from under the wheels.
By the way, the same situation is observed in places where individual body parts come into contact; it is for this reason that during replacement or normal assembly you should be extremely careful about adjusting the standard clearances.
Such damage is usually characterized by deep corrosion damage; it is no longer possible to level the surface with primer and paint. In this case, you have to putty. Polyester putty with aluminum powder gives good results. It has greater mechanical strength and is resistant to external influences, including shock loads.
After thoroughly removing the rust and treating it with a converter, the damaged area is covered with several layers of putty with mandatory drying and grinding of each. In this case, the work is carried out in such a way that the leveling layer is as small as possible. If everything is done wisely, then the paint in such areas will not crack after a dozen openings of the hood or door.
Repairing damage
As already mentioned, before getting rid of it, you need to determine the nature of the damage. If there are a lot of scratches and chips on the body that only damaged the surface of the paintwork, then you can get by with budget options.
The first way to repair such damage is to use a wax pencil. This kind of repair of chips on the body is not particularly difficult, except that before you start removing chips from the car, you need to wash it and treat the area around the scratch or chip locally with gasoline
This is very important, because a layer of wax can fall off from the car’s paintwork
It is clear that you can do this yourself, while saving a considerable amount of money.
There is also a second option for eliminating chips from a car’s paintwork. This method is called body polishing. In this case, you need to wash the car thoroughly so that grains of dust or sand during polishing do not cause even more damage. In this case, you will need to purchase special creams for local polishing of the paintwork. In addition, you need to have a machine special for this process, and if you don’t have one, then an ordinary drill can be an alternative. Removing chips using this method can be done with your own hands, provided that everything is done correctly and carefully.
The fact is that during the first polishing, many drivers remove the paint layer right down to the ground, after which they have to paint the area where the polishing was done incorrectly and carelessly.
After polishing the paintwork, it needs to be varnished, this will help extend the service life of the surface. This method is considered the most effective compared to the method that uses a wax pencil. There are several reasons for this, the main one being speed. Getting rid of chips on a car using this method is much faster than in the first method due to the fact that the machine processes a larger area of paintwork faster.
How to prevent chipping in the future
Unfortunately, it is impossible to completely prevent the occurrence of chips, but there are several ways to minimize the likelihood of such a development. Among the most common solutions are the following:
- Protective polishing with compositions such as liquid glass or nanoceramics. The coatings have good durability and water-repellent effect. If the application technology is followed, the protection will last up to a year; it is recommended to treat the entire body as a whole.
- Good results are obtained by armoring the bumper and other body parts using polyurethane or vinyl film. In terms of efficiency, this option is considered the most reliable, but do not forget that before pasting it is necessary to remove all existing pockets of corrosion, otherwise rust will grow well under the film.
- Simple fly swatter deflectors can also be used as inexpensive hood protection. They perfectly divert the flow of small stones and insects, reducing the number of impacts on the paintwork.
In any case, no matter what means of protection you use, do not forget the basic rule: if you notice a chip, start repairing it. In this case, the car’s paintwork will thank you very much and will last much longer without the need for repainting.
AUTO captain:
06.02.2021
` 3523
★★★★★
Relevance
Chips occur on any car, even under careful operating conditions. This is explained by the fact that the principle of their appearance is the impact of small particles such as stones on the paintwork. It is impossible to avoid this, you can only try to protect the car. Most often, these minor defects appear on the front bumper and hood of the car.
Not only the appearance of the car, but also its body suffers from the presence of chips, since at the points of chips the metal is open to interaction with the environment. Therefore, this is where corrosion appears. In view of this, it is necessary to regularly remove chips or protect the car from their occurrence.
Treating the car with wax in places of chips after repair and painting
Wash and wax the entire car. Once the repaired area is completely dry, wash and wax the entire car to ensure even distribution of the wax. Waxing the car will further blend the freshly painted area into the surrounding paint and make the repair even less noticeable. You may want to wait a few days before waxing to ensure that the repaired layers of clear coat, paint, and primer are completely dry, so you don't risk damaging the new paint during the waxing process.
https://www.youtube.com/watch?v=9teEltBQ-zo
Full repair of deep scratches on the car body
In the presence of deep damage, only the staining method can help.
- Prepare the surface - rinse thoroughly and dry .
- If rusty spots appear on the damaged area, treat them with fine sandpaper.
- Degrease the cleaned surface and mark the working area with masking tape.
- Apply a layer of anti-corrosive primer and dry.
- Treat with primer to level the surface.
- Apply two layers of paint alternately , drying them well.
- After drying, apply clear varnish .
Car color metallic or pearl
To ensure that the painted area is not noticeable, you need to choose the right color. To do this, you need to know how to determine the shade:
- The first way is to study the vehicle's documentation. In the technical passport of the vehicle, the painting code is indicated, using it you can find the coloring material of the desired shade.
- If the documentation for the car is not available, you need to remove the gas tank cap and go to the store. There the desired paint is selected by color.
- An alternative option would be to use the services of a colorist. A specialist using special templates will select the exact shade of color.
The surface of the car is painted using a spray gun or a spray can. The paint is applied to a dried, degreased surface in a dry, closed room. If dust or moisture gets onto the area being treated during painting, the painting will be damaged. After tinting the body, with a metallic or pearl color type, polishing is performed, which almost completely masks the area to be restored.
What is needed for repairs
If you are not particularly interested in high-quality repair of chips, then you can take a thin brush, nitro enamel of a suitable color and paint over the damage. For those who do not think a slight spot on their car is a good idea, they should do it differently and spend up to three days repairing the chip.
Work is carried out in dry and heated garages. In extreme cases, repair work can be done in the summer. The room must be electrified. Alternatively, find a portable power generator.
Electricity will provide good illumination of the work area and connect an infrared heater. Before starting work, you need to acquire some tools and consumables.
- acrylic paints for exterior use. You can use water-soluble or hyphtal;
- two-component acrylic primers;
- two-component acrylic varnish;
- waterproof sandpaper P1500 and P2000;
- final polishing paste;
- magnifying glass;
- a metal tool with sharp ends - a tool knife, a hook, etc. You can make them yourself;
- portable infrared emitter. For example, Ballu BHH/M-09.
Repair materials
In order to repair the hood you need to acquire the following things:
- Sandpaper designed to work in wet conditions. The paper must be marked from P1500 to P2000. The abrasive grain size is from 24 to 12 microns.
- Polishing pastes.
- To avoid lengthy polishing operations by hand, it is best to find or buy a polishing machine.
- Nitro putty.
- Varnish and paint of the required color.
If the stone has penetrated deeply and the corrosion process has begun, then it is necessary to have a primer.