Once you have decided what type of LED strip you will use for your lighting, and have installed the wires to connect it, the next important question arises - how to securely fasten it.
Let us consider in detail the five main methods and the common mistakes made in this case.
Here's what you can mount the LED strip on:
- factory adhesive layer on backing
- additional double sided tape
- Super glue
- aluminum profile
- clips, staples or clamps (for 220 volt tapes)
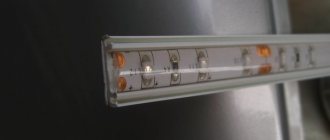
Adhesive tape for LED strip
Manufacturers of tapes, as a rule, have already provided one of the most common methods - installation on the adhesive layer located on the reverse side. It is hidden under a protective shell and to get to it, you just need to pick up the tip with a knife and pull off the protective film.
Roughly speaking, there is already double-sided tape there. On one side it is glued to the tape itself, and on the other, you stick it on the corresponding surface of the ceiling, wall, or kitchen cabinet.
The surface can be either smooth or uneven or rough. Due to its flexibility, the tape should fit normally on any of them, be it a convex arch or other elaborate shapes.
If you doubt the reliability, then simply apply a little varnish or paint to the surface. They will level the entire base as needed.
Just note that gluing in this way can only be done once.
If you didn’t guess correctly with the trajectory or path of the backlight and started to rip it off, then you won’t be able to reliably glue it onto the same layer a second time. Therefore, always apply markings first.
And if the tape has already come off or needs to be removed and moved to another place, what should I do? Then use the second method - additional double-sided tape.
It is better, of course, to first apply it in the right place, and only then glue used or new tape to it.
LED strip peels off
It would seem, why come up with something else if there are already such simple methods provided by the manufacturers. However, as practice shows, after not a very long time, the backlight fixed by this method begins to fall off and peel off.
There are most often two reasons:
- poorly prepared surface for installation
- poor quality tape
Before gluing to any surface, it must be properly prepared:
- clear
- wipe dry
- degrease
This must be done a few minutes before actual installation. Only after this can you hope that the backlight will hang for a long time and not fall off.
The second point is the quality of the adhesive tape. Choose copies that have a ZM icon on the reverse side.
This is the most famous world brand that produces not only adhesive tape. Even the Scotch brand itself is just a small part of the company.
At the same time, the presence of such a sign does not guarantee that you will get a quality product. Forging and writing just two letters is not very difficult for Chinese craftsmen.
Also, always pay attention to the date of manufacture. Even high-quality copies from famous brands (Philips), after lying in cold rooms for several years, can easily lose their original properties.
And you will rack your brains, it seems like “ZM”, but for some reason it doesn’t stick well.
What should the average user do and is there a more reliable way to attach LED strips? Of course there is, and most installers and electricians have been using it for a long time.
What to do if the LED strip comes off?
The first step is to assess the scale of the tragedy. If the LED strip is hidden inside the profile, then you need to remove the diffuser and inspect it along its entire length. For local minor sagging, you can get by with a few drops of superglue without disturbing the entire structure. If the situation has become critical, then it would be more correct to re-stick the tape. To do this, you will have to carefully dismantle it, and clean the base to which it was attached from the remnants of old glue.
Then take thin double-sided tape and stick it on the prepared surface where the tape was before. After this, remove the film from the tape and attach the LED strip to a fresh adhesive base. If you do everything correctly and use high-quality tape, then high strength is guaranteed.
To re-glue the LED strip, it is recommended to use adhesive tape from the well-known 3M brand, which is a leader in the production of durable adhesive mixtures and products based on them. By the way, on the back side of some types of LED strips you can also find the “3M” symbol, which indicates the high quality of the applied glue.
Adhesive for LED strip
It consists of using ordinary superglue. Thanks to it, your tape will be securely attached and will not fall off, even when the LEDs reach the end of their service life and lose their brightness.
It is best to use gel glue.
It would seem, how can such a small bubble be enough for several meters? The secret is in the installation technology.
For reliable contact, there is no need to apply glue over the entire surface; it is enough to evenly place drops every 5-10 cm and that’s it. Factory tape will do the rest of the work.
The glue is applied to the surface itself.
Just don’t even think about using hot melt glue, generously lubricating everything with a hot melt gun.
Why this cannot be done, read below, where installation errors will be discussed.
These are two of the simplest, most reliable and inexpensive ways to install and secure LED strips available. However, it is primarily suitable for low power models such as SMD 3528 or SMD 5050 up to 14W/m.
They can be attached directly to a wall with wallpaper, a ceiling or the wooden base of cabinets.
Heat dissipation power of 6 to 10 W is easily handled by the surrounding air. But from 14W, more significant heating occurs and here an aluminum profile will be required to act as a cooling radiator.
Main conclusions
Installation of the LED strip is carried out either on its own adhesive layer or on one of the available materials. The gluing process is not difficult and only requires the user to be careful and careful when handling the lamp.
It is important to remember that direct contact of the back side of the tape with an aluminum profile or other conductive substrate can cause a short circuit, so these types of lighting should only be glued with double-sided tape. You can express your options for installing the LED strip in the comments.
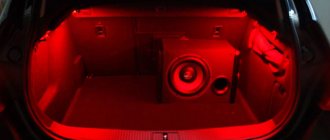
Illumination of living rooms using LED strips has become a mandatory element of the decor of modern apartments. Thanks to a wide range of colors and different powers of installed SMD LEDs, the user has the opportunity to create backlighting with the most suitable parameters. But the main thing is that the fastening part of the tape is made in such a way that even a child could cope with its installation. However, even such a simple matter has its own subtleties. How to glue an LED strip to avoid operational problems later? Let's talk about this.
Aluminum tape
If your tape is, as they say, on the border between low-power and powerful, and besides, there is nowhere to place the overall profile, try using aluminum or foil tape.
First, glue this tape to the surface, and then apply the LED strip to it. At the same time, again, it won’t hurt to use superglue spot-on.
It will hold quite securely, and the aluminum will play the role of a small reflector and heat sink.
Why doesn't the tape stick?
There are three main reasons why the tape does not stick well and eventually falls off in certain places:
- insufficiently clean and uneven surface
- low quality, cheap tape
- old LED strip with tape that has already lost its properties
Aluminum profile
If you have an extended and powerful backlight, made on the basis of the most popular SMD 5050 LEDs, or more powerful SMD 2835 and SMD 5630.5730, then you cannot do without an aluminum profile.
It can be of three types:
- overhead
- mortise
- angular
All the secrets for the correct selection, installation and characteristics of this profile are discussed in detail in the article below.
The tape itself is also glued to the profile with adhesive tape. Here, thanks to the perfectly flat surface, it will be held much more securely than on a wall or wooden base.
However, be especially careful about one important point.
When you remove the protective layer from the back side, in certain places, conductive paths may be exposed.
1 of 2
And if you directly apply them to an aluminum surface, you will short-circuit them with each other. At the first test switch-on, a short circuit will occur with all the ensuing consequences.
To avoid this, in these places (and only in them), you can apply a layer of insulating hot-melt adhesive to the surface, or make an insulating backing from simple electrical tape.
It is also very convenient to use hot-melt glue to place joints and joints where special plastic connectors are used.
The profile can also be equipped with a device such as a diffuser. A bright ribbon will not hit your eyes, but will evenly illuminate the space.
Where aesthetics are not important and the lighting is either hidden or temporary, use plastic clamps or nylon ties.
True, you won’t be able to attach them directly to the wall; you’ll have to look for a suitable profile again.
General installation rules
In order to ensure uninterrupted operation and extend the service life, certain rules and requirements must be observed:
- when designing, the length diagrams of the lighting installation should be calculated;
- The LED strip should not be subjected to mechanical stress - bending, crumpling;
- before cutting the tape into pieces, you should unwind the reel and connect it to a power supply to check its serviceability (in case of a defect, the product will be returned under warranty);
- round or flat connectors are used to connect the tape;
- The power supply must correspond to the full load of the product;
- For tape segments over 4A, it is recommended to use soldering rather than connectors;
- the surface on which you plan to place the filament with LEDs should be cleaned and leveled;
- When installing LED strips on conductive surfaces, be sure to install electrical insulating material.
Methods for installing lighting on the ceiling
The most popular place for installing LED strips is a suspended ceiling (especially plasterboard). The product is secured using the following methods:
- installed in a special box as a hidden backlight;
- fixed on an aluminum profile;
- mounted on the ceiling plinth.
Installing lighting on kitchen units
In the kitchen, a well-chosen option for fastening the tape can serve not only as an additional light source, but also act as a full-fledged lighting source for work surfaces. LED strips have replaced outdated built-in spotlights; they can be used to illuminate a sink, countertop or stove surface well. The solution to how to attach an LED strip to a kitchen set is individual: it can be mounted both at the bottom of the furniture and inside it.
For ease of control, it is better to purchase a device for LED lamps. With this control controller it is convenient to regulate the lighting intensity.
LED strip 220 volts
What to do with 220V models? There is no adhesive backing on them, and they themselves are completely contained in a sealed shell. How to fix such a backlight?
There are three ways to do this. If we are talking about mounting on a profile, then you can use the same clamps.
For other cases, mounting pads or clips are used.
Well, the last option is the same double-sided tape, purchased separately.
But in view of the fact that 220-volt LED strip is not recommended for use in residential apartments, and its use is mostly outdoors, clips remain the most reliable option.
Pros and cons of LED strips
Installing LED strips on suspended ceilings is a fairly common way to organize lighting. This is due to the many advantages of this method:
- Ease of installation is ensured by the presence of a sticky base on the back side of the strip.
- The duration of use of the LED is another plus in favor of such lighting
- The flexibility of the tape base allows it to be used on any surface
- Wide choice of colors (there are monochrome single-color tapes or multi-colored units)
- Buying an LED strip will allow you to significantly reduce your energy costs
- During use, the device practically does not heat up, which makes it an ideal lighting source for suspended ceiling products.
Common Mistakes
1The first and most important mistake is gluing a powerful tape without any profile directly onto the surface of the ceiling, wall, cabinet, box, etc.
Not only will the tape fall off due to heat, but the LEDs themselves will fail quite quickly.
2Another method that is not recommended to use is a construction stapler.
Some people select staples that are slightly wider than the tape itself and simply shoot the strips to wood or drywall surfaces.
However, the total number of such shootings should be more than a dozen, and if you miss just once, the LED backlight track will be guaranteed to be damaged.
3Gluing the bare tracks on the back side of the LED strip directly to the aluminum profile.
As mentioned above, the result will be a short circuit and failure of the controller or the backlight itself.
4Use of a plastic profile from a cable channel.
You will not get any cooling effect from such a profile. And all your LEDs will burn out sooner or later (more likely sooner).
Therefore, use only materials intended for this work. There is no need to think out anything and save money.
5Another common mistake is gluing the tape to hot glue.
Of course everything will be fine, no one can argue with that. However, do not forget about heating the surface when the backlight is on.
And along with this heating, the layer of glue under the substrate will heat up and emit an unpleasant and harmful odor. Not everyone will like breathing this kind of air in their bedroom.
In addition, a thick layer of hot-melt adhesive prevents heat dissipation, which further provokes overheating of the LEDs. With it, you actually isolate the tape from the aluminum base, not allowing it to really cool.