Additional lighting is a fairly popular tuning option. Moreover, you can do this yourself, using a standard set of tools and available consumables.
Illumination is mainly done purely for aesthetic reasons. But there is also some practicality here. The only question is how exactly the system will be implemented.
To implement the idea with your own hands, you will need basic skills in working with electricity. If you follow the instructions and recommendations, very soon your car will sparkle with new colors. And in the literal sense of the word.
Backlight options
Motorists perceive the concept of footwell lighting in a car somewhat differently.
Basically we are talking about the following options:
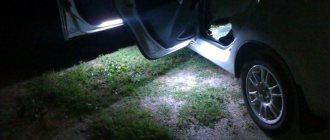
- Turn on the car lights when the door is opened. That is, the system is mounted at the bottom of the door, and the light is directed to the ground. The practicality of such a solution is minimal. Although some automakers install such lighting from the factory, displaying the logo of the car brand.
- Lighting in the feet. There is no need to open or close the door anymore. The light is directed towards the pedal assembly area. Looks impressive. This way you can see what is happening under your feet. This helps a beginner to better navigate the pedals in the dark.
Objectively, it is the second option that is more practical and preferable than illumination when opening a car door. But no one is stopping you from making sure that when you open the doors in the car, the asphalt lighting turns on, displaying the car company logo or some other image there. But the lighting of the legs is not only visually impressive, but also practical in certain situations.
The lighting system is implemented in different ways. You can choose a different color, even provide a color music effect. But when moving, it will certainly be distracting. Therefore, it is more correct to make the necessary lighting so that it helps during trips and makes it easier to change the position of your feet on the pedals.
Wheels and wheel arches
This type of lighting is not so common, but still has a right to exist. The illumination of the wheel arches looks especially impressive together with the underbody illumination, but as an independent tuning element, it copes with its task quite well. Auto backlight
arches and Borbet LV5 wheels - this combination will be liked and remembered by many. Implementing such a modification is not difficult, and it does not cost much.
Video instructions - how to make wheel lights with your own hands:
What is required for work
To make your own footlights in your car, you will need to first prepare a certain set of tools and some consumables.
To implement the simplest, but at the same time original project, it is enough to assemble a set consisting of:
- light source;
- wires about 5 meters long;
- heat shrink tube;
- glue;
- pliers;
- soldering iron;
- screwdrivers;
- sharp knife, etc.
That is, you need a standard set of tools.
You can complicate your task somewhat, but make the glow more universal. For this purpose, a brightness control controller, a control panel, and a switch are additionally used. This will allow you to adjust the settings, turn on the backlight as needed and at the brightness that suits you.
As for the light source, the footlights installed in the car interior can be made of 2 types of tapes:
- Neon ribbons. They look very impressive, beautiful and expensive. The light is objectively more pleasant. But for most motorists this is not a fundamental difference. Neon strips are much more expensive. To install them you will need to use an ignition unit. And this involves interfering with the vehicle’s electrical system.
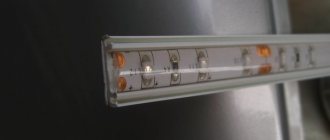
- LED strips. The most practical and versatile option. There are no installation difficulties. The ribbons themselves are affordable and come in a wide range of colors.
Having chosen a light source, you should decide in advance where exactly the backlight will be located. Some install it only in the driver's feet. Others prefer to provide illumination on the driver and front passenger sides for balance. And there are even those who like to illuminate the entire cabin, also affecting the legroom of the rear row passengers.
This determines exactly how much tape you need to purchase.
Installation
You will need : four pieces of LED strip (you can get it on AliExpress (see catalog)), additional wires.
We glue the LED strip to illuminate the driver's floor with double-sided tape onto the electronics unit. We attach the tapes for the front passenger with one end to the wiring harness (using electrical tape or a tie), and glue the other to the ventilation motor.
For rear passengers, the footwell lights are mounted under the seat. The most convenient way is to fix the LED strip directly on the upholstery material by making 2 holes with an awl into which we insert a plastic tie. We lay the wires next to the seat heating wires, wrapping them with black electrical tape.
Installation procedure
Before installing diode footlights in a car with your own hands, you need to choose a place for convenient and correct placement of the lighting strip.
The following areas can potentially be used for this:
- perimeter at the bottom of the front seat;
- under the car dashboard;
- under the glove compartment (glove compartment), etc.
Here you should build on your own imagination and the design features of a particular car.
According to the rules and for reasons of comfort, the lighting should be directed strictly to the floor.
Some car enthusiasts do not take this point into account and install the tape on the side, on the floor covering itself. But in this case, the lighting can interfere, dazzle the eyes, etc. Remember, this is lighting specifically for the feet, and therefore it should be located in the cabin so as to illuminate this particular area, and not direct streams of light into the eyes.
Installing LED footwell lights in your car yourself is not at all difficult. Here you need to perform the following procedures:
- clearly define the places where the tape will be located;
- cut the LED strip into the required lengths;
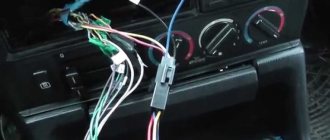
- a wire is soldered to the edges of the tape;
- Next, the tape is tested by connecting to a power source;
- if the light comes on, you can continue working;
- the soldering area is insulated using heat-shrinkable tubing for this purpose;
- In order for the tube to fit well into place, it should be heated with a soldering iron or just a lighter;
- Having finished with the insulation, the prepared tape is mounted at selected points in the cabin;
- double-sided tape, glue or silicone ties are suitable for fixation;
- By analogy, the tape is installed in all parts of the cabin where it needs to be done.
The LED strip can only be cut in certain places where appropriate marks are provided.
Objectively, the most questions arise regarding how to make the connection correctly.
Communities › DIY › Blog › Foot lighting with smooth ignition and decay
Hi all! I fulfilled one of my long-time wishes) I got a free 5 meters of RGB strip with a controller and remote control, so I decided to have backlighting! And the most important thing is that everything should be according to Feng Shui - with smooth ignition and smooth decay. There is an idea - we are looking at implementation options on the Internet, I found many connection diagrams, but only one with a control minus will work for us.
I made a compact signet in Layout and LUT the whole thing)
Next, I cut the tape: 3 sections for the front, 2 sections for the rear passengers.
For wiring I used a wire from a good USB extension cable. The tape was made modular with a USB connection for the tape at the front and the tape at the back, in case the LED section burns out or the rear passenger footwell lights simply turn off. Serial connection: ignition controller > tape controller > 3 section tape > 3 section tape > front and rear USB connection > 2 section tape > 2 section tape.
For the mounting frame, I took a regular cable channel 1 cm wide and glued the tapes, securing the connections between the cable and the tape with ties.
Connection
There are several suitable options for how to make the lighting in your car yourself to ensure an original glow in your legs.
Each motorist will decide for himself how it will be more convenient and easier for him to connect the LED footlights in the car. But there are 3 main options:
- to the lighting of the interior itself;
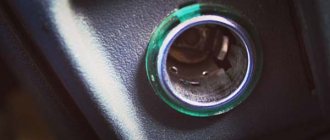
- through the cigarette lighter;
- from dimensions.
The choice depends on the format in which the driver wants to see the backlight. After all, each scheme provides its own version of when and how the glow will be activated.
Through interior lighting
Some motorists prefer to install footwell lighting in their car by connecting to the main lighting system of the vehicle interior.
This connection method ensures that the backlight will always turn on exactly when the doors are opened or when the car interior lighting is turned on.
If you connect LED lighting for the footwell area in a car through interior lighting, then the light source will need to be connected according to the following algorithm:
- remove the interior lamp;
- connect the wires, observing polarity;
- the white wire usually goes to the plus;
- the negative wire is connected to the red wire;
- the wires are hidden under the interior trim;
- It’s most convenient to stretch them directly along the side post;
- Next, connect the wires of the installed LED strips to each other;
- connect them to a power source;
- check the system for functionality;
- if everything is functioning, perform high-quality insulation;
- return the lampshade to its place.
If you install an additional controller, the light will gradually dim rather than suddenly turn off.
If you are not sure about the polarity of the wiring, use a tester or multimeter. This will make it clear where is the plus and where is the minus. However, the wires may differ in color, depending on the car.
In this way you can connect to functioning interior lighting, but this is not the only option.
Through the cigarette lighter
You can also activate the LED strip from the cigarette lighter, which is done quite often.
By connecting the strip to the cigarette lighter, the light will turn on when the doors are opened.
Not the worst option, since most drivers do not need backlighting while driving. They use it for comfortable getting in and out of the car.
The connection itself is performed according to the following algorithm:
- plus the LED strip connects to the cigarette lighter;
- the minus must be connected to the limit switch on the door;
- the tape wiring is brought out together with the rest of the wires, connecting into a single bundle;
- All contacts are insulated and secured with a tie if necessary.
How exactly to remove and hide the wires depends on the specific car and the driver’s ideas.
Through dimensions
If you connect from the dimensions, then the backlight will function constantly, in parallel with the operation of the dimensions. That is, this is the most relevant option for many, since the system will turn on at night while traveling.
You can connect the plus from any backlight bulb. For example, the glove compartment or dashboard. The minus is thrown onto the body.
If you connect the minus to the door limit switch, then the backlight will turn on provided that the door is open and the lights are on.
Here, each motorist decides for himself how and in what situations he needs the LED strip in his legs to work. Therefore, you can choose different connection options.
By installing the tape in the legs, you can achieve the original appearance of the interior, as well as get some practicality from such a solution. Having chosen the appropriate work option, all that remains is to implement the scheme. Moreover, you can do this yourself, without having a wealth of experience and special specialized education.
