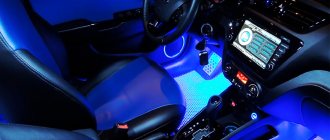
According to the installation method, modern car radios come in two types: built-in and stationary.
- Built-in car radios are usually equipped with a removable front panel or a special curtain - the devices are simple, but effectively protect the radio from theft.
- Stationary car radios are usually installed by car manufacturers on the assembly line. Their original shape and non-standard sizes save them from theft.
When installing a car radio with your own hands, you need to consider the following features.
Firstly , you need to connect the radio only in accordance with the instructions. Failure to comply with this rule may lead to its failure or even fire. In this case, you should not use installation instructions for other car radios, since even the same manufacturer may have different plugs and wire markings depending on the model.
How to connect a radio to a car
Consult an audio equipment store directly with the choice of the radio itself. This device will accompany you the entire time you are in the car, so you must immediately decide what you expect from it in advance.
IMPORTANT! You can get advice and purchase equipment in online stores, but always be careful, purchase car accessories only in trusted stores and use the cash on delivery system. Recently, cases of fraud have become more frequent, when Chinese consumer goods are sold to gullible customers under the guise of interesting accessories.
Having acquired the long-awaited high-quality “sound”, you will find that you now need to install it. Of course, you can go to a car dealership or find another workshop, but after buying a car, not everyone has an extra couple of thousand to work with the craftsmen. Therefore, understanding how to properly connect a radio to a VAZ 2114 with your own hands will come in handy.
To connect you will need:
- Selected radio.
- Tools that are present in any garage.
- Understanding the connection process.
- A certain amount of your time and desire.
If the first and third points are present, let's deal with the second. The first thing you really need to do is make sure there is a niche for the audio system in the torpedo body and check its dimensions. If you select a future radio that matches the size of the special section in the dashboard preinstalled by the manufacturer, there will be no problems at all, and connecting the VAZ 2114 radio will take a minimum of time.
In the fourteenth there is no standard sound, there is only a pre-allocated place at the bottom of the torpedo and acoustic preparation. The latter is the distribution of audio wiring throughout the car interior to four speakers.
Features of Chinese radios
In general, there is absolutely nothing wrong with a Chinese radio. This can be explained very simply.
Almost all car radios can be considered Chinese. Why? Everything is elementary. Leading manufacturers, including Japanese, European and American brands, prefer to carry out assembly in China. This is due to financial gain. Collecting everything in China, including radios, is very cheap. Hence the conclusion that the majority of radio tape recorders offered on the market are from China.
But here it is also important to determine which Chinese product we are talking about
All car radios can be divided into several categories. Moreover, I advise you to study this issue separately in more detail.
Price is a largely determining factor in choice. When buying a Chinese radio, you actually choose one of 3 options.
- Radio tape recorders manufactured to order from leading manufacturers. These include Sony, Pioneer, Kenwood, etc. There are clear regulations, rules and standards from which the contractor (factory in China) has no right to deviate. This allows you to obtain very high-quality devices at low manufacturing costs for the brand owner;
- Chinese brands. These are well-known companies that offer radios under their own brands on the international market. The quality may be a little lower, but the price is appropriate. In most cases, they copy or make radios as similar as possible to devices from leading radio manufacturers;
- Unknown Chinese brands. These are radio tape recorders with an incomprehensible name and the same origin. If this is your first time hearing about the company and you can’t find anything really about it on the Internet, it’s better not to mess with such a 2 din radio.
Drawing conclusions, I can say that the best solution would be to buy a radio for your car from category 1 or 2.
How to connect and install
It is recommended to install and configure any musical device on the VAZ-2114 in accordance with generally accepted rules. Only in this case will the equipment work efficiently and perform all its functions.
Are you a car driver?! Then you can take this simple test and find out. Go to test »
Connection
To connect a radio to a VAZ-2114, just familiarize yourself with the procedure provided for any similar model (2115, 2109). The only difference will be in the location of one or another wire.
Connect the radio using this method:
- Connect the musical equipment connector to the positive and negative poles of the power source (battery). In this case, the cigarette lighter plug can be used for switching.
- Remove the cables from the speakers and connect them to the corresponding outputs on the device plug.
- As soon as the wiring is connected, all potentially dangerous places are isolated using special tape. You can additionally protect the cable from accidental contact and the negative effects of moisture by using a corrugated tube.
- An antenna is installed on the inside of the windshield or roof of the vehicle.
- The cable running from it to the dashboard is laid under various parts of the car's interior trim.
- The wire is connected to the radio directly or through an adapter.
Scheme
In order to check the correctness of the connection, it is necessary to draw up its diagram. With its help, you can identify mistakes made and correct them as quickly as possible.
The diagram should indicate the location of the following wires:
- Red. It should go from the radio to the ignition switch.
- Yellow. It is connected to the positive terminal of the battery and the corresponding connector on the back panel of the connected device.
- Blue. This cable must be used to connect the speaker system to the antenna.
- Green, purple, gray, white. All these wires should be routed to the two front and rear speakers.
- Black. They connect the radio to the negative pole of the battery.
Installation
Installing a radio on a VAZ-2114 is a difficult task, which is recommended to be performed only after careful preparation. Otherwise, you can easily make a mistake that will not allow the device to function normally.
You can install the radio in the following way:
- Installation on a VAZ-2115 or 2114 begins with removing the dashboard trim.
- After this, disconnect the wire from the negative output of the battery.
- Protective elements are removed from the installed device.
- A mounting clip is installed in the groove and securely fixed.
- At the next stage of work, switching wires and power cables are laid.
- The radio is mounted on a plastic console.
- It is then connected to the vehicle’s on-board network.
- After this, the equipment is mounted in the guide shaft.
- Return the removed decorative panel to its place.
Choosing a car radio for VAZ
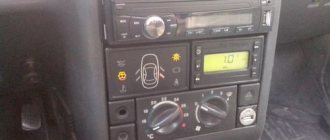
With today's variety of head units and multimedia systems, the choice depends primarily on the owner's wallet. According to many experts, the most successful VAZ model is the VAZ 2114 Samara -2. As you can see in these photos and videos, the radios installed in the seat of the pants fit very well into the interior of the car.
Nowadays, the most popular radios are those with a 2-din size; if your choice falls on such a car radio, then you will need to cut out a place for it in the dashboard. If the device you have chosen has a size of 1 din, then you will not have to cut anything, since the standard connector for the radio on the VAZ 2114 is exactly 1 din.
How to connect a radio
Recommendations for connecting the head acoustic unit to the on-board network:
- Before connecting the radio to the VAZ-2114, you need to find in the plug the power wires with red and yellow insulation, which are used to supply positive power. An additional black cable is intended for switching the negative power signal.
- Connect the head unit connector to the negative and positive poles of the power supply, using the cigarette lighter plug as a connection point. It is allowed to connect the negative wire to the nearest ground bolt welded to the body.
- Route the speaker cables from the speakers installed in the front doors and on the luggage compartment shelf. The wires are connected to the corresponding outputs on the radio plug. It is prohibited to combine the negative terminals of the speakers into a single circuit or connect the outputs to the car body.
- All joints must be protected using insulating tape or tube; to increase the strength of the connection, it is recommended to use terminals or soldering.
- The radio antenna is located on the roof of the car; it is possible to install an active antenna on the inside of the windshield. The wire is routed under the decorative trim elements inside the dashboard. Switching to the radio is performed directly or through an adapter.
Preparation and necessary tools
Before you begin installing the device, you should search at home or buy all the required tools and materials. To connect equipment to the VAZ-2114, you can take the same items as when installing the radio on the VAZ-2109. Among them must be the following:
- mounting knife;
- electric or manual jigsaw;
- screwdriver, brush;
- automotive spatula.
Materials you should buy include sandpaper, polyurethane foam, epoxy glue, primer, paint and special automotive putty.
The process of installing and connecting a car radio
The installation process for car radios of different types and manufacturers is not much different from each other. To do this, the container without a radio is installed in a standard socket and fixed by bending outward the metal petals along its perimeter.
- In modern cars, a special ISO standard connector is provided for connecting the car radio. The whole connection in this case comes down to the fact that you will need to insert the connecting block of the car radio into the corresponding ISO connector of your car.
- In older cars, as well as in many domestic cars, the ISO connector is not provided by design. To install a car radio in this case, you will have to purchase the appropriate connector and connect it yourself. Fortunately, the wires on such connectors are usually marked and signed.
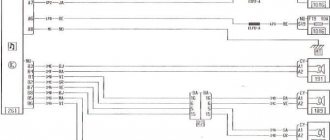
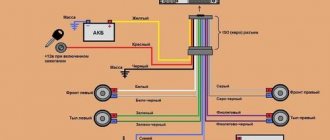
Let's move on to connecting the car radio wires to the ISO connector. Take a look at the connection diagram below. As can be seen from the diagram, the left side of the ISO connector is responsible for powering and controlling the radio, and the right side is for connecting speakers to it.
Typical connection diagram for a car radio
The main step in connecting a car radio is connecting the power. It is at this stage that most mistakes are made.
Power is connected to the car radio through a separate fuse using a flexible stranded wire with a cross-section of at least 3 mm 2. In most cases, it will be enough to use a 10 ampere fuse; it will reliably protect the power circuit from emergency situations.
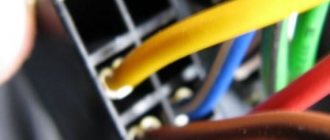
The radio is powered through three wires: yellow, red and black.
+12 V (yellow) – main power wire. It powers the built-in amplifier and also serves to save car radio settings. This wire is connected through a fuse directly to the battery. It is advisable that the length of the wire from the battery to the fuse does not exceed 30 cm.
ACC (red) – control of turning on the car radio from the ignition switch. On many vehicles, the ignition switches have an ACC (accessory) position. When you turn the key to the ACC position, power is supplied to the car radio, interior heater and cigarette lighter socket, but the car's ignition system is de-energized.
GND (black) – connects to the negative terminal of the battery. But this is ideal. Due to the low power of the car radio, it is allowed to connect the black wire to the car body. You must first ensure good contact with the body by cleaning the joint from dirt and oxides. You can also use contact lubricant to protect them from oxidation.
The yellow power wire can also be marked as B+ , BU , Batt .
It can be connected to the red ACC wire (bypassing the ignition switch) - this will allow you to listen to music without a key. But in this case, the radio will constantly consume current, and if the machine is idle for a long time (from several days to 2-3 weeks), your battery may run out.
The following wires are responsible for connecting acoustic speakers to the car radio:
- FL – front left,
- FR – front right,
- RL – rear left,
- RR – rear right.
When connecting the speakers to the radio, be sure to maintain the correct polarity, otherwise the sound will be of poor quality, since the acoustics in this case will work in antiphase.
In some car radios, the outputs to the speakers are duplicated with separate “tulip” type connectors - it is advisable to use them if the acoustics installed in the car have the same connectors.
It is advisable to use special speaker wires to connect speakers. They often come with a radio.
And do not even think about connecting any of the terminals intended for connecting acoustics to the ground of the car - you will be guaranteed that the car radio will fail!
The remaining wires in the car radio are responsible for controlling additional functions and equipment.
ANT (white) – antenna control. Acts as a power source for an internal active antenna, or provides a control signal to turn on an automatic external antenna.
ILL (ILLUMINATION) – is responsible for the backlight of the car radio. Connects to the “plus” of the side lights power supply circuit.
MUTE – controls muting the sound from the car mobile phone kit. The sound is turned off when this pin is connected to ground.
Parking Line – found on most car DVD players. Connects to the parking brake sensor. With this connection, you will be able to watch DVD only when the car is in the parking brake.
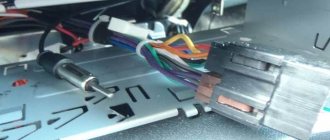
After connecting the power, acoustics and antenna wires to the ISO connector, this entire harness is pulled inside the container so that their ends with connectors extend into the car interior at a length convenient for work (approximately as shown in the photo at the beginning of the article), and connected to to the corresponding connectors on the rear wall of the radio.
After this, the car radio must be turned on and listened to. If everything works fine, then it can be inserted into the container until it stops (the latches on the sides should work).
Installing a radio on a VAZ 2114
You need to know the following if your car is under warranty and you decide to install a radio on it. Then you need to install only radios that have a certificate of conformity. Installation should only be carried out at authorized service centers. And upon completion of the installation, you must make an entry in the “Special Notes” section of your car’s service book. If your car is no longer under warranty, then you can proceed with the installation yourself.
Radio connection diagram
And so we decided to install a 2-din radio tape recorder on a VAZ 2114 car. First, we need to cut out the required hole for the radio tape recorder in the so-called “torpedo”. We need to know that when installing the radio, we will need to move the stove control devices to the place of the radio. And so we cut out the required hole; you can cut it either with an angle grinder using a machine or with a jigsaw. If your hand trembles during the cutting process, then the defects can be corrected by painting, or by soldering plastic to the necessary places.
When installing, you need to know the purpose of the power wires.
- The black wire is always the ground wire.
- Yellow is twelve volt power.
- Blue is the current to the antenna.
- Orange is the backlight of our device.
- Red is power supply at ignition.
So, now we connect the head unit and speakers, as a rule, there are 8 plugs for four speakers, two for each, but sometimes there are 5 plugs, this is for simpler models. Look carefully at the connection diagram of the head unit with the car's power supply; it is always described in detail in the installation and operation manual for the radio. And we connect the wires we need using so-called PPE connectors; these connectors allow us to avoid soldering. As a rule, the wires to the speakers, antenna and amplifier come from the head unit in one stream; it is best to wrap them with electrical tape, for further ease of installation and to avoid unnecessary tension.
Power cables
After we have connected the head unit, we check the presence of ground using an indicator screwdriver; if there are “sleds”, then we install them first before inserting them into the car’s power supply system. And so we connected all the wires according to the diagram in the installation instructions, once again checked the presence of power and ground, and installed the radio inside the car panel. After we install the cladding, install the front panel of the head unit and turn on the device. If everything is done correctly, the radio will work perfectly.
Connection nuances
I think no one will have any problems or difficulties in removing the stock radio. There is an instruction manual and a number of videos online that can help you do the work step by step.
There is no point in describing the removal and installation procedure, since each machine has its own dismantling nuances. But most often 2 din are installed:
- to Granta;
- Ford Focus;
- Lada Kalina 2;
- Kia Rio;
- VAZ 2110;
- Lada Largus;
- Lada Priora;
- Renault Logan;
- Renault Sandero;
- VAZ 21099;
- VAZ 2114;
- Nissan Almera, etc.
If you have a regular radio, you can easily replace it with more functional and multimedia-rich 2-din equipment.
Briefly about the history of VAZ
It all started back in 1966, when the ruling, and only at that time, party realized the lack of civilian automotive industry. After collecting and analyzing data, it was decided to build the production and assembly of passenger cars intended for the needs of ordinary citizens; the city of Tolyatti was chosen as the construction site. And already in the winter of 1967, the construction of the plant itself began.
VAZ 2114
The entire construction was designed for a period of six full years. But according to the customs of that time, everything was completed ahead of schedule - in just over three years. Perhaps we are still reaping the fruits of the plant’s early commissioning to this day. At the end of 1970, the first batch of VAZ 2101 cars was formed and sent, which was almost entirely a FIAT-124 car. In the normal place for the radio there was a simple radio receiver operating in HF/VHF format.
How to connect your phone to the radio via AUX?
Connecting via AUX is one of the first and easiest ways to connect a car radio with external media. The connection is made using a cord, at the ends of which there are 3.5 mm connectors.
To listen to music, you just need to insert the plugs into your phone and radio. With this connection, the phone's player is used. The radio plays the role of an amplifier; you can use it to adjust the volume of the music. The cord that is used for connection can cause some inconvenience, and rapid drainage of the phone battery is inevitable.
In conclusion
As you can see, installation of the radio is simple and for the most part requires only your desire
The main thing to note is that with any modernization not intended for the design, it is necessary to take care of the insulation of electrical connections and thermal insulation of coolants (corrugated air ducts)
The torpedo of the fourteenth, like most modern cars, is made of synthetic, flammable materials, so the issue of safety is very relevant. If you are not confident in your abilities, contact a professional workshop, because it is much cheaper than a burnt-out car.
voice
Article rating
Methods for solving the problem
Now that the main causes have been sorted out, you can move directly to elimination methods.
It is worth warning that if the motorist does not understand the design or is not sure that he can repair the fault on his own, then it is recommended to turn to a professional car service center.
So, let's look at what ways to deal with the malfunction.
Fuse
Disassembled dashboard while searching for fuse and cigarette lighter faults.
The most common cause of malfunction or inoperability of the electrical circuit of individual elements is the notorious fuse.
This is where you need to look for the cause first.
The fuse box socket – F4 – is responsible for the radio and cigarette lighter. The fuse marking in it should be 20A.
But it does not always withstand the load placed on it. Thus, frequent and large use of additional devices can lead to frequent burnout of this element. Therefore, to check it is worth removing and inspecting the fuse itself. If necessary, the element is replaced with new ones and if everything works, then the reason has been found. But if the problem does not go away, then you should look for it in other places.
Contacts
Checking the contact group of fuses for malfunction
A contact group is another common cause of a non-functioning electrical circuit. In most VAZs, the connecting contacts of the fuse with the block or in the circuit of the wire block oxidize or burn out, and molten plastic can interrupt the contacts.
To troubleshoot the problem, you need to check all the contact blocks of the wires that go from the radio and cigarette lighter to the fuse box. So, it is oxidation and insufficient contact that can lead to the inoperability of the elements.
Wiring
Another reason could be broken power wires. So, in order to find and fix the fault, you will need a tester that will test the wiring and find a broken wire . It is recommended not to fasten the wire using the old “old-fashioned method” using electrical tape, but to replace it with a new one. This will take little time, so it’s better to do everything in such a way that you get a short circuit and cause big problems.
Short circuit
Location of frequent failure of the cigarette lighter socket.
The worst thing that can happen is a short circuit. The reason for this phenomenon is that frequent use of the cigarette lighter loosens the socket and this can lead to the contacts crossing and causing a short circuit.
The standard cigarette lighter is just a disaster for the VAZ-2114.
Here, the treatment for the malfunction is quite simple - replacing the socket. But, often motorists take a low-quality and cheap product, which repeats the procedure after a short time.
Problems with the operation of the radio and cigarette lighter
Car enthusiasts often face the problem of cigarette lighter and radio failure. Here are the main reasons for their refusal:
- Short circuit in the circuit.
- The fuse has blown.
- Contacts often oxidize and burn during operation; this needs to be checked.
- The backlight bulb has burned out.
- failure of fuse contact in the block.
Car radio These are the five main reasons for the failure of the radio and cigarette lighter.
In general, the cigarette lighter is not designed to constantly supply power to external devices. And in most cases, when installing with your own hands, the main mistake is the low strength of the contact assembly and the power supply unit itself; often it is simply impossible to tightly link and connect everything. And subsequently, the natural vibrations of the car and the peculiarities of Russian roads worsen the quality of the already unreliable assembly at the contact points, which leads to their burning and short circuit currents. Therefore, when you undertake to install the radio with your own hands, do not skimp on consumables and the necessary tools for high-quality fastening of your device. Music is an integral part of our lives, it shortens the journey and the wait in the car; without it, any journey seems incredibly long. The musical preferences of their owners are heard from the windows of millions of cars, so why stay away. To enjoy life on the road and fully enjoy it, you need little - purchase and install a radio.
Many car owners who bought a new car for the first time are surprised by the unexpected lack of an audio system in the car, and even if there is one, it is not a radio, but at best a radio.
There are many manufacturers on the market that offer a variety of models with a huge range of capabilities. With the knowledge of how to connect a radio to a VAZ 2114, you can choose any radio, but some will have to suffer, which we’ll talk about.
Connecting the radio
Some tips
I recommend taking advantage of the opportunity while everything is sorted and carrying out some simple procedures to improve quality. These tips may seem trivial to you, but they will help extend the life of the new audio system for an extra year or two. First, tin the wires and solder them.
This procedure will prevent the sound from losing quality even during prolonged use. Use female/male connectors. This method will be more effective and easier than soldering. Use heat shrink tubing. They will help maintain the quality of wire connections and extend the time it takes to resolder.
Source
Which radio should I choose?
Most leading masters offer two options for improving the functionality of the car:
— Installation of a standard head unit.
— Select one of the available 2 din radio options. It is recommended to entrust the installation of the device to real professionals with many years of experience in this field. Of course, you can try to install it yourself if you have certain knowledge in this area, as well as a set of necessary tools.
The main advantage of the first option is the preservation of the original design of the car interior. The second option opens up wide functionality for the driver. In addition, the 2 din radio is a universal option, therefore it is especially popular among vehicle owners.
What additional features can I get?
It is necessary to understand that installing 2 din requires a professional approach in order to obtain the most positive end result. In addition, it is difficult to independently understand the wide range of radio tape recorders presented, which are characterized by individual functionality. To choose the best option for your car, you need to consider your own needs and desires. In addition, you can always get advice from real professionals who will help you make the right choice.
