Repair / From Ekaterina Larina
- Several ways to check functionality
Method No. 1 - Method number 2
- Method number 3
- For what reasons can fuel pumps fail?
- Preparing tools
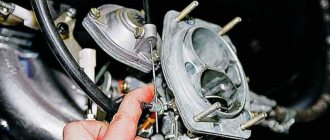
Electric fuel pumps are installed on VAZ 2108 and VAZ 2109 models. The task of this device is to supply fuel under certain pressure into the fuel rail, and from there the injection system distributes fuel into the engine cylinders. In other words, it ensures the transfer of gasoline from the tank to the engine unit. However, electrical devices can cause some problems for owners of VAZ 2108/2109 with a carburetor. Their performance is not always flawless. Owners of domestic cars need to be prepared to know and be able to carry out inspections, repairs and replacements with their own hands.
Installation of fineness pump and chips
After reading the opinions of people, I came to my conclusion and its setting will be as follows:
We install the EBN only vertically!
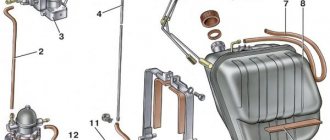
The location of the pump under my hood is as far as possible from the engine, since it also gets hot and it would be desirable for there to be airflow to the pump. I placed the filter in front of it; it is not advisable for debris to remain in the pump. A full return to the tank is also connected. Here, too, people write differently. The fact that it is not needed, since the pump, after filling the float chamber with fuel, begins to work on its own, and with the return line it will constantly oil. Others write that a return line is needed to make it easier for the pump to work, and the carburetor won’t overfill if the needle doesn’t hold well. Theoretically, both versions are correct, but I installed everything backwards
For installation, we need a soldering iron, a multimeter, wires, a chip for a 4-pin relay and the relay itself, as well as a chip for a fuse, respectively, and the fuse itself is needed for 15A. A fuel pipe and a couple of clamps.
The engine compartment of the M41 is not small, so the space for installing an EBN is quite sufficient.
Source
Correct procedure for disassembly and replacement
To remove the fuel pump, you need to perform the following sequence of actions:
- Buy a repair kit right away, it costs a pittance
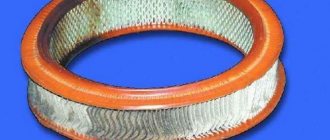
- Remove the air filter and its housing
- Disconnect the fuel supply and return hoses from the pump fittings
- Unscrew the nuts that secure it
- We remove it carefully, because there is a possibility of destroying the gaskets
- Then you should inspect all the parts for cracks, check the tightness of all its valves
- Pay attention so that the discharge and absorption fittings do not rotate in their sockets
- Diaphragms are not required to have detachments or ruptures
- The filter must be undamaged and completely clean
- Wash all its parts with gasoline, and then blow with a compressor
- After checking, replace all damaged parts; it is recommended to change the pump gasket as well.
- When installing the gasket, apply lubricant like Litol-24 to its surface
- If the housing is damaged or there is irreparable damage to the main parts, replace the pump completely
- Then you can move on to installing it backwards
- With all this, immediately adjust the feed using shims
- And for this we measure the protrusion of the pusher
- Because with strong protrusion, excessive gasoline pressure will be built up, which will simply break the carburetor shut-off valve
- In the case when the distance is lower than necessary, when the load increases and the vehicle speed increases, the missing amount of gasoline will begin to flow into the carburetor
- The pump installation procedure is reverse to removal.
- Also make sure that the arrow located on the body points towards the carburetor
- When installing the diaphragm unit, it is important to place the holes in its gasket away from the muffler pipe
Here we have posted a more detailed summary on removing and disassembling the fuel pump, so that it is easier for you to do it yourself if one thousand and ninety-three fuel pump malfunctions appear on the VAZ 20. We conclude here, no problems should arise; in addition, you can, of course, watch a lesson on this topic.
Electric fuel pump for carburetor: installation features
Let's start with the fact that the carburetor is a mechanical component of the power supply system of a gasoline engine. The main task of the carburetor is to prepare a suitable fuel-air mixture, as well as to dose the finished working mixture when supplied to the engine.
Naturally, many solutions are borrowed from more modern systems. Quite often on carburetor cars you can find electronic ignition or an electric fuel pump. Next, we will talk about what advantages an electric fuel pump provides for carburetor engines, how to connect an electric fuel pump to a carburetor engine, as well as what subtleties and nuances need to be taken into account during such an installation.
Electric fuel pump for a motor with a carburetor
So, an electric low-pressure fuel pump on fuel-injected cars is located in the gas tank and takes fuel from the fuel tank, after which it supplies it under a certain pressure to the injectors. As a result, the engine operates stably regardless of the load, and accurate and timely injection is also achieved.
In both the first and second cases, the pump supplies fuel to the metering systems (injectors or carburetor). It is quite obvious that if you install an electric pump instead of a mechanical pump, you can achieve trouble-free operation of the carburetor and a stable fuel supply.
Advantages and disadvantages of installing an electric fuel pump on a carburetor engine
In the list of main advantages after installing an electric pump on a carburetor, we should highlight the ease of starting the internal combustion engine. The engine starts quickly, both cold and hot, reducing the load on the battery and starter. As for operation, if connected correctly, there is not so much smell of gasoline in the cabin, and fuel is also consumed more economically.
If we talk about the disadvantages, then it is worth noting only the complexity of installation and the need to purchase the pump itself. Also, for normal operation of the pump, the vehicle’s electrical systems must be in good working order, as well as a normal battery charge level.
Tips and tricks
It should be noted that before purchasing a gasoline pump, you must carefully study its characteristics in terms of performance and pressure, current consumption, etc. In some cases, a situation may arise when the device is not able to work normally with a particular carburetor.
The fact is that clogged filters increase the load on the pump, as a result of which the device may overheat or fail. As a rule, in case of problems with filters, first the pump’s performance drops, then the engine may begin to work unstably, power is lost and traction deteriorates. Ignoring these symptoms not only makes it difficult to operate the car, but also significantly reduces the service life of the electric fuel pump.
Mechanical and electric fuel pump, design and principle of operation of the device, types of pumps and main malfunctions, operating features
Checking the general condition of the fuel pump
First of all, let’s check whether the supply system of your VAZ 2109 is working at all. To do this, you need to take the following steps:
- Remove the pump fuel hose from the source or discharge fitting;
- Manually press the fuel pump lever several times;
- If the pump is operational, a strong stream of fuel will immediately flow through the fitting;
- If there is no jet or it is very weak, it will be necessary to carry out other checks.
Intake Valve Check
- Disconnect the hose from the suction fitting so that both hoses are eventually removed, each from its own fitting.
- Simply plug the suction fitting with your finger, then pull the lever several times to manually pump fuel. If everything works fine, your finger will begin to be sucked into the fitting. This effect indicates that the pump is working properly. Therefore, we look for the problem in the tank or lines.
- If there is no suction, you will have to disassemble the device to replace the inlet valve. Its tightness is most likely broken.
”
Pump diaphragm failure
You need to do the following for your fuel pump:
- Remove the upper part of the fuel pump housing and remove the diaphragm assembly from there;
- Unscrew the nut on the rod, and then pull out the 3 diaphragms;
- Replace faulty elements with new ones. They are available in any repair kit for the VAZ 2109 fuel pump;
- Reassemble the assembly in reverse order;
- If you have a Pekar pump, there is only one diaphragm. It can be removed by removing the cover;
- To disconnect the diaphragm assembly, rotate it 90 degrees.
Be sure to simultaneously check the condition of the spring located under the diaphragm. To do this, you need to remove the upper part of the pump housing, remove the diaphragm rod and look at the current state of the spring. If it is broken, deformed or lacks elasticity, replace the element.
Node elements
Intake and exhaust valve malfunctions
If both valves raise doubts about their functionality, certain measures will have to be taken.
- Remove the cap from the fuel pump and remove the strainer.
- Visually assess the condition of the pump cavity and inlet valve.
- With the top of the pump body removed, you can take a look at the outlet valve.
- If both valves are not installed tightly enough, they are not pressed well or have become motionless, replace the entire pump completely.
- If you find traces of clogged valves, remove them and blow out the housing with compressed air.
DIY installation of an electric fuel pump on a carburetor VAZ 21099
Let's start with the fact that I have an old VAZ 21099, produced in 1993. Naturally, carburetor. And it was on this car that I decided to install an electric low-pressure fuel pump - as it turned out, this is a very necessary and useful thing. In the article I will share with you how the electric fuel pump was installed, and also why I took this step in the first place.
I decided to install an electric fuel pump on the VAZ carburetor, having had a fair amount of trouble with the standard mechanical fuel pump. Over the entire service life of the car, countless numbers of them have been replaced: either the rod breaks, or simply wears out, or the pump does not gain the required pressure. Naturally, all this does not have the best effect on the stability and power of the engine.
When deciding to install an electric fuel pump, I was guided by the following factors:
- stability of fuel supply to the carburetor, regardless of engine speed;
- reliability of the system, since I constantly drove with a mechanical pump in anticipation of its failure;
- ensuring the supply of gasoline in the quantity required for the engine: so that at high speeds it does not lose power due to lack of fuel.
After going through many different options, I decided to settle on a low-pressure electric fuel pump from the manufacturer OSIAS, model HEP02A. By ordering it on Aliexpress.
Several ways to check functionality
Experienced owners of VAZ 2108/2109 cars know exactly how to check the functionality of the fuel pump. Malfunctions related to incorrect fuel supply may not always relate specifically to the pumping device. Therefore, you will need to be able to identify problems with the device yourself.
Method No. 1
You will need to turn on the ignition and listen to whether the pump is working or not. A buzzing sound should be heard in the cabin behind one of the rear seats. If there is no characteristic sound of the pump operating, then you will need to check whether power is being supplied to it.
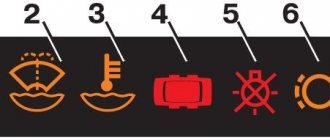
The block with the relay is dismantled. For the convenience of the driver, the assignments of all relays in the block have schematic assignments. If the relay and fuse are working, then it is recommended to recline or remove the rear seat, open the hatch and measure the voltage on the device itself. Typically, a multimeter or wiring with a low-power lamp is used for this.
Method number 2
You will need to replace the fuel pump with a new one. If the problems disappear immediately, it means that the fuel pump was indeed faulty. If the car still cannot be started due to low pressure in the fuel rail, the problem is not in the fuel pump, but in the fuel system itself. It is best to contact specialists.
Method number 3
The performance of a gas pump can be checked by measuring the amount of gasoline it pumps over a certain period of time.
You will need to organize access to the fuel rail and unscrew the spool on the tube. Connect a hose to the hole, the other end of which is lowered into a container for measurement (for example, a three-liter jar). The pump on the “eight” and “nine” pumps approximately one liter of fuel per minute. If the readings are much lower, it means the high pressure filter is clogged.
FUEL PUMP SPECIFICATIONS
The HEP02A electric fuel pump perfectly meets all my requirements. Its main characteristics are as follows:
- metal body with “ears” for rigid attachment to the body. This is important, since the diaphragm type pump, accordingly, vibrates a little during operation;
- length is only 138.2 mm, diameter is 58 mm, and weight is only 350 grams, which allows it to be easily placed in the engine compartment;.
- operating current is 1.8A, which does not create a high load on the generator and battery;
- productivity 70 l/hour. Considering that ideally a standard mechanical pump produces no more than 60 l/h, a small supply will not hurt at all;
- working pressure 0.032-0.045 MPa. Sufficient for pumping the fuel line and providing reliable power to the carburetor;.
- The diameter of the connected pipes is 0.8 mm, which fully corresponds to the diameter of the fuel line.
So, I decided on the pump. By the way, the parcel arrived quite quickly, and even the box was not wrinkled.
WHAT YOU NEED TO INSTALL A FUEL PUMP
To install an electric fuel pump, you will not need many additional materials. All of them can be easily purchased at the nearest auto parts store for domestic cars.
To install an electric fuel pump, I additionally had to purchase:
- fine fuel filter in a metal case from Lada. You can use any other filter with a similar diameter of fittings, but only fine filter;
- the low pressure electric pump itself OSIAS HEP02A. As already mentioned, I purchased it on Aliexpress;
- wires for connecting the pump are about a meter long. It is advisable to choose a wire with a cross-section of at least 0.75 square;
- standard four-pin domestic relay. It is necessary to automatically start the electric fuel pump immediately when the ignition is turned on;
- relay connector;
- clamp for fastening fuel hoses;
- 15A fuse with wire.
From the tools we will need a knife for cutting hoses, a drill with a metal drill, a set of keys and side cutters (pliers are also possible).
When all the necessary Internet and materials have been collected, you can proceed directly to the installation process.
Mechanical fuel pump repair
- intake and exhaust valves;
- diaphragms with spacers, “plates”, rod;
- pusher;
- thermal spacer;
- gaskets
Diagnostics of the electric circuit of the fuel pump
In order to check whether voltage is supplied to the fuel pump, turn on the ignition without starting the engine and listen. When you turn the key, you should first hear the click of the relay, and then the corresponding “squeal” that the electric motor of the fuel pump emits. If these sounds are absent, the search for the problem must begin with pump circuit protection devices.
The fuel pump relay and fuse are located in an additional mounting block, which is located under the glove compartment. The pump relay (R2) is installed in the middle, and its fuse (F2) is located to the left of it.
The fuel pump relay and fuse are located in an additional mounting block under the glove compartment.
We check them in this order:
- Disconnect the negative terminal from the battery.
- We remove the fuse from the socket and test it with a tester. If it is faulty, we replace it.
- We connect the terminal to the battery and turn on the ignition without starting the engine. We switch the tester to voltmeter mode and measure the voltage between the relay terminal, to which the pink wire goes, and ground. The device should display twelve V. If there is no voltage, the problem must be found in the wiring or contact group of the ignition switch. If power is supplied to the relay, use a screwdriver to close the terminal to which the pink wire fits with the terminal connected to the grayish wire. This way the pump circuit will be closed directly (bypassing the relay). The fuel pump is working - we change the relay, if not - we check whether voltage is supplied to the pump itself.
- We remove the back seat. We bend the carpet underneath and find the hatch. Unscrew the screws (2 pcs) securing it. There is an electronic connector under the hatch. Disconnect it from the pump. Turn on the ignition. Using a tester turned on in voltmeter mode, we measure the voltage between the “plus” (grayish wire) of the pump and its “ground”. There is voltage - there is a problem in the pump itself, if not - the reason should be found in the wiring.
HEP02A ELECTRIC FUEL PUMP INSTALLATION
The entire installation process takes only 2-3 hours. But a lot depends on your experience and having all the necessary tools at hand.
Initially, it is necessary to install a fine fuel filter - pre-filtration of gasoline will protect the new pump from damage caused by dirt particles entering it. I installed the fuel filter directly under the tank, where the fuel pipes exit. I attached it to the hoses, carefully tightening them with clamps.
How to remake: step-by-step instructions
Before starting work, wash the car thoroughly and remove dust and dirt from around the engine.
- In the rear of the car we remove the old carburetor fuel system.
- Pull out the gas tank and fuel pipes.
- We screw on the new bracket and use it to secure the new injection lines.
We install the bracket in its original place and secure the lines - We install the fuel filter along with hoses.
We fix the fuel filter with hoses - We attach the fuel pump to the injection gas tank.
- We go into the engine compartment and remove the ignition.
- We disconnect the wires that go from the sensors to the ignition braid.
- We pull out the old ignition tee and install an injection tee in its place.
Before doing this, completely drain the antifreeze from the system. We install the injection ignition tee in place of the carburetor - In place of the distributor, we make a plug with a seal and treat it with sealant.
- Remove the carburetor along with the intake manifold.
We dismantle the old carburetor along with the manifold - We replace the gasket and install a new injection manifold.
We install the injection manifold in place of the carburetor - We install the injectors on the ramp and secure it to the manifold.
- We connect the hoses and install the receiver.
We install the injection receiver and connect the hoses to it - If your model has an oil pump without a casting, then it also needs to be replaced.
- The generator on the nine must be replaced, but the pulley itself is suitable for the new system and can be left.
- Instead of a carburetor ignition cable, we install an ECU wiring cable.
- We connect the wiring to the controller and the motor.
- In our case, the fuel sensor will remain the same; you just need to connect it to the new pump.
- Turn on the ignition and check the operation of the fuel pump. The entire fuel system must be sealed and leak-free.
- We replace the carburetor module with an injection one.
We remove the carburetor ignition module and install the injection module in its place - We install a new ignition system (spark plugs and module).
- We install the air filter.
- Drill a hole for the knock sensor (depth 16 mm).
- We start the engine and check its operation.
PROS AND CONS OF INSTALLING AN ELECTRIC FUEL PUMP
The obvious advantages of using such a fuel supply system include:
- ensuring a stable supply of gasoline throughout the entire range of engine operating speeds;
- ease of installation, which does not require large expenses and the involvement of professional car mechanics: all work can be easily done in the garage with your own hands;
- minimal maintenance and system reliability. The pump does not require intervention during its entire service life. The main thing is to periodically change the fine fuel filter;
- ease and efficiency of returning the fuel route to its previous state using a mechanical fuel pump. This is a definite plus if you suddenly have to repair the car “in the field”;
- low cost of modernizing the fuel system. At least over the life of your car, you spent a lot more money on replacing standard fuel pumps.
But this system also has a number of disadvantages:
- The pump is cooled solely by the gasoline passing through it. It is enough to drive a “dry tank” several times for it to overheat critically and fail. This must be taken into account.
- Vibrations and noise of the pump during operation. But it is worth noting that you cannot hear them over the noise of the engine, not to mention the noise when the car is moving. If sound insulation is installed in the engine compartment, it is almost inaudible even when the engine is not running.
- Dependence on electricity. With such a pump, it is necessary to monitor the condition of the battery and the performance of the generator.
- The need for a return line. Excess pumped gasoline must be returned to the tank, which is why “return” is required. Therefore, owners of very old VAZs and AZLKs without a return line will be forced to buy additional pipes and install a return line.
In practice, the disadvantages of using a pump cannot even be called full-fledged disadvantages - these are simply features of the design and operation of the fuel system on an electric fuel pump as a whole.
Replacing the fuel pump on a VAZ 2108/2109
The procedure for replacing a faulty fuel pump on a VAZ “eight” and “nine” is relatively simple. The main thing is to be careful so that when installing and dismantling you do not accidentally catch parts of other elements of the car.
Preparing tools
In order for the work to be completed quickly and not have to be distracted by searching for this or that tool, it is necessary to prepare everything in advance. So, to remove a faulty fuel pump and install a new one, you will need the following set of tools:
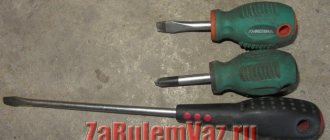
- Phillips screwdriver;
- flat screwdriver;
- socket wrench (or head) size 7 mm;
- extension;
- open-end wrench 17.
It is recommended to carry out all stages of operations with gloves so as not to stain or injure the skin on your hands.
Step-by-step instructions on how to remove a faulty fuel pump
The first stage of work is to dismantle the old device, which can be divided into several steps:
1. Turn off the ignition.
2. Fold down the rear seat in the cabin.
3. There is a small hatch under the foot carpet in the cabin; it must be opened by removing the fastening screws with a Phillips screwdriver.
4. Raise the hatch cover.
5. A plug will appear in your field of view; you will need to bend the latches on it and disconnect its parts.
6. Next, you need to unscrew the fuel pipes with a 17 wrench.
7. The tubes must be diverted in different directions so that they do not interfere with further work.
8. There is a pressure plate under the hatch - you will need to unscrew all the nuts on it to open it.
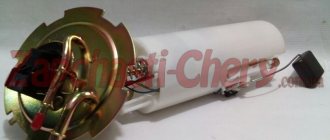
9. The fuel pump is located under the plate; to get it out you will need to pry off the rubber seal with a screwdriver.
10. As soon as you manage to lift the device a little, you will need to tilt it so as not to touch the body of the fuel level sensor.
Step-by-step instructions on how to install a new fuel pump
Further actions involve the reverse order:
- Carefully insert the new device into the hole, not forgetting to change the O-ring.
- Retighten all nuts on the pressure plate.
- Connect the fuel pipes to each other.
- Connect the two parts of the plug.
- Close the cavity with the hatch cover and screw the hatch.
- Place the carpet in its original place.
Video instruction: how to replace the fuel pump yourself
Thus, you can diagnose and repair the fuel pump in VAZ 2108/2109 cars yourself, without involving service station specialists. The procedure for determining the performance and replacing a faulty device is quite simple, so performing these procedures yourself will not cause difficulties even for inexperienced drivers.
Do-it-yourself fault diagnosis and repair of the Daewoo Nexia stove
Repair of carburetors VAZ 2108–2109