Replacing the clutch in a car requires knowledge of some nuances, assembly technology, as well as disassembly - this may differ between different models. When carrying out work to replace parts, you should also pay attention to the replacement of parts accompanying this mechanism.
We’ll look at how to do this ourselves in more detail below.
The principle of operation of the clutch in a car
This mechanism in a car is needed for more uniform gear shifting, reducing torsional vibrations, as well as temporarily disconnecting it from the engine gear. Components: drive and mechanism.
To supply force to any mechanism in the car, the drive mechanism comes into operation. Any mechanism in a car is equipped with a drive; its structure has its own specifics and operating features.
The shutdown drive, based on the hydraulic principle, has elements such as pedals, cylinders, a power plug, a pressure bearing, and a pipeline.
The mechanism transmits torque through the entry of friction force. Thanks to it, the engine and gearbox are temporarily separated, followed by their gradual reunification.Its components are a crankcase and a casing, a drive disk, a pressure disk together with springs, and a driven disk with wear-resistant linings.
Considering the video of replacing the mechanism yourself, the question arises of how to do it yourself.
Factors influencing the price of the service - replacing the clutch disc in Moscow
It is common knowledge that the cost of car repairs depends on several aspects. Among them are the following:
- cost of spare parts (original, China, alternative manufacturers);
- personnel qualifications;
- level of equipment of the service station (availability of painting booths, lifts, special tools and equipment, etc.).
For example, the price of the service - replacing the clutch disc in Moscow will also depend on factors such as the age, make and model of the car. We are confident that car services will compete for your order and offer the best conditions. The centers have a system of discounts for regular customers.
Replacing the clutch on a VAZ car with your own hands
Replacing the clutch on a rear-wheel drive VAZ yourself is done like this: we make the car accessible for repairs, put it in neutral gear. We unscrew the screws from the gearbox fixing cover, remove only the upper part, unscrew and remove the shaft, detach the speedometer cable and the clutch slave cylinder from the gearbox.
We remove all the fasteners and the box. We remove the basket fixing bolts and take out the parts, replace the parts with new ones and put everything back.
On front-wheel drive VAZ models, replacing the clutch yourself is more difficult to dismantle, since removing the box requires much more time.
To replace the clutch yourself, you should place the car in a specially equipped place for repairs.
Next, you should unfasten the battery terminal, remove the bolts from the front wheels, and mount the front wheels. We disconnect the mechanism cable fastening from the box, then move it to the side.We remove the speedometer cable, unscrew the support nuts on all sides, remove and put the starter aside, remove the front wheel hub fasteners. Remove the three gearbox mounts, then the casing.
If there is existing engine protection, it is worth installing it too. Next, you should remove the left mudguard, the left mounting bolts, near the bumper. Mount the left lever mount, make the lever mount weaker, move it down.
Then you should remove the left gearbox cushion, the bolts securing the gear shift part, and disconnect it. Then remove the right cushion, unscrew the upper bolts securing the box to the engine, replace them with larger cylinder head mountings.
Next, we remove the remaining fasteners, and the box calmly moves away from the engine. We take out the basket mounting bolts, install new parts instead of the old ones, then gradually move the box towards the engine and tighten the fastenings until they stop. Then we install other parts.
Replacing the clutch: sequence of actions:
- place the “front” of the machine on tripods, blocks, beams, logs;
- remove the front wheels and remove the fastening cable from the bracket;
- disconnect the speedometer cable from the gearbox;
- Unscrew the bolts of the ball joints on the steering knuckle;
- loosen the longitudinal fastener of the lever;
- remove the elements holding the extension and turn the lever 90 degrees;
- remove the battery mass attached to the gearbox;
- unscrew the flywheel protection cover from below and remove the engine mount;
- unscrew the rear engine mount and remove the clamp on the PP drive;
- remove the drive mechanism;
- unscrew the engine and gearbox fasteners;
- remove the gearbox, leaving the mechanism suspended;
- release the clutch;
- install a new release element (bearing);
- replace the clutch driven disc;
- Reassemble the mechanism in reverse order.
Please note: The car magazine "Cartel" provided approximate instructions for replacing the clutch with your own hands. You carry out all actions and operations at your own peril and risk, since the quality and volume of garage equipment, most often, does not correspond to the level of specialized car services. If you do not have the necessary knowledge and experience, contact a transmission repair shop.
We would like to add that the above instructions are relevant for cars with a traditional gearbox and related units. Replacing the clutch on particularly rare models that were not supplied to Russia, or manufactured “to order” can seriously differ from generally accepted rules and regulations. For example, in the material about tuning the VAZ 2102, we wrote that the gearbox was modified for the Nissan Silvia engine!
Replacing the clutch on a VAZ 2110 with your own hands
Replacing the clutch on a VAZ 2110 yourself does not require removing the box. You need a specially equipped place to work and a set of tools.
The first step is to disconnect the negative terminal of the battery, and also mount the set of wires from the air mass flow sensor. Then you should remove the air filter, install the ignition mount, and remove the upper bolt in the starter fixation.
Next, you should disconnect the cable connecting the mechanism to the fork. Unfasten the gearbox mounts one by one, starting with the left bolt.
Then you should mount the starter nut, the front left wheel, and then remove the protection on the engine. First remove the brace, then the support bolts and the lever located below. Then we remove everything from the car.On the box, remove the connector responsible for the rear lights. We disconnect the lower fastening of the box located in the immediate vicinity of the constant velocity joint.
Then we remove the reaction rod fastenings, mark the location of the gearbox control locking drive mechanism, loosen the clamps on the clamp and remove the box control rod.
We fix the bottom of the engine and remove a couple of rear support fasteners. We very carefully remove the gearbox housing from the cylinder block. Next, you should look at the wear of parts and, if necessary, replace them with new ones.
What you need to replace the clutch
To replace a clutch, you need to do a lot of work. In particular, the gearbox must be removed; without this it will not be possible to carry out repairs. It is precisely because of the dismantling of the gearbox that many motorists are simply afraid to make repairs on their own. There is a lot of hassle, there is a need for an overpass or a hole, and it is almost impossible to carry out repairs on a flat surface.
But it is worth noting that on front-wheel drive cars (VAZ, for example), you can replace the clutch without completely removing the gearbox. It is enough to move it slightly to the side to form a small gap. It is through her that, like an experienced doctor, you carry out repairs. And to prevent the box from falling, instead of the standard bolts on top, screw in those that are used in the “classic” suspension to secure the upper suspension arm. They are screwed in from above, and it looks as if the gearbox slides along them, as if on rails.
Replacing the clutch on a Priora yourself
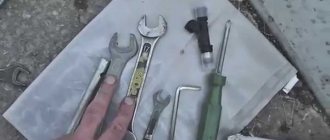
Replacing the clutch mechanism on a Priora car yourself is carried out in this way, first equip yourself with an arsenal of necessary things, namely a jack, a special rack for the gearbox, a mount, a set of tools, a new mechanism, a gearbox shaft.
Place the car in an equipped place, activate and secure the brake mechanism. Mount the lower part of the engine, provide access to the box fixation, and raise the driver's side of the car.
Remove the left wheel and gain access to the ball joint, remove it, remove the CV joint and leave it in the assembly. Carry out similar actions with the right wheel.
Then you should install the gearbox mountings. Release the mechanism cable from the bearing drive. Unscrew the fastenings of the box and engine block, and then mount it. We gain access to the coupling and replace it.
Procedure for removing the mechanism
It is easiest to repair or replace the clutch basket when the entire engine is overhauled. If the power unit is removed, then you can inspect, repair or replace worn parts of this part of the car without much effort. In this case, dismantling the unit does not present any difficulties.
Let's take a closer look at how to disassemble the clutch and how to remove the failed part. The operation scheme is simple. The main thing is to comply with the technological regulations given below:
- First you need to remove the gearbox (gearbox). If the gearbox does not need to be repaired, then there is no need to disconnect the drives before removing the battery and mass flow sensor and draining the oil.
- Unscrew the drive (cable) that activates the mechanism and remove it.
- Unscrew and remove the starter.
- Unscrew the top bolts securing the box.
- Unscrew all electrical wiring harnesses and the speed sensor chip.
- Loosen the drive nut on the right side and completely unscrew the nut on the left side.
- Unscrew the suspension arm.
- Unscrew the ball joint.
- Remove engine protection.
- Remove the reverse signal switch chip.
- Unscrew the torque rod from the gearbox and remove the lower cover of the clutch housing.
- Loosen the nut of the gearbox control drive clamp and remove the rocker.
- Unscrew the lower bolts and gearbox mounting nut.
- Jack up the engine.
- Unscrew the gearbox from the pillow.
- Remove the box and gain access to the necessary component of the car.
Brief summary
Replacing the fastening mechanism on cars is a labor-intensive process, but it can be done independently.
To do this, you need a specially equipped place, tools, as well as knowledge of the features of installing parts. We discussed how to make the clutch mechanism of some cars in this article.


