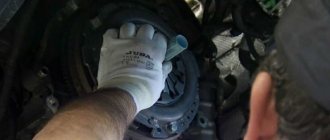
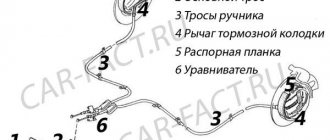
Under the hood of Kalina The first generation of the VAZ 1118 was released in 2004 and, one might say, quite adequately rode along the roads of our vast Motherland for almost a decade. There were, of course, unpleasant moments with the recall of cars to the plant due to defects in the steering and engine mounts, but be that as it may, the model took 4th place in the list of popular cars in Russia.
Taking into account past mistakes, VAZ started producing the second generation Lada Kalina. Now the car has received complete stuffing in the form of ESP, ABS, audio system, airbags, automatic transmission, climate control. Car enthusiasts have a chance to avoid many problems, including such as replacing the clutch on Kalina
Description of design
Clutch Surely, while in a driving school, everyone took a course on the design of transmission components, but it’s unlikely that everyone went into all the details and, I must say, in vain. Knowledge of the design and principles of operation will allow the owner to identify a breakdown at an early stage, take measures to eliminate it and avoid large costs for major repairs. Therefore, let’s briefly consider the components of the clutch of a Lada Kalina car:
- casing;
- release bearing;
- pressure disk;
- driven disk;
- drive cable;
- fork lever;
- cable length adjustment mechanism.
The type of friction clutch used on this model is single disc, dry with a diaphragm type spring. The aluminum casing is integral with the gearbox. Modifications involve the installation of two types of transmission components - with a diameter of 190 and 200 mm. You can determine which one is used in a particular car by the number of starter mounting bolts: two – 200 mm and, if there are three bolts, then – 190 mm.
The clutch housing is secured to the flywheel with six screws. Three pins on the flywheel fit into corresponding holes in the housing, thereby centering it. As the linings wear out, the cable length changes automatically and does not require intervention from the owner.
Methods for checking the technical condition of a friction clutch
When the pedal is released, torque should be transmitted from the motor to the transmission without loss. Smooth inclusion and absence of jerking indicates normal operation of the unit. Before replacing a faulty clutch on Kalina, you should perform the following measures:
- Check the clutch pedal travel.
- Press the pedal and make sure there are no jams or extraneous noises.
- Measure the distance from the floor to the outer surface of the pedal (factory size – 146 mm).
- Check gear engagement with the engine running.
- Check for smooth operation, absence of slipping and burning smell.
The presence of any of the following deficiencies may indicate a malfunction:
- release bearing;
- drive cable;
- pressure plate;
- driven disk.
When troubleshooting breakdowns, experienced motorists advise changing all parts at the same time. Even if, say, the problem was in the driven disk, then it would be correct to install a new basket and release bearing at the same time, and not wait for the next breakdown and disassemble the assembly again.
Operating rules
In order to avoid new clutch problems, you should follow these simple rules:
- Press the clutch pedal smoothly, but release it more sharply, but without throwing it.
- When parking on an incline, it is better to release the clutch pedal and engage the handbrake (handbrake - approx.). The handbrake must be adjusted and keep the machine on the slope.
- Shift gears as quickly as possible, avoiding “throwing” of the gearbox.
- In the cold season, when many people press the clutch pedal to make it easier to start the engine, the clutch experiences increased load. The clutch system does not suffer wear only when the oil warms up.
- While driving, do not keep your foot on the clutch pedal, but slightly further away from it.
As you can see for yourself, despite the fact that the process of replacing the clutch is quite complex, time-consuming and will take more than one or two hours of your time, it is still possible to do it yourself.
Reference!
Clutch - thanks to this mechanism, torque is transmitted from the transmission to the engine. The transmission itself is carried out thanks to the presence of a clutch cable, which connects the mechanism to the gearbox, due to which the start, braking and gear shifting take place.
Replacing the clutch without removing the box
Replacing a VAZ 2109 clutch is quite difficult if you follow all the instructions and recommendations that are in the car’s operating manual. The reason for the difficulty lies in one small detail - not every motorist has an overpass, a pit, and even more so, a lift. At the service station, all replacement procedures will be completed for you in an hour; you can carry it out on your own for a day or two. It all depends on how fast you work. From my own experience, I will say that repairing a clutch on a nine takes a maximum of two partial days - disassembly and reassembly takes up most of the time. And it only takes 15-20 minutes to install new components. There are no pits or overpasses, and even more so, we had to get out, look for information, and then try.
Technology for replacing the clutch on a Kalina car without visiting a service station
To carry out work in this direction, you first need to dismantle the battery and air filter. Next, jack up the engine and remove the gearbox. If, despite all the recommendations, you decide to put the old basket back, then you should immediately mark with paint its position relative to the flywheel.
The following works are listed:
- Unscrew the basket mounting bolts.
- Remove the basket and driven disk.
- Remove the release bearing.
- Remove the protective cover and the release fork bushing.
- Remove the plug and repair any defects.
- Reinstall the drive parts in reverse order.
- Using a centering mandrel at the end of the crankshaft, install the driven disk.
- Secure the basket.
- Install the gearbox.
- Adjust the operation of the drive and the length of the cable.
The drive cable is adjusted by moving its lower tip forward until it stops. In this position, the distance between the guide arm and the fork is measured, which should be 27 mm. If the specified value does not correspond, you should adjust the size with a leash.
1200 rub. for the photo report
We pay for photo reports on car repairs. Earnings from 10,000 rubles/month.
Replacing the clutch on a Kalina is not easy, just like on any other car, because the amount of work is quite large. You need to make room to access the box from under the hood.
To be removed under the hood:
- air filter box;
- starter;
- remove the clutch cable.
Need to remove from below:
- drive shafts;
- unscrew the “crab” from the box;
- cardan gear change;
- remove the support (after jacking up the box).
Don’t forget that replacing the clutch requires dismantling the gearbox, so one way or another you will need to drain the oil, and if you are going to dismantle the gearbox yourself (very difficult), then you need to completely drain the oil, and if with an assistant, then you can’t drain all of it (as long as did not run when dismantling the drives).
You can get to the clutch disc by removing the basket (unscrew the 6 bolts with an “8” key). After this, you can safely replace the clutch disc of the Lada Kalina.
To do everything correctly and successfully replace the clutch on Kalina, watch the entire video and the master will tell you step by step how to do it.
Viburnum clutch
The process of replacing the clutch on Kalina
Depending on how you drive the vehicle and the kilometers traveled, you may need to replace the clutch on Kalina
. The procedure is simple and you can do it yourself.
READ Granta which is better to install a pump
Each car has its own “diseases”. A common problem with the LADA Kalina car is that the clutch system does not always work correctly over time. True, this disease is not chronic and is quite rare. In most cases, this is due to the release bearing or indicates that the clutch disc needs to be replaced. If we consider the top faults of LADA Kalina
, then this one confidently takes 8th position.
It is not recommended to replace the disc and bearing separately; they can only be replaced as an assembly. In order not to remove the gearbox every time, it is highly advisable to change the clutch in one set. Before making a decision about the need to replace the clutch kit, let’s figure out what characteristic malfunctions appear and whether it is possible to carry out adjustments, thereby postponing expensive repairs for some time.
The machine itself will “tell” and “show” that problems have arisen in the operation of the mechanism. The main thing is not to miss the moment and make do with minor repairs or adjustment of the clutch cable, without waiting for the fault to manifest itself on the track and the repairs will cost a lot of money.
Before solving the problem of replacing the clutch, let's consider what can be done in terms of adjustments.
LADA Kalina cars are equipped with a single-plate dry clutch
with a central spring and connected to the pedal via a clutch cable, which are self-adjusting via a ratchet mechanism.
Malfunctions when replacement
cable, its adjustment:
If the adjustment does not help, you need to replace the clutch
. This is one of the most important mechanisms in any car. Gasoline engines begin to develop enough power to move the car starting from 1000 rpm. Such speeds are too high to directly connect the engine with the drive wheels, which is why there is a clutch mechanism through which the engine torque is transmitted to the drive wheels.
The car starts and moves smoothly. The driver has the opportunity, by switching speeds, to choose the optimal operating mode of the power unit.
VAZ 2108-15 clutch replacement without an assistant, with incomplete removal of the gearbox.
On the Lada Kalina, the manufacturer can install one of two types of clutch: with a diameter of 190 mm and 200 mm. It is easy to calculate which type is installed on your car: we count the bolts that secure the starter: 2 - 200 mm, 3 - 190 mm. Which kit to purchase depends on your desire and financial capabilities.
This may be the official supplier of the manufacturer’s conveyor, or there may be companies specializing in the production of similar products. It is believed that imported ones work more softly - these are Valeo and Sachs. How long it takes, as stated above, depends on the operation of the car. An average clutch kit lasts up to 100,000 km.
The work is done both from above (access under the hood) and under the car, that is, we either drive it onto an overpass or use an inspection hole in the garage. You will also need:
- clutch kit;
- a set of keys;
- engine support (can be hung on a hoist in the garage);
- vessel for draining oil from the gearbox.
- Remove the air filter and corrugation.
- We disconnect all the wiring and terminals from the battery and remove it too.
- Unscrew the starter power wires.
- We separate the cable and wiring from the gearbox.
- Remove the engine crankcase protection.
- We clean the entire space where the gearbox connects to the engine and unscrew it.
- We remove the engine mount, either place a jack under it, or hang it on a hoist.
- We unscrew the drive shafts from the gearbox, the “crab” attached to the box.
- All that remains is to disconnect the gearbox from the engine and begin replacement.
- The bolts securing the release disc housing to the flywheel are unscrewed. Clamp the flywheel with a screwdriver. The bolts are unscrewed sequentially in half a turn, moving in a circle.
- Remove the clutch discs. Even if there is no visible damage to them, we put it off. Check the flywheel for chips and scratches.
- We begin installing everything removed and disassembled into its place. When installing the basket, center the disk inside it.
- First we install the driven disk, then the pressure disk housing.
- The bolts must be tightened evenly in a circle.
- We screw the gearbox to the engine.
- We combine the gearbox with wiring and cable.
- We adjust the cable - now this is necessary for the correct functioning of the system, you already know how to do this.
Read more: Audi RS6 Avant 2019-2020 - photo, price and characteristics of the Audi RS6 Avant model
Tools
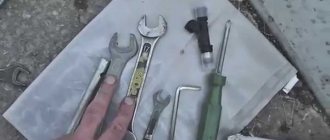
To replace the clutch, the car must be raised, since some of the work is performed from below. To do this, you can use a lift, overpass or inspection pit. From the tools and materials for the replacement procedure with your own hands, you need to prepare:
- new kit;
- set of tools;
- engine support;
- container for draining oil;
- clean rags.
New clutch kit
When dismantling the gearbox, the oil must be drained. If you carry out the work yourself, then you need to drain all the lubricant. If you have an assistant, you can drain some of the liquid from the wires so that oil does not leak when they are disconnected.
How to adjust the clutch cable
- Open the hood and remove the air filter;
- Visually evaluate the cable and, if it is in unsatisfactory condition, replace it with a new one;
- Using a caliper, measure the distance between the driver and the fork lever;
- If the obtained value is higher than 27 mm, then it must be corrected by rotating the driver along the thread of the tip;
- Press and release the pedal several times and repeat the procedure;
- It is necessary to repeat until the results align with the regulated value.
How to check the release bearing on Kalina and how malfunctions manifest themselves (noisy or buzzing)
To understand whether your Kalina needs to replace the clutch, you must first respond in time to signs of failure and diagnose the unit. Signs of a malfunctioning Kalina release bearing:
- Noise or hum when pressing the pedal (damaged, insufficient lubrication or jammed);
- Difficulty pressing the pedal occurs when the coupling ear is broken, as well as the spring is deformed;
- These videos clearly show when the Kalina release bearing is faulty (noise, buzzing, knocking, creaking), as well as how to check the release bearing.
Example of noise during a fault:
Clutch noise when pressed:
The VP fell apart - sounds:
How to check the release lever without removing the gearbox:
What happens if the VP jams:
Clutch problems and solutions:
How to remove the release bearing from a Lada Kalina - location of the part and gearbox mounting diagram
As mentioned at the beginning of the article, to correctly replace the VP and dismantle it, you will need to remove the gearbox. Below is a photo of the transmission from below. To dismantle the manual transmission, you will need to disconnect all the components under the hood that are attached to it. Next, the wheel drives and front suspension elements are removed. Then the manual transmission is unscrewed from the “engine” and removed. Inside the “head” of the clutch housing is the release bearing itself.
The structure of the manual transmission-2181 and the location of the release bearing in the cable box
How to replace the release bearing on a Lada Kalina with your own hands
- Signs of a faulty clutch release bearing on Kalina
- Dismantling the gearbox and removing the release clutch
- Installing a new release bearing
- Replacing a bearing without removing the box
- How to choose a “squeezer”: number, dimensions, price
- Repair tips and useful videos
The release bearing (VP) is a ball bearing that is installed in a special clutch with a spring and moves along the input shaft bushing. The part is used to press the clutch disc and remove the flywheel from engagement with the gearbox. The release bearing (Kalina VAZ 1118, Priora, Granta), like the clutch, periodically fails after a long mileage or improper operation and maintenance. If a clutch malfunction occurs, the gearbox will need to be removed for repairs, but there is a method in which the Kalina release bearing is replaced without dismantling the gearbox. Many VAZ 1118 owners often ask the question “How much does it cost to replace a release bearing on a Kalina?”, we can say with confidence that in a car service this repair will cost about 3,000 rubles. Replacing it yourself according to these instructions will take you 3-4 hours, so the choice is yours.
Note: It is worth noting that without removing the box, repair time is reduced, but the process itself is not simplified.
The article outlines a guide to replacing the clutch release bearing on a Lada Kalina with removing the gearbox, and also shows a method without removing it. Additionally, information is provided on the selection of spare parts, numbers, prices, and sizes. The material is accompanied by numerous photographs, as well as supporting videos, including on replacing the clutch on Kalina. This instruction is suitable for owners of Lada Priora, Lada Granta, VAZ 2110-2115 cars.
Signs that your clutch cable needs to be adjusted
- Extraneous sounds when disengaging the clutch;
- Problems when shifting gears;
- Poor traction;
- Incomplete release of the clutch.
You can check the clutch by performing a few simple steps: with the engine turned off, you need to depress the clutch pedal several times, and you should listen carefully to see if there are any extraneous noises during the pressing process.
However, not all car enthusiasts can easily determine play and jamming by eye. In such cases, it is best to press not with your foot, but with your hand, because it is a more sensitive human organ.
- Measure the distance using a ruler from the floor to the pedal itself;
- Press the clutch pedal to the floor and measure the distance again;
- Perform the procedure several times for the most accurate result.
Replacing the release bearing Kalina 2, 1118, Cross, Sport
To make a replacement you will need to put your car on a pit or a lift. Repairs are also possible if you have reliable supports and a jack. It is worth noting that without a pit or lift, the replacement method without removing the box, which is described at the end of the article, is suitable.
Important to know: For work, it is best to use a set of sockets with a ratchet. When directly dismantling the manual transmission, ask someone to help you “pull” it off. To replace the VP without removing the box, you will need two studs with a diameter of 10 mm and a length of 30-35 mm.
How to remove the gearbox and release bearing on Kalina 2 (1.4-1.6 8kl) with your own hands
Replacing the release bearing on a Lada Kalina begins with dismantling the gearbox; this process is described in detail in step-by-step instructions with photos/videos. Perform the operations in order.
- Open the hood of the car and immediately remove the battery.
- Next, remove the air filter by unscrewing the clamp and disconnecting the fastenings to the body.
- The clutch cable is located behind the battery; you need to unscrew the nut and disconnect the cable from the fastener.
- Now disconnect the plug of the speed sensor wire, it is located behind the “engine”, in the area of the pipes.
- Next, find the upper bolts securing the gearbox to the engine and unscrew them.
- The last operations on top of the gearbox are unscrewing the starter and its terminals, as well as disconnecting the clutch cable and electrical wiring.
- Remove the front wheels and tighten the hub nuts. We disconnect the protection (mud flaps) under the wing.
- Immediately disconnect the terminal of the reversing lights wire.
- Nearby there is a suspension beam, first twist the rear nut with a 24mm wrench.
- Now we move on to the ball joints, loosen the nuts and remove them on both sides.
- On the same side of the manual transmission we find the oil drain plug, unscrew it and drain it into any container.
- Between the manual transmission and the engine there is a clutch protective cover. To remove it, unscrew the nuts around the perimeter.
- Let's move on to dismantling the gearshift mechanism. First, unscrew the two bolts and remove the cover.
- Then unscrew the screw that secures the linkage connection.
- The next step is to remove the wheel drive shafts from the gearbox on both sides.
What you need for work
The work is done both from above (access under the hood) and under the car, that is, we either drive it onto an overpass or use an inspection hole in the garage. You will also need:
- clutch kit;
- a set of keys;
- engine support (can be hung on a hoist in the garage);
- vessel for draining oil from the gearbox.
We perform the following actions:
- Remove the air filter and corrugation.
- We disconnect all the wiring and terminals from the battery and remove it too.
- Unscrew the starter power wires.
- We separate the cable and wiring from the gearbox.
- Remove the engine crankcase protection.
- We clean the entire space where the gearbox connects to the engine and unscrew it.
- We remove the engine mount, either place a jack under it, or hang it on a hoist.
- We unscrew the drive shafts from the gearbox, the “crab” attached to the box.
- All that remains is to disconnect the gearbox from the engine and begin replacement.
- The bolts securing the release disc housing to the flywheel are unscrewed. Clamp the flywheel with a screwdriver. The bolts are unscrewed sequentially in half a turn, moving in a circle.
- Remove the clutch discs. Even if there is no visible damage to them, we put it off. Check the flywheel for chips and scratches.
- We begin installing everything removed and disassembled into its place. When installing the basket, center the disk inside it.
- First we install the driven disk, then the pressure disk housing.
- The bolts must be tightened evenly in a circle.
- We screw the gearbox to the engine.
- We combine the gearbox with wiring and cable.
- We adjust the cable - now this is necessary for the correct functioning of the system, you already know how to do this.
Even if the clutch pedal in your car clicks, don’t put it off for a long time. Fixing a minor fault is always much easier, faster and cheaper. You can do almost any locksmith work on repairing the Lada Kalina yourself, without resorting to the help of a car repair shop, and, having completed the repair, experience the incomparable pleasure when the car starts up and drives.
How to replace the release bearing on a viburnum
Lada Kalina 2. REPLACING THE CLUTCH RELEASE BEARING
You will need: keys “10”, “13”, “17”, “19”, TORX T14, a large flat-blade screwdriver or mounting blade, pliers.
1. Remove the transmission from the car
4. Press out the four tabs of the spring holder and remove the holder, then remove the bearing from the coupling.
5. Install the bearing onto the coupling (the protruding part of the inner ring should be directed away from the coupling) and secure it with the holder.
6. Secure the coupling with the bearing with a spring clamp and install the gearbox in place.
Lada Kalina 2. REPLACING THE CLUTCH RELEASE FORK
You will need: keys “10”, “13”, “17”, “19”, TORX T14, a large flat-blade screwdriver or mounting blade, pliers.
1. Remove the clutch release bearing (see “Replacing the clutch release bearing”, page 147).
2. Carefully pry up the rubber protective cover B with a screwdriver and remove it from the fork lever A of the clutch release.
3. Squeezing the locking tabs on the inside of the clutch housing with pliers and prying them from the outside with a screwdriver, remove the plastic bushing of the fork axle.
4. Lifting the fork, remove its axle from the bushing pressed into the clutch housing, and remove the fork by removing the axle, and then the lever from the holes in the clutch housing.
6. Press out the worn metal bushing and press in the new one until it stops.
7. Install the clutch release fork in the reverse order of removal. Make sure that the protrusion on the plastic bushing fits into the groove on the clutch housing, and that its petals securely fix the bushing in the housing to prevent it from falling out.
Changing the clutch on a Lada Kalina
But, just like on any other car, there are certain components that require mandatory replacement after a certain mileage. Such components include the clutch, without which a car simply cannot exist.
During clutch change
Changing the clutch on a Lada Kalina yourself is not easy, although it is doable. Below, in our article, we will carefully tell you how to carry out such work from start to finish without making mistakes at the same time.
On VAZ 1117 , 1118 and 1119 two different types of clutch are installed: 190 and 220 mm. Finding your own diameter is painfully simple; all you have to do is note the number of starter mounting bolts. At 190 mm there are 3 of them, and at 200 mm there are 2.7. Regardless of the manufacturer's office, you will often find the clutch disc itself, the basket and the release bearing in the assembly.
New clutch set
Replacing the clutch on a VAZ 2109
Please note that there is a small wear on the petals of the VAZ 2109 basket. This is a normal phenomenon, because the release bearing is in almost constant contact with them. Therefore, you should not be sad if you suddenly notice such a detail. Replace the basket in a timely manner, then it will not cause you any problems. As a rule, the shape of the groove follows the contour of that part of the bearing that comes into contact with the petals.
And if it is insignificant, then there is no need to worry. But if the edge of the petal can be bent and broken off with a little force, then the VAZ 2109 basket needs to be replaced. And the paradox is that spare parts from one manufacturer turn out to be more expensive if you buy a set. But if you purchase a bearing, basket and disk separately, you can save 300-400 rubles.
Seemingly unusual replacement
clutch on a VAZ 2109, but the benefit is that there is no need to center the disc. The basket fastening bolts are tightened only after the box is installed in its place. However, the gearbox may not be fully seated. First, tighten two bolts thoroughly, then you can move the box back and tighten all the others. After this, you can install the gearbox and tighten the bolts on it. Assembly is carried out measuredly and calmly, do not leave “extra” parts, everyone should have their place. This method of replacing the clutch mechanism is possible on the VAZ 2108-21099. This method was not tested on later VAZ models.
READ Replacing the rear wheel bearing of a Chevrolet Aveo
Video about how to replace the clutch on a VAZ 2109:
How to replace the LADA Priora clutch
Clutch
The car is subjected to a heavy load - constant intrusion during the use of the car, engine vibration, very huge loads on the engine. The latter wear is usually accompanied by the corresponding smell of a burnt clutch.
The first signs include a feeling of incomplete clutch operation, extraneous sounds, and possibly even crunching sounds. The driver should not be left without replacement
clutch after removing the box. The clutch pedal may also sag, which also indicates that you need to change the clutch on the Lada Priora as quickly as possible.
But inexperienced car enthusiasts often have a logical question: how to change the clutch with your own hands? There is nothing complicated in this process, but it is necessary to stock up on tools and some knowledge.
VAZ-1118 Kalina. Replacing the clutch.
Let's move on to working under the car
- If there is a crankcase protection, we unscrew the bolts left for our client and remove it.
To dismantle the protection, you need to unscrew 4 bolts
We remove the gearbox and move on to working with the clutch.
- First we need to unscrew the release plate housing, which is secured to the flywheel with 6 bolts. When performing this work, the flywheel must not be allowed to rotate and it is necessary to hold it in one place with a screwdriver prepared in advance. And unscrew the bolts slowly, one by one, allowing one turn per circle for each bolt.
Unscrew 5 bolts on three sides
Remove the basket and driven disk
The driven disc is covered in oil - one of the reasons why the clutch does not work well
Lada Kalina. clutch replacement.
- The clutch does not engage - this malfunction occurs when the clutch pedal has too much free play. Usually, when you engage first gear, there is a corresponding cracking sound from an unfamiliar gearbox. It makes no sense to ignore this issue, because it leads to even more huge dilemmas with the checkpoint itself.
- Clutch slipping - the cause of this malfunction is that the car does not gain the required speed when the engine speed increases. This is usually observed at first at high speeds, but then becomes noticeable at the “bottoms”. The second symptom is a nasty smell that occurs at high engine speeds. If a similar problem is observed, you need to urgently diagnose the clutch.
- Incorrect travel of the clutch pedal is a sign of this breakdown, uneven travel of the clutch pedal, when the pedal at one time returns to its initial position, at another it is in free floating. There are no teeth, the reason lies in the spring, but the inspection should begin with the clutch cable.
- Jerking of the car when pressing the clutch pedal - this malfunction is very serious and you should urgently check what remains to be done for our client connections and the entire clutch as a result for wear and see them.
Lada Kalina is a reliable car that has proven itself on domestic roads. In each generation, manufacturers corrected shortcomings and introduced some innovations. When using a car, some components wear out and require repair or replacement. For example, over time it is necessary to change the clutch. Replacing the clutch on Kalina with your own hands is a rather labor-intensive procedure, but it can be done at home. The article describes the process in detail and also includes a video.
What malfunctions can happen to the clutch?
Although this list is small, if problems arise it can cause quite a few problems:
- The clutch does not engage - this malfunction occurs when the clutch pedal has too much free play. As a rule, when engaging first gear, a characteristic cracking sound occurs from the gearbox. This problem should not be ignored, as it can lead to even greater problems with the gearbox itself.
- Clutch slipping - the cause of this malfunction is that the car does not gain the required speed when the engine speed increases. As a rule, this is observed first at high speeds, but then becomes noticeable at the “bottoms”. The second symptom is an unpleasant odor that appears at high engine speeds. If such a problem is observed, it is necessary to urgently diagnose the clutch.
- Incorrect travel of the clutch pedal is a sign of this breakdown, uneven travel of the clutch pedal, when the pedal at one time returns to its original position, and at another it is in free floating. It would seem that the reason lies in the spring, but the inspection should begin with the clutch cable.
- The car jerks when you press the clutch pedal - this malfunction is very serious and you should urgently check all connections and the entire clutch for wear and notice them.
Replacement instructions
The clutch transmits torque from the transmission to the engine. The transmission is carried out thanks to the clutch cable, which connects the power unit to the gearbox and ensures starting the car, shifting gears and braking. Thanks to the lever mechanism, the car is set in motion.
Which clutch should you choose?
There are several types of clutch, differing:
- principle of operation: electrical, mechanical and combined;
- working medium: air and oil bath;
- mechanism: closed and alternately closed groups of mechanisms;
- number of disks: single-, double- and multi-disc;
- number of springs: with one or several;
- two-stream.
Replacing the clutch and release bearing of a VAZ 2114 without removing the box
Replacing the clutch and release bearing of a VAZ 2114 (VAZ 2108, 2109) without removing the box, drives (grenades) and draining.
It is noteworthy that when installing new parts, the length of the lower threaded part of the cable tip is usually not enough to restore its original position.
Therefore, it is necessary to restore the wear compensation mechanism to its original position. To do this, size L must be installed between the leash and the clutch release fork lever.
The clutch pedal should be raised all the way up. Replacing the VAZ 2110 clutch without removing the box. Replacing the LADA Priora clutch with and without removal. Then the spring will automatically return the slider to its original position. After this, all that remains is to check the result of the work and, if necessary, adjust the clutch
.
Replacing the VAZ 2110 clutch with your own hands
Reference!
Clutch - thanks to this mechanism, torque is transmitted from the transmission to the engine. The transmission itself is carried out thanks to the presence of a clutch cable, which connects the mechanism to the gearbox, due to which the start, braking and gear shifting take place.
READ Replacing brake discs Ford Mondeo 3
Replacement algorithm
- It is necessary to remove the corrugation with the air filter housing.
Disconnect the terminals and other wires from the battery, and the battery for the duration of the repair.
View of the engine compartment with the battery removed.
Disconnect the gearbox shift lever.
We tie the box to the crossbar so it doesn't fall.
We remove the wheel, lever and pull out the drive so that it becomes possible to move the box without draining the oil.
Engine support is required, since the mounting pads have been removed, and they are common to the engine and gearbox.
After pulling the box away, a gap is formed that allows you to remove the clutch basket.
Old clutch - the linings are gone and the disc is already rubbed with rivets.
Before installing new parts, lubricate the clutch fork.
For alignment we use a plastic bushing (some manufacturers include it in the clutch kit).
Even when the first signs of a clutch malfunction appear, it is recommended to start purchasing parts and prepare quickly to replace the entire set.
Minor problems are always easier and cheaper to fix than major repairs of components.
Symptoms of replacement
Mechanical damage can be seen only after removing the clutch from the car, but its wear can be understood by certain changes that have appeared in the operation of the mechanism.
The manufacturer recommends a complete replacement for the following symptoms:
- “Driving” begins, in other words, the engine power decreases.
- Slippage and incomplete activation appear.
- When shifting gears, extraneous sounds, jolts or clicks appear.
- The clutch sometimes disappears.
- There is vibration when the clutch pedal is depressed.
