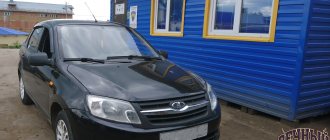
Lada Granta is a car of a completely new generation, but it is also not without a number of disadvantages, among which is noise insulation.
The Lada Granta has decent sound insulation compared to previous car models, but not ideal. The solution to this problem is the ability to implement additional sound insulation with your own hands, which, in the end result, is not expensive and quite simple.
Having experience working with appropriate materials and tools, you can achieve not only an increase in the degree of noise protection, but also additionally protect the Lada Granta from corrosion of the body and other elements.
As you know, it is not easy to completely isolate the car interior from all kinds of squeaks and “crickets”, since the source of noise may be located precisely in the car interior.
It is worth noting that the main source of noise in the cabin is the rear of the car, namely the shelf located above the luggage compartment. That is why most owners of the “domestic car” family, from their own experience, immediately soundproof the rear of the car.
To achieve the maximum degree of sound insulation of the Lada Granta, you must adhere to the following plan, namely:
What is the danger of noise?
The basic configuration of the Lada Granta car has everything you need, but the level of comfort of the vehicle is average. Unnecessary sounds can be removed only through comprehensive sound insulation. It will give the following results:
- will reduce the negative impact of noise on some organs;
- will allow the driver to clearly react to situations on the roads and quickly take the necessary actions;
- will protect against the development of dangerous diseases, including mental ones (high noise levels negatively affect the nervous system).
For example, a large number of unpleasant sounds leads to a narrowing of the lumen of blood vessels, activates the work of the heart muscle, causes a sharp jump in blood pressure, angina pectoris. Therefore, noise becomes a source of chronic stress.
Sound insulation of other parts of the car
If you decide to process all the other parts in the car, then the work process as a whole is completely similar. However, there are some features:
- The floor must be treated only with hard materials, i.e. vibroplast with a thickness of 4 mm or more.
The entire area of the car is completely covered with vibration insulation.
The ceiling is treated with a vibration-isolating layer, all that remains is to attach the Shumka
As you can see for yourself, to independently treat your car with full sound insulation you will not need any additional skills, just a few days of free time and preliminary familiarization with our instructions is enough.
Causes of increased noise
Soundproofing of Grant doors is done to eliminate all types of noise:
- Intermittent - they are created by a faulty heater motor, less often cooling or air conditioning.
- Constant - here we are talking about external noise that enters the cabin from the outside, causing problems with the suspension, tires, and transmission.
- Pulse ones are creaks, knocks, clicks.
It is impossible to exclude sources of noise, but it is possible to minimize their negative manifestations. To do this, it is enough to soundproof Grant's doors according to the diagram below.
Soundproofing the Lada Granta with your own hands: video and photos available!
Comfortable travel in a car is one of the main priorities for passengers and the driver. However, few domestic car manufacturers pay due attention to acoustic comfort. The Lada Granta line of cars also has this problem, so the owners of this car sooner or later resort to this type of additional tuning such as sound insulation.
Soundproofing a car is one of the main stages when tuning a Lada Granta, which is quite possible to do with your own hands, and besides, such work turns out to be of much higher quality, unlike the work of a specialized service.
Distribution methods
Soundproofing Granta doors, if done correctly, will remove all unnecessary noise. It is necessary to work comprehensively, since there are many channels for the penetration of extraneous sounds into the cabin. The first method of noise transmission is airborne. The volume in this case depends on the presence of obstacles on the way - if there are many of them, the intensity of the waves will be low, and vice versa.
The structural diagram of noise progression involves the transmission of waves to various body parts that generate vibrations. Metals transmit vibration effects best.
When soundproofing the doors of Grant's cars, two types of materials need to be used - sound absorbers will eliminate noise transmitted through the air, and vibration absorbers will cope with vibrations.
Soundproofing Grants with your own hands
It's no secret that most noise in a car comes from the contact of the wheels with the road.
Soundproofing Lada Granta lockers does not require much time and effort, and the effect of the work done is noticeable immediately. Sound insulation of the trunk plays a significant role in organizing comfort in the car interior, especially if the car body is a hatchback or station wagon. The Lada Granta (VAZ 2190) is available only in a sedan body, but despite this, there is certainly an effect from soundproofing the trunk.
Probably all owners of LADA Granta have noticed that the interior of the car begins to fill with crickets over time, and the dashboard is no exception. The reason is poor build quality and materials (cheap plastic). To get rid of crickets for a long time, it is recommended to soundproof the Granta panel, and the advantage of this method is that it does not need to be removed for this.
The Granta's gear knob has adopted the diseases of its predecessors, front-wheel drive cars. As a result, the vibrations of the gearshift knob produce rattling noise, which becomes annoying. How to get rid of this problem?
Car sound insulation includes a number of measures that are aimed at different parts of the body. Floor soundproofing is considered one of the most significant, the effect of which is immediately noticeable. How difficult is it to soundproof the floor of a Lada Granta yourself?
At first, there are no creaks in the LADA Granta, but after a while the crickets begin to wake up and rattles appear inside the cabin. Soundproofing the front panel will help kill all the crickets in the dashboard and reduce engine noise.
Noise insulation (sound insulation) of VAZ is popular, and this is not surprising, Russian cars have never been famous for their quiet interior. The LADA Granta is no exception; after purchase, they immediately begin to modify it for a more comfortable ride. In this article we will look at how to make soundproofing doors yourself.
The rear parcel shelf of the VAZ 2190 separates the luggage compartment from the passenger compartment. We all know that the main noise comes from the road, so when soundproofing a car, the main attention is paid to the arches and floor, as well as the rear parcel shelf.
Why is there such a big difference between closing the door in a foreign car and a Russian car? In fact, there are several reasons behind the silence of the door slam, for example, high-quality silent locks and door seals. In this article we will look in detail at how to install a door seal on a VAZ 2190 (Lada Granta).
To be honest, the hood of the Lada Granta is quite rigid and heavy, which cannot be said about many foreign cars, where it can easily bend with a little hand effort. But soundproofing the hood has a number of other positive aspects, which are discussed in this article:
Recommendations from manufacturers
Door insulation reduces external noise and increases vehicle comfort. When working with Granta doors, special attention should be paid to the clanking and ringing parts of window regulators and locks. They can be treated with special materials to eliminate the problem.
Work should begin by disassembling the interior - use plastic spatulas and clip lifters. You can replace the tool with regular screwdrivers. Cutting is done using a stationery knife or scissors; after application, the material is rolled using a metal roller.
The doors are treated in 4 layers. The first is a vibration isolator 2 mm thick. To increase work efficiency, the foil is rolled with a roller. The second layer is a sound absorber with a moisture-resistant sealant, the third covers the holes on the door body. The fourth, when soundproofing doors (cards, frames), Grant absorbs unnecessary sounds. Visually, it looks like a foam-like substance that is applied to the plastic door trim from the inside.
Sequence of procedure
If you decide to do the soundproofing of doors yourself, it is recommended to carry out the work in accordance with a certain sequence, adhering to important rules and recommendations. In general, the work can be divided into 3 main stages:
- dismantling;
- installation of insulating materials;
- reverse assembly.
In this case, the installation includes the installation of vibration-proofing and sound-proofing materials. This is done in exactly this sequence.
Dismantling
To perform proper sound insulation of car doors, you first have to prepare the element for the application of special materials. In general, disassembling the door is not that difficult. Although some cars have their own nuances, due to which owners encounter problems even at the dismantling stage. The set of tools and materials will consist of:
- screwdriver;
- keys;
- construction knife;
- degreaser;
- insulating materials.
The first to be removed is the old casing, which will open access to the interior space. The problem here is the need to remember the location of all the fasteners. You can get out of the situation by simply marking it or using adhesive tape, which is used to glue the fasteners near their hole. But what you shouldn’t waste time and energy on is dismantling window lifters and door opening mechanisms. They will not interfere with high-quality sound insulation. When dismantling is completed, be sure to clean the metal surfaces of dirt and treat them with sponges or lint-free rags soaked in a degreaser. Regular inexpensive White Spirit will do. Be careful not to touch the paintwork or cause mechanical damage. Otherwise, you risk creating a source of corrosion with your own hands.
Vibration isolation
Some people ignore the stage of vibration isolation of doors, thereby making a serious mistake. Vibration protection is needed in order to absorb your own sounds from door vibrations and reduce the level of noise coming from outside. Vibration insulation is applied to the inner side, located closer to the road. The following materials are suitable as vibration insulators:
- Bitoplast;
- Vizomat;
- Vibroplast Gold;
- StP Aero Plus;
- Accent Premium;
- Bomb Premium.
StP noticeably outperforms Vibroplast in terms of weight, which is why it is actively used by motorists. You should not seriously increase the weight of the door, as this will cause the hinges to wear out faster. Plus, StP has a wider temperature range, which is why it is recommended for use in regions with very cold winters.
When working with vibration isolators, be sure to wear protective gloves. Otherwise, you risk injuring your fingers and hands from the sharp edges of the insulators.
- The entire surface is covered as much as possible. But you don't need to touch the door reinforcements.
- If there are speakers in the doors, it is recommended to treat them with Bitoplast. This will reflect sound waves from the doors, resulting in cleaner sound. But it is not worth using Bitoplast everywhere, since the material is characterized by its ability to absorb moisture.
- Next, you can apply the Accent Premium layer. A very worthy vibration isolator, which has become a worthy replacement for Spleen. The Accent has been specially designed to provide effective vibration protection. The material is not afraid of contact with moisture.
- The product is two-layer. The first layer is black, and the bottom one is green. The second is an adhesive base, which has impressive water resistance. This characteristic allows the material to remain on metal surfaces for a long time.
- To achieve effective vibration isolation, it is better to block all technological holes. If they are large, use sheets of aluminum or fiberglass;
- Next comes a layer of Visotmat or Bimast. Bimast is heavier, which negatively affects the weight of the door after completion of work;
- When sound quality does not play a key role and the driver uses a conventional audio system, you can replace Bimast with StP Aero. This material is lighter, so the load on the hinges will be lower.
Now you can move on to the next step.
Noise insulation
The following are recommendations on how to properly soundproof the doors of your car yourself. This procedure is designed to reduce the level of noise entering the cabin from the street. Additionally, noise insulation diffuses the sound of the speakers, resulting in improved sound quality.
- Soundproofing materials are applied on top of the vibration-proofing layer;
- Leave 3-4 centimeters from the bottom point;
- To insulate the skin, you can take several layers of vibroplast and leave reserves around the edges;
- All joints are carefully sealed;
- After applying the material, all excess must be trimmed off;
- Such processing eliminates knocks and unnecessary noise;
- If there are plastic elements, they are covered with Madeline.
There is nothing complicated here. But you need to be careful and consistent in your actions. If you miss some important points, you risk ruining the result of the work done. Motorists often make quite common mistakes. To eliminate them, use a few tips.
- Stop using Splen. This material used to be the pinnacle in the matter of sound insulation. But it has been replaced by more modern and efficient products. Splen negatively changes the sound quality of music, promotes the formation of moisture inside the doors, from which it quickly peels off, plus it provokes the formation of corrosion.
- The material must be glued in horizontal stripes. And this must be done with overlap. You should not leave gaps between the sheets, otherwise the result will not meet your expectations.
- While doing one, try not to spoil the others. Drivers often approach their work thoughtlessly, covering literally everything in their path with insulators. Such inaccuracy often leads to wiring being broken, cables breaking, operating mechanisms being blocked, which is why locks or power windows stop working.
- Insulation quality and material weight. Look for a middle ground. There is no need to chase the thickest and most effective soundproofing products. In fact, in most cases they are not needed to achieve a good result. And heavy insulation puts stress on door hinges, causing them to quickly wear out and break.
When you have finished all the work, reassemble the doors in reverse order. There are usually no serious difficulties here. Especially for those who have previously taken care of the correct labeling.
Tools and materials
For vibration insulation of rear and front door areas, stp plates and other materials are used. A complete set of tools and raw materials for work includes:
- set of acoustic plugs;
- a couple of sheets of insulators 460*700 mm;
- bitoplast sheet 1000*700 mm;
- 50 cm corrugations for wires;
- 3 sheets of Visalis 460*700 mm;
- industrial dryer;
- degreaser;
- gloves;
- knife;
- screwdrivers;
- keys.
If the old vibration isolation pad is very worn, it is recommended to install a new one. Visalis is cut into equal pieces, the fragments are laid out in piles and heated using a hairdryer.
• installation of additional seals on Granta doors
Necessary tools: hair dryer; degreaser.
Closing the door, and in particular the “clap” itself, completely depends on the presence of a vertical seal, which, in turn, is installed only in the Luxury configuration, on the front and rear doors, as well as noise-resistant locks.
Vertical seals not only regulate the level of noise when closing the door, but also prevent noise from penetrating into the car interior.
Do-it-yourself soundproofing of a Lada Granta, even with a standard configuration, allows you to buy and install vertical door seals for yourself. All you need is to know the catalog numbers for the front door seals: 1118-6107028 and 1118-6107066. Catalog numbers for rear doors: 1118-6207028; 1118-6207029; 1118-6107066.
The installation process is quite simple and is carried out exclusively from top to bottom. It is worth noting the need for installation on a previously degreased surface.
The sealant must be glued at a temperature not lower than – 15 degrees, and the seal itself must be heated to 45 – 50 degrees, since it has an adhesive base.
Peel off the protective tape at a length of 50-70mm from one end of the seal, then fit it tightly to the door and gradually free it from the remaining protective tape.
Vibration isolation
Vibration-absorbing materials (vibration for short) are applied to the iron parts of the body of a Grant or other car. The transmission, power unit, suspension elements - all this and uneven road surfaces, a certain air resistance, cause the parts to creak and make other sounds that are not particularly pleasant to the ear.
The operation of vibration is explained by the laws of physics, which determine the parameters of internal friction. As a result, the vibration energy is converted into heat. The basis of the compositions is mastic or bitumen.
• sound insulation of the Lada Granta glove box
Tools needed: scissors; roulette; glue “Moment”; cardboard.
Granta's glove compartment is made of rough plastic, which, when in contact with any objects, creates rather unpleasant sounds. In order to avoid such contact, as well as generally increase the degree of noise insulation of the car, it is necessary to soundproof the glove box.
This process is accompanied by the use of modelin; you can also use other materials with an adhesive side, for example, bitoplast or splen. If all these materials are not available or you simply don’t like it, you can use carpet.
It is worth noting that the carpet does not have an adhesive base and is attached with glue, which was indicated above in the list of tools. Soundproofing of the glove compartment can be done both from the outside and from the inside.
How to apply correctly
Soundproofing of Grant doors is done in stages, first one part of the car is treated, and then all the rest.
The first stage is door processing. It can be the only one or the main one - noise on the doors is required, but it alone will not be enough to achieve optimal performance. The treated door space will make a good enclosure for the speaker. Work options:
- processing of the door card, outer panel;
- sheathing with dense thick materials;
- The standard scheme is the most popular.
When performing work using standard technology you need to:
- Provide access to work surfaces that will be soundproofed.
- Prepare surfaces for applying sound insulators - first of all, degrease and clean.
- Cover the panel with a vibrating layer of materials.
- Place an air absorber on top to serve as a heat insulator.
- Treat the frame with or without sealing the holes. The first option is preferable, but not always possible. Cover the holes with materials from the “Viek” set, cutting them according to the shape and size of the windows.
- Treat the door trim, coat the joints with sealant or hot melt adhesive. When choosing a composition, it is not so much the price that is important, but the characteristics and their compliance with the specified parameters.
To eliminate vibrations, it is recommended to use Bimast or Vibroplast M1 plates. Ideal sound absorbers - Accent and Splen. It is better to lay the material overlapping in horizontal stripes - this will increase the degree of rigidity of the working panel.
Installation of sound insulation
In the maximum version, the first layer of vibration insulation is glued to the inner surface of the outer layer of the door. It is recommended to glue the material in long strips, with a slight overlap on each other. The entire accessible surface is glued.
The second layer is a sound absorber. It should be installed in the widest possible layers. The result is a two-layer coating that dampens vibration and traps sound waves.
For better insulation, the inner layer of the door is treated in the same way. In this case, the technological holes in the doors are sealed with special aluminum foil, on top of which layers of material are applied. When carrying out processing, you should take into account the trajectory of the lock’s cables and drives.
The door trim itself is also treated. All its joints must be filled with sealant. Afterwards, the inner surface of the skin is glued with a noise-absorbing coating. This allows you to avoid squeaks from the trim itself, which sometimes occur on budget models of cars.
Comparison of treatment zones
When soundproofing Granta doors, a number of points need to be taken into account. Basic:
- the side parts of the body are processed in a similar way to the doors;
- Hard, not soft, slabs are laid on the floor - Bimast is the best option;
- Shumka can be of 3 types, as is the case with doors;
- the partitions of the engine compartment and wheel arches are covered with Barrier-type materials; ordinary vibrations are powerless in this case;
- The ceiling is usually large, the metal on it is thin - Vizomat is used for sound insulation.
You need to work with the ceiling carefully so as not to get the opposite effect. Be sure to improve the rigidity of the panel by gluing B-polystyrene strips or a special profile.
Recommendations
Comments 11
And why not, before the advent of your accents and other things that everyone is shouting about now, they were glued with isolon, so here we are not making super noise insulation in three layers, we are doing it cheap and cheerful. Well, there is no need to scold us, much less distribute the drying money for which you are selling this whole thing. Drive was first created to tell the story of what he did to the car, I and many who made the Shumka with splenium are not in any way advocating to repeat this, here they do it first for themselves and make the choice of material themselves, so leave this sore subject similar to the PC dispute and consoles.
Why the hell did you stick it on splen? it does not block sounds in any way, it is a heat insulator, they make noise with Accent or bitoplast
Splen will also work for the trunk, especially since it has vibration, and I would not recommend gluing this moisture-absorbing sponge, especially in the trunk. Splen is not only a heat insulator but also a sound reflector... Accent and bitoplast sound absorber and moisture storage are glued in certain places where there is no moisture... the trunk is the place where quite often there is condensation in winter... I had a nine all in bitoplast ukutona, so this sponge absorbed so much water that mom, don’t worry... And like advice, glue vibro, accent and on top Splen 4 ml, thank you, thank you... any noise Insulation should be in moderation... the simpler the better... Previously, they only made noise with construction resin and did not complain... Now they sculpt the more the better without thinking about the fact that with each sheet the weight of the car also increases, which negatively affects the cost of gasoline... I also glued the doors with this Spleen and no matter how you say it, the sound became dull... And that’s enough for me))))) I don’t strive for the ideal of silence... It won’t happen This is not a foreign car Over 1,000,000...
Is water accumulating in the trunk? This is the first time I’ve heard of it, maybe someone who transports a lot of firewood from the street in winter or damp boots after fishing. Why compare the trunk of a nine-wheeler and grants? who told you that splen is a sound reflector? you were deceived, why the hell should you believe everything they say, for the same money you could have put on an accent and with a normal mat, no wonder there will be water there, splen is only good for the roof. Since I undertook to make a Shumka, it means I didn’t like the factory one, no one says to glue everything in 3 layers, First read the literature about each material, fortunately I’m familiar with each and don’t make such crap)
Let's get to work...
STP brand materials were used
:
- The first layer is vibration-absorbing material GB with a thickness of 3 mm;
- The second layer is the noise-absorbing “Barrier KS” (4 mm);
- The third layer (“wish” on the front wheel arches) is Noise Block (2 mm).
From left to right: GD, Noise Block and Barrier KS.
I will say right away that the thicker the material, the better. But I chose the most budget. True, the result is quite significant (more on that later), but if the means allow, then it is better to put a thicker second layer.
And this is not only my personal knowledge of physics, but also the conclusions of Shumka tests by the Za Rulem magazine somewhere in the mid-90s - I remember that article. Everything there is linked to the number of surfaces that sound encounters on its path. In thick material, in its numerous layers and bubbles, there are more such surfaces! It will take a long time to explain, but know: thicker is better!
Please note that the “vibration” is not glued to the stiffeners, but only to the “area” elements - they are the ones most vibration-loaded. Those.
Please note: Review of Volkswagen cross up! .
There’s no need to blow the minds of the craftsmen if they vibration-isolate the way I do, and not every inch, whether it’s needed or not, it won’t do any good.
But be sure to check this: it is the “vibration” that needs to be rolled in forcefully with rollers like these. Just don’t try to demand from the craftsmen that they roll out the second layer as well - the whole point of the noise will be immediately lost. The second layer is simply applied “by hand”!!!
One of my “wishes” was that the craftsmen would make noise and the “podium” on which the passenger sofa lies. According to the original “plan”, i.e. the one that costs 8,000 rubles, Shumka only reaches this podium and rises to the top. That's all. I asked to cover everything up to the backs of the seats.
The second layer completely repeats the first. Everything looks like this, but let me remind you that if funds allow, then do not be greedy for thicker Shumka, at least in the area of the arches and along the central tunnel (the muffler runs below there). True, problems may arise with laying the floor covering, but here you need to find a balance or insist on your own!
In the photo above, I show you the second “wish” - increased noise in the arches and partially in the front shield. A thin Noise Block is pasted here. According to the masters, it gives an effect. This is probably true, but I have very noisy stock Pirelli Cinturato P1
and this Noise doesn’t even save you from it. But still, the roar of rubber is now noticeably less audible.
However, we must take into account that my wheels are a little overinflated. Instead of the required 2 “points” I pumped up 2.3 (+15%). This is a “cargo” habit I have, which appeared after two explosions. *
wheels on MAN and Gazelle. Overinflated wheels are hard and make more noise.
*
—
Only under-inflated wheels explode due to overheating.
.
The old factory Shumka is put back on top of the one made. This is normal and saves us money. You can, of course, demand that a thick Shumka be rolled up instead, but... Mani, mani...
Causes of noise in a car
First you need to determine the nature of the noise in the cabin, it could be:
Airborne noise occurs when the gaps of doors, glass, or the presence of technological openings are not sealed.
Structural - cause vibration of almost all elements of the engine, chassis, exhaust systems, which in turn are transmitted through the body and floor to the car interior.
Algorithm for carrying out noise insulation work
First of all, Granta Liftback doors are soundproofed. This is explained by the fact that the main cause of noise lies precisely in them. Even if this work does not bring results and you have to continue installing the Shumka further, the cabin will become much quieter.
Before gluing, the sound insulation should be heated with a hairdryer, applied to the area to be glued and smoothed with a roller or other method. This will allow the material to take shape, literally merge with the surface being treated, repeating all its curves, which will improve noise absorption.
Conclusion Installing sound insulation yourself is not such a difficult job. Why overpay? Hone your skills on your car, maybe this will become your additional income in the future? There are a lot of people willing!
Tools for disassembling the interior
- Basic set for the motorist. Sometimes such kits can be purchased as additional interior equipment for an additional payment when purchasing a car. This kit includes everything you need to disassemble the interior yourself.
- Vehicle Operation Manual. The diagrams presented in the manual will greatly simplify the disassembly process, and from there you can find out which tools to use for certain parts of the machine.
- A device that allows you to remove plastic clips. Many interiors are attached to each other with plastic connecting elements. Of course, you can use a regular screwdriver to dismantle them, but it can damage or deform the plastic parts.
Let's talk more about money
Even my youngest daughter told me that “why should I buy a new car and then finish it up?” Alas, she didn’t know that a car that was more or less decent in terms of sound insulation (station wagon) was another 350 thousand, no less - LADA Vesta SW Cross. And here, even if I suddenly order a full Shumka, everything will cost me 26 thousand (plus “wishes”).
I didn’t order full sound insulation, but only ordered floor insulation for 8,000 rubles. Along the way, “wishes” arose, which were valued by the craftsmen at another 2,000 rubles - I agreed and they did everything!
Beginning of work…
