What is a reverse sensor
Any car has a reverse gear in the gearbox, or, more simply, reverse gear. You can’t do without this function; reverse direction of movement is required when making difficult turns in a limited space, leaving and entering a parking lot (garage), and when crossing off-road conditions. Since the natural position of the driver is directed towards the direction of travel, visibility when reversing is limited. There may be people, vehicles, or stationary obstacles around a vehicle moving backwards. It is necessary to ensure their safety, as well as help the driver navigate difficult driving conditions.
And what about the reverse gear sensor?
Among the safety measures and driver assistance when engaging reverse gear, the following technical means can be listed:
- Reversing lights. They not only illuminate the vehicle's path when reversing. For pedestrians and other road users, the inclusion of white lights on the rear of the car is a signal. Drivers located on the trajectory will be prepared for non-standard movement of the car in front.
- On large vehicles (buses, trucks, special equipment), turning on the reverse is accompanied by a sound signal.
- Activation of parking sensors.
- Turn on the rear view camera, which is the best means of monitoring traffic in blind spots.
How to activate these funds? Activating them manually is dangerous and unreliable; safety devices must be activated automatically. This is why you need a reverse sensor.
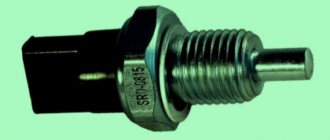
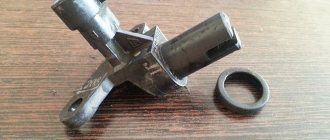
From a technical point of view, this is a switch (more precisely, a switch) activated mechanically.
Such limit switches are used not only in cars. When a certain object is moved into the action area of the push rod, the switch contacts close.
And then it’s a matter of technology. You can activate relays to turn on high-power devices, or supply power directly to them. For example, on the reversing lights. Actually, according to their purpose, these sensors are divided into universal (for connecting a number of systems via a relay) or working exclusively in the rear lighting circuit.
Description of RZH
Now we suggest that you familiarize yourself with the basic information regarding the reverse control. Where is it located, how to check the device and replace it? Read on.
Location and purpose
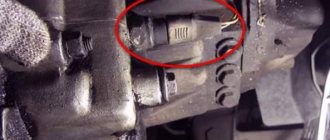
The main purpose of the RZH is to activate the white lights in the rear headlights, which indicate that the vehicle is starting to reverse. Thanks to this, other drivers know that the car will make a maneuver. Correct operation of the RZH allows you to prevent a possible collision on the road. As for the location, the device itself is installed on the gearbox - looking at the box, you can see two controllers - speed and RZH.
Principle of operation
The main component of any RZH is the limit switch. When the driver engages reverse, this switch is activated and powered by the battery. The device closes the electrical circuit, resulting in voltage being supplied to the lighting sources located in the rear lights. If the driver disengages the reverse gear, the limit switch is pressed out, as a result, voltage is no longer supplied to the light bulb and it goes out.
Possible problems and methods for eliminating them
A breakdown of the RZH can be recognized by the absence of light from the lamps when reverse gear is activated. Before checking the sensor itself, you need to make sure that the lamps installed in the headlights are working properly.
There may be several reasons for problems:
- The contacts on the rear headlights have oxidized. If such a problem occurs, it is necessary to clean them, which will most likely help solve the problem. If the contacts are severely damaged, they will have to be replaced.
- Over time, when operating under vibration conditions, the regulator may become loose. If the device is working, then simply screw it on and check that it is securely installed.
- There is no contact with the electrical circuit in the box itself. It is necessary to restore the contact of the device and check the wiring.
- In some cases, the reason lies in the lack of contact between the connector, as well as the mounting block with fuses. In this case, you need to check all contacts for signs of burning or damage. If burning occurs, then you should find out the reason why power surges occur in the on-board network.
- In "Fours" it often happens that the safety device in the block burns out (we are talking about any fuses), and this contributes to disruption of the contact circuit. It is necessary to check all safety devices and replace the failed element (the author of the video is the channel In Sandro's Garage).
Location of the switch in the car
Where is the reverse sensor located? In principle, it can be placed next to any object that occupies a certain position when reverse gear is engaged. Is the gearshift lever suitable for this? In principle, yes, but moving the handle may not engage reverse gear. And vice versa: reverse gear may be engaged, but for some reason the handle will not take the desired position. It is most reliable to place the sensor itself in the switching mechanism. It is usually located in the gearbox housing.
The sensor rod is moved by the rocker, which is responsible for the position of the reverse drive gear.
Information! Sensors of this type are located only in manual transmissions. In cars with automatic transmission, the signal to turn on the reverse safety systems is provided by another device.
You should know that the mechanical part of the sensor and the threaded connection are actually a plug in the sealed gearbox housing. It contains transmission oil, which can spill out if the seal is broken.
Replacing the reverse frog on a VAZ 2110-2112 and video review
To show this process in the most accessible and visual way, a video was shot that shows all the intricacies of diagnosing and replacing this switch. If you cannot open the video, regardless of the reason, then below is a photo report of this repair.
First of all, we drive the car into a pit, remove the engine protection and find our frog for turning on the reverse light there.
Everything is shown clearly below:
- Disconnect the plug from the connector and move it to the side.
- And now you can unscrew the frog itself using a 22 key, it is advisable to use a carob or cap:
- And finally unscrew this switch by hand.
Please note that when you finally unscrew this part, oil will flow out of the gearbox. Therefore, the following measures must be taken:
- Or do everything at a very high speed so that oil loss is minimal
- Or substitute the container and after all the repairs, add the losses back to the gearbox
In principle, if you do everything quickly, then the oil practically does not have time to flow out and no more than 10-20 ml can spill out, so place the container and go ahead. When everything is screwed into place, we connect the plug and that’s it. This procedure can be considered complete.
The price of a new frog for a VAZ 2110-2112 is about 100-200 rubles, so in essence, this repair can be considered cheap.
Types of sensors
By drive type:
- Rod or rod: a movable element in the form of a pin with a large range of movement.
Such an element does not require high mechanical precision, but takes up a lot of space in the gearbox. In addition, it is necessary to ensure tightness: for example, a seal around the rod. - Ball-type: a pressure mechanism in the form of a spring-loaded steel ball.
Small stroke (2–5 mm), high precision required. But the sensor takes up little space and is sealed in design.
By connector type:
- opening pin or knife type contacts;
- closed standard connector with casing for protection against oxidation;
- bayonet swivel connector;
- screw terminals for fastening wires without a connector.
The way the wires are connected is fundamentally unimportant. All types of connections, except open ones, are quite reliable and sealed.
Do-it-yourself IAC cleaning
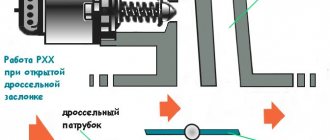
How to clean the IAC? The procedure for cleaning the device begins with removing the device, we described this above. Once you have the device in your hands, you first need to clean it with a dry cloth and cleaning fluid, which is usually sold in aerosol form. Alternatively, you can use WD-40. In addition to the controller itself, you should also clean the seat. Press the canister with the product several times, with the aerosol stream directed towards the tip of the IAC, which is also called the needle.
It is best to use carburetor cleaning fluid.
Depending on the design features of the IAC, this needle can be either plastic or metal. Clean the sensor needle directly, since liquid should not be allowed to get under the spring into the inside of the device . If you do hit the spring, the regulator will have to be purged with a large volume of air; for this you can use a pump or compressor. If liquid gets into the device mechanism itself, it can damage the lubricant inside it, and this, in turn, will cause a quick breakdown of the device. Choose the correct dosage of the product and do not dose the liquid too much, as this will also force you to clean the spark plugs in the future.
Sensor failure
The faulty element is identified immediately: the reversing lights and other related devices stop turning on. This problem can also occur due to a broken wiring. How to check the sensor for serviceability?
- Remove the connector, connect the multimeter in dial mode, and engage reverse gear.
- The next step is to unscrew the sensor, connect the device, and press the rod (ball) manually.
Important! When dismantling the sensor, it is necessary to prepare a screw plug to quickly block the hole. Otherwise, oil may leak from the gearbox housing.
- If the sensor itself is operational, you need to check the mechanisms inside the gearbox.
Repairing the reverse sensor is not practical. The case is sealed; after opening it and putting the contact group in order, it will be impossible to restore the structure to its factory condition. The unit is inexpensive, especially on domestically produced cars. Therefore, replacement will not be too expensive.
Important! There is no point in experimenting with selecting sensors from other car models. If the mechanical part is larger than standard, the gearbox may be damaged.
Replacement requires no special tools: just a wrench.
Repair methods
To repair the reverse signal, you can proceed in two ways. They differ in the way the sensor is accessed.
- Drive the car onto a lift or pit.
- Do the work by climbing under the car.
If you have already encountered a similar problem, then you will probably agree that replacing the DZH is best done using a pit or overpass. This makes access to the sensor as comfortable as possible, plus you minimize the risk of being splashed with oil from the gearbox.
Replacing the DZH is not the cleanest job
Of course, there is another cleanest way - sending the car to a car repair shop. But then you will have to pay not only for the sensor, but also for the services of the specialists. And this is another 2-3 times the cost of the sensor. The choice is yours anyway.
Self-replacement
It’s not difficult to get to and replace a failed DZH on your own. Follow the instructions, do not break the sequence of operations, and then the process will not take you much time and effort.
- Place the car on a pit or overpass. Be sure to apply the handbrake and place the transmission in first gear. This will help prevent your car from accidentally rolling away.
- Remove the protection from the contacts of your sensor, disconnect the contacts.
- Prepare a container into which the oil will be drained when unscrewing the DZH.
- When the container is ready, remove the sensor. In some cases, it may not be unscrewed by hand. In such a situation, use a 22 mm socket.
- Very rarely even the key cannot help, since the sensor becomes stuck to its location. Here you will have to arm yourself with a hammer and chisel and try to remove it as carefully as possible.
- Take out the failed device and insert a new one in its place.
- If oil gets on the gearbox housing, remove it with dry rags. There is no need for extra dirt. Plus, it can lead to a decrease in the efficiency of the device.
- Return all contacts to their places, put the protection back on.
- If a decent amount of lubricating fluid has spilled out of the box, be sure to top it up. Just use fresh ones. By the way, this is one of the reasons to completely change the oil in the gearbox if it has been there for more than the first season.
- The decision to change the oil will simplify the task when removing the sensor. If the liquid is drained in advance, it will not flow in different directions when the sensor is unscrewed. The work will be cleaner, plus you will kill two birds with one stone - replace the sensor and gearbox oil.
Removal and replacement
After completing the work, do not forget to check whether the reverse traffic warning system is now working. For this:
- Turn the ignition key, but do not start the engine;
- Engage reverse gear on your gearbox;
- See if the white lights turn on. If yes, everything went great.
How much it costs?
Many VAZ 2114 owners are often interested in the cost of certain spare parts. In the case of DZH, a new device will cost you up to 300 rubles. You can find devices for 100 rubles.
The price depends on the manufacturer, quality level and pricing policy of the auto parts store where you decide to shop.
Additionally, it wouldn’t hurt to purchase WD40, which can be used to clean contacts. Plus, the wires may need to be replaced. We do not recommend doing this on your own if you do not have the relevant experience.
If the culprit for the problem with the rear lights is the light bulbs themselves, replacing them will cost a pittance. Today they cost up to 50 rubles.
Loading …
