Domestic cars such as the Lada 2170 are extremely in demand among domestic consumers due to their low cost and budget maintenance. Among the benefits, one can also highlight its disadvantages - the Priora’s tidy is not the most reliable element of the car, which necessitates frequent intervention in the electrical part of the car. The dashboards of cars from different years of manufacture are almost identical. The symbols on the board of the 2013 version differ little from their 1st and 2nd generation counterparts. Here are signs indicating identical faults and corresponding to similar indicators.
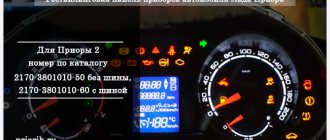
Priora dashboard indicators with interpretation
A separate category of indicators is mainly responsible for indicating the status of on-board systems and mechanisms. Such symbols do not indicate serious damage, they simply notify the driver.
The description and full explanation of the indicators looks like this.
| Visual Identification | Decoding |
| Fuel level indicator | Indicates the remaining gasoline in the fuel tank. When the supply is exhausted, the following sign lights up. |
| This indicator indicates that there are less than 10 liters of fuel left in the gas tank and the car needs to be refueled urgently. Initially, the red symbol of the gas station flashes, but when the fuel reaches 5-6 liters, it lights up constantly. | |
| On VAZ models, it indicates a low battery or a strong drop in voltage in the network. It usually appears after prolonged attempts to start the car in the cold. To fix it, just replace or charge the battery. | |
| The key against the background of the red car indicates that the immobilizer is turned on. This option is not available on 2008 models. Depending on the configuration, a green key may flash on the car’s dashboard. If the lamp blinks, the system is faulty. | |
| Standard turn signal activation indicators. The indicator lights light up for left or right turns respectively. If the indicator lights blink simultaneously, the hazard warning system is on (the red triangle lights up in parallel). | |
| A similar indicator lights up when the car is parked with the handbrake. It may also indicate a serious malfunction of the engine. | |
| The ABS system is not working correctly or the wheel is punctured. The system is present in cars optionally and is not directly related to the brake system. | |
| The red watering can is marked accordingly. The light indicates a critical drop in engine oil pressure. If the indicator goes out after the car warms up and the speed of the power plant is equalized, everything is in order. | |
| The green symbol indicates the activation of the side lights. | |
| The car's headlights are in long range mode. Lights up only when the mode is activated. | |
| Antifreeze temperature dial indicator | The indicator is installed on all machines without exception and displays the actual antifreeze temperature. |
Instrument cluster
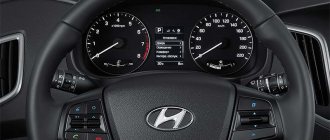
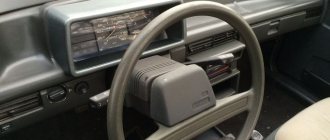
First, let's look at the description and pinout designation of the icons of the new instrument panel on the Lada Priora car.
So, the shield includes the following elements:
- A tachometer device designed to demonstrate engine speed. Red arrows on the combination indicate speeds that are not recommended to be exceeded. Lada Priora allows you to accelerate the engine to six thousand revolutions.
- Pinout icons for light alarms or turn signals. A green arrow pointing to the left lights up on the dashboard when the left turn is engaged. It not only lights up, but also blinks, the same applies to the right turn signal. In addition to the fact that the icon turns on, at this moment the sound signal also works; its shield turns on along with the turn signal.
- The speedometer shows the speed level at which you are traveling.
- Refrigerant temperature level sensor in the system. If, as a result of any malfunctions, the coolant temperature increases to 115 degrees, an audible signal will tell the car owner about this. This will happen for five seconds until the temperature drops to 110 degrees. To prevent the engine from overheating, you should turn it off and get rid of the problem of antifreeze boiling.
- The designation of the arrow for the level of gasoline in the tank is known to everyone. If the arrow on the Lada Priora instrument cluster has approached the red zone, this indicates that the tank needs to be refilled as quickly as possible, since there are about five liters left in it. Please note that sediments present in the fuel collect at the bottom of the gas tank, so it is not recommended to use gasoline completely.
- A pinout icon indicating that the gasoline reserve is turned on; this symbol is made in the form of a gas station. When it lights up orange and stays on continuously, it means refueling is needed.
- There is a button on the speedometer designed to reset the daily mileage; when you press it, the daily mileage will be reset to zero.
- Alarm. When this function works, red icons are activated on the Lada Priora instrument cluster. The vehicle's parking lights begin to flash, indicating a breakdown.
- An icon indicating the operation of the electric power steering. When the ignition is turned on, this icon works and passes the test, but after the engine starts, the backlight disappears.
- Icon with blue highlight. On the Lada Priora combination diagram, when you turn on the high beam headlights, you will be able to see the corresponding icon with a blue backlight, but it will be practically invisible during the day.
- Handbrake icon that illuminates when the lever is activated. The backlight of this element lights up in red; it also disappears when the engine starts, after the test.
- Symbol for turning on external lighting, that is, side lights or low beam. The icon turns on with a green backlight.
- The symbol of working airbags on the Lada Priora combination diagram turns on for 3-4 seconds after turning on the ignition, during the test, it lights up in orange.
- Engine fluid pressure emergency icon. There is also this icon on the navigation diagram for the driver; it always lights up in red when the ignition is on and goes out after the engine starts, that is, the test. The driver must always use the navigation panel of the Lada Priora and monitor the operation of this indicator. If it does not light up when igniting, this may indicate a sensor malfunction. If the fluid pressure level is below the required level, an audible signal will tell the driver about this within five seconds. It is not recommended to operate the car when the fluid level is low, as this will harm the engine.
- Immobilizer icon. On the navigation diagram you can see a symbol with orange backlight - the immobilizer icon. The element demonstrates to the driver whether the Lada Priora vehicle protection system is turned on or not.
- The computer is another symbol that shows the full mileage of the Lada Priora per day, with indicators of the main functions located in the middle.
- The seat belts disconnected symbol lights up red during the test; if the seat belts are not fastened, the system will sound a corresponding buzzer.
- Battery symbol. Another indicator that is tested when the ignition is turned on is the battery symbol. When you turn the key, it passes the test and lights up, the indicator goes out after the engine starts. It should be noted that the operation of this component of the Lada Priora instrument cluster must always be monitored. If it does not turn on, then there is a possibility that the battery is not ready for use or the sensor has failed. If the indicator functions while the engine is running, this may indicate a low battery charge. There is also a possibility that the timing belt is loose or broken, or the generator is not working correctly (the brushes are worn out).
- The brake system status regulator is also located on the Priora dashboard. This symbol on the combination lights up in red when the ignition is on, like other sensors, it stops working after the engine starts. If the brake system does not pass the test, then using the Lada Priora is not recommended.
- The Check Engine regulator on the Lada Priora combination indicates the condition of the engine. When the ignition is turned on, it passes the test and turns off when the engine starts. If the symbol continues to light while the engine is running, this indicates a malfunction of the unit; it is recommended to carry out computer diagnostics of the engine. This is the only way to obtain the most accurate data about possible breakdowns that need to be eliminated in the near future.
- The ABS system icon lights up continuously when it fails.
- Airbag disabled icon. The driver's navigation control panel also has this icon, in particular those located on the front passenger seat.
- Symbol of failure of the electronic brake force distribution system (video author - Automotive Diagnostics).
What do the icons on the Priora dashboard mean?
There is a separate group of icons indicating the presence of breakdowns and malfunctions within the vehicle’s on-board systems. The emblems are displayed in the space surrounding the main instruments. The following is a transcript of the signs with photo accompaniment.
| Icon | Decoding |
| If the car with the key is flashing, this indicates a malfunction or lack of response from the immobilizer. To fix the problem you need to check the block. | |
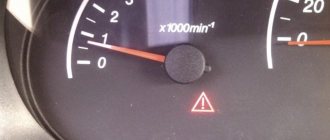
| An exclamation mark surrounded by brackets blinks on the dashboard, indicating a malfunction in the brake system or ABS. A similar indicator located slightly higher may indicate an incorrectly pumped brake system. | |
| The electric power steering is faulty or defects have been detected in the operation of the mechanism. Mostly installed on cars after 2011 model year. | |
| Failure in the wiring or units responsible for controlling the airbags. If the icon lights up after starting the engine, the specified element may not work under shock load. | |
| Seat belts are not fastened. Can also be red. At the same time, it is accompanied by a sound signal. | |
| The passenger airbag is not activated or is faulty. Usually lights up when the engine starts. | |
| If the indicator blinks constantly, this indicates a battery failure or critical discharge. | |
| An urgent check of all engine systems is necessary - a critical malfunction has been detected. |
The reasons why these icons may light up always require driver intervention. Ignoring machine signals can cause serious damage.
Depending on the year of manufacture and configuration, the interpretation of the instrument panel indicators may differ. The exact definition can be found in the vehicle's service manual.
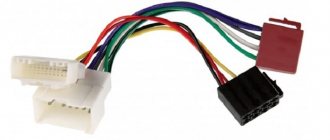
Pinout of the instrument panel of a Priora car
The panel pinout looks quite complicated, but there is a more simplified diagram that will help you figure out the wires connected inside:
- EUR
- "emergency light"
- Engine oil
- Handbrake
- Immobilizer
- Airbags
- Headlights and dimensions
- Right turn signal
- Left turn signal
- Electronic control unit
- Pad wear sensor
- Seat belts (closing sensor)
- ABS
- Reset button
- Brake system, brake fluid
- ABS
- High beam headlights
- Torpedo shield lighting
- "Weight"
- Thirtieth terminal
- Fifteenth terminal
- Fuel consumption
- Forward key
- Back key
- Ambient temperature sensor (minus)
- Ambient temperature sensor (plus)
- Fuel level
- Speed sensors
- Coolant temperature
- Odometer
- Diagnostics of the shield (service)
- Generator regulator
How to enable autotesting on Priora
Self-diagnosis of the VAZ Priora dashboard is necessary to be able to detect hidden problems or defects in on-board systems. To complete the procedure, you will need to perform a certain sequence of actions.
- Get into the car and insert the key into the ignition lock.
- Press and hold the daily mileage reset button.
- At the same time, turn on the car's ignition.
- If everything is done correctly, the instrument arrows will make several full revolutions and return back. All indicators will also flash.
The problem will be identified if any signal does not respond to manipulation.
Self-diagnosis of Priora through the tidy
Like any modern car, the Lada Priora is equipped with dozens of various sensors, the functioning of which determines the condition of the main vehicle systems. Diagnostics of the machine for errors allows you to detect all sensor faults in order to eliminate breakdowns. Now you will learn how Priora error codes are deciphered and how to independently diagnose the on-board computer (hereinafter referred to as BC).
Error codes on the Priora dashboard
When entering self-test mode, combinations of numbers and letters may appear on the display indicating the part of the circuit where a malfunction is detected.
Usually, after entering the service mode, one or more numbers appear on the device:
- 2 – a critical overvoltage was detected in the on-board network, caused by a short circuit or breakdown of the unit;
- 3 – an error has been detected in the fuel level sensor, a circuit break is possible;
- 4 – there is overheating of the cooling system, or the corresponding sensor is broken;
- 5 – the thermometer that determines the temperature outside is broken or there is an open circuit in versions before 2012, mounted optionally;
- 6 – the engine has boiled, you need to wait for cooling or check the serviceability of the sensors;
- 7 – the oil pressure in the crankcase of the power plant is too low, the sump may leak or the lubricant level has dropped significantly;
- 8 – breakdown of the brake line or units of the corresponding system;
- 9 – the battery is discharged or the element is faulty; it can also appear after the car has been idle for a long time in the cold;
- E – the firmware has failed or there is a critical error in the EEPROM data packet.
Elm327 settings for Priora
Settings of the Torque Pro program for working with right-hand drive cars using the example of Toyota Mark II 2001 via ELM327
For right-hand drive Toyota Mark II (2001) Torque Pro, you need to write a command to programmatically reduce the speed of the ISO 14. and ISO 9. protocols (see the picture attached to the article)
For other models and brands of JDM (JDM-Japan Domestic MArket - Japanese domestic market), the following initialization lines should be entered to specify the protocol exchange rate:
Toyota Mark II 2001 y.o.: ATSP4\n ATIB96\n ATIIA13\n ATSH82 13 F0\n
Toyota Celica ZZT230: ATSH8213F1 \n ATIB96 \n ATIIA13
Toyota Vitz 01.2002: ATSH8213F1 \n ATIB96 \n ATIIA13, OBD2 protocol ISO 14230-4 (5b init, 10.4k baud)
Japan Domestic Market Nissan: ATSP5\nATAL\nATIB10\nATSH8110FC\nATST32\nATSW00
Japan Domestic Market Nadia/Harrier: ATIB96\nATIIA13\nATSH8213F1\nATSPA5\nATSW00
JDM Nadia/Harrier: ATIB96\nATIIA13\nATSH8213F1\nATSPA5\nATSW00
Toyota Common: baud rate - 10400 baud, ATIB10\nATIIA13\nATSH8013F1\nATSPA4\nATSW00
JDM Nissan(will test this with Xtrail): ATSP5\nATAL\nATIB10\nATSH8110FC\nATST32\nATSW00
Toyota Fielder: ATIB96\nATIIA13\nATSH8113F1\nATAL
JDM Toyota Caldina Gt-Four( 2004 model) Protocol: ISO 14230-4(5b init, 10.4k baud), ATIB96\nATIIA13\nATSH8113F1\nATSPA4\nATSW00
For the rest of the majority of right-handed Toyotas, it is enough to write the initialization line: ATSH8213F1\nATIB96\nATIIA13
Source
When do you need dashboard repair or replacement?
The Priora tidy does not have a large number of parts that are subject to frequent breakdowns. Typically, repair of the indicator unit comes down to replacing light bulbs and individual elements of the device. Users resort to replacing the board only when there is a malfunction of the contact group, connectors, or the board is damaged.
In case of serious damage (major short circuit leading to burnout of the main structural elements), repair may not be cost-effective. The cost of labor and materials often exceeds the price of a new module.
Possible malfunctions and ways to eliminate them
When operating a vehicle, individual components of the instrument panel may fail. Among the most common breakdowns are factors.
- Burnt out contact of one of the indicator lamps. Usually resolved by replacing the light bulb.
- Failure of the contact group can be eliminated by completely replacing the module - resoldering the part is not economically profitable.
- Malfunction of arrow indicators. It can be fixed by replacing the block.
Connecting diagnostic equipment to the car
Archival article. 2001–2003
To connect the car to a personal computer, it is necessary to purchase or manufacture a communication interface between the COM port and the K‑LINE diagnostic connector.
The first message on the screen of diagnostic equipment or a computer that causes panic among beginners is usually something like “No connection”, “No controller response” or something similar, but no less intriguing. The motor tester, for example, begins to offer options - from unconnected power to a hardware malfunction of the adapter.
It’s good if the car with the immobilizer was the first to arrive for diagnostics and you are sure that everything is in order with the adapter. The reason for the lack of communication on cars without immo is trivial and is possible only in the domestic auto industry - a break in the diagnostic line running from the diagnostic connector to the ECU. The immobilizer uses K‑Line to communicate with the ECU and is included in the diagnostic line break.
If the immobilizer is not installed, then the diagnostic line hangs in the air and there is no connection with the computer. Apparently there was supposed to be a plug in this place, but... To restore communication, you just need to install a jumper between pins 9–1 and 18 of the immobilizer connector (or install the immobilizer) as shown in the figure.
| GAS diagnostic connector. 1 12V2 12V from battery10 L‑Line11 K‑Line12 Weight | Diagnostic connector VAZ |
| A – GNDB – L‑Line (may not exist) M – K‑LineG – Fuel pump control. | |
| H – 12V. Constant from the battery through a fuse. /may not be. |
How to dismantle and install the Priora dashboard
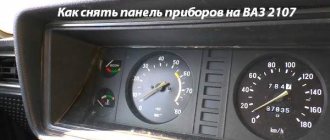
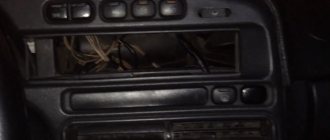
To dismantle the module, you will need to prepare two screwdrivers – a Phillips and a flathead one. A complete replacement of the Priora tidy looks like this.
- Disconnect the wires from the battery.
- Pull the steering column all the way down and remove the steering wheel from the pin.
- You will also need to remove the cover covering the fuse box.
- Unscrew the 4 bolts holding the instrument panel and remove it.
- Loosen the two mounting bolts of the trim panel and remove it.
- Disconnect the wiring harnesses from the contact groups and completely remove the board from the machine.
Installation is performed in reverse order.
What to do if the Lada Priora check engine light is on
There is an interesting icon on the Priora instrument panel. Upon closer examination, it is clear that this is the silhouette of a car engine. Every experienced driver, looking at him, will casually say, “Ahhh, Check.” But at the same time he will not be able to clearly explain what kind of “Chek” this is, and what it serves and why it caught fire.
You can hear many interesting versions. The most common one is that if it lights up, this is a signal of a breakdown of the mass air flow sensor (mass air flow sensor). Well, and a dozen more equally exotic versions. So what is this alarm? And in what cases does it light up? And most importantly, what to do in this case?
Stories from our readers
“Fucking basin. "
Hi all! My name is Mikhail, now I’ll tell you a story about how I managed to exchange my two-wheeler for a 2010 Camry. It all started with the fact that I began to be wildly irritated by the breakdowns of the two-wheeler, it seemed like nothing serious was broken, but damn it, there were so many little things that really started to irritate me. This is where the idea arose that it was time to change the car to a foreign car. The choice fell on the melting Camry of the tenth years.
Yes, I had matured morally, but financially I just couldn’t handle it. I’ll say right away that I am against loans and taking a car, especially not a new one, on credit is unreasonable. My salary is 24k a month, so collecting 600-700 thousand is almost impossible for me. I started looking for different ways to make money on the Internet. You can’t imagine how many scams there are, what I haven’t tried: sports betting, network marketing, and even the volcano casino, where I successfully lost about 10 thousand ((The only direction in which it seemed to me that I could make money was currency trading on the stock exchange, they call it Forex. But when I started delving into it, I realized that it was very difficult for me. I continued to dig further and came across binary options. The essence is the same as in Forex, but it’s much easier to understand. I started reading forums, studying trading strategies. I tried it on a demo account, then opened a real account. To be honest, I didn’t manage to start earning money right away, until I understood all the mechanics of options, I lost about 3,000 rubles, but as it turned out, it was a precious experience. Now I earn 5-7 thousand rubles a day. I managed to get the car buy after half a year, but in my opinion this is a good result, and it’s not about the car, my life has changed, I naturally quit my job, I have more free time for myself and my family. You’ll laugh, but I work directly on the phone)) If If you want to change your life like me, then here’s what I advise you to do right now: 1. Register on the site 2. Practice on a Demo account (it’s free). 3. As soon as you get something on the Demo account, top up your REAL ACCOUNT and go to REAL MONEY! I also advise you to download the application to your phone, it’s much more convenient to work from your phone. Download here.
- Electromagnetic relay, small-sized (12V). For example, Tianbo HJR 1-2C.
- Transistor KT 503. Can be replaced with almost any npn structure.
- Capacitor 100uF, electrolytic (16V).
- Resistors for 1koma, 6.8koma, 22koma.
The principle of operation of the circuit: the relay, with its normally closed contacts, closes the tidy button. When you turn on the ignition, the circuit starts working after half a second, and then turns on the relay, which opens the button.
To illustrate the operation of the circuit, a hanging circuit was assembled.
This test of arrows and dashboard indicators is already available on all modern models. The only thing is that it acts differently on different samples. For example, there may be 1 pass of the arrows, or three, or until the button is pressed, or even a pass only up to half the scales. The speed of the instrument panel arrows also depends on the manufacturer and version of the device.
In other words, an autotest is a test button that is automatically pressed when the device is turned on. If there is a test during the standard test, then there will be one during the autotest. Therefore, doing an auto test of the Kalina dashboard is not a problem.
Now, when you turn on the ignition, the arrows make a full revolution and all the lights come on. You can check the operation of the circuit by connecting the tidy at home.
