Installation of the instrument panel
You can reinstall the instrument panel in reverse order. After this, do not forget to unlock the driver's airbag. To ensure you don’t forget anything, keep these instructions nearby:
- Install the nozzles and interior ventilation housing.
- Put the Largus instrument panel in place and connect the wiring harness in the glove compartment.
- Tighten the top mounting screws near the windshield.
- Reinstall the heater instrument panel and tighten the screws.
- Tighten the screws in the space behind the radio.
- Screw in the lower fasteners.
- Reinstall the headlight range control and its handle.
- Connect the wires of the devices and install them in place.
- Place the instrument visor.
- Install the radio and connect all the wires.
- Place the decorative trim on the center trim and snap it into place.
- Connect the cigarette lighter wires and replace the floor tunnel cover. Tighten the screws at the front and back.
- Install paddle shifters, airbag, steering wheel and steering wheel adjustment system.
- Place the negative terminal on the battery.
Device panel Lada Largus (removal and installation)
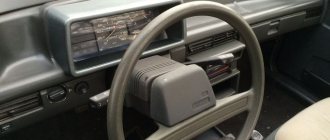
The Lada Largus car is equipped with a prefabricated device panel, consisting of a decorative panel and a panel frame. The decorative panel is a molded plastic piece that is screwed to the frame. Attached to the decorative panel are control instruments, vehicle controls, heating (air conditioning) and ventilation systems, as well as linings that cover components located under the device panel, or serve to install devices and controls; air duct nozzles, glove box. The panel frame consists of metal fittings to which control elements, wiring harnesses and vehicle electrical system units are attached. The frame is attached to the front pillars, the front panel, the base of the body and extends into its power structure. In this article we will tell you about the procedure for removing the instrument panel from a Lada Largus car. Here are step-by-step photos and a description of them.
How to connect a radio
Connecting the head unit depends on the vehicle modification. When installing the radio, you need to firmly snap the ISO plugs in place, and then reinstall the antenna connector.
If the product is equipped with a wired remote control, it is located on the steering column or the front of the instrument panel. The wire is laid inside the panel along the standard lines of the electrical harnesses.
With 2 speakers
The 2-speaker circuit is used only on cargo vans; the loudspeakers are located in the doors under the plastic panels.
The radio is ready for use immediately after connecting to the standard connectors. The car owner can install additional speakers in the cabin by laying separate speaker wires to them.
With 4 speakers
On passenger versions, 4 speakers are used, which improves the sound quality in the cabin. The wiring has a separate harness leading to the speakers in the rear doors.
The connection does not require any additional modifications to the vehicle wiring.
No speakers
The layout without speakers is found on the basic configuration. The car has connectors for connecting the radio and front speakers, as well as an antenna output. After switching the radio, you need to disassemble the door trims, which will allow you to mount the speakers in their standard places.
Loudspeakers are attached to factory mounting points, and wooden adapter rings may be used. After installing the elements, it is necessary to return the removed parts to their place.
Installation of the radio. . . There is nothing complicated, you need to select the wires. I bought the wires on the white tower in the first boutique I came across, with music.
Read also: How to choose springs for Opel Astra H
In short, I subconsciously believed that there were some cheap speakers at the door.
In the hope that the music will play. . . Fuck you and not the speakers.
Where is this button
So, we present to your attention the most difficult to reach buttons in this car, some of which will be very difficult to find without instructions.
First of all, let's press the familiar horn button on the steering wheel. However, the machine is stubbornly silent, and in general, to be honest, nothing was pressed. There is no need to rush back to the dealer and scold him for the defective product that he, such a “scoundrel,” nevertheless slipped to us. The horn button is actually located on the steering column switch and, of course, this location is extremely inconvenient and unusual.
Let's go further, the button for heating the driver's seat turned out to be somewhere unknown, by the way, why it was there is also a mystery shrouded in darkness. And it is located next to the seat height adjustment lever between the chair and the door. Getting it will be problematic, especially in winter, if you are also wearing a jacket. Imagine the situation - winter, minus thirty outside, slippery road and speed around eighty. In such a situation, you can say goodbye to life, trying to find and press this ill-fated button by touch.
Largus was not offended by the presence of a power window on the front and rear doors. However, the window lift buttons were also not where we would like. Instead of installing them directly on the doors, the designers made a completely inexplicable layout. The front window lift control system is located on the front panel directly under the audio system and, while this is more or less convenient for the driver and front passenger, the rear passengers had a very hard time. For them, the window lift buttons were made between the front seats almost on the floor of the car.
Given the decent amount of space in the cabin, people sitting in the back seat will have to stretch hard for a breath of fresh air. It will also be difficult for the driver if he is alone in the car and needs to lower or raise the windows of the rear doors; not everyone will be able to twist his hand so skillfully and feel these same buttons. The rear window lock button is also not pleasing, since it was made directly under the handbrake lever and, if you suddenly reach for it, you can hit the lever, it’s good if your fingers remain intact.
The electric drive of side mirrors is an excellent and very useful thing, it is especially convenient to use it while driving, but not in the Lada Largus. The mirror adjustment button was also located under the handbrake lever and was extremely inconvenient to use.
To summarize, I would like to note that VAZ does not have as much experience in producing its own cars as its foreign competitors have. Initially, the Italian Fiat was copied, which in Russia was called Zhiguli, but now the French Renault has been used. So maybe we shouldn’t scold our people for what is not ours, and give the auto industry a chance to release something of its own?
LADA > Largus
Prices and configurations of the Lada Largus car
There are three main trim levels available for the Lada Largus model: Standard, Norma and Lux.
The Standard assembly includes an eight-valve K7M power unit with a five-speed manual transmission JH3 and the following options:
- Driver airbag;
- Seat belts for the driver and front passenger with limiters;
- Clips for child seats;
- Vacuum brake booster;
- Mechanical optical lighting corrector;
- Inertial seat belts – 5 pcs.;
- Rear seat head restraints;
- Locking doors from opening by children;
- Immobilizer;
- Chair upholstery made of fabric material;
- Plastic upholstery;
- Brushed carpets in the cabin and luggage compartment;
- Bracket for securing cargo;
- Tilt adjustment of the steering wheel;
- Lighting in the luggage compartment;
- Indicator of non-switching off of side lights;
- Single ignition key and door locks;
- Audio preparation;
- Stamped wheels R15;
- ABS and EBD systems;
- 12V socket;
- Cabin air filter;
- Light tinting;
- Rails;
- Full size spare wheel.
This build is average both in terms of options and price, which is why buyers most often choose it. The cost of a Lada Largus car in the Norma configuration is 544 thousand rubles. It additionally includes the following options:
- Sun visor with mirror for front passenger;
- Possibility to recline passenger seats in a 60/40 ratio;
- Power steering;
- Seat belt height adjustment;
- Central locking;
- Power windows on the front windows;
- Bumpers painted in the same color as the body;
- Moldings on the side doors.
The Climate option package additionally includes:
- Air conditioner;
- Heated front seats.
And the Comfort package for the Norma package includes an airbag for the front passenger with the ability to turn it off, a luggage rack, a curtain shelf in the luggage compartment, and an audio system with two speakers.
The Luxury equipment of the Lada Largus car has the following parameters:
- Sound signal in two tones;
- On-board computer;
- Fabric inserts on door trim;
- Chrome elements in the interior trim;
- Leather steering wheel;
- The ability to adjust the driver's seat with lumbar support in height;
- Cigarette lighter with ashtray;
- Pockets on the front seats;
- Central locking with remote control;
- Electric windows on the rear windows;
- Exterior mirrors with electric drive and electrical heating;
- Painting door handles and mirror caps to match the body color;
- Thresholds on the front doors;
- Fog lights;
- Alloy wheels R15;
- Audio system with four speakers;
- Parking sensors front and rear;
- Parktronic.
How to remove the instrument panel on Lada Largus
The interior of such a popular car as the Lada Largus is almost similar to the interior of the Renault Logan. Essentially, the central panel itself, round channels and buttons. Only the appearance of the dashboard has changed little, the buttons on the center console have a new design, and the lining is covered with piano lacquer. The weights of the devices themselves have taken on a nice silver edge.
The Largus instrument panel itself is a prefabricated structure consisting of a frame and a decorative panel. The frame is made of metal reinforcement. In particular, it is attached to the systems and wiring units of the vehicle's electrical equipment, well, besides what we have to do for our client is the controls. The frame itself is attached to the front panel, front supports and the base of the case. It is an integral part of the body's power structure.
Lada Largus
Information panel
As for the decorative panel, it is a hard molded piece of plastic that is attached to the frame with screws. The vehicle controls and, in particular, the ventilation and heating (air conditioning) system are fully connected to it. It also has control devices and covers that cover under-panel assemblies or are required to install controls, gadgets, gloves, and ducts.
Sometimes you need to change some part under the device panel or even completely change the frame or decorative panel
It is important to know how to do this without the help of others, there are different cases in life, and such knowledge will come in handy
To remove the instrument panel, you will need a special plastic spatula or flat-head screwdriver. You will also need a T20 and T50 TORX wrench and a Phillips screwdriver.
Removing the dashboard
The dismantling procedure itself consists of a step in a certain sequence:
First you need to disconnect the terminal from the “-” battery. It should then be removed from the bracket attached to the windshield. Then the control wheel is removed. The next step is to remove the steering column switch assembly with the driver's airbag slide ring. Then remove the entire combination of devices. The floor tunnel lining is later removed. The lining of the 2 A-pillars has been removed. After some time, carefully bend the edges of the central cover of the device panel and detach it from the panel itself
Remember that there will likely be resistance to the spring clamps and you should proceed as carefully as possible to ensure that hard clamps and additional force do not ruin your appearance on the backing or panel. The next step is to disconnect the wiring harness blocks from the central locking switches, front door windows, alarms, rear window defroster and remove the unit's center panel panel. Next, you need to remove the main audio system unit. The screw holding the decorative panel in place must then be unscrewed through the hole. By stretching the axle slightly, you can remove the headlight adjustment knob. Then remove the 2.4 screws holding the controller to the panel and insert the controller into the panel. Then carefully lower and discard the left and right bottom panel trim screw caps on the unit panel. The next step is to remove the 2 screws that secure the console to the bracket on the base of the case. Then you need to unscrew the bottom and right side screws. Later we unscrew the two upper mounting screws on the left and right. Next, the steering arms are removed. The front and right pistons of the lower left panel are then removed. After completing all the above steps, you can completely remove the device panel once it is removed by detaching the diagnostic glove from the socket.
Installation of the GF 890 FERRUM instrument panel on LADA Largus
After changing the necessary parts, you must install the device panel in place, doing everything our customer needs in reverse order.
In the video, the light bulbs on the dashboard are changed:
As can be seen from the description of dismantling, the action is a little more complicated and quite possible for any motorist. So if you have to change the panel without any help, it will be easy to handle.
Lada Largus Fully stock. Name is Laura › Logbook › A story about how I filmed a torpedo.
Sooo! After Laura tried to kill us, namely freeze us, refusing to turn on the stove in the frosty winter, it was decided not to put off finding the problem. After reading Drive2, just some information on the Internet, I just wanted to remove the motor, because this simple method through the Kama Sutra solved the problem for many, but something inside me said that the motor was working and the problem was before it. Yes, and they changed it for me under warranty, and I can’t believe that 2 motors have the same malfunction in the form of a self-correcting defect, but I called everything before the motor three years ago, the resistor and control unit are normal. Taking the electrical circuit, I found an electric motor on it, which is connected through a kind of extension cord
which cannot be checked without removing the panel. The conclusion suggests itself: remove the panel. As soon as two events coincided, namely: it warmed up to an acceptable -2 and it was a day off, I went looking for a bad contact. Previously, I made 2 mistakes. The first - on Friday evening, after work, I headed to, where would you think? No, not to the bar, to the gym! The first time in half a year... But after the gym (second mistake), at night, to the bar... In general, on Saturday I could not only think, but also move, so I postponed the repairs to Sunday. On Sunday, the brain worked, but the muscles did not. Overcoming the pain all over my body, I still took my wife to work and when I returned I began to remove the panel.
There, in the depths, behind the radio, there is a self-tapping screw securing the torpedo to the body, down with it. Then it was the turn of the steering wheel, the removal of which begins with the removal of the airbag
There is a very convenient groove in the steering wheel that guides the screwdriver directly to the airbag retaining spring.
Then there was the turn of the steering column switches, everything is simple here, there is a bolt at the bottom that ensures fixation
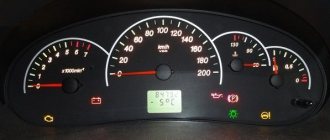
And of course, you need to dismantle the instrument panel. To do this, tear off the visor, decorative trims to the left and right of the column, unscrew 2 screws and remove the inside of the visor, and then unscrew 4 screws
Having disconnected 2 pads, remove the instrument panel. Next, as it is written in the book, “Overcoming resistance” and having cut your finger, remove the side pillar trim, then
We unscrew the screw. The same one below, under the decorative plug. And two similar ones on the right. Let's go to the tunnel
One self-tapping screw at the end under the plug. With a shurik and a slight upward movement, we almost break a piece of the interior decoration, because there’s no need to forget about the handbrake. Next is the second part of the tunnel, which is attached with a nut... With a slight movement of the hand, we will convert Shurik into a low-power impact wrench. Whack! And they removed the nut. Next are two self-tapping screws in the cup holders and two on the sides (So that’s where there are 2 more left after assembly! I’ll have to tighten them today). Congratulations to my beloved self, the tunnel has been dismantled, by the way, don’t try to break out the upholstery of the gearshift knob, there is a lock on the “forward direction” side, so you need to press it and it will come out freely, and don’t forget to disconnect the cigarette lighter. By the way, having looked at the flimsy wiring of the cigarette lighter, I think I should plug something into it now.
Next, in the glove compartment, press the latch of the computer connector and push it there, behind the glove compartment.
Let's pull, let's pull! Horseradish was floating there, who will unscrew the headlight range control for you? Ivan Fedorovich Krusenstern? We pull the twister towards ourselves, two whimpers, and try number two. Let's pull, let's pull!
A torpedo in the trunk. It’s so good that you don’t have to leave the car to do this! Glory to the Largus trunk! Well, here it is:
If you look closely, you can see that the green wire even managed to burn out. And all because the contact stop inside the plug was torn off. I put on the negative terminal, screwed it around, the motor started working, beauty! I pressed it in, inserted it, everything works, tugged it, it sits securely. At the same time, I found an alarm unit so that I would know where to go next time, otherwise it began to rosin the brain, then yell out of nowhere, or something even worse. Well, that's where the fun ends. Disconnected the negative terminal. Swish, swish, swish and put everything back together in the reverse order, naturally mixing up several screws in places and now I don’t have it attached to the radio, but the steering column switches no longer play. And the spare parts, as always, remained, today by the way I remembered where they came from, I’ll get them in the evening. I didn’t remove the motor itself, because it doesn’t vibrate or glitch. And the ancient auto mechanic wisdom says “Does it work? Don't interfere!” That's all guys, it took two and a half hours to do everything. Clean roads to everyone and not a nail or a rod!
Source: www.drive2.ru
Largus station wagon review
This car can easily adapt to any of your needs.
LADA Largus ideally combines comfort, practicality and high payload.
The car looks very friendly: faceted lines of body panels, decisive wheel arches, original taillights, and a signature radiator grille. Strong, well-built, confident Largus clearly states: “You can rely on me!”
LADA Largus has a dynamic body design, a modern interior and a surprisingly spacious interior.
Largus is the only car of its class that provides truly comfortable seating for seven adult passengers.
Thanks to folding seats, LADA Largus can be easily transformed to suit any needs - from a tourist trip to the transportation of large cargo.
LADA Largus is adapted to Russian operating conditions, and the proven design and technology ensure the high quality of the vehicle.
Some cars are designed for speed records. Others - to dazzle everyone with a bright design.
And Largus is created for real life. He will go where there is no way for a sports car. And they will look at him with love. Because it is the working car that is truly beautiful.
- Small overhangs and a ground clearance of 170 mm (145 mm with the maximum permitted load) - we have a car with excellent cross-country ability for its class.
- The high-torque motor confidently accelerates the Largus at full load.
- Interior transformation: from a 7-seater station wagon to a 2-seater truck.
- The third row of seats can be removed (without tools) and stored in the garage.
- The maximum load on the rails is 80 kg.
- Convenient hinged tailgates are fixed in several positions.
- The engine compartment is protected by a powerful mudguard made of 2 mm steel.
- 15-inch wheel rims.
LADA Largus is an amazingly roomy and very comfortable car.
The wide driver's seat is equipped with height adjustment and lumbar support. Truly comfortable seats have been created for passengers in the third row: men above average height feel free here. Each of the three rows of seats is equipped with air ducts to warm the feet of passengers.
The car's chassis is tuned for comfort: a long wheelbase ensures a smooth ride, and the energy-intensive suspension copes well with different types of surfaces. The front subframe provides confident stability and controllability at any speed.
LADA Largus is European-quality. All systems - from pedals to door handles - work with minimal effort. Thanks to the careful selection of materials, high acoustic comfort is ensured - even with high mileage, there are no squeaks in the cabin.
Despite its European pedigree, LADA Largus is a car for our roads.
A reliable long-travel suspension that easily “swallows” bumps and potholes, high ground clearance and good geometric cross-country ability – these are confident arguments against surprises on roads and directions!
- All external body panels of LADA Largus are made of double-sided galvanized steel.
- The B0 platform on which Largus is built has proven itself well all over the world.
- Largus is entirely manufactured using RENAULT-NISSAN Alliance technologies.
- The basic design, originally created for Eastern Europe, was adapted for Russia: the suspension and brakes were strengthened, the thickness of the anti-gravel and the area where it was applied to the bottom was increased, and chip protection linings appeared on the wheel arches.
- LADA Largus has original engine control calibrations, which make the car fully adapted to Russian gasoline.
- The terms of the LADA Largus warranty are 3 years or 100 thousand kilometers.
Badges on hybrid cars
Hybrid cars are a modern transitional type of transport that uses both the traction of an internal combustion engine and an electric motor, so the dashboard information panel is significantly different in the expansion of additional icons. They describe the operating modes and transitions of the power plant, which is why there is a wide variety of special icons.
The principle of grouping by color and purpose of indicators has been preserved, so detection of red or orange lights requires attention to the car in order to find out the reasons for recording failures or deviations in operating modes. It is worth noting that hybrid technology is very complex in structure and has large interconnections in the systems, so ignoring warning signals can quickly lead to failure of the machine with further complex and expensive repairs.
Variations of hybrid car information icons
Video about replacing the dashboard
Good luck, driver reader!
This post is to help those who want to overexpose the main devices.
Attention! It is recommended to do all work on disassembling and assembling interior elements in warm weather or after the interior has been well warmed up!
For work we will need TORX T10 and T20 screwdrivers.
Using a T20 screwdriver, unscrew the two screws at the bottom of the steering column housing. The first time it’s hard to get into them because you’re not used to them, you need to look into the holes from below and everything will become clear.
We snap off the top part of the casing; it is held on by four latches like this.
Immediately, almost completely, unscrew the screws from the bottom of the casing so that they do not interfere with us during assembly.
Carefully pry up the left and right panel flaps from all possible sides and unlatch the latches. I just do this with my hands. The photo shows the latches on these shields.
Next, I remove the immobilizer ring so that it doesn’t get in the way; it is held on by one latch (shown in the photo).
Using the same T20 screwdriver, unscrew the two screws that hold the visor. Here we note that when removing the instrument visor, the white connector of the right steering column switch (shown by the yellow arrow) may interfere with us.
Now, to remove the visor, you need to rip the left side of the visor off the latches with a sharp, soft, short tug
in the direction against the movement of the car. Then also tear off the right side of the visor, not forgetting the connector for the right steering column switch.
The following photo shows the latches and guide (middle) that hold the visor in place.
So we got to the instrument panel. Unscrew the 4 screws with the same T20 screwdriver.
Attention! Before disconnecting the instrument panel and any other manipulations with the wiring, it is recommended to remove the negative terminal from the battery. Having tilted the instrument panel towards you, remove the two connectors by pressing the latches on top (shown in red)
Here we see the latches and guide into which the instrument panel visor fits.
Having tilted the instrument panel towards you, remove the two connectors by pressing the latches on top (shown in red). Here we see the latches and guide into which the instrument panel visor fits.
Disassembling the instrument panel
Carefully remove the glass from the front side; it is held in place by 6 latches.
Before removing the hands, you need to fix their original position in order to put them in place during assembly. I simply make marks on the front front black plastic with a simple soft pencil. To remove the hands, you need to carefully turn them counterclockwise and gently pull them towards you. We put on the hands, also rotating only counterclockwise and lightly pressing so that they sit in their place. Usually you have to make several turns. We set the arrows according to the marks; it also usually doesn’t come out on the first turn. If it doesn’t work out the first time, we rotate it counterclockwise for another turn and so on until we set it. After installing the arrows, erase the pencil marks with a damp cotton swab or soft cloth.
Details on how to remove the panel
devices for Renault Logan for repair work, video and detailed photo of the removal process
Complete dismantling of the instrument panel (dashboard) may be necessary for car enthusiasts in various cases, be it gluing with noise insulation, or repairing various parts and elements, or installing an alarm system and secretly installing a diagnostic connector for anti-theft purposes. Renault Logan remove replacement repair heater radiator Renault Logan How to remove the washer reservoir on a Renault Logan (or a video about nothing) - cars from “AVTO CLASS”! We eliminate the knocking of the washer reservoir in Logan (2), Sandero, Duster, Largus. How to remove the Renault Logan gear knob Remove
Renault
dashboard But in order to carry out this work with the greatest ease, you need to know the exact sequence of work.
Instructions for Largus OBD2 speedometer winder
To purchase the device, go to product: Lada Largus speedometer winder
The Lada Largus speedometer knob is connected to the vehicle's diagnostic connector. Cars Lada Largus, Reanault Logan, Sandero, Duster, Nissan Almera are made on the same Renault Logan platform of the 2005 model. In the glove compartment of all these cars there is an OBD2 diagnostic connector, to which the speedometer knob will be connected.
To operate the speedometer knob for Lada Largus, you need to connect one wire from the instrument panel to the diagnostic connector. This modification is a prerequisite for the operation of the speedometer twister for the Lada Largus; without it, the winder will not work. .
The installation process of the Largus winder is shown in detail in the video clip that we have prepared for you.
You can purchase this device in our store for 2500 rubles. This price already includes all transportation costs, so no matter what region you are in, the cost will not change. The coiler comes with everything you need for connection: a wire with a contact for the diagnostic connector and a detailed diagram with pictures.
Prepayment is NOT required to order. Payment for goods occurs upon receipt at the post office.
You can place an order through the website's shopping cart or by calling our FREE phone number. We can also write to Viber, WhatsApp number. You can also do this in the JivoSite chat in the lower right corner.
Rewinding the Largus speedometer in OBD2 or in the cigarette lighter, which is better?
Unlike the cheaper cigarette lighter twisters that other sites offer for this car, our winder connects to the OBD2 diagnostic connector and has a more complex circuit design, created specifically for this car. The advantage of our solution is the connection method. In our version, there are no “left” wires hanging from under the panel and going nowhere in the car. The crank works not only while on the move, and to use it in a parking lot you do not need to break any wires. In addition, our company, one of the few, provides everything you need for connection, provides technical support, and does not just try to sell something that you will then have to think about how and where to connect. Think about it!
How to remove the floor tunnel on a Lada Largus with your own hands
The central tunnel on the Lada Largus consists of two parts (front and rear lining). If there is a need to dismantle it, the process should begin from its rear. To avoid breaking anything, it is recommended to use the instructions for removing the floor tunnel.
Required
: Torx T20 wrench, 10mm socket, flat screwdriver.
- Remove the block with the rear power window buttons (pry it off with a screwdriver, disconnect the block with wires).
- Unscrew the rear screw securing the tunnel, first remove the plug.
- Remove the rear part of the tunnel together with the mirror control unit (sliding it back, disconnect the wires).
- Remove the screw securing the tunnel under the mirror control unit.
- Remove the two screws securing the tunnel, which are located at the bottom of the cup holders.
- Remove the gearshift knob cover by prying at the edges with a flat-head screwdriver.
- Remove the screw on each side that secures the tunnel to the instrument panel.
- Lift the tunnel and disconnect the cigarette lighter connector.
- Remove the floor tunnel, bringing the gearshift knob cover out through the window in the lining.
By the way, did you know that you can install a wireless phone charger in a car tunnel?
Source of the article: https://xn--80aal0a.xn--80asehdb/do-my-self/repair/repair-lada-largus/2675-kak-snyat-nakladku-tonnelya-na-lada-largus-svoimi-rukami .html
How to replace the coolant sensor
To work on removing the coolant temperature sensor, you need to remove at least part of the antifreeze from the system. The easiest way is to drain it from the radiator, but you will have to unscrew the plug on the cylinder block, since the sensor is located not far from this unit. Let's figure out how to drain the liquid from the system completely:
- Remove the negative terminal of the battery. Remove the middle mudguard in the engine compartment.
- Close the cap of the expansion tank tightly, place a container with a volume of at least 6 liters under the hole in the radiator, and remove the plug. To make the fluid drain faster, unscrew the cap on the expansion tank.
- To remove antifreeze from the cylinder block, you must additionally unscrew the plug on it. The exact instructions will depend on the number of valves in the engine. If your Kalina has an eight-valve system with a traction drive gearbox, then you need to find the drain hole under the ignition coil on the front side of the cylinder block. After this, place the container under it and remove the stopper. After this, all you have to do is unscrew the sensor, having first disconnected the block with wires from it.
If your Lada Kalina has a sixteen-valve system with a cable-driven gearbox, then you will need to remove the starter before draining the antifreeze. If you do not do this, you will fill this unit with coolant. The starter is held on by three bolts, but before removing them you need to disconnect the wiring.
Once you have removed the fluid, replace the plugs. Now you can start replacing the sensor itself. Remove the wire block from it, if you did not do this to check, then unscrew the controller using a 21 key. In its place you need to install a new element, having previously treated the thread with heat sealant. Connecting the wiring to the new sensor is not at all difficult - the chips have special notches for proper installation.
Return fluid to the cooling system through the expansion tank. It is necessary to use new antifreeze; the manufacturer recommends using red “Felix” for this. Then reassemble, warm up the engine to bleed the system. Check to see if antifreeze is leaking from the plugs or through the threads of the sensor. After the engine has warmed up, touch the pipes - they should all become warm. If everything is normal, you can begin testing the system and making a test drive. If the error persists, then most likely the on-board computer provided false information.
Removing and installing the dashboard of a Lada Largus car
We prepare the vehicle for work. Disconnect the negative terminal of the battery.
Disable the airbag computer using a diagnostic tool.
We remove the driver airbag module (MNAPB).
Remove the steering wheel, steering wheel covers, steering column switches, steering column adjustment knob and transponder receiving ring.
Having overcome the resistance of the clamps, fold back the decorative plug 1, Figure 2, unscrew screw 2 and remove the rear part of the floor tunnel lining 3 (flat screwdriver, replaceable Torx T20 head, wrench).
Unscrew two screws 1, Figure 3, securing the front part of the floor tunnel lining (replaceable Torx T20 head, knob).
Unscrew nut 4, Figure 4, and two screws 1. Remove cover 5 of the gear shift lever.
Disconnect the wiring harness connector from the cigarette lighter 2 and remove the front part of the floor tunnel lining 3 (replacement head 10, replacement head Torx T20, extension, wrench).
Remove the central trim 1, Figure 5, of the instrument panel, overcoming the force of the clamps.
Disconnect the wiring harness connectors from the switches and remove the trim.
Remove the plug from the center console of the instrument panel or the radio with CD player 2, disconnect the wiring harness connectors and the antenna (radio and CD player puller).
Remove decorative trims 1 and 3, Figure 6, overcoming the force of the clamps.
Unscrew the two screws 2 securing the visor of the instrument cluster and remove it, overcoming the force of the clamps (replaceable head Torx T20, knob)
Unscrew the four screws 1, Figure 7, securing the instrument cluster 2.
Disconnect the two wiring harness connectors and remove the instrument cluster (replaceable Torx T20 head, knob).
Remove the wind window pillar trims left 1 and right 5 (see Figure 1), overcoming the force of the clamps.
Remove handle 4, Figure 8. Unscrew the two screws 3 securing the headlight range control regulator 2, remove it from the hole in the instrument panel (replaceable Torx T20 head, knob).
Having overcome the force of the clamps, fold back the decorative plugs 5 and unscrew one screw 1 of the lower fastening of the instrument panel on the left and right (replaceable head Torx T20, knob).
Unscrew screw 1, Figure 9, securing the instrument panel through the window that opened after removing the radio and CD player (replaceable Torx T20 head, extension, wrench).
Unscrew two screws 1, Figure 10, securing the heating, air conditioning and ventilation control unit 3 to the instrument panel, squeeze the clamps 2 and push the unit inside the instrument panel (replaceable head Torx T20, knob).
Unscrew two screws 2, Figure 11, securing the instrument panel 1 to the heater body (replaceable Torx T20 head, extension, knob).
Unscrew one screw 1 from the right and left sides, Figure 12, of the upper fastening of the instrument panel 2 (replaceable Torx T20 head, knob).
Remove the instrument panel.
When removing, remove the diagnostic connector from the socket in the glove box and disconnect block 1, Figure 13 (remove with an assistant).
Unscrew four nuts 2, Figure 14, securing the passenger airbag module 1, disconnect the wiring harness block 3 and remove the passenger airbag (replaceable head 10, knob).
Remove outer ring 1, Figure 15, ventilation nozzles.
Remove the inner ring 2 of the ventilation nozzle and, pressing the three clamps 3, remove the housing 4 of the ventilation nozzle from the instrument panel
Install the removed parts in the reverse order of removal.
Unlock the airbag computer using the diagnostic tool.
Instructions for replacing the backlight
So, if you decide to change the color of the control panel lighting, then first of all you need to go to the store and buy diodes or LED strip.
- First of all, disconnect the terminals from the battery.
- Sit behind the wheel of a car, move the seat back, if possible, lower the steering wheel.
- The next step will be to remove the tidy itself. The dismantling process will be individual for each car, so at this stage we recommend using the service book for setting up and operating your car. It should describe in detail all the nuances of this process. But in general, this procedure usually does not cause difficulties for car enthusiasts - you just need to unscrew the bolts or disconnect the clamps, and then disconnect all the wires connected to the device.
- Then the glass is detached or peeled off. If it is fixed with glue, then a hairdryer may be required to unstick it; you should treat the tidy around the perimeter with hot air.
- When the glass is disconnected, you can check the functionality of existing lighting sources using a tester. Of course, this is necessary if you are just replacing burnt out bulbs and not all LEDs. Now we change the lamp itself - for this, first of all, the base is dismantled - it can be unscrewed by hand or with pliers, counterclockwise. This procedure is repeated in a similar way with all other light sources.
- If the light bulbs themselves are soldered to the device, then you will need a soldering iron to remove them. Unsolder all light sources one by one. In this case, you need to be very careful, since when changing the backlight and replacing lamps, you can accidentally damage the tracks on the panel.
- When all light sources are sealed off, the procedure for installing new diodes is performed. Now you just need to solder them into the seats and check their functionality.
Price issue
The cost of diode light bulbs today averages from 20 to 150 rubles per piece, depending on the type and manufacturer. As for the tape, its average price is about 100-200 rubles per meter.
Illumination of the heater unit and instrument cluster
We remove the block. First you need to remove the center console trim (held on by clips), remove it from the bottom (I used a knife) to the top...
Next, unscrew the two screws on top (TORX 20) and, pressing the two latches on the sides, first take the block inward, then pull it out.
Then we disconnect the recirculation damper cable from above...
A connector in the middle and two cables (temperature control and air flow direction) at the bottom...
Then press out the plastic clips to remove the scale. Three from the bottom...
And three on top, under the recirculation flap slider...
To remove the recirculation lever, you need to separate its outer and inner parts
To do this, carefully press inward and push out the three latches.... After removing the heater unit, it is necessary to remove the skin
Proceed with caution, the skin is easily scratched. I slowly peeled it off, trimming the layer of glue. Then it sticks back without any glue. The numbers and human figures were covered with white electrical tape. The air flow arrows are yellow, and the outlines of the machine, the fan icon and the letters AC are blue...
After removing the heater unit, it is necessary to remove the skin
Proceed with caution, the skin is easily scratched. I slowly peeled it off, trimming the layer of glue
Then it sticks back without any glue. The numbers and human figures were covered with white electrical tape. The air flow arrows are yellow, and the outlines of the machine, the fan icon and the letters AC are blue...
I would like to warn you against using a solvent; I spoiled the number 3 myself. Then I quietly took cologne and cotton swabs from my wife (alcohol wipes are ideal!) and removed all the rest of the paint easily and without consequences. In addition, I removed all sorts of strange partitions on the scale body, since they interfered with the normal illumination of the symbols...
As a result of simplifying and, accordingly, reducing the cost of the design, the recirculation damper is adjusted mechanically, using a cable (as well as the temperature damper and the air flow distributor). Of course, there is no indication of the operating mode of the recirculation system. And if you turned on recirculation to quickly warm up or cut off exhaust gases, and then forgot, then after a while you will see how much the glass is covered in evaporation.
It was never possible to take a photo with real flowers in the dark with an ordinary soap dish, but that’s how it happened...
Later I redid the illumination of the heater block. And the way the Christmas tree is beautiful, but not serious...
To do this, you just need to change the electrical tape on the skin to another, white one.
I won’t describe in detail how I redesigned the instrument cluster; there are examples on the Internet.
We remove the instrument cluster and solder the LEDs indicated by the arrow on the board, observing the polarity. LEDs of standard size 3528, white, or whatever you want.
1 and 2 – two LEDs each for backlighting the hands and scales, 3 – four LEDs for display backlighting (photo not mine)…
The results of the work are visible at night... The illumination of the heater unit and instrument cluster was a success!
Installation of LED lamps
Many car owners, especially tuning enthusiasts, prefer to use LED lamps to replace conventional lamps, which illuminate the dashboard of the Lada Kalina much brighter. For such an event, both diodes are used, which are inserted into the so-called sockets intended for ordinary lamps, and LED strip. The latter is simply glued around the perimeter of the instrument panel. The process of replacing LED lamps itself is carried out according to a similar scheme, which we previously analyzed. The only thing you need to do before starting work is to cut off the tip of the diode a little. The diode must be cut down very carefully so as not to damage the luminous element. If the cut is not made, the diodes will not produce scattered light, that is, the luminous element will illuminate only one point.
In general, I installed the knobs, tested them, the quality is good, I like everything and am happy with it, the only thing is that the price is a little high, but everything is convenient and beautiful. But the bad news is that the light bulb for the knobs and the heater base burned out. Everything seems simple, but as it turned out, the AvtoVAZ team had a hand in this too. There are 2 light bulbs in total. They light up with half light, the right one has burned out, it’s hard to see during the day, but at night it can only be felt by touch.
Using your hand to touch the probe bulbs from the back side is not a very simple or convenient task. To pull it out, you need to turn it 45 degrees with force with two fingers. In general, it’s not very convenient (ps it’s better to do it as described below.)
And so we take out the light bulb,
The couple decided to change. And so I thought I’d insert it “blindly” in the same way, but not everything is so simple, and after a couple of attempts and scratches all over my hand I decided to simplify the task many times over. And so an easier way: After removing the central cover, Unscrew two torx 20 screws
This is interesting: Removing and installing the front wheel speed sensor Lada Largus
SEE THE ROOT
It is easier to replace headlight bulbs on the right. The battery prevents access to the left headlight; it is often better to remove it. Especially if your hand is calloused and your fingers are not like a pianist’s. And yet, in most cases, it is possible to fasten the spring latch of the H4 lamp, although not the first time. Access to the turn signal is more or less acceptable.
To replace the fog lamps, you will have to lie on the ground and unscrew the corner screen fasteners under the bumper. The work is dirty and terribly unpleasant, especially in the slush. The question is, what prevented you from providing technological windows in the mudguards, as is done on many French cars?
Engine and transmission
The main task of such manipulations is to make the engine “breathe” better. A car can be compared to a person, only he has gasoline instead of blood, and electrical wiring replaces the nervous system. Both systems require air. The higher the load, the more air is required. Therefore, the car needs to ensure good air flow. The engine power will increase with the replacement of the air filter. It would seem that such a simple detail, but power indicators increase by as much as 8%. After removing the filter, it is necessary to remove the entire throttle assembly. Of course, there will be additional costs, since it will be necessary to purchase an exhaust receiver. But it is necessary to change it, just like the camshaft, only in specialized conditions. In other words, the car will have to be taken to a service center. And this also comes with additional costs, since the car will have to be delivered there by tow truck.
Of course, it will be necessary to replace the exhaust system. It is possible to install a 4-2-1 manifold. According to this scheme, gases merge into two pipes, and then into a common flow.
It would be a good idea to modify the standard transmission. It wouldn't hurt to install a sixth gear. But it should be said that this will require a lot of effort and time. Although the result will justify all the costs. The car will reach its maximum speed very quickly.
