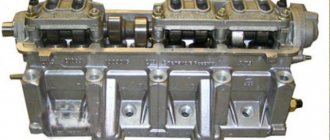
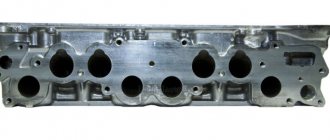
Cylinder head of engines 2112 and 21124 (16v) - removal and installation
Comment.
The engine cylinder head can be removed as an assembly or after partial disassembly (remove the camshafts). Both options are shown on engine 21124 (1.6i). On the 2112 (1.5i) engine, the work is performed in a similar way (see text for details). 1. Drain the coolant from the engine (see “Coolant - replacement”).
If disassembling the cylinder head is not required
(for example, to replace the cylinder head gasket), it should be removed as an assembly with the camshafts, bearing housing, fuel rail, oil pressure and camshaft position sensors.
4. Disconnect the upper mounting rod of the power unit from the cylinder head bracket (see “Upper mounting rod of engines 2112 and 21124 (16v)”).
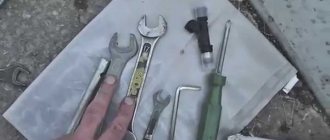
13 mm socket wrench
Unscrew the three nuts securing the rod bracket.
6. Remove the bracket from the studs.
8. 10 mm
Unscrew the bolt securing the ground wire tip and disconnect it from the block head.
9. 13 mm
Unscrew the nut securing the tip of the negative terminal wire of the battery and remove the tip from the stud.
10. To avoid damaging the sensor connectors, disconnect the wires from the coolant temperature sensors of the engine management system (see “Coolant temperature sensor - check and replacement”) and from the temperature indicator (see “Coolant temperature sensor - check and replacement” ), as well as from the camshaft position sensor, if we remove the cylinder head assembly (see “Camshaft position sensor - check and replacement”).
13 mm socket wrench
Unscrew the two nuts securing the thermostat housing.
12. Remove the thermostat housing from the cylinder head studs and, without disconnecting the hoses, move it to the side.
13. Remove the sealing gasket.
10mm hex wrench
unscrew the ten bolts securing the head to the cylinder block in the specified sequence.
Sequence of loosening the head bolts
15. Remove the head from the cylinder block assembly.
. or with the camshafts removed.
16. Remove the cylinder head gasket.
17. In order not to lose it, we remove the two guide bushings from their seats in the cylinder block.
1. Wash the cylinder head from dirt and deposits with kerosene or diesel fuel.
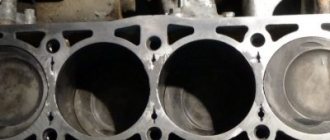
2. Remove any remaining oil and coolant from the threaded holes of the cylinder block (under the cylinder head bolts).
3. We clean the mating surfaces of the head and cylinder block from the remains of the old gasket, and degrease the surfaces with a solvent.
Warning! Always use a new gasket when installing the cylinder head. Oil contact with the gasket surface is unacceptable.
4. Install the head guide bushings into the seats of the cylinder block. We place the gasket on the cylinder block, and the guide bushings should fit into the corresponding holes in the gasket.
5. Install the head on the cylinder block. By slightly moving the head from side to side, we ensure that the guide bushings fit into the corresponding recesses of the head.
Warning! Reuse of cylinder head bolts is only permitted if their length does not exceed 100 mm
6. Using a caliper or a bench ruler, measure the length of the bolts. Bolts longer than 100 mm are replaced.
7. Before installation, dip the threaded part of the bolts into engine oil and let the oil drain, waiting for about half an hour.
8. Install the head mounting bolts into the holes of the head. Using a torque wrench, tighten the head mounting bolts in three steps - first with a torque of 20 Nm (2 kgfm), then turn the bolts by 90° and then turn the bolts again by 90°. In this case, we follow the order indicated in the photo.
Head bolt tightening sequence
We perform further engine assembly in reverse order.
Work order
We put the car in the repair bay. We clean the engine using a sprayer and washing liquid. We carry out work to replace the VAZ-21124 engine gasket:
- We remove the protective covers, disconnect the pipelines and equipment power cables.
- Disconnect the battery, drain the antifreeze and oil.
- We fix the 1st piston of the engine at TDC (top dead center).
- Remove the air filter.
- We remove the valve system protection cover by disconnecting the supply systems and unscrewing the fastening nuts.
- Disconnect the exhaust gas system.
- Remove the internal manifold spacers. We disconnect the temperature sensors, oil pressure, injectors, and current supply wires from the spark plugs.
- Remove the timing belt. The timing parts have several marks that serve to tune and adjust the VAZ-21124 engine: on the timing pulley the crankshaft TDC mark is mark A, on the oil pump cover there is control mark B, on the rear protective cover of the toothed belt there are control marks C and F, on on the exhaust camshaft pulley - mark D, on the intake camshaft pulley - mark E.
- To do this, carefully remove the camshaft gear, fix the shaft and unscrew the fastening bolt. All actions are carried out with care so as not to lose the key.
- Remove the thermostat and pipes and disconnect them from the system.
- Loosen and unscrew the block head bolts. We remove the block head and remove the damaged gasket.
- We install a new gasket, having first removed the oil with a rag. The procedure for installing and tightening the bolts should be carried out taking into account the following sequence: the first operation is carried out with a force of 20 Nm, the second - with a force of 65.4 - 85.7 Nm, the third - tightening is carried out by 90 *, the fourth - tightening by 90 *. The bolt tightening order should be done in the following sequence - top row (8, 6, 2, 5, 10), bottom row (7, 3, 1, 4, 9).
- We check the position of the crankshaft and camshaft, which should be at TDC (the valves should be closed). Install the head on the cylinder block.
- We carry out reverse operations on the installation of attachments, connecting hoses and electrical cables.
- We mount the exhaust and intake camshaft pulleys.
- We adjust the tension of the timing belt and generator. Check the condition of the tension rollers. To tension the belt, we use the tension roller (located under the exhaust camshaft pulley) by installing it in the desired position and tightening it to ensure the necessary belt tension.
- We install the valve cover and timing belt protection. We check all connections of power supply systems and electrical wiring. To seal individual components, we use Loctite-574 sealant, which, after application to the surface, hardens within one hour.
For what reasons do they change the cylinder head gasket on a VAZ-2112?
An official source claims that the cylinder head gasket on a VAZ-2112 with 16 valves can last up to 200 thousand kilometers. Basically, after a completed mileage, this part simply wears out and requires replacement.
There are several reasons why you need to replace the cylinder head gasket on a VAZ-2112:
- the first reason to change this part is its wear and tear, since any item has an expiration date;
- if the cylinder head is damaged, deformed or punctured, then it is worth checking the gasket; it can also be damaged, and coolant may get on it;
- If you drive a car for a long time with an overheated engine, the gasket will be damaged.
Reasons why you should change the cylinder head gasket:
- If you see that engine fluid has begun to leak, then it is necessary to diagnose the operation of the engine.
- If during operation of the machine there are not characteristic exhausts coming out of the pipe, but steam or smoke, then it is worth checking the engine, as this may indicate that coolant has entered the cylinders.
- If foam appears in the expansion tank, this indicates that exhaust gases are entering the cooling system because the seal is broken.
- If greasy spots appear on the antifreeze, this means that the seal has been broken and there is a bad connection.
- If coolant gets into the lubricant, a white coating will appear in the engine fluid, this is a sign of gasket damage.
Signs of failure of the cylinder head gasket of a VAZ 2110
There are no specific warranty periods for the use of a cylinder head gasket. Its durability is influenced by such factors as: the degree of operation of the engine, its model, driving style and other reasons. However, there are several symptoms by which you can determine that the gasket has failed:
- at the junction of the block and the head there are leaks of engine oil or coolant ;
- using an oil dipstick, foreign light impurities or foam-like emulsion , which occurs when antifreeze penetrates through the connection with the cylinder head;
- the color of the exhaust changes to bluish-white, which indicates water entering the combustion chamber of the cylinder block;
- presence of oil stains in the coolant reservoir;
- The engine temperature rises due to the breakthrough of hot gases into the cooling system, which immediately heat the coolant.
Tips for replacing the cylinder head gasket
Removal and installation of the cylinder head gasket is carried out with the crankshaft set to TDC. It is also necessary to ensure that both valves of the 1st cylinder are closed.
It must be remembered that the cylinder head gasket must be changed after each removal of the engine head, even if this is not due to its unsuitability.
The procedure for replacing the cylinder head gasket on a VAZ 2110 on a 16-valve engine is generally similar to how to change the cylinder head gasket on an 8-valve engine, but has several nuances :
- The receiver must be dismantled.
- When removing timing belt pulleys, a mark is placed on two pulleys and two pulleys are removed.
- The fuel rail is removed.
- The order and tightening torques are carried out in accordance with the requirements for a 16-valve engine.
How to replace the cylinder head gasket on a VAZ-2112
Replacing this part on a VAZ-2112 16 valves is quite difficult, and if there is no experience, then it is to some extent unrealistic. It is necessary to thoroughly understand and understand the essence and scope of the work that needs to be done.
When replacing the gasket yourself, you should immediately prepare the following items:
- set of spanners;
- engine oil and cooling agent (this is in case the consumed items are mixed);
- a force wrench (with its help you need to tighten each cylinder head bolt);
- container for collecting waste liquid;
- Phillips and flat screwdriver;
- clean cloth.
Principle of action when replacing the cylinder head gasket:
- First, the car needs to be sent to an inspection hole or overpass, since you will need access to the bottom of the car.
- Next you should open the hood. It is necessary to loosen the bolt located on the battery negative terminal with a key, and then remove it.
- It is necessary to prepare a container for draining the coolant in advance, and unscrew the drain plug.
- If you started replacing it immediately after you arrived, then you need to relieve the pressure in the fuel lines. To do this, press the latch and disconnect the cables that lead to the fuel pump.
- Afterwards, it is necessary to disconnect the manifold from the intake manifold passing through the exhaust system. The thermostat must be disassembled. To do this, you need to loosen the clamps located on the pipes and then separate them.
- When the disconnected nuts securing the bracket have been unscrewed, the bracket itself can be moved to the side just right. Afterwards you can begin disassembling the cylinder head. To do this, you will need to unscrew all the bolts that hold it in place using a torque wrench. Then you need to remove the bearing devices with their housings and the fuel rail from the head.
- To remove the controller that controls the fluid pressure in the engine and the DPKV, you need to disconnect the plugs with wires from them.
- To dismantle the belt located in the timing mechanism, it is necessary to loosen the tension roller screw. Then we fix the pulley in the form of teeth, which actually holds the strap. After this, you need to unscrew the fixing screw, and you can begin dismantling with the washer.
- You need to remove the disc from the camshaft using a prepared tool.
- Separate all cooling lines from the engine and remove the system that controls the temperature of the antifreeze in the engine itself. Then you need to unscrew the screws securing the head. The part should be removed together with the former gasket. Afterwards, you need to clean the surface where the head comes into contact with the blocks from various dirt. The threaded holes also need to be cleaned.
- Then you can install a new gasket.
- Before installing the cylinder head, make sure that each mark on the shaft corresponds.
- After installing the cylinder head, you need to tighten the fixing bolts. For this procedure, you should use a torque wrench, since without it it will be impossible to do this.
- Next, you need to carry out the assembly procedure in the exact backward order. After assembly, you will need to adjust the valves and tighten the timing belt.
This work is quite difficult and long, not every beginner will be able to do it efficiently and effectively. If you are not confident in your abilities, then it is better to turn to specialists who know how to do their job at the highest level.
How to find out if the cylinder head gasket is blown
You can determine whether the cylinder head gasket is blown by using one of several methods. In this case, diagnostics are simple and can be done by anyone, even a novice and inexperienced driver.
To check the integrity of the gasket, you must do one of the following:
With the engine running, visually inspect whether smoke is coming from the gap between the cylinder head and the cylinder head. Also listen to see if there are loud ringing sounds coming from there that were not there before.
Inspect the surfaces of the radiator caps and expansion tank of the cooling system, as well as the neck for filling oil into the engine. To do this, you just need to unscrew them and visually inspect them. If antifreeze gets into the engine, there will be a reddish emulsion on the oil filler cap. If oil gets into the antifreeze, then there will be oily deposits on the radiator or expansion tank caps.
White smoke from the exhaust
Make sure there is no white smoke coming out of the exhaust pipe (it is actually steam). If it is, then there is a high probability of gasket burnout. Especially if the exhaust smoke has a sweetish smell (if you use antifreeze as a coolant rather than ordinary water). At the same time, the coolant level in the radiator usually drops. This is an indirect sign of the mentioned malfunction.
Check whether exhaust gases are entering the cooling system. This can be done in two ways - visually and using available tools. In the first case, it is enough to unscrew the cap of the radiator or expansion tank and see if there is intense seething there. However, even if intense “geysers” are not observed there, it is necessary to use available means. Most often, a common condom is used for this.
How to independently detect a faulty cylinder head gasket
Owners of any cars, including the VAZ-2112 with 16 valves, must constantly inspect their car, observe whether oily spots appear under it, and listen to how the vehicle’s engine operates. If, during inspection, oily discharge is detected in the place that is connecting to the cylinder head and the cylinder block, you need to pay attention to the gasket. Most often, such leaks appear due to burnout of the gasket, and to eliminate such a malfunction, an immediate replacement of the cylinder head element for the 16-valve VAZ-2112 engine is necessary. Replacement is quite simple, so every car enthusiast can do this operation independently.
Product added to bookmarks!
- Description
- Reviews
APPLICABILITY: 16V engines VAZ 21126 (1.6L), 21127 (1.6L), 21129 (1.6L), 21179 (1.8L) with a cylinder diameter of 82-84 mm
.
Federal Mogul is a leader in the aftermarket industry - a leading supplier of a full line of engine parts, fuel pumps, water pumps, CV joints, CV joints, struts and shock absorbers, ball joints, ignition products, brake friction materials, steering ends, bushings and other parts. for the chassis.
The VAZ 21126 (Priora) engine is equipped with a metal, two-layer head gasket with spring ridges to seal the gas joints and the lubrication system channel.
This gasket can be installed in VAZ 2112, 21124 and 21128 engines in order to increase the compression ratio.
The thickness of the VAZ 21126 head gasket in a compressed state is 0.45-0.50 mm, volume 2.76 cm3.
It is important to remember that the distance from the piston at TDC to the cylinder head plane should not be less than 0.8 mm.
Before installation, it is necessary to determine the design compression ratio.
How to replace a cylinder head gasket with your own hands
Before you start repairing the car, you need to prepare all the tools that replacing the cylinder head gasket on a 16-valve VAZ-2112 engine will require:
- automobile keys of overhead and socket types;
- torque wrench;
- high-quality new gasket;
- container for draining liquid substances.
If the cylinder head gasket is replaced in a special pit intended for vehicle inspection, then the whole process will be much simplified. When there is no such recess, then this operation can be performed without it, if you carry out the manipulations step by step, taking into account all the recommendations.
In what cases is repair necessary?
Timely diagnosis of the cylinder head on a VAZ 2112 is necessary for normal engine operation, especially with 16 valves. When operating a car, you should avoid overheating the device, as the head may move. To adjust valves and replace oil seals, there is no need to dismantle the cylinder head. Removing the head is necessary for major repairs:
- when guide bushings are changed;
- if lapping and replacement of valve guides is necessary;
- removing carbon deposits from parts;
- replacing the gasket;
- replacing the camshaft and its beds;
- mechanical processing of contacting planes.
During a comprehensive repair, small parts are changed and, if necessary, the valves are ground in, removed, modified, and adjusted.
Step-by-step replacement of a worn part
As mentioned earlier, you can replace the gaskets in the VAZ-2112 of 16 valves yourself if you do all the work in stages:
- Disconnect the terminal from the car battery.
- Drain the coolant into a prepared container.
- If you need to carry out repairs on a car that has just been in operation, then the pressure in the fuel system must be relieved. To carry out this manipulation, it is necessary to disconnect the wires that go to the fuel pump from all connecting wires of the machine.
- The exhaust pipe is disconnected from the manifold.
- Proceed to remove the thermostat.
- As soon as the connecting fasteners of the thermostat are unscrewed, the part should be redirected to the side to make it convenient to dismantle the non-separable head, since only the gaskets of the 16 VAZ-2112 valves need to be replaced.
- The bearing housing and fuel system frame must be removed along with the cylinder head.
- The sensors that indicate the oil pressure level are removed from their permanent location.
- Using a key, unscrew the fasteners that secure the timing belt and remove the tension roller.
- Using an additional tool, it is necessary to fix the toothed pulley so that it cannot change its position, then the fastening element is removed and removed along with the connecting washer.
- The pulley is removed from the camshaft using two reliable screwdrivers.
- The fasteners that secure the temperature sensor and the system responsible for cooling are unscrewed.
- The last stage of the process of replacing the cylinder head gasket in a 16-valve VAZ-2112 engine is to remove all the unscrewed bolts along with washers from the unit, and along with the unit you also get a burnt gasket, which must be replaced immediately.
Replacement process for a 16 valve car
The procedure for replacing the cylinder head gasket on a VAZ 2112 with engines that have 8 and 16 valves is similar. To carry it out you need to prepare:
- a set of spanners and wrenches;
- torque wrench;
- new consumables;
- container for draining coolant;
- clean rags.
For the convenience of the procedure, it is better to use an overpass or inspection hole.
Engine VAZ 2112 16 valves
Stages
- First of all, you should de-energize the car by removing the negative terminal from the battery.
- Then you need to drain the antifreeze into the prepared container.
- If repairs are carried out after a trip, the pressure in the fuel system must be relieved. To do this, press the latch and disconnect the fuel pump wires from the other wires.
- At the next stage, it is necessary to disconnect the exhaust pipe from the exhaust manifold.
- Next, the thermostat is removed.
- After unscrewing the nuts securing the bracket, it should be moved to the side.
- Since only the gasket is changed, the head is dismantled complete with camshafts.
- Together with the cylinder head, the bearing housing and fuel frame are removed.
- Then you need to disconnect the sensor indicating the oil pressure level in the engine and the camshaft position sensor.
- Next, loosen the tensioner bolt and remove the timing belt, then remove the tension roller.
- The toothed pulley must be fixed so that it does not rotate. Then you should unscrew the mounting bolt and remove it with the washer.
- Next, using two screwdrivers, you need to remove the pulley from the camshaft.
- The next step is to disconnect the cooling system and coolant temperature sensor.
- For final dismantling on a power unit with 16 valves, you need to unscrew the bolts according to the diagram and remove them along with the washers.
- The old gasket is removed along with the cylinder head.
We dismantle the cylinder head along with the gasket - Before installing a new consumable, the surface at the connection point should be cleaned of remnants of the old gasket and dirt.
- Threaded holes must be clear of coolant and engine oil.
- The new consumable is installed along the guide bushings. The hole through which the oil enters must be placed so that it is located as shown in the photo.
Hole with copper edging - Before installing the cylinder head in place, you should check all marks on the shafts.
- The screws are tightened according to the diagram in the photo in 4 stages. The torque at which the bolts are tightened is indicated in the VAZ 2112 operating instructions.
Scheme for tightening the mounting bolts - Assembly is carried out in reverse order.
- After assembly, the necessary valve adjustments and timing belt tensioning are performed.
Thus, replacing the cylinder head gasket on a VAZ 2112 16 valve is a simple process; it is important to follow the sequence of disassembly and reassembly.
Replacing a gasket on a 16-valve engine is quite difficult. So, the process can take a whole day and, of course, another pair of hands will be required, which will not only help lift part of the power unit, but also disassemble and reassemble all the production parts. Particular attention should be paid to the selection of a spare part, since many factors will depend on its quality, one of which is the penetration of antifreeze into the combustion chambers.
Recommendations regarding cylinder head assembly
Before you begin assembling all components, you should remove any contamination that could remain due to burnt consumables. There should be no oil stains or other stains on the threads. New gaskets are installed in such a position that their outer part is directed towards the bushings.
Before installing the cylinder head in a permanent place, you should carefully check the correspondence of all marks relative to the shafts. All bolts must be tightened firmly and securely; for this, a tool of suitable size and shape must be used.
Replacing the cylinder head gasket of a VAZ-2112 (16 valves) with your own hands
For reliable and smooth operation, the engine needs not only lubrication, but also good cooling. Therefore, there are separate channels in the block and head. Some are designed for oil circulation, the second for antifreeze. They do not intersect with each other. To prevent these two fluids from mixing, any engine uses a gasket. The engine at the junction of the block and the head must be sealed. If this is not the case, the operation of the motor will be impaired. Today we will talk about how to independently replace the cylinder head gasket of a VAZ-2112 (16 valves). We will also consider the symptoms of this phenomenon.
Do-it-yourself repair of the cylinder head (cylinder head) on a 16-valve VAZ-2112
Cars of the VAZ-2112 family were produced with one of two 16-valve engines - 21124 and 21120. The displacement of these engines is different, and only one part called the “cylinder head” is used - it is designated by the numbers 2112-1003011. There are rumors that the cylinder head from the 21120 engine does not fit the 24th engine, but a reverse replacement is possible. However, there is only one article in the spare parts catalog, and it is suitable for two motors at once. Next we consider what actions to repair the VAZ-2112 cylinder head you can perform yourself. We will only talk about 16-valve engines.
Causes of malfunctions
There are several reasons why a car needs a head gasket replacement. VAZ-2112 (16 valves) stops working normally due to natural wear of the gasket. As a rule, this happens at 200 thousand kilometers. If the part was installed incorrectly (with non-compliance with the tightening torque), then the replacement date may come much earlier. The next reason is deformation or deflection of the sealing element. This leads to breakdown, causing coolant to leak onto the surface.
Another common reason why a gasket needs to be replaced is engine overheating. Therefore, you should always monitor the condition of the cooling system and change the antifreeze on time. Experts recommend replacing every 50 thousand or every 2 years. For antifreeze, this regulation is 4 years.
How to determine gasket failure? The problem can be identified by several symptoms. The first sign is the characteristic color of the exhaust. You will notice steam coming out of the exhaust pipe. In the places where the block connects to the head, traces of antifreeze will be visible (but not always). Check the fluid in the expansion tank. It should not come off and contain oil stains. If antifreeze gets into the lubrication system, the latter begins to foam. You will notice how a characteristic emulsion – mayonnaise – forms on the dipstick and the filler cap. This phenomenon looks like the picture below.
Calculation of the compression ratio - logbook Lada 21099 1997 on DRIVE2
Calculation of the compression ratio is necessary when changing the volume in the combustion chamber of the cylinder head. In my case, the cylinder head was milled, the combustion chamber in the cylinder head was changed, plus the Prior gasket. And since I’m already cutting the cylinder head, why not find a couple more horses by increasing the compression ratio. First, you need to find out the degree in the stock configuration, the piston's shortfall to the upper plane of the cylinder block, the volume of samples (forgings) in the piston, the net volume in the cylinder head. I googled the characteristics of the VAZ 21083 engine, and almost every site has its own special data on this engine. Therefore, it was necessary to recalculate Art. szh. and check the data. As a result:
Volume of samples (puddles) in the piston = 11.8 cm^3: volume of the piston puddle 21083
Piston shortfall in VAZ 21083 block = 0.4 mm:
Thickness of the VAZ 21083 gasket in the compressed state = 1.05 mm: thickness of the gasket 21083
Thickness of the PRIORA gasket in the compressed state = 0.45 mm: thickness of the PRIORA gasket
Calculation Art. szh. for drain with Prior gasket:
I increased the compression ratio to 10, this is the extreme limit for 92 gasoline, and I need to make the net volume in the cylinder head = 25 cm^3.
Dependency graphs Art. szh. from octane number:
Calculation Art. szh. for cylinder head 25 cm^3 and prioro gaskets:
The volume of the cylinder head was measured with a syringe with testing; it was necessary to obtain 25 cubes. In photos 1 and 4 the camera needs to be sharpened a little more:
On the Prior gasket, it is advisable to drill out the coolant channels to 6 mm, and sharpen the holes for the cylinder head mounting bolts, since they are M10.
Since the engine needs to be opened and the cylinder head repaired, I was a little puzzled by the question of whether to install a metal package gasket from Grants 21116 instead of the usual so-called one. "paranitic". Thereby raising the compression ratio (hereinafter referred to as CL) slightly.
But somehow I initially rejected this idea because, based on quick calculations, I was confused by the very small gap between the piston and the cylinder head plane.
And this recently someone else’s post about a broken cylinder head gasket prompted me to once again count everything, reread and rethink.
So let's go through the candidates: 1. Regular gasket 21083100302012 (the last 2 digits may be different if at the end of 12 it is a VATI manufacturer)
Attention:
Gasket from 16 cl. Priora 21126100302000 for 8 cl.
is not suitable
due to a different arrangement of holes for coolant circulation. If you don’t believe me, see photo:
So now about the differences between Grant's and regular 21083: 1. Thickness 0.43 mm (according to other sources 0.45 mm) versus 1.1-1.2 mm for the regular one, which is why the coolant increases 2. Enlarged holes for the coolant duct because The thermal load of an engine with an increased coolant is higher 3. The holes for the cylinder head bolts are designed for M10 bolts, and not M12 as in a conventional one.
Pros after switching to a gasket from Granta: 1. An increased compression ratio with correct ignition angle settings will give greater efficiency and slightly higher torque 2. The metal package, in theory, should be more reliable than a conventional gasket
And now about the disadvantages: 1. Ideally, the ECU firmware needs to be adjusted because the compression ratio has changed 2. The engine will heat up a little more, again due to an increase in coolant 3. The piston-valve distance is reduced, because of this the engine can become “butt-in” 4. Increased requirements for the quality of processing of the cylinder head plane and block 5. Reducing the distance piston - cylinder head plane at TDC
If you can still fight and live with the first 4 points, then the most extreme point requires good adjustment so as not to destroy the engine.
Tools
In order for the replacement of the VAZ-2112 cylinder head gasket (16 valves) to be successful and quick, you need to prepare the following set of devices:
- Torque wrench.
- Set of socket heads and wrenches.
- Coolant container (volume of at least 7 liters).
- Clean rags and degreaser.
- New gasket and sealant for it.
So, open the hood and remove the negative terminal from the battery. Then you need to drain the antifreeze from the system. Unscrew the tap on the radiator and the cap of the expansion tank (so that a vacuum does not form inside). Next, you need to unscrew the exhaust manifold mounting bolts.
When is it time to change?
The gasket serves to seal the connection between the head and the cylinder block. There are several types of it:
- Asbestos. The main advantage: minimal shrinkage and excellent recoverability.
- Metal. These are some of the most reliable and high-quality consumables.
- Non-asbestos. Used as repair kits. Main advantages: elasticity, heat resistance, elasticity.
The procedure for replacing 16 valves on a VAZ 2112 is indicated in the manual, but this is not the main reason. There are a number of signs that determine the need for replacement:
- motor leakage in the connection area;
- white steam present in the exhaust gases indicates that antifreeze has entered the cylinders;
- when exhaust gases enter the cooling system, foam appears at the neck of the expansion tank;
- the presence of oil stains in the coolant indicates a leak in the connection;
- the presence of a white coating on the oil dipstick indicates that there is antifreeze in the engine oil; this may be due to a damaged gasket.
What should you pay attention to?
Pay attention to the condition of the screws. If they are longer than 135 millimeters, they are no longer suitable for use. Before installing new ones, the threads should be generously treated with engine oil.
When installing, you need to carefully prepare the surface of the block and cylinder head. It is cleaned of old sealant and all roughness is removed. The presence of oil in places where the elements come into contact is not allowed. There should only be red sealant here. Therefore, we thoroughly degrease the surface with alcohol or gasoline. Use clean lint rags.
