Preparing for painting
Any surface to be painted requires preliminary preparation. This fully applies to the entire car body or its parts. If the body and its paintwork (paint) are in satisfactory condition and no traces of rust are visible, then the task of preparing it for painting is greatly simplified. The least common type of damage caused by corrosion is the roof of a car.
It should be noted that the bodies of VAZ cars are not particularly resistant to corrosion, and the body of the VAZ 2110 was no exception. Therefore, before painting work, the body must be examined very carefully for the presence of rust lesions.
Particular attention should be paid to the condition of the thresholds.
Painting a car may be preceded by the removal of:
- headlights;
- direction indicators and their repeaters;
- side rear view mirrors;
- door handles and locks;
- radiator grilles;
- doors, hood and trunk lids;
- one front wing or both at once;
- rear and front bumpers.
If you are going to paint only individual elements of the body, then you should ensure protection from paint on the headlights, rear, as well as front bumper, all car windows and other elements that do not require painting. Most often, the hood and trunk lid, front fender, door and bumper are painted separately.
Painting a VAZ 2110 car
According to one of the owners of the “Ten”, who decided to paint his car himself, the painting took quite a long time. Although at first glance it seemed that there was nothing complicated about it. Moreover, it was necessary to paint the car in the same color, and not another, to give the car a brighter and fresher look. However, it was necessary to disassemble almost half of the car; I had to dismantle the hood, remove the headlights, doors, trunk lid. In the section of our website you can find tips on the care, operation and troubleshooting of the VAZ 2110. After painting, all parts must be put back in place. This begs the question: isn’t it easier to entrust the painting to car service specialists?
putty
The rust that appears on the body of the VAZ model 2110 is cleaned off with sandpaper to bare metal. The emerging shells are treated with a rust converter, which can be found in many car dealerships.
After sanding, damaged and straightened areas must be puttied. For such work, a quick-drying two-component epoxy-based putty is used. It is applied with a spatula to a previously degreased surface in a thin layer. After the putty has dried, the surface is leveled by sanding it with abrasive paper using a sanding machine or manually.
In the latter case, use a wooden block or a special device with clamps for sandpaper. They are needed to form a hard, flat surface underneath. This is especially important when processing large surfaces, such as a car roof. If, as a result of processing the putty, bare metal begins to show through, then the procedure is repeated until a smooth surface is obtained, completely ready for further priming and painting. The installation locations for car headlights have a complex metal configuration, so this will require particularly painstaking work.
Damaged or restored plastic bumper is also puttied and then sanded until a smooth surface is obtained.
Painting a VAZ 2110 car
According to one of the owners of the “Ten”, who decided to paint his car himself, the painting took quite a long time. Although at first glance it seemed that there was nothing complicated about it. Moreover, it was necessary to paint the car in the same color, and not another, to give the car a brighter and fresher look. However, it was necessary to disassemble almost half of the car; I had to dismantle the hood, remove the headlights, doors, trunk lid. In the section of our website you can find tips on the care, operation and troubleshooting of the VAZ 2110. After painting, all parts must be put back in place. This begs the question: isn’t it easier to entrust the painting to car service specialists?
Primer and painting
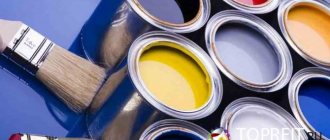
Most often, when painting a VAZ 2110 with your own hands, they use primer and paint in aerosol cans. It is more convenient to paint parts such as hood and trunk lids, as well as doors separately. The rear and front bumpers will also have to be painted separately, since they require the purchase of a special primer and paint for plastic parts.
Before priming, the surface to be treated must be degreased, and special attention should be paid to treating hard-to-reach areas (under the hood, headlight seats, sills, etc.). Special liquids are used for this. Of course, you can use pure gasoline or solvent instead, but then you need to check (for example, on the edge of the inside of the hood) how these liquids affect the rest of the paintwork or the plastic of the bumper.
The primer is applied according to the instructions printed on the surface of the aerosol can. After the surface has dried, it is sanded with sandpaper. Depending on the result obtained, the surface may need to be re-primed and sanded.
Next comes the most crucial moment - painting the body parts yourself. The prepared surface is degreased and the required number of layers of paint are applied, again following the instructions on the paint can.
Painting the entire body from the sills to the roof will require an impressive amount of consumables. Therefore, you need to calculate everything first. It will be a great shame if suddenly there is not enough paint for the same hood cover. The final stage of this work will be polishing the painted parts, or coating them with varnish from an aerosol can.
It takes a long time for car paint to dry completely. Therefore, if you decide to drive such a car, then the installation of headlights and other removed equipment should be done very carefully.
If the path lies in the “molar”...
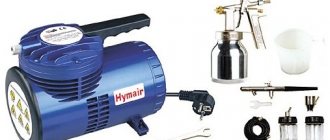
Today we will raise the topic of painting; the conversation will concern non-professional issues related to the choice of paints, guns and compressors. No, we invite not painters to today’s conversation, but their clients.
Humanity is characterized by a manic desire to divide. No, not to division in the sense of reproduction, although this is not alien to us. People are inevitably divided into women and men, into bosses and fools, into pedestrians and motorists. And the last category of homo sapiens, in turn, is divided into painters and their clients. There are, however, lucky ones who find themselves outside this classification. These people manage, without scratching their car even once, to exchange it for a new one after three years - and drive around without knowing any grief. But the worst enemies of the motorist - corrosion, crushed stone from under the wheels, a green snake that forces poles to cross the road in the wrong places, young writers with nails in their hands, and finally, the gate of a neighboring garage - are not asleep, and various-sized "painters", be it paint shops branded stations or cluttered garages of single wolves are not empty.
By the way, those who are used to quietly driving a new car for several years without problems now have a much greater chance of counting themselves among the painter’s clients. Alas, the quality of the paintwork on domestic cars is falling, as the classics said, “rapidly.” If VAZ is still balancing on the line between “bad” and “mediocre,” then all other factories seem to have declared war on their bodies. But paint stubbornly refuses to lie on bare metal! And at most, after a year and a half, the car “blooms” with rusty cracks and chips...
GRAY AND BLACK
If a car is thoroughly chewed up by corrosion or fatal circumstances, the question inevitably arises of replacing body parts: fenders, doors, sills, panels. And, as a rule, the client himself is sent to the market for spare parts. But it doesn’t matter - everyone can distinguish the “fifth” wing from the “sixth” one. Something else is bad. Almost all domestic body parts that end up on the shelves of auto stores and markets are substandard. Stamped with spent matrices, they not only do not provide normal clearances, but are simply unfinished. On the rear fender they “forgot” to weld the frame for attaching the gas tank flap, on the front fender they forgot to drill a hole for the turn signal repeater... But the painter should be concerned with another question. If your painter doesn't care what the part is primed with, then the paint results will be as predictable as Russian roulette.
Normal “gray” parts, so called for the color of the primer applied to the phosphated metal, have long become a rarity. God forbid that the factories process the bodies themselves according to technology, there is no time for spare parts. And “black” parts can be coated with anything, even nitro paint. And some “painters,” considering this a primer, calmly paint the part. The result is as permanent as a beauty's heart.
A normal conservation coating should not be removed with solvent, which is very easy to check. And the surest sign is that a real conservation coating scratched by a sharp object in no case flies off like a shell. And in any case, before painting, the surface of the new part must be sanded and only then primed. It’s a good idea, once in the workshop, to take a look at the machines that are “in operation” and figure out whether the local painters follow this rule or not. And if you have doubts when choosing a spare part, then it’s better not to take risks, buy a “bare” unprimed part. After all, firstly, manually removing the “linden” coating with a solvent increases the cost of work by about a quarter. And secondly, where is the guarantee that the painters will do this and then will not unanimously complain that for some reason the soil, putty, etc. are swelling?
Although even in the case of a “bare” part, not everyone can guarantee that everything is done correctly and there are no pockets of corrosion left under the paint...
PREPARATION
A good painter works with his own primers and putties, but for a “garage” client the likelihood of being sent to the market for them is also high. In this case, of course. You should listen to the advice of the master, but remember that buying a domestic primer is still a risky business. The famous GF-021 and the vaunted Togliatti “synthetics” are not always distinguished by real quality, and they are outdated a long time ago. And imported primer, of course, is more expensive. But if you are painting a car not for sale, but for yourself, then you should not skimp on materials for preparation. It is a good idea to carefully ask the painter if he uses a silicone cleaner. But the answer, most likely, will be negative - this branded degreasing product, which perfectly cleans the surface after sanding, remains exotic in our country. Meanwhile, it is very important to thoroughly clean and degrease the part to ensure good adhesion of the primer or paint to the previous layer. The presence of a reliable link between metal and paint is especially necessary for new parts, both “gray” and “black”, and even more so “bare”. “Bare” elements that have not undergone technological preparation after the stamp, have oil not only on the surface, but also in hard-to-reach places, require especially serious preparation. Thorough degreasing with a solvent, even a proprietary one, and extremely thorough sanding are not enough in this case. Firstly, the oil literally saturates the surface layer of the metal, from where it is not washed out by the solvent. Secondly, on “white” parts after phosphating there are traces of electrolyte - here the solvent is powerless. And thirdly, the painter will sand only where it is convenient to do so, and the main sources of corrosion, as a rule, are located in hard-to-reach places. So, whatever you say, it’s tempting to use a rust converter for treatment, and many people do so. The acid, which is usually included in such products, not only degreases the metal, but also ensures good adhesion (cohesion) of the soil. But Western companies themselves do not use rust converters and do not advise others - they claim that half a pound of active reagent residues can provoke the emergence of a corrosion center. So whether to use converters or not is still an open question.
If the “tin” was made in one place, and will be painted in another, then try not to delay the journey to the “painting” shop. Tinsmiths often leave bare metal surfaces after straightening work. But every day of driving in this form, as well as with the “black” parts welded but not painted, is another chance to return to the “painting shop” after the first puddle. And if you still have to travel (for example, a painter has a line), then you need to protect unpainted surfaces from corrosion with Movil or other means for hidden cavities, but not with greases like Litol. Painters look at such “defenders” as enemies of the people: it is very difficult to remove Litol, and if a lot of time has passed, then the rust also has to be cleaned off, revealing layers of putty.
A few words about all sorts of spoilers, thresholds, trims and other various “decorations”, usually made of fiberglass. Smooth and beautiful on the outside, inside they have pores and shells that fill with water in winter and crack when frozen. And if you want to see them intact and beautifully painted, then it is better to use expensive branded pounds, paints and special plasticizer additives. Beauty requires sacrifice... By the way, plastic parts are afraid of nafev and can “float” in the oven, warp or bubble, and the hardener, which is part of two-component modern paints, reduces the required drying temperature.
WHAT TO PAINT?
Let’s say right away that a hundred-pound jar of nitro paint and aerosol cans are nothing more than a half-measure from the harassing state traffic police. Although there are now Western companies offering repair enamels in aerosol packaging in a wide range of colors, they are hardly suitable for any more serious work. If you don’t have the money for “adult” painting, it’s better not to paint at all for now - painters prefer to remove rust and Movil rather than a layer of paint of unknown origin.
This enamel produced by the Yaroslavl plant was very popular in stagnant times, and among its advantages were the high mechanical strength of the coating and a modest price. And recently, only the last one has remained among the advantages, and extremely unstable quality has been added to the disadvantages - for example, high drying temperatures. Therefore, for those who still decide to save, it makes sense to give recommendations. When buying two or more cans, take them in one place and at the same time and check whether the lot numbers of the cans match - otherwise there is a chance of buying “off-suit”. And it’s not a sin to purchase the IZUR-021 drying accelerator; without it, the “Yaroslavka” sometimes does not dry at all.
Yugoslavian, but bottling near Moscow, Odihel paint differs only in that it is a little more expensive. Chromos, Color, Body, Autoluks are easy to use, but the quality of the paintwork is very average.
Finnish enamels Tikkurila and Sadolin are more common in our country. Reasonable price, a wide selection of numbered Zhiguli colors are the main components of their popularity. Tikkurila offers color mixing plants on the Russian market, Sadolin this year followed suit, and in addition released a transparent varnish for two-layer metallic coatings - exactly like those of “adult” companies. The varnish is inexpensive, and the shine of a body painted in two layers will speak for itself. By the way, you can also varnish regular paint - the appearance, mechanical strength, and corrosion resistance of the coating will improve.
Elite paints - Glasurit, DuPont, Sikkens, Spies Hecker, Standox - frighten the owner of an inexpensive car with a fabulous price. But, firstly, widespread competition forces the “elite” sellers to reduce prices, and secondly, only these paints, thanks to developed color matching systems, have a real chance of “getting into tune” (note, a chance, not a guarantee; keep this in mind if you are planning to buy an expensive cheaper paint), and thirdly, the quality of coating with these acrylic enamels is at the highest level.
So, we think that more and more clients of inexpensive paint shops will be guided by the well-known principle when choosing paints - “we are not so rich as to buy cheap things.”
M. DOROZHNY L. GOLOVANOV Photo of M. Dorozhny
Stickers
Using cool stickers and a VAZ 2112 tuned at no extra cost, also a kind of “Styling”:
- In this very inexpensive way, the owner can express emotions and show others their and their mood
- Ready-made stickers are widely sold in stores, although if you wish, you can easily make any vinyl stickers for your car yourself
- All you need is: a pencil, self-adhesive vinyl film, a stationery knife or sharp scissors, and self-adhesive mounting film (simple masking tape)
- Making car stickers begins with getting a design on paper.
- You can draw it yourself, or find it on the Internet, then print it on paper
- You cannot print a design directly on a self-adhesive film; you will damage the cartridge. Cut out a stencil from paper, apply it and trace it on self-adhesive tape, or simply draw the design you want on film (you can also transfer it using carbon paper) Then use a knife or scissors to cut it along the contour, without cutting through the paper
- Then we remove the material that is no longer needed and can glue it
- First, you should thoroughly clean the surface of the machine, then wipe it with a clean rag.
- After this, remove the protective film and stick the sticker on the prepared area.
- This is the easiest way to make car stickers
- However, if you want to get a complex pattern (multi-colored, for example), then you will need that same self-adhesive mounting film
- This is what will help you make a multi-layer sticker and simplify its application on an uneven area of the body.
- So, to make cool stickers for cars you will need vinyl film of different colors
- First, we make layer No. 1 made of black, and then glue it onto the red film on top using mounting film
Cut out the design on the film using a knife
- All that remains is to cut it out of the red film with an indentation of 1-2 millimeters
Pasted the first layer onto the film of the second layer
- It’s no different when making stickers directly onto your car windshield.
- The only thing you need to do to improve the protection of the sticker on top is not to rip off the film
- Vinyl stickers located on the rear window of the car are widely used for advertising.
Now making your VAZ 2112 car tuned will not be difficult for you, good luck in tuning!
Improved dashboard lighting
The VAZ 2112 dashboards have always had one problem: dim lighting. This was especially noticeable at night. So the first thing tuning enthusiasts do is change the light bulbs in the instrument panel. Initially, there are simple and extremely weak incandescent lamps. They are being replaced by white LEDs, which have two advantages: some are durable and economical. Here's what you'll need to get started:
- 8 white LEDs;
- medium sized flathead screwdriver.
Sequence of operations
To remove incandescent lamps from the VAZ 2112 instrument unit, you will have to unscrew it and pull it out.
- The steering wheel moves down all the way.
- Above the dashboard there is a visor into which a pair of screws are screwed. They are removed using a screwdriver.
The location of the screws holding the panel is shown by arrows - The visor is pulled out from the panel. To do this, you need to slightly push it towards you, and then pull it forward and up.
- Under the visor there are 2 more screws, which are unscrewed with the same screwdriver.
- The block with instruments is removed from the niche. The wires located on the rear wall of the unit are disconnected. There are also light bulbs there. They are unscrewed and previously prepared LEDs are installed in their place.
Light bulbs are unscrewed from the printed circuit board by hand, their location is shown by arrows - The wires are connected to the block, it is installed in a niche and screwed together with a decorative visor.
Video: removing the instrument panel on a VAZ 2112
Hood: features, modernization and replacement
The hood of the “ten” needs general modernization. No matter how modern the car is, at the factory some components, including the hood, are not given due attention. It turns out that taking care of the detail, the question of its full compliance with all parameters of comfort and style falls on the shoulders of the owner.
Peculiarities
The hood of the “ten” differs in its exterior from similar parts of other models produced by the domestic auto industry. There are a lot of them, but first let’s figure out what kind of body element this is and what its features are.
As you know, the task of the hood is to reliably protect the engine compartment and its contents from external influences.
In simple terms, the hood is a part that represents the cover of the engine compartment of a car. But the purpose of the hood is not limited to this alone. Here are its main functions:
- Reliably protect the power unit;
- Influence the aerodynamics of the vehicle and improve its performance.
- Absorb the noise made by a running engine.
The “ten” hood consists of:
- Loops securing it to the body;
- Upora (on the “ten” it is gas-filled);
- Fuse (hook);
- Lock stopper and nuts.
The hood is hung in front of the frame of the “ten” on special-purpose hinges. As for the fuse or hook, it has the function of automatic protection against mechanical opening. If the hood is open, a gas-filled stop prevents it from closing.
Painting
No car body element can boast of an impeccable appearance after a certain period of time. So is the hood. Over time, scratches appear on it, weak zones form, which immediately become covered with rust. Many owners, in order to avoid problems of this kind, simply replace metal with plastic. A plastic hood for the “ten” can recently be bought at any auto store.
Owners of a VAZ 2110 with a metal hood can also be recommended to do the painting themselves. A newly painted hood will look like new, standing out stylishly from the background.
Some important tips to follow during the painting process:
- The “Ten” needs to be thoroughly washed and all hard-to-reach places removed from dust and dirt. A brush and a special shampoo will help in this case;
- The hood will need to be removed;
- If traces of corrosion are found on the metal, then you should not paint in these places. Rust will take its toll through the paint. For this reason, it is better to cut out the rusty areas, and then apply patches and carefully weld them;
- Place the hood on a special trestle, made independently from boards;
- It is necessary to degrease the surface with a special solution;
- Apply acidic primer, preferably in a thin layer;
- Putty and a second layer of degreaser are applied only after the soil has completely dried;
- The paint must also be applied to a dry surface, using a special tool;
- The paint is applied in several layers;
- The final stage of painting involves sanding and applying varnish.
Noise insulation
One of the most significant parts of the VAZ 2110, the most important element of body iron, is the hood. True, the level of noise insulation carried out by the plant on it leaves much to be desired.
How to dilute varnish for car painting?
There are several types of varnish compositions. Their consumption will depend on the ability to form a glossy surface on the car body and on the type of surface to which they are applied. The varnish must be diluted in strict accordance with the instructions.
headlight varnish treatment
All ingredients must be carefully filtered (you can use a special filter or regular nylon for this). It is better to prepare the mixture in a special container and not dilute a large amount at once. You need to add to the varnish:
- Hardener (according to instructions).
- Anti-silicone (this component gives the varnish additional durability, you need to add about 5%).
- Accelerator (3%, it promotes faster drying).
Various additives will make the painting process easier, but there is an increased likelihood of side effects. Therefore, it is necessary to strictly follow the dosage indicated in the instructions.
Next article: DIY ventilation in a paint booth. Previous article: Do-it-yourself tinting of headlights (lanterns) with film and varnish, video.
Replacing the braid on the steering wheel
The standard braid on the VAZ 2112 is made of leatherette, the surface of which seems too smooth to many. The steering wheel simply slips out of your hands, which is very dangerous when driving. Therefore, almost all owners of “dvenashki” change the standard braids for something more suitable. There is now a huge selection of braids in spare parts stores. The steering wheel of the VAZ 2112 requires a braid of size “M”. It is put on the steering wheel and sewn along the edges with ordinary nylon thread.
Clamp needles and nylon threads are used to sew the braid together.
