July 22, 2016 Lada.Online 29 543 12
Depending on the vehicle’s configuration, the factory installs different blocks of steering column switches (popularly called snail). The volute is replaced to install a multifunctional steering wheel with buttons or in case of breakdown. Let's look at the features of removing and installing the steering column switch on the Lada Vesta sedan and Lada XRAY crossover.
1 – driver airbag module (MNAPB); 2 – steering wheel; 3 – block of steering column switches; 4 – lower steering column casing; 5 – ignition switch; 6 – upper steering column casing; 7 – steering shaft; 8 – steering mechanism; 9 – protective casing for the steering rack cover.
Removing the snail
You will need: remove the negative terminal of the battery and the steering wheel, prepare a Torx key T10, T20.
Procedure:
- Remove the upper and lower steering column casings (plastic lining) by removing two screws from the bottom (No. 3), and then unclip the fasteners;
- Loosen the screw (No. 2) securing the steering column switch block to the steering column housing;
- Press the locking tab (No. 2) and remove the steering column switch block from the steering shaft housing.
We repair the device
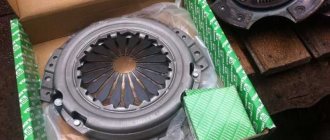
The switches located under the steering wheel of a VAZ-2107 car, at the first sign of a malfunction, require first of all to find the reason why this or that function does not work. To find the cause, first remove the device and try to determine the problem yourself. There are not many reasons for the breakdown, but often there is a need to replace the device with a new one. So, in order to determine the reasons for the failure of paddle switches, let’s consider what parts they consist of, and a photo will help us for this.
The design of the switches is non-demountable. If problems arise with the operation of the control levers, disassemble them and try to make repairs. Even if it fails, you can always buy a new component.
Remove the steering column switch on a VAZ-2107 car in the following order:
- Disconnect the vehicle from the power source and remove the steering wheel.
- Next, remove the casing that secures the steering column shaft, on which the control levers are attached. To do this, use a Phillips screwdriver to unscrew the 4 screws and self-tapping screw.
- After removing the housing, we move on to the levers themselves. Disconnect the power cord strip.
- Unscrew the screw holding the switches located at the bottom.
- By loosening the fastening, you can remove the switch without much effort.
Now the device can be repaired after first checking it for damage. If they are not there, clean the contacts in the connector block and bend the sagging springs. Also check if the wire has been unsoldered from the unit. After the repair, you need to check whether you have fixed the problem. To do this, connect the pads and install the terminals on the battery; if all functions work, then the repair was successful.
How to replace a broken device
If after repair the paddle switch does not work, then there is no way out, you will have to buy a new one. The cost of such a switch on a VAZ-2107 is around 300-500 rubles. This is not too much of an expense for such an important control. Now comes the time for replacement, which consists of removing the old one and installing a new element in its place. How to remove a non-working device is already known, so let’s get down to business. To do this, you need to install the device in place, secure it and connect the power wires. Replacement does not involve any difficulties, after which you check the functionality of the device and install the casing and steering wheel.
The process of repairing and replacing switches under the steering wheel takes no more than an hour, after which the device will work as if the car had just left the showroom.
Sources
- https://motorchina-online.ru/avto-lada-drugoe/podrulevoj-pereklyuchatel-vaz-2107.html
- https://motorchina-online.ru/avto-lada-remont/dvornikov-vaz-2107.html
- https://lemzspb.ru/zamena-podrulevogo-vyklyuchatelya-2107/
- https://inkam-auto.ru/raznoe/kak-razobrat-pereklyuchatel-povorotov-na-vaz-2107.html
[collapse]
Removing the steering column switches
The steering column levers can be removed without removing the block and steering wheel.
To remove the left switch (turn signals and headlights):
- Unscrew the 2 fastening screws (No. 2);
- disconnect the connector with wires (No. 6);
- remove the switch from the block (No. 1).
The right switch (windshield wiper control) is removed in the same way.
If only the signal does not work
To repair the Renault Logan steering column switch, disassembly is performed:
- To divide the mechanism into two halves, you will need to squeeze out six latches installed around the perimeter of the protective housing.
- Next, the Renault Logan light switch is dismantled. To do this, you need to move it to the side and pull it up.
- At the next stage, the slider and contact part are cleaned of dirt deposits and carbon deposits. In this case, the signal contact is located on the rod, and the mating part is the plate. For cleaning, use Scotch-Brite, which is wrapped in a small piece on the tip of a flat-head screwdriver. After this, everything is wiped with alcohol.
- The assembly process of the Renault Logan steering column lever is carried out in the reverse order. At the stage of connecting the power supply, it is recommended to immediately check the functioning of the light and sound modes.
Snail installation
When reassembling, the front wheels must be aligned and the rotating contact plate must be locked in the middle position by the safety lock. For this:
- we determine the maximum number of revolutions of the contact disk (No. 2) by rotating it from the extreme left to the extreme right position (without using force);
- turn the contact disk to the middle position, counting half the maximum number of revolutions from the extreme position;
- align the holes (No. 4) for the fuse on the disk and the hole (No. 5) in the body of the rotating device and install the fuse (No. 6).
The screw tightening torque is 1.6…2.4 N.m (0.16…0.24 kgf.m).
Let us remind you that the website contains other instructions for servicing and repairing Vesta or XRAY with your own hands. The necessary information can be easily found using the search (in the upper right corner of the site) or by content (Vesta, XRAY).
Keywords: Lada Vesta steering wheel | Lada Xray steering wheel | turn signals Lada Vesta | turn signals lada xray | fog lights Lada Vesta | fog lights lada xray | headlights of Lada Vesta | headlights lada xray | tail lights of Lada Vesta | rear lights lada xray | windshield wipers for Lada Vesta | windshield wipers lada xray
+1
Share on social networks:
Found an error? Select it and press Ctrl+Enter..
Manual mode as an objective necessity
If we abstract from the issues of accelerating dynamics and increasing productivity, then there is a more practical application for the design of steering column switches. Truck expert Stephen Elmer commented: “When towing a heavy trailer, especially on long inclines or descents, it may be necessary to make shifts, but it is advisable to keep your hands on the steering wheel to maintain control of the vehicle.”
When driving SUVs or crossovers equipped with paddle shifters, such as the Jeep Grand Cherokee or Subaru Outback, drivers can use the quick shift paddles when approaching a hill to maintain constant acceleration. The opposite is also true: they can manually brake the car when going downhill or approaching a traffic jam. Automation cannot see hills and analyze the upcoming situation, so changing gears in anticipation of an ascent or descent will allow you to use the vehicle's resources more efficiently.
Heuschle explains that engine braking, which is only possible in manual mode, will not damage the expensive transmission. “We are ready, according to customer needs, to equip vehicles with such switches,” he said. “At the same time, the automatic system will not allow you to downshift when the engine speed is close to maximum.” He added that SRT and ZF carry out a lot of testing to ensure that the transmissions can cope with the rigors of everyday use.
“Endurance tests are carried out manually, which allows us to guarantee a high service life of components and assemblies.” The designer explained how these tests are carried out and what loads the most critical elements are subjected to. “We do 50 runs of the strip with the hardest tires and then 50 with the low rolling resistance radials, both teams driving as aggressively as possible.”
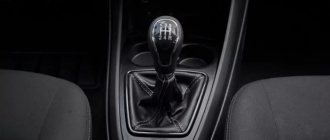
It is worth noting that until recently, paddle shifters were the prerogative of automatic transmissions, but this year Master Shift designers presented their development in the field of manual transmissions to the general public. In the car, the clutch pedal is retained, but the stage selection is controlled by electrified steering column switches.
Another example of the feasibility of automating the gear shift process is driving on a snowy road. Most automatics will allow the car to start in second gear rather than first, which will limit the amount of torque sent to the drive wheels and also help prevent wheels from spinning or losing traction in the snow.
Most cars can be equipped with a trail mode that automatically does the same thing, but paddle shifters put the driver in control. According to Heischle, switches are “when you want to be in control of a situation. Driving a car is a labor-intensive process, automation of which allows you to achieve the best results, however, the current level of technology does not yet allow us to fully anticipate all possible situations.” And these situations are usually related to driver preferences.
So, if you are not satisfied with the performance of the automatic transmission, do everything yourself, do not be afraid to take control.