Spray painting
Do-it-yourself repairs are not a quick and painstaking task. Even to spray paint, you need to prepare the surface. I want the paint not to peel off and the new shiny sides not to be dotted with painted scratches.
Spray painting parts
In order for the paint to lay evenly and last as long as possible, actions are required as in the usual repair of a damaged surface: leveling, putty, primer and sometimes intermediate procedures. But which parts exactly require special attention?
Painting the main details
So, let's begin. The moped doesn't have many parts that need painting. First of all, these are the tank, sides and tail. Wings. The tank is made of steel and can be painted using automotive technology. If the dents are shallow, then they can be sanded and puttied along with the rest of the scratches. Then go over it with sandpaper, cover it with a primer and after drying apply paint. Both primer, paint, and varnish can be applied with a spray can. It will be necessary to give several layers after the previous coating has completely dried. You can apply stickers before applying the varnish. Under varnish they look richer and cannot be washed off with a high pressure washer.
Scooter decorated with stickers
Moped sides and fenders are usually made of thick ABS plastic. Putty and primer must be purchased specifically for this material. The sidewalls do not suffer much from use. Maybe they don't need to be painted? Only if the painting does not change the concept.
How to solder cracks correctly
The front part of the wing will most likely undergo extensive repairs. The cracks need to be soldered with a soldering iron and then with the same soldering iron, press in the wire mesh, which can be bought at a hardware store. This is a mesh for plaster. The cell size is two millimeters. The mesh will strengthen the fault. The scar from the soldering iron must be cleaned with coarse sandpaper and then puttied. Further painting operations are the same as with the tank. But there must be primer for plastic. Otherwise the paint will bubble.
Sealing a crack on a scooter
We restore plastic
The plastic of the scooter, although it is also made of ABS, is thinner. And there is a chance, if you start painting a scooter, you will ruin everything with your own hands. First, it is necessary to determine how many elements of plastic are lost irretrievably. Is the repair justified, or is it easier to find another part, a new one? A careful scooter owner never leaves plastic fragments at the crash site.
Even a piece crushed to smithereens can be folded like a puzzle and soldered on the wire mesh, which has already been discussed. Although for many scooters the Chinese have established the production of cladding parts. The new plastic is already painted and if the color does not match, it can be changed. Simply spray paint without additional preparation. Just matte it a little with sandpaper (to matte means to make the surface matte).
Severely damaged part after sealing
The entire process of restoring the plastic will take much longer than the rest of the scooter's painting. Repairing plastic with a soldering iron is quite a harmful task. All work must be carried out in well-ventilated areas .
Preparing for painting
Before painting, the area where the paint will be sprayed must be free of dust. Because electrified dust will stick to the paint and then no amount of sanding will remove this grain. If you are desperate to achieve the result you expected with a spray can, and still decide to take the plastic to professional painters, persistently warn them that there is no need to dry plastic in the drying chamber. Let him stay with them longer. In the drying chamber, the parts will simply shrink, like a pure wool sweater in boiling water. Afterwards, all this “beauty” can simply be thrown away. The facings will not stretch over the fastening points.
Scooter plastic painting
The main problem when painting plastics is poor adhesion of paints and varnishes to the surface of the plastic. But chemists found a solution and created a product under the scientific name adhesion promoter.
In the retail chain, this product is often referred to as 1K primer for plastic, although, in fact, it is not a primer. Often inexperienced painters call the same material a plasticizer, which is also completely wrong. The plasticizer is a thick, clear liquid used for painting very flexible plastics and is added directly to the primer, acrylic paint or varnish, while the adhesion promoter is applied directly to the bare plastic.
Painting a scooter is almost no different from painting a car bumper. The only difference is the different color scheme. In other words, you most likely won't find the exact same paint, even in a color matching lab. There is only one way out - to paint the part completely, in a similar car color.
How and with what to paint a scooter yourself at home?
1 1 1 1 1 1 1 1 1 1 Rating 3.00 (10 Votes)
Today, such a means of transportation as a scooter is gaining increasing popularity among teenagers, young people, and older people. A modern, economical and easy-to-drive moped, now called the fashionable and modern name SCOOTER, will allow you to get to work after spending only half a liter of gasoline, give rides to friends or girlfriends, go to the nearest store in the country and much more. At the same time, situations often arise when the surface of your scooter may be damaged - hitting a curb or a large stone, the scooter may fall, you may get caught in another scooter, or even get into a small accident, as a result of which the paintwork of your two-wheeled friend will be damaged. Don’t get upset, rush to the car painters and count your losses.
You can repair most scratches and damage to the paintwork yourself. This guide will help you learn how to paint a scooter (moped) at home using an aerosol can. We will tell you about both repair and decorative painting of a scooter. Paint over scratches and abrasions, repaint the entire scooter in a different color, apply an emblem or design to the scooter’s gas tank - it’s all quite simple
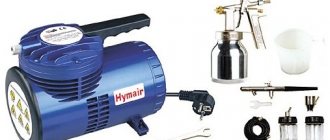
What do you need to paint a scooter yourself?
Preparing the scooter for painting
It had a few scratches after a little fall and now we will make it new again so that no one can guess what happened to me. If you are not interested in repair painting, but in completely repainting the scooter or applying an image using a stencil, then the preparatory work will be almost the same, except that to work with the stencil you will not need to process the paint with sandpaper. Now that we have everything we need to paint the scooter, let's move on to preparing our unit for painting. As an example, I will tell you how I painted my Yamaha Vino YJ50 scooter.
Step 1 Wash your scooter with warm water and soap
Step 2 Degrease all surfaces of the scooter that will be painted
Step 3 Cover the parts of the scooter that you will not be painting. This can be done using paper tape and paper or covering film.
Important Tip 1. Seal all the small cracks on the surface of the scooter in the parts that you are not painting. I accidentally missed a couple, and even though they were very small, the excess paint leaked through them and ended up in the wrong place, so I ended up having to remove the drips.
Important Tip 2: Do not use newspapers to cover the parts you are not painting. Ink from newsprint is printed onto the paint. Use clean printer paper, there is no such problem.
I covered all the emblems, serial number plates, etc., as well as all the parts that I couldn't remove from the scooter, but didn't want to paint.
Step 4 Sand all scratches and damaged surfaces with sandpaper. Start sanding with coarse sandpaper, then use finer sandpaper to finish the surface so that the surface is as smooth as possible.
Step 5 If the scratches are deep or there are dents on the surface of the scooter, use putty. Any automotive putty is best, because a scooter is almost a car
Step 6 If you used putty, go over the sandpaper again. The more thoroughly the sanding and smoother the surface, the better the paint will adhere.
Step 7 Wipe the surface with a clean, dry cloth to remove dust and dirt
Scooter painting process
Step 8 Next you need to prime the surface. One coat of primer is enough
Step 9 If, after the primer has dried, there are streaks and uneven spots somewhere, lightly sand with the finest sandpaper. Wipe everything again and degrease the surface of the scooter
Step 10 Before spray painting the scooter, shake the can thoroughly so that the contents have an even consistency. 20-30 seconds is enough. To avoid paint drips, paint the scooter from top to bottom, applying paint from a distance of 25-30 cm. Make sure that the paint applies evenly and all areas are painted equally well
Step 11 As a rule, the scooter is painted in 2-3 layers. Before applying the next coat of paint, let the previous layer dry, this should take 20-40 minutes (depending on whether you are painting the scooter indoors or outdoors and what time of year it is). We do not recommend painting your scooter outdoors at sub-zero temperatures or in the rain. After you have applied the final coat of paint to the scooter, let it dry for 1-2 hours
Step 12 This is an optional step. If you want to further protect the painted surface of your scooter, as well as add more depth and shine to the color, you can apply an acrylic spray varnish to your scooter. Varnish drying time 1-2 hours
After you have completely completed painting, varnishing and drying the scooter, remove the protective film and tape, and then install the accessories and decorative elements that were removed initially.
If you followed the proposed technology, then after completion of the work your scooter will look like new! I did the painting job on the scooter in the garage and it took me just over two days - just enough work for the weekend!
How to paint the plastic of a scooter yourself
Since last year, in warm weather I have been riding around the city on a scooter. There are a whole bunch of advantages to this - you don’t get stuck in traffic jams, you fill up for 150 rubles and you drive for 3-7 days, i.e. cheaper than public transport. Last year I had a Honda dio 28 zx, but it was small and it wasn’t very comfortable to sit on, so I decided to change it to something a little larger. This is how I got the Gilera runner. Naturally, I didn’t buy it new, and after purchasing it I immediately peeled off all the stickers that were on it. Under them, a huge number of scuffs and scratches of the plastic were discovered. It was decided to repaint it.
This is what it looked like before painting:
What I used (I bought everything from a store near my house, hence the links to it):
Primer KUDO KU-6002 520ml for plastic black aerosol x 1 Paint Black glossy Body 400ml aerosol x 3 Varnish Body 400ml aerosol x 3 Sandpaper No. 60, 80, 150, 320, 800 I sanded everything by hand, but you can also use a sander, The main thing is not to overdo it. I had everything the old fashioned way, a wooden block, a piece of foam on top for softness, and sandpaper on top. I didn’t sand off the paint all the way down to the plastic where it stuck well. I started sanding with large grains and then gradually moved on to smaller grains. I sanded it to something like this: The mistake I made was that after sanding the first part I immediately started painting it and while it was drying I sanded the others. It’s better to sand all the parts right away, then thoroughly clean off any dust from the old paint, and only then start painting. I used regular gasoline as a degreaser, because... There was nothing else at hand. Primer and paint must be applied from a distance of no less than 25-30 cm, otherwise there will be overflow. In this photo you can see that it was overfilled in the corner. Be sure to let each layer dry thoroughly, despite the 10 minutes indicated in the drying instructions. It is better to give at least 20-30 minutes to each layer. During the process of applying intermediate layers, if you mess up somewhere, you can sand it down with fine sandpaper. I applied 3 layers of paint and then another 3 layers of varnish, but more is possible. In the end it turned out like this:
enut.ru
To watch online, click on the video ⤵
How to paint the plastic of a scooter with your own hands, the easiest and cheapest way using a spray can Read more
How to paint a scooter Read more
Scooter painting process. Part 1 Read more
Painting plastic with your own hands What happened Project stealth skiff 50 Read more
HOW TO MAKE A 100% LOOK OF PAINTING rims on a scooter Read more
How to spray paint a scooter Learn more
Finally I painted it! Dio for 1000 rubles Read more
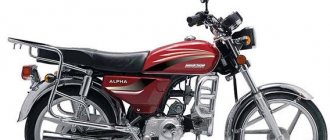
Painting the Alpha Moped Read more
#12 Yamaha Jog painting rims, assemble the scooter from scratch. More details
How to paint a moped or scooter with a spray can? How to paint plastic on a moped at home - part 1. Read more
Project. Honda Dio. Painting plastic. More details
Painting plastic on a scooter Read more
WE WILL PAINT A MOPETED FOR 1000 RUBLES. /HOW TO PREPARE A SURFACE FOR PAINTING/ SERIES No. 9 PBS Read more
Top paint for a Minsk motorcycle. Painting a USSR motorcycle with your own hands using a spray can Read more
Alpha moped #2 Painting More details
How I painted plastic on a Scooter Read more
ENGINE WASHING \ PAINTING A MOPED ENGINE FROM A SPRAY CAN More details
Painting a scooter with your own hands using a spray can // Live video Read more
Do-it-yourself spray painting of a scooter
Painting a scooter is not a cheap pleasure, but sooner or later everyone thinks about painting their “favorite”. Before you start painting, you should decide on the color and type of paint, and also inspect all external parts of the vehicle. The scooter painting video is an opportunity to get acquainted with all the nuances of the work.
Choosing paint for a scooter
You can use almost any paint for a scooter; it all depends on your budget and how much time and effort you are willing to invest. You can use cheap paint ML 1110. Its advantage is price, a large selection of colors, and the absence of the need to varnish. The disadvantage of paint is that defects will be very difficult to eliminate. In addition, this paint takes a very long time to dry.
The next option is acrylic paints. They are easy to apply, dry quickly, do not require varnish and, if necessary, the part can be repainted after a few days. The main disadvantage is the narrow range of colors.
Alternatively, you can buy metallic. These are quite expensive paints, they are difficult to apply and require several layers of varnish. At the same time, the abundance of colors will suit the taste of the most demanding scooter owner.
Scooter painting technology
The procedure for painting the plastic of a scooter consists of the following steps:
- Disassembly and troubleshooting.
- Plastic repair.
- Primer and painting.
Before starting work, the scooter must be washed. All plastic parts are then removed and thoroughly inspected for cracks, scratches, dents and other changes in shape. It is possible that some parts will need to be replaced. The result of this stage is the division of all elements into two types: those that require repair, and those that can be painted immediately.
There are quite a lot of technologies for repairing plastic. Let's look at one of them. Initially, you need to clean the surface of paint using sandpaper. Then heat up the soldering iron and take a fine mesh. Use a soldering iron to fuse the mesh into the plastic.
Thus, the crack is eliminated. You can cool the plastic with water. Then you need to clean the repair area. After that we degrease the surface and then apply putty. Only after the putty has dried, it needs to be cleaned a little and you can start painting.
First we select a primer. If repair work has not been carried out, you can buy a one-component composition. After repair, a two-component primer is used. Before priming the surface, it must be degreased.
The primer is applied in several layers and after complete drying, the surface must be made perfectly smooth. Before painting, the parts must be degreased again. The paint should be diluted in accordance with the requirements specified on the label.
It is best to paint using a spray gun. The application of paint will be as even as possible, and there will be no drips. Photos of the scooter's painting indicate the main mistakes.
Spray painting a scooter indicates low professionalism of the owner. But in some cases a good result can be obtained. To paint in two or three layers, you need to purchase 5-7 cans of 0.5 liters each. The can must be shaken well. You can start painting.
The optimal distance is 20-40 cm from the surface. After 20-30 minutes. you can apply a second layer. If there are no drips, after 50-60 minutes. You can start coating the surface with varnish. If you wish, you can find a video of painting a scooter with your own hands. This will help organize the painting process more accurately.
Autoworld news
(Rate this article)
motoholder.ru