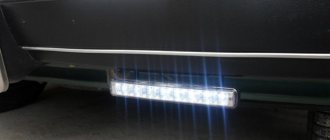
I have long been puzzling over why good thoughts and useful ideas go exclusively into the heads of foreign automakers and auto engineers... For some reason, foreign cars always emphasize useful nuances such as ignition switch illumination, which make life easier for the driver and make driving more enjoyable and convenient. Proof of the above is not only the illumination of the ignition switch, but also the illumination of the interior handles in the cabin, heated seats, a rear view camera, electric windows, in general, foreign cars have many pleasant little things that help “live” and which our cars lack so much. Today, we will talk about illuminating the ignition switch, or rather, about how to make this beauty with your own hands from simple improvised materials.
I had a desire to correct the shortcomings of VAZ engineers a long time ago and I spent a long time thinking about how best to implement the backlight, and settled on LEDs and plexiglass. The main thing in carrying out this kind of tuning was to preserve the color scheme, that is, to choose an LED of exactly the color that would fit into the lighting of the entire cabin.
After thinking a little and practicing with search engines, I chose an option for myself, which I will tell you about in detail today. The ignition switch illumination in this design looks beautiful and is almost no different from the original factory versions.
LED illumination
The best option for creating lighting is to install LED illumination.
It is very important to maintain the color scheme in which the car’s interior is made. If you illuminate the ignition switch in the same shade as the other luminous elements, the effect will be simply fabulous. Of course, there is a standard backlight, which is an ordinary light bulb. Its glow is directed directly into the ignition switch cylinder. However, such a device is inconspicuous and does not look very aesthetically pleasing. LED lighting looks much better. In fact, to create it, you just need to replace a standard light bulb with an LED. However, such a replacement will not bring you the desired result. A more modern and attractive option is ring-shaped lighting. This is exactly what we will teach you to do.
Drivers who do not know how to illuminate the ignition switch will be able to find the answer to this question in our article. We will tell you how to create such a device from available materials. So, the first thing you need to do is go to the store for all the necessary components.
What types of backlights are there?
Motorists who want to transform their car have various options for decoration:
- use of universal backlight sets offered in car dealerships;
- installation of blocks from other brands of cars that are suitable in size;
- creating an ignition switch illumination with your own hands.
The most modern option for lighting the area for the ignition key is the installation of LED elements. In addition to saving energy, they have another advantage: unlike classic lamps, diodes practically do not heat up. The preferred shape for such a built-in flashlight is a ring.
Important! The use of a colored shell helps give the lighting the desired shade.
The convenience of factory universal models lies in the possibility of placing rings on almost any car model. The kits also contain connectors and plugs that make it easy to connect/disconnect contacts as needed.
Instructions for creating backlight
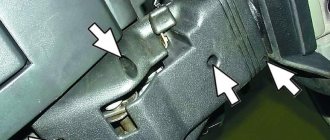
First you need to completely disassemble the steering column trim and remove the ignition switch. Using a soldering iron, attach the resistor to the LEDs. Next, you need to solder two wires to the corresponding poles of the LEDs.
Now take the plexiglass and cut out a round ring of the required diameter from it. You need to make a small hole in the center. Using a thin drill, make several holes in the end of the ring. LEDs will be installed in them. If the plexiglass is thin, we recommend fixing the LEDs using silicone or superglue.
If you are using LED strip, you do not need to drill holes in the end of the plexiglass. It is enough to drill a small hole in the lock body. Then its sides will allow you to securely fix the tape.
After collecting all the backlight parts, carefully check your device. Do not immediately put the lock in place. First, create darkness in the cabin and try to achieve an even dispersion of light. If necessary, make the back section of the plexiglass frosted - this will allow you to achieve a uniform glow.
So that later you don’t have to disassemble the structure again, first make sure that the backlight is working properly and the plexiglass is not loose. After this, you just need to connect and insulate all the parts, and then reassemble them in the reverse order. Since the ignition switch illumination should light up when the car doors are opened and go out after they are closed, it is necessary to connect it to the interior lamp. Using the power supply of the lampshade, bring the lighting to where it is more convenient for you - for example, to the left pillar. The result is that when the car is disarmed and the door is opened, the backlight lights up, and when the engine is turned on and the alarm is set, it goes out.
The video shows what the ignition switch illumination looks like:
Light ring made from a plastic bottle
Let's look at another, more unusual way to create a backlight ring. The main item you will need is a plastic bottle with a wide neck (for juice or milk). There is a place on the neck of this bottle where the cap is attached. We need a blank in the form of a ring with 2 sides of different diameters.
The original ring size is slightly smaller than the ignition cap, but this can be corrected. Take a beer bottle and put a protective ring from a plastic product on its neck. Draw a circle along its bottom side on the bottle. It will act as a boundary along which the part needs to be expanded.
Now cut off the neck part of the plastic bottle. We'll need it later. Heat the beer bottle evenly using a hair dryer or gas stove. We recommend that you protect your eyes with goggles. Then put the ring blank on the neck and push it to the drawn line. Use another plastic bottle for this, as the glass will be hot. Just string it on top, pushing the ring forward.
The plastic ring will heat up and stretch to the required size. Allow it to harden, as the material becomes plastic when exposed to high temperatures. Then it can be removed and slightly heated again - then it will easily fit onto the ignition switch.
In principle, the lighting ring can be made from other materials. For example, a fiber optic wire is perfect. You can purchase it at a store that offers network equipment. Instead of plexiglass, you can also use a regular jar lid, cutting a ring out of it.
You will see for yourself that an illuminated ignition switch looks more attractive and respectable. Plus it's very convenient. Now you will not need to search for the well by touch in order to turn the key in it. In addition, by making your own ignition switch illumination ring, you will save a decent amount of money. In a car store, such a device costs several thousand rubles. And do-it-yourself lighting will cost you cheap and cheerful.
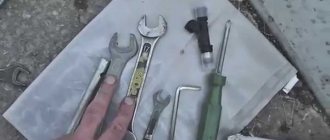
Required materials and tools
You will need the following components and tools:
- LEDs (or LED strip) - 3 pieces or more;
- epoxy glue or other instant adhesive;
- soldering iron with all necessary accessories (rosin, solder, tin);
- thin drill;
- resistor (1 kOhm);
- plexiglass.
Having purchased everything you need, you can begin work on installing the backlight. If you don’t know where to buy plexiglass, contact a company that sells advertising materials. Typically, it is used to create billboards. The cost of plexiglass is about 200 rubles per kilogram.
The video shows how to connect the ignition switch illumination:
DIY ignition switch illumination on a VAZ
I have long been puzzling over why good thoughts and useful ideas go exclusively into the heads of foreign automakers and auto engineers... For some reason, foreign cars always emphasize useful nuances such as ignition switch illumination, which make life easier for the driver and make driving more enjoyable and convenient. Proof of the above is not only the illumination of the ignition switch, but also the illumination of the interior handles in the cabin, heated seats, a rear view camera, electric windows, in general, foreign cars have many pleasant little things that help “live” and which our cars lack so much. Today, we will talk about illuminating the ignition switch, or rather, about how to make this beauty with your own hands from simple improvised materials.
I had a desire to correct the shortcomings of VAZ engineers a long time ago and I spent a long time thinking about how best to implement the backlight, and settled on LEDs and plexiglass. The main thing in carrying out this kind of tuning was to preserve the color scheme, that is, to choose an LED of exactly the color that would fit into the lighting of the entire cabin.
After thinking a little and practicing with search engines, I chose an option for myself, which I will tell you about in detail today. The ignition switch illumination in this design looks beautiful and is almost no different from the original factory versions.
FakeHeader
Comments 43
It turned out great) tell me what brand of milk, I’ll do the same)
Prostokvashino, like in childhood. Any milk bottle with a neck like this will do.
yeah, I suffered too once, it was so boring. And the DRLs are flexible in optics and there are different overexposures. Then I got tired, sold the bucket of it. And I realized that everything you don’t do doesn’t affect the selling price, and it won’t surprise anyone. except the children from 3B class.
I don’t know about you, but I do it for myself.
Not practical to the point of horror! In fact, while driving, it is not needed at all, since it does not carry a semantic load (unless, of course, you suffer from illumination masturbation :)). A more practical application is to turn on the backlight when the door is opened and fade out with a delay after the door is closed. Example: at night, you open the door, the interior and ignition lights turn on; you sit down, close the door, the interior lighting goes out, and the lock illumination continues to work for about 15-20 seconds. During this time, you will have time to insert the key even without the habit. :))
Do you generally ignore comments? I will have a backlight unit! You don't need to tell me how to do it. I know it myself.
is it constantly on? Does it interfere with driving at night? The tape is redundant; 3 LEDs would be enough. It is better to make the algorithm like this: when opening the door + 30 seconds after closing, and also 30 seconds after turning off the ignition. By the way, this is how the light in the interior of my Ford turns on, it’s very convenient (but it cost me quite a headache when installing the start-up signal).
Now it's time to make the ignition switch illumination itself.
1. First of all, solder the resistor to the LEDs.
2. Solder two wires of different colors to the poles of the LEDs.
3. Make a ring of the required diameter from plexiglass.
4. Drill the required number of holes in its end to insert LEDs. If the thickness of the plexiglass does not allow this, try to fix the LEDs in some other way, for example using glue.
5. If you have an LED strip, you can use it, then you don’t have to drill the ends of the plexiglass, just drill a hole in the lock body so that the sides of the lock securely fix it.
6. Do not rush to install everything, try to achieve the most beautiful glow, the dispersion should be uniform, if necessary, process the back of the ring, or remove the chamfer installed on the ignition switch.
7. Illumination of the ignition switch is not done just once, so make sure that the plexiglass sits tightly and nothing is loose anywhere; it will be very disappointing if after several days of operation you have to disassemble it for modification.
8. That’s basically it, all that remains is to connect the lock illumination to the power supply and assemble everything in reverse order.
That's all, the result as you see is impressive, all you have to do is wait until it gets dark and start using it. In general, the illumination of the ignition switch on the VAZ cost me less than fifty dollars, but it looks expensive and chic!
Using LED strip
To make such a backlight you will need:
- LED strip (5 – 15 cm, depending on the size of the lock);
- Thermocembric;
- A pair of connectors (male - female);
- 1 - 2 meters of wire.
In this case, the lighting will be done directly in the lock body. It is advisable to match the color of the tape to the backlight of the panel:
- The plastic panel is removed, after which the lock cylinder is removed. To do this, you need to pry off the plate covering it. After which you can easily pull out the cylinder, to do this you need to turn the key to the position
; After this, the plastic ring is removed from the larva. To do this, use a utility knife to pry up one of the latches and remove it. If you look inside the ring, you can see the partition. It is carefully cut in half;
DIY ignition switch illumination
This article provides an example of organizing the lighting of the ignition lock cylinder on an OPEL VECTRA B (pre-restayl) car. But this technology can also be applied to other cars. The article in no way pretends to be an adulation, but presents the reader with an inexpensive and quite effective way to improve the comfort of your car.
1. Introduction. — We have a car OPEL VECTRA B 1996. The car was inherited from a rather neat previous owner and if you don’t pay attention to the little things, you can say it’s in solid four condition. But a new broom sweeps in a new way. Many novice car owners know the feeling when they want to immediately re-equip the car to suit themselves, add a bunch of gadgets and devices.
When you drive a 9, you don’t pay any attention to the creaking of the dashboard, burst plastics and other rubbish. What do you want? This is a 9. But when you switch to a foreign car, you immediately feel how your level of needs and requirements for car comfort rises. So I began to notice that it is quite inconvenient to insert the key into the ignition in the dark. Especially in a hurry. It would be very nice to have an illuminated ignition lock cylinder.
2. Solutions. - Naturally, the easiest way is to go and buy a new lock with built-in lighting. But this method is not suitable. Either faith doesn’t allow it, or it’s the mentality... Well, I can’t exchange a working part for the same working part only with a bauble, which also costs a lot of money. Option number two is to buy a separate transparent luminous ring and attach it to an existing lock. I searched all the car markets in our town - the sellers just stare at me, “What is this? What’s more?” Internet only.
But there is a catch here too. Such rings are sold, but they are not suitable for Opel due to the peculiarity of the decorative casing of the ignition switch. Well, the last option remains - do it yourself. This is where the field for activity opens up :-D. The easiest way is to drill a hole near the lock cylinder and insert an LED of the desired color into it. However, gentlemen, I’ll tell you the effect is far from ice.
This option is only suitable if the backlight stays on for a few seconds and then goes off. And the desired result is a uniformly glowing translucent disk around the larva that turns on along with the dimensions and burns throughout the entire time of their use. This is what we will be doing throughout this article. 3. Implementation. — This is how simple and relaxed the decoration of the ignition switch on an OPEL VECTRA B car looks.
— After some thought, I decided that a fairly suitable material for a luminous disk would be the CD Disc itself. I carefully cut it out, installed blue LEDs... The result did not amuse me. It's all somehow banal. The fact is that the dashboard lighting is standard and has an orange-yellow glow.
And suddenly a blue light shines on you from under the steering wheel. It was decided to put the ring in the color of the tidy. And I cut a new one from a round box from the same CDs. I made small slits on the sides of the ring and fused four SMD LEDs from the keyboard backlight of an old mobile phone into them.
— This is not a space image of the distant planet Jupiter. This is a photo of the side of our ring taken under a mounting binocular microscope. By the way, microscopes are a good thing. The first photo shows an SMD LED with its crystal directed inward, and the second photo shows the same LED, but with an SMD resistor soldered next to it, limiting the current to about 15-20 mA. All four LEDs are connected in series. Thus we got this ring.
— I outlined the outer edge with a marker - an elastic band will be glued there, and pieces of black oracal will be glued at the locations of the LEDs to hide the peaks of the glow and distribute the light flux more evenly across the disk.
— Next, the process is as follows: we cut out the outer circle from thin rubber. We glue it to the main decorative casing with rubber glue. Using a scalpel, cut a hole for the wires on the back of the casing and insert a transparent disk between the rubber bands.
4. Result. — Solder a thicker wire. We insulate with heat shrink. Fill the joint with hot melt glue and rubber glue. We solder the connector and potentiometer to adjust the brightness on site. We receive the finished product. - Front side.
— And here’s how it looks on the car and in work. (Here I took a photo on my phone. I apologize for the quality.)
5. For those who want more. — If you understand electronics, then I think it will be useful for you to “play around” with such a circuit.
— This scheme works as follows: you enter the car interior and the backlight of the ignition switch lights up and stays on for eight seconds. Then it goes out. During this time, you have time to insert the key without any problems. Whether to assemble such a scheme or not is up to you. This is, as they say, a matter of taste. For example, I didn’t bother. Just entering the salon, you immediately turn on the side lights, and along with them our lighting turns on. Brightness is selected at a comfort level. Combines perfectly with the dashboard lighting and does not dazzle the passenger.
The ignition switch is a very important part that combines many functions. Its malfunctions on the “ten” are also varied and require a clear description.
The ignition switch on any car performs at least three functions: switching electrical circuits, access to starting the engine using a key, and locking the steering shaft for anti-theft purposes. On the “ten”, protection against restarting the starter, a forgotten key indication signal and illumination of the cylinder are added to this list.
Let's look at how it all works point by point and... breaks down!
The ignition switch contact group does not work
A contact group is a structure that closes various electrical contacts, depending on the position of the key in the lock. It is located in the back of the lock body and is capable of presenting unexpected surprises. If the contact group malfunctions, strange at first glance electrical problems arise in the car - for example, the headlights may fail, or the heater may stop working. A faulty contact group may also make it impossible to start the engine. In detail - in the article there are signs of a malfunction of the ignition switch contact group.
Steering shaft lock does not work
The ignition switch must include an anti-theft device. It works on the principle of blocking the steering shaft with a special tongue, which occupies a working position strictly when the key is pulled out. The locking element may become wedged in its socket and not slide out. In this case, you will need to remove the lock, disassemble it and, at a minimum, lubricate the moving parts of the anti-theft device. If the mechanism breaks down, it is better to replace the ignition switch assembly.
No forgotten key signal
The VAZ-2110 has a function to remind you of a forgotten key in the ignition switch. The function is controversial, since it is unlikely that anyone will leave the car without removing the key. Especially when you consider that the keys and the alarm key fob are usually on the same bunch.
The reminder is implemented by triggering a microswitch in the lock, which is activated by the inserted key. The switch sends a signal to the on-board control system unit, which, if the engine is turned off and the driver's door is open, emits a series of sound signals.
If, when these conditions occur, the display unit is silent, then the reason may be a faulty lock microswitch. Although we cannot exclude a “glitch” of the BSK unit itself, especially since this device is not very accurate.
The ignition switch illumination of the VAZ-2110 does not work
The illumination on the “tens” ignition switch differs depending on the version of the lock. There are two samples: with a glowing ring around the cylinder, installed on the first copies of the VAZ-2110, and with spot illumination of the cylinder on more recent cars. The backlight ring is illuminated by a light bulb, and in the point version, as a rule, an LED is installed.
Both options work when the driver's door is opened and are quite helpful in the dark. If there is no backlight, then, first of all, you need to pay attention to the interior lamp and the open door alarm on the BSK unit. When none of this works, check the door limit switch - it has oxidized and is not passing current.
If there is light in the cabin and the BSK provides the required information, the light bulb should be checked for filament burnout, and the LED, first of all, for power supply.
Most ignition switch faults are electrical. Thus, to search for them, you will need a test lamp or multimeter. You will also need knowledge of automotive electrics. When none of this is available, it is better to entrust the search and repair of the breakdown to specialists.
Sometimes, even minor breakdowns in a car lead to the impossibility of movement. Due to some problems, you even have to switch to public transport. A number of such breakdowns include damage to the ignition switch. To repair the ignition switch, you first need to consider the most common types of faults and know the reasons for their occurrence.
Applications of LEDs
The most pleasant appearance of the ignition switch illumination is when using separate lighting devices; this option is the most difficult to manufacture. Again, the color is selected based on the lighting of the instrument panel. Also in the radio store you can buy one resistor with a resistance of 1 kOhm and a piece of heat-shrinkable tubing. You will need a small piece of transparent plexiglass with dimensions somewhat larger than the diameter of the ignition switch. Its thickness should be greater than the diameter of the LED. You will also need a piece of thin stranded copper wire with wires of different colors.
To make the backlight, the lock will have to be dismantled. After this, its outer diameter is measured, which will be the inner diameter of the plastic ring. For the external dimension, add approximately 10mm, this will be enough to install the LEDs. The thickness of the ring depends on the size of the selected parts. If there is no plate with the required thickness, it can be glued together from two sheets.
The dimensions of the ring are transferred to plastic, after which they begin to cut out the ring. There are many ways to make a plastic ring. It can be cut with a jigsaw or use a heated piece of nichrome wire. This depends on the capabilities of the driver who took on the production of such lighting. The made circle is carefully processed with fine sandpaper. You need to drill several holes in the ring for the LEDs. Their number can be from 3 or more. They are installed either in the plane of the ring or at its end. You can make a hole with a drill with a diameter slightly larger than that of the lighting device.
When the holes are ready, the prepared parts are glued into them. It is advisable to install them in such a way that the “+” leads of the LEDs are directed in one direction. This will make it easier to connect them. The connection is made in parallel, that is, the “+” terminals are connected all together, and the rest are connected to another circuit. A resistor with a resistance of 1 kOhm is soldered to one of the terminals.
A flexible stranded conductor with different colors of conductive wires is connected to the free terminal of the resistor and the remaining contact of the LEDs. This will make it easier to properly connect power to the backlight. What else remains to be done? The lock needs to be assembled and installed in place.
This is what the finished product looks like after final assembly and installation of the lock in its normal place. Connect the lighting to the interior light bulbs.
Types of ignition switch malfunctions
The most common faults are:
- combustion of the contact group due to mechanical wear;
- lock cylinder malfunction;
- failure of the larvae;
- breakdown of the locking mechanism;
- turning/blocking the lock core.
The reasons for all of these problems may vary. Approximate signs of burnout of the contact group are the simultaneous inoperability of many devices powered by electricity, since the contact group of the ignition switch powers many objects: low beam, high beam, turn signals, lights. All these components of the car, at first glance, are not interconnected. But if they stop working at the same time, you should look for problems in the ignition switch.
If the first variant of the malfunction can be attributed to the electrical part, then the second - to the mechanical part. This part may be subject to premature wear due to poor quality workmanship by the manufacturer. Another malfunction may occur due to strong heating of part of the housing. With such problems, the key may turn around the axis for no apparent reason, but the car will not start. In electronic locks, the cause of this turn of events may be faulty sensors that affect the start.
Failure of the ignition lock cylinder means that the car can be started with any key or even a foreign object. Such a breakdown does not affect the performance of the equipment. However, the car loses its anti-theft qualities.
A malfunction of the ignition switch may cause the steering column locking mechanism to not work. Although this is a primitive protection, it creates some difficulties for the hijacker. A malfunctioning ignition switch sometimes results in the key itself being blocked. With this breakdown, it cannot be turned in the lock, and after persistent attempts, the key may even break.
Experts identify the following main reasons for this problem: the main unit froze due to low temperatures, contamination, and deformation of the key. All these breakdowns can be fixed with your own hands. Let's take a closer look at the process of removing and installing the part yourself.
Removing and installing the ignition switch yourself
So, it is clear that in order to remove the ignition switch there must be significant reasons, a number of which are mentioned above. Replacing the entire lock may be necessary not only if the mechanisms break down, but also if the keys are lost. To get the ignition, you need to proceed according to the following sequence:
- Remove the casing from the steering shaft and unscrew the screws securing the ignition switch.
- To disable the anti-theft device, leave the key in the zero position.
- Using a screwdriver, press the special lock through the hole in the bracket.
- Then remove the core from the bracket and the keys from the lock.
Memorize or write down the location of all connected wires. Only then disconnect them from the connection point.
Check the operation of the contacts by placing the key in different positions. Determine the functionality of the anti-theft device. The locking rod can be extended or retracted.
After the analysis and inspection, decide whether the device can be repaired. Sometimes you can do without completely replacing the ignition switch.
Before installing the device, turn the key inside to position I. This will secure the steering shaft lock, which will not interfere with installation. After installing a new device, do not tighten all the bolts at once. Make sure that the mechanism is in the right place and position and is operational.
Connect the wires through the old removed connector from the old lock.
Self-repair instructions
Let's consider the option of repair due to poor contacts, as well as due to breakage of the cylinder. Repair of the ignition switch is most often needed for this reason.
First, check the battery by disconnecting the negative terminal. At the same time, remove the lower casing from the steering column.
Disconnect the contact group and test the wires using an ohmmeter. Entire contacts show zero resistance; otherwise, the device must be replaced. If the damage is minor, you do not need to completely change the device; just change the cylinder or contact group. The kit is sold in the form of a box with terminals.
The cylinder is sold together with a new set of keys that are needed to turn it. When replacing the ignition lock cylinder, you should remember that you will have to use the old key for the trunk of the car. If this is unacceptable, purchase an additional set of larvae for the luggage compartment.
Replacing the ignition lock cylinder will require more time from the technician, but will allow you to save on purchasing a whole part. To replace the device, unscrew the screw connecting the two parts of the lock body. The body will split, and in one of the parts there will be a larva that can be taken out.
Keep in mind that the new cylinder will not contain such things as a return spring and a locking element. Transfer these parts from your old device. The return spring may not be immediately noticed, since it is located at the bottom of the part, be careful!
Fix the new cylinder in the lock shell in the same way as the old one. Screw the device part. Check the functionality of the ignition switch assembly.
What do all models have in common?
The ignition switches of VAZ 2107, 2106, 2109 and the following models have the same operating principle. Voltage is supplied to pin 30, this name comes from the fuse rated at 30 amperes. In some cases, two lines 30/1 and 30/2 are used. The 15th contact is responsible for providing power to the main ignition circuit. But with “50” the voltage goes directly to the starter solenoid relay.
In the “Parking” mode, the ITN contact closes, and voltage is supplied from it to additional equipment. When you turn on the ignition, you also engage the ITN, but 15/1 and 15/2 are also connected with it. If you go into start mode, only contacts 15/1 and 50 are switched on. All this works like a clock, but then what differences are we looking for in the ignition switches of various VAZ models?
Important points
Carry out repair work in a dry room, preventing moisture from entering the device. Otherwise, you will then have to disassemble the system again to clean the oxides. Install a new or repaired lock according to the old electrical diagram. To make wiring easier, transfer the markings to the new device.
Be careful when unscrewing the bolts. There is not enough space under the steering column; swinging it is not enough to strike. It's easier to use a heavy hammer. However, if you work carelessly, an impact can damage the plastic.
In order for a repaired or replaced lock to work for a long time, you need to follow all the details of the work. A guarantee of uninterrupted and safe operation of the device will be the choice of a modern and high-quality model.
Remember that the starting system is the most important component of a car. Without it, the proper operation of important components of transport is impossible. During long-term use, the ignition switch is often subject to simple wear and tear.
You can fix the malfunctions yourself or contact a service center. The first option allows you to save money. However, stinginess can lead to even greater expenses, especially if some actions related to repairs are not carried out in full.