Overhaul of VAZ 2107
In some cases, major repairs of the VAZ 2107 power unit can be partially carried out without dismantling it. Before starting work, thoroughly rinse the engine and engine compartment with running water and dry. Without removing the motor you can replace:
- crankcase seal;
- cuffs of both collectors;
- crankshaft oil seals;
- pump;
- generator;
- gasoline pump;
- carburetor.
The cylinder head is also easily removed from the engine without dismantling.
A major overhaul involves the restoration of engine elements, as a result of which the technical parameters will correspond to the parameters of the new engine. For this:
- the entire piston group is changed;
- cylinders are bored;
- the crankshaft is ground;
- liners are changed.
I remember how I got into the first major engine overhaul due to my own stupidity. I went out onto the field. There was a ravine ahead, so I drove in my “seven”. I couldn’t go further up the hill, and I couldn’t go back either. Basically, the car is stuck and skidding. Then an acquaintance came up, he was collecting something there - flowers or plants of some kind. He says: “You’re doing it wrong, you need to give it back, and then sharply forward. Let me sit down, and you push me when he moves forward.” Well, I agreed like a fool. The car skidded for about half an hour, no use. I called a tractor, which I wanted to do before. They pulled out the car. I sat down and drove back home. A few meters later the check flashed. It turns out, as I later found out, all the oil leaked while the car was slipping. It’s good that the tractor didn’t go far. I had to take the car for a major overhaul, replacing the piston and boring the shaft.
The need for major repairs is determined by the condition of the cylinder block and piston group. If most of the elements are well preserved, you can limit yourself to replacing individual parts. If even slight block wear is detected, cylinder honing will be required.
Sometimes VAZ 2107 owners buy a repair kit, which includes a reground crankshaft and a piston set. It is also recommended to purchase an incomplete cylinder block for major repairs. Since in this case the gaps are not misaligned, replacing the block will be quite simple. However, most often you have to buy a complete cylinder block, including an oil pump, pan, cylinder head, bell-shaped couplings, etc.
It is recommended to disassemble the internal combustion engine on a professional stand, after first removing the flywheel and clutch assembly. If there is no such stand, the dismantled engine is firmly fixed and only then its repair begins.
Typically, a major overhaul of a VAZ-2107 engine involves:
- disassembling the cylinder head, followed by cleaning and checking;
- inspection of rocker arms and valves;
- valve repair or grinding;
- dismantling pistons and connecting rods;
- dismantling the crankshaft;
- checking the condition of the cylinder block and cleaning it;
- checking the camshaft;
- inspection of bearings and checking them for play;
- removal and installation of rings;
- checking clearances;
- inspection of seals and their replacement.
Thus, almost any repair of the VAZ-2107 can be carried out independently. To do this, you need to have certain skills and a set of repair tools, as well as follow step-by-step instructions from specialists.
Causes of cylinder head gasket failure
A crack or burnout of a gasket is a fairly common occurrence on a Chevrolet Niva. The vehicle is operated in extreme conditions; the engine runs at high speeds or with poor cooling off-road. The temperature in the combustion chambers reaches 1000°C, so the appearance of the slightest crack leads to rapid burnout of the gasket in this place.
A damaged node can be easily identified by the following symptoms:
- white steam from the exhaust pipe of the car (antifreeze enters the cylinders);
- drop in coolant level in the expansion tank;
- bubbling of antifreeze in the expansion tank;
- the appearance of an emulsion on the oil dipstick and timing components under the valve cover;
- increase in oil level due to antifreeze entering the crankcase;
- oil leaks from under the gasket outside the engine;
- the engine begins to stall and run intermittently;
- low compression in the cylinders.
Attention! The main reason for cylinder head gasket burnout is severe overheating of the engine, which leads to bending of the light-alloy cylinder head and the formation of cracks between the cylinder block. The manufacturer does not regulate gasket replacement on a Chevrolet Niva
It is designed for the entire service life of the engine - 125 thousand km. This part is disposable and is replaced with a new one every time the cylinder head is removed. Dismantling the engine head may be necessary to repair valves and their seats, replace pistons, piston rings
The manufacturer does not regulate gasket replacement on a Chevrolet Niva. It is designed for the entire service life of the engine - 125 thousand km. This part is disposable and is replaced with a new one every time the cylinder head is removed. Dismantling the engine head may be necessary to repair valves and their seats, replace pistons and piston rings.
Replacing the Chevrolet Niva manifold gasket in auto repair shops in Moscow
48 car repair companies
- TTS Motors
- Pyatnitskoe highway, 2
- +7 (495) 24… show all
- Lexus on the market
- Wilgood
- Wilgood
- Lorant
- Wilgood
- Auto-rad
- Wilgood
- Wilgood
- Wilgood
- Remacpp
- Wilgood
Popular companies
Replacing the gasket
The marker of a failed gasket is considered to be soot that forms in the place where the exhaust escapes. In this case, proceed to replacing the defective seal.
What is needed for repair
To replace the exhaust manifold gasket, prepare the following materials and tools:
- screwdrivers (slotted and Phillips);
- sharp knife or spatula (remove used gasket);
- spanners included;
- anti-rust liquid (for example, WD-40);
- 5 liter wide-neck container (for draining antifreeze);
- dry rags.
ATTENTION! When replacing the manifold gasket on a VAZ 2114 (as on other factory models), it is necessary to drain the antifreeze in advance, otherwise the engine intake windows can be flooded
Step by Step Actions
The process of replacing a seal when it fails is simple, but has nuances for different engines. In general terms, the algorithm for dismantling and subsequent installation of the VK gasket looks like this:
- Open the hood and remove the air intake with the carburetor, under which there is a manifold.
- Remove the thermal screen covering the VC (some older models do not have a screen).
- Unscrew the bolts that attach the spider to the exhaust pipe, and then the bolts connecting it to the engine block.
- Proceed to removing the exhaust manifold itself, on which sits a burnt-out gasket, which often “sticks” to the VC.
- Carefully clean the area between the cylinder head and the manifold with a spatula, removing carbon deposits and fragments of worn gasket from the second.
- Once the area is shiny, coat it with graphite lubricant and install a new gasket.
- Treat the fasteners with the same lubricant (to prevent corrosion).
Finally, return all dismantled parts to their rightful places.
Replacing the gasket VAZ 2114
First, remove the engine protection from the car standing on the overpass, having previously drained the antifreeze, and then proceed as follows:
- Remove the air filter, having first disconnected the negative terminal of the battery.
- The fuel pipes with the accelerator cable are disconnected from the throttle.
- Disable the idle speed/throttle sensors.
- Disconnect the crankcase ventilation and brake booster hoses, turning off the receiver.
- Remove the latter by disconnecting the wires at the injection control unit.
- Dismantle the fuel rail without unscrewing the injectors.
- The receiving pipe is detached from the VC.
- Remove the intake and exhaust manifolds one by one.
- Remove the old gasket.
- Clean the joint between the manifold and the cylinder head with a knife.
- Install a new gasket and perform reverse installation.
- Fill in coolant.
The exhaust manifold gasket will last a long time if you use quality fuel and monitor antifreeze levels to prevent engine overheating. You also check the reliability of the joint between the cylinder head and the cylinder head and immediately change the gasket if you notice its malfunction. In addition, you need to buy gaskets from reputable manufacturers.
Exhaust system (exhaust system)
Before you begin the process itself, you need to decide on the necessary tools. So, what will you need: a ratchet and sockets for 17, 19; screwdrivers with flat and Phillips tips; a set of keys and the gasket itself.
Now that everything is prepared, you can start working directly. In order for the manifold to be removed without any problems and rusted bolts not to create trouble, everything must be lubricated with WD-40 before performing the operation. It is advisable to do this several times. Before performing the operation, you need to think again, weigh everything and calculate your strength.
Replacing the exhaust manifold gasket on a VAZ-2114 engine is quite difficult and not easy, which can become a whole challenge for many novice motorists. But if you follow the instructions, everything will work out. Well, if you can’t do it, then go directly to a car service center. Particular attention should be paid to the quality of the product so that you do not have to change the part after several thousand kilometers.
The exhaust manifold is a unit that is responsible for ride quality, without which comfort is impossible. This is silence and the absence of exhaust smell under the hood, which can be drawn into the cabin through the hole in the cabin filter. Fixing a leak in the exhaust manifold of a VAZ 2114 is a necessary repair. Fortunately, it is not urgent; you can prepare in advance and choose a convenient moment.
The key factor that causes 90% of exhaust manifold malfunctions on VAZ 2114 cars is high temperature and poor quality materials from which the parts are made. During operation, the steel repeatedly heats up and cools down, which leads to the appearance of cracks in the body. This is a common occurrence for VAZ cars older than 7-8 years.
Auto repair shops offer crack welding services using argon welding. However, for a number of reasons, this activity is useless for cars older than 7 years.
1) Just removing and installing the exhaust manifold will cost about 2.5 thousand rubles. Taking into account the work of the welder and other actions, the cost of repairs can be 4-5 thousand rubles. If you do the work yourself, buying a new part will cost less.
2) Welding, even argon welding, disrupts the structure of “tired” metal. A boiled part rarely lasts longer than a year, after which new holes appear. The older the car, the faster the problem returns, and the collector has to be removed again.
If the car is older than 8 years and there are problems with cracks in the manifold, it is better to remove the part and replace it with a new one.
Pad
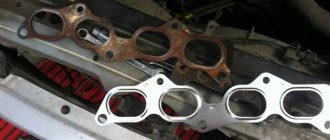
As already mentioned, the VAZ manifold gets very hot during operation. Heating sometimes leads to thermal stress. The consequence of this is the movement of the surface of the part along the surfaces of the cylinder heads. To ensure that the connection between the manifold and the cylinder head is airtight, AvtoVAZ engineers used a manifold gasket. Sometimes the gasket may need to be replaced, and sometimes the manifold needs to be replaced entirely.
The gasket is an important part that serves as a seal. The correct operation of the exhaust manifold depends on its condition. If replacement is not made, the vehicle's performance may noticeably decrease.
The gasket is located between the exhaust manifold and the cylinder head. Its task is to under no circumstances allow gases to enter the space under the hood. The gasket is the weakest link of this assembly. She has to perform her functions in particularly difficult conditions. It is these gaskets that car enthusiasts often have to replace.
When should you change the gasket? Today, seals are made from compressed asbestos, and then they are reinforced with steel. But even such a high-strength material one day becomes unusable. How do you know when it's time to change the gasket? When the vehicle moves, the motorist will hear noise and a clearly distinguishable smell of gases.
In addition, the car will start every once in a while, and from under the hood you can hear sounds that are unnatural for a car. To replace the gasket, you need to remove the air intakes, then you will need to remove the VAZ exhaust manifold. Sometimes this requires dismantling the thermal screen. Now you need to unscrew the bolts that connect the exhaust manifold to the engine.
Next, the VAZ exhaust manifold is removed. Immediately below it you can see the remains of the gasket. It will be necessary to work hard, because what is left of the gasket is strongly stuck to the cylinder head. First you need to remove the carbon deposits, and then clean the area where the VAZ manifold is adjacent to the cylinder block. Next, you need to apply a special graphite lubricant to the surface, and then you can install a new gasket.
Replacing the cylinder head gasket for a VAZ 2107 injector – Automaster
The replacement process itself, both with an injector and on an engine with a carburetor on a VAZ 2107, is simple and in order to cope with it, you just need to carefully study the material we offer and watch the video.
Need for replacement
There are few reasons for replacement and some of them require immediate intervention, while others not so much, that is, the vehicle can be used, albeit in a gentle manner.
Reasons for replacement:
- Damage to the gasket in the area of the cooling system channel and the drainage channel of the lubrication system. When this happens, the coolant ends up in the oil pan and mixes with the lubricant. The result is a mixture with a brownish tint. This can be detected by checking the lubricant level in the power unit on the dipstick. This malfunction is also indicated by a decrease in the coolant level in the radiator. If you do not intervene in time, the consequences can be catastrophic, including the destruction of the power unit.
- Damage to the gasket in the area of the cooling system channel and cylinder. This may occur due to a poor quality gasket or an incorrectly installed head.
- Burnout in the cylinder area. This malfunction is detected and diagnosed by a decrease in compression in the cylinders and unstable engine operation. Burnout between the cylinders
- Destruction of the gasket. If coolant begins to leak through the gasket and all efforts to tighten the cylinder head do not bring any results, then an urgent replacement is necessary.
Stages of work
Torque wrench
To replace the cylinder head gasket on a VAZ 2107 you will need a standard set of tools and a torque wrench.
Replacement on an injection engine
- Drain the coolant.
- We remove the battery.
- Disconnect the temperature sensor wire.
- After unscrewing the fastening nuts, remove the exhaust pipe.
- Having previously set the piston of the 4th valve to the top dead center position, we remove the upper housing along with the camshaft.
- We remove the starter thermal protection shield by first unscrewing the nut.
- Disconnect all wires and sensor connectors.
- Disconnect the throttle cable.
- We remove the bypass pipe.
- We remove the radiator pipe.
- We disconnect the tubes through which fuel is supplied.
- Remove the hose from the receiver pipe.
- Unscrew the bolts that secure the cylinder head. There are thirteen bolts in total.
- We remove the cylinder head.
- We change the gasket.
- We put the cylinder head in place.
- The cylinder head bolts on a VAZ 2107 engine with an injector are tightened in a strictly defined sequence using a torque wrench. Sequence of tightening the bolts
- We connect all the removed elements.
Replacing the cylinder head gasket on a carburetor engine
- Drain the coolant by first unscrewing the drain plug.
- We remove the battery.
- Disconnect the coolant temperature sensor wire.
- We dismantle the carburetor air-cleaning barrier housing.
- Use a clean rag to cover the carburetor chambers.
- We turn off the throttle levers.
- Remove the air damper cable.
- Remove the ignition air corrector hose.
- We remove the blocks with wires from the solenoid valve.
- Remove the fuel supply hose.
- We dismantle the EPHH hose.
- We remove the camshaft housing along with the shaft from the cylinder head.
- Remove the valve levers with springs.
- We unscrew the candles.
- We dismantle the distributor.
- Remove the starter thermal protection shield.
- Remove the ground wire.
- Disconnect the brake booster and economizer hose.
- We remove the cooling system pipes.
- After unscrewing the block bolts, remove the cylinder head.
- We remove the old one.
- We install a new one. Installing a new
- We tighten the cylinder head bolts in a strictly defined sequence using a torque wrench. Tightening with a torque wrench
- We reinstall the head and all previously removed equipment.
“Replacing a burnt gasket on classic Lada models”
In this video, an experienced master will clearly show and explain in detail how to correctly change the cylinder head gasket on classic Lada models. On a VAZ 2107 with an injection and carburetor engine, all work is carried out according to the same scheme.
When should the Kalina catalyst gasket be replaced?
Most vehicle owners mistakenly think that the catalytic converter, even if in good condition, is the reason for the reduction in power of the power unit.
In view of this, owners of budget car models deliberately exclude this part from the exhaust tract. However, the power of the power unit is reduced solely due to a violation of the throughput of the exhaust gas converter, due to damage to the honeycombs inside it.
Our car service specialists identify the main reasons for premature failure of parts and wear of gaskets:
- Low fuel quality;
- Use of various additives;
- Mechanical damage to elements;
- Incorrect operation of the ignition system;
- Failure of the lambda probe, as a result of which the process of formation of the fuel mixture is disrupted.
If the catalyst fails, the following symptoms are observed:
- If the throughput of the neutralizer is completely impaired, the vehicle's power unit will start and immediately stall, or not start at all. You can diagnose catalytic converters as quickly as possible in our service center. But you can also perform an independent check, however, it is not always highly accurate. To carry it out, unscrew the lambda located in front of the catalyst, and then start the engine. If it starts, the catalyst is faulty.
- The acceleration dynamics of the car are noticeably reduced, the speed of the power unit drops.
- Fuel consumption increases significantly. However, this evidence of a catalyst malfunction only applies in the event of a noticeable decrease in the power and acceleration dynamics of the vehicle. To put it simply, if the vehicle begins to become “stupid” and fuel consumption increases, therefore, the converter needs to be replaced.
- The “CHECK ENGINE” indicator on the dashboard came on. But this is not always direct evidence of a catalyst failure. In this case, you need to contact a car service for detailed diagnostics.
Purpose
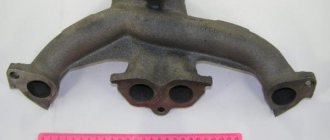
The collector (collector) is a container where the combustible mixture is collected, due to which the engine operates, as well as the exhaust gases leaving the exhaust system. Based on this, there are two types of manifold: intake and exhaust.
Intake - designed to collect the combustible mixture and gas into a common container, from which it is distributed among all four cylinders. The distribution from the intake device to the cylinders occurs evenly, which ensures uninterrupted and high-performance engine operation.
Exhaust is part of the exhaust system of a Niva Chevrolet car. The exhaust generated in the cylinder enters the exhaust manifold. Then it moves further through the resinator and muffler, and exits into the atmosphere.
This is what the exhaust manifold looks like
Exhaust manifolds are divided into two types: tubular and solid.
Tubular - made of stainless steel pipes or ceramic materials, which significantly extends its service life.
A solid one is made of cast iron, which reduces the service life of the device.
Malfunctions
Often there are malfunctions of the intake manifold of a Niva Chevrolet car, which require replacement or repair. Replacement is required when air leaks into the system. In this case, the gasket will need to be replaced. If it is damaged, it will appear on the car as follows:
- engine power will decrease;
- noise from under the hood will increase;
- Jerky movements will appear, especially when accelerating.
In order to eliminate the malfunction, the gasket should be replaced. We will consider the process of replacing it in the next subsection.
This is what the Shnivy manifold gasket looks like
Replacing the gasket
When carrying out repair work, it is necessary to install the Chevrolet Niva car on an overpass and equip it with standard tools
There is nothing complicated in performing the work, but it is important to know their sequence
Important! The intake and exhaust manifolds are located on the same gasket, so replacement is carried out immediately for the intake and exhaust manifolds
- The car is de-energized and the coolant is drained from the system.
- The fuel rail with injectors is removed. The removal process can be learned from the relevant articles, so there is no point in dwelling on this.
- Having reached the inlet tube, you need to remove its receiver.
- Unscrew the 4 nuts securing the tube to the manifold.
- The upper fastening nut is unscrewed, and the lower one is simply loosened in order to be able to move the spacer to the side.
- The intermediate pipe must be removed. To do this, reduce the tightening of the clamps securing the heater radiator tube to the thermostat, and remove the hose together with the pipe.
- The nut of the front strut of the intake pipe must be unscrewed and removed, and the lower one must be loosened and the strut must be moved to the side.
- Now you need to unscrew the right nut that holds the heat shield and inlet tube. The nut is removed along with the eye located behind it.
For your information! The screen is designed to prevent heat from entering the intake manifold, fuel rail and other vehicle parts.
Let's start removing the nut on the left. After removing it, you need to unscrew the central nut, which secures the thermal protection screen. The pins secure the thermal shield, which must be removed. The receiver tube is moved to the side. The nuts securing the starter shield on both sides are unscrewed.
The lower brackets also need to be unscrewed, and then the starter shield itself must be removed. All that remains is to unscrew some of the remaining brackets for the exhaust pipe and exhaust manifold. The nuts and washers are removed.
The gasket is secured with bolt studs. It needs to be removed and replaced. Before installation, the gasket must be lubricated with graphite grease to improve tightness.
How to fix an oil leak on the manifold?
Often, Shevik car owners have observed a phenomenon where oil leaks from under the studs of the device. The oil is oozing due to the fact that the hole for the studs, shown by the arrows (see photo below), is drilled into the side studs of the receiver mount. It is through these studs that oil enters the intake manifold of the Chevrolet Niva. To eliminate this kind of malfunction, it is necessary to lubricate these studs with sealant. In this case, oil will not leak, and problems with the need to top it up will disappear.
Thus, by replacing the manifold gasket, you can be absolutely sure that the car will not fail along the way. It is recommended to check the integrity of the gasket every 60 thousand km, if necessary.
Exhaust manifold (spider) VAZ 2101-07/21213 Niva Stinger sport
- 61
- 0
- 58k
- 4
- 1
- 16k
- 4
- 0
- 20k
- 1
- 0
- 9k
- The main symptom of a failed intake manifold is a sudden loss of car engine power.
- at the same time, there is an increase in fuel consumption , with a deterioration in traction and a drop in engine performance.
It is important to determine the cause of the breakdown and eliminate it in time.
- Often a problem is indicated by a missing stud in one of the manifold flanges. It simply comes off when the collector goes “screw”, that is, due to temperature changes, for example in winter, or over time (average service life is 7 years), the collector begins to bend along the plane, and the pin simply “spits out”, pulls out .
- Due to the fact that the manifold has “leaded”, a crack may form and, as a result, exhaust gases from the engine escape, and the manifold must be replaced. Before changing the gasket, make sure that all the studs are in place. When you remove the manifold, you also need to check the flatness of the exhaust manifold, because often these areas require grinding or replacing the entire part.
- Manifold flaps often fail. This happens for several reasons: low-quality material used to make these dampers, too high a temperature, the presence of oil condensate. A sign that oil consistency has entered the intake manifold is its increased consumption.
- The control valve for these dampers may also fail.
Changing the resonator
It is also advisable to replace the resonator on a VAZ 2110. This is done after changing the muffler.
New resonator for VAZ 2110
The work of replacing the resonator is performed in the following sequence:
- The resonator is secured to the muffler with a crimp clamp with an O-ring.
- It is attached to the neutralizer using a floating flange consisting of two bolts and a flare.
- On the opposite side of the element there is a so-called fist.
- Removing bolts is often quite difficult. So that you don't have to suffer, just cut them off with a grinder and buy new bolts. This is the simplest solution to the problem.
- If you couldn’t get a grinder, use a liquid key. This is a popular product among motorists - WD40 or its analogues. Treat the bolt attachment points with this compound, wait a while, after which the bolts should come off.
- After removing the bolts, remove the muffler clamp.
- Remove the resonator from the suspension rubber bands. Check the condition of the rubber bands. If they are worn out, replace them with new ones.
- Take a new resonator, secure them to rubber and connect them to the muffler so that the pipe leading to the muffler from the resonator is parallel to the ground.
- If you notice wear, burrs, or traces of rust on the neutralizer fist, be sure to coat the connection with sealant. Moreover, it must be a high-temperature sealant.
- Armed with new bolts and nuts, tighten the catalytic converter and resonator flanges.
- The neutralizer is fixed to the resonator with two bolts using a flange connection. The fastening occurs to the states, but there is a receiving pipe, using a spring-loaded connection and two flares. The space between them contains a sealing ring made of graphite or metal asbestos.
Read more: Euro 2 without removing the catalyst
Dismantling of collectors
The gasket is a consumable item, the purchase of which will literally cost you 50-250 rubles, depending on the manufacturer and region. Services for replacing the gasket at a service station cost more than 1,500 rubles. Add to this the cost of a high-quality gasket and you will get quite a lot of money. Such costs can be avoided if you do everything yourself.
Dismantled unit
Intake manifold
To dismantle it you will need a certain set of tools:
- Ratchet with 10mm head;
- Collar;
- Ratchet;
- Deep head 13;
- Regular head 13;
- Open-end wrench 13.
When everything is ready, you can start working.
- Unscrew a couple of mounting nuts to bend back the platform located under the carburetor.
- Disconnect the hoses that are connected to the intake manifold.
- Remove the six mounting nuts located on the intake manifold.
- Remove the manifold itself from the studs. To do this, simply rock the knot to the sides. It often sticks to the gasket, which causes problems with removal.
- Inspect the condition of the unit. If there is damage, the collector must be replaced.
- If the problem is only with the gasket, put the intake manifold aside for now and start removing the outlet.
An exhaust manifold
To dismantle a graduate you will need:
- Ratchet;
- Open-end wrench 13;
- Socket wrench 13;
- Deep head for 13.
All is ready? Then let's get started.
- Unscrew the four exhaust pipe mounting nuts from our exhaust manifold.
- Pull the so-called pants off the heels and take them to the side. Now you can unscrew three more fastening nuts securing the VK.
- Carefully, without sudden movements or jerks, pull the graduate off the stiletto heels.
- It is not uncommon that during the process of dismantling this unit, the manifold or its mounting nuts become stuck to the seats. To prevent this, treat the assembly with WD40 in advance, let it react, after which there will be no problems with dismantling work.
- If the studs break off during removal, you will need to drill out the old element, make a new thread and install a fresh stud.
Pad
Well, the check showed that the burnt gasket was to blame. Therefore, only it will have to be changed.
Pad
To replace an old, used gasket, you will need:
- Remove the old gasket. Here you may face certain difficulties, since most likely the gasket has become properly stuck and burned to the cylinder head;
- Arm yourself with a thin screwdriver, sharp knives, aerosol solvents;
- Spray the surfaces first, then let it react. It’s better to take your time in order to make your work easier;
- When the product takes effect, begin to gradually remove the old gasket from the surface of the block;
- Do not forget to remove carbon deposits from the mating surface of the cylinder block. Here you will no longer need an aerosol, but full-fledged sandpaper. Do not use coarse-grain sheets;
- Install a new gasket for the exhaust and intake manifolds of your VAZ 2109;
- Assembly of the unit is performed in reverse order. That is, first, both manifolds are installed in place, then the carburetor and air filter are returned to their homeland, the fastenings are tightened properly and the result of the work done is checked in practice;
- Of course, don’t forget about the coolant that was drained in the first stages. By the way, this is a great reason to change it to a fresh one.
Installing a new gasket
It is up to you to ensure that the new gasket has a long service life. To do this, before installation, treat the gaskets on both sides with graphite lubricant. This way you will increase the product’s resistance to temperature changes that it regularly encounters. Similarly, coat the cylinder head studs with graphite lubricant for the same purpose.
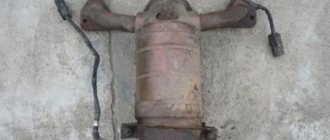
Exhaust manifold (catalyst) on a Chevrolet Niva
Installing an equal-length exhaust manifold (“spider”) improves the purging and filling of the combustion chamber. The use of a 4-2-1 manifold allows you to obtain an increase in power and torque in the highest possible speed range.
Spider 4-2-1 for VAZ 2101-07 cars is made of black heat-resistant steel, outlet pipe diameter: 51mm, inlet diameter: 36mm ATTENTION!!!! With old-style starters, there may be difficulties during installation/disassembly and small gaps.
Suitable for: VAZ 2101, 2102, 2103, 2104, 2105, 2106, 2107
Section: Spiders › Spiders VAZ 2101-07
Tags: Exhaust manifold VAZ 2101-07 Spiders
We have detected suspicious traffic originating from your network. Using this page, we can determine that you are the one sending the requests and not a robot. Check the box to continue.
If suddenly something goes wrong, try another option.
The exhaust manifold gasket is not one of those elements whose replacement is included in the routine maintenance plan. It can serve for two, five, or ten years. Its condition does not depend on age and mileage. The only factor that affects its service life is the correct operation of the engine. If it operates in standard mode, does not overheat, uses good fuel, the gasket will last a long time. If the opposite is true, it may burn out even after three months of operation.
Replacing the exhaust manifold gasket involves using the following means:
- set of spanners;
- slotted and Phillips screwdrivers;
- sharp knife or spatula (to remove old gasket);
- a container with a wide neck with a volume of at least 5 liters (for draining coolant);
- rust preventative (WD-40 or similar);
- dry rags.
Although replacing the exhaust manifold gasket is inexpensive and can be done successfully in your own garage, who wants to waste their time on it? It's better to let it serve longer. And to extend its service life, listen to the following tips:
- monitor the condition of the cooling system, check the level of antifreeze (antifreeze) to prevent engine overheating;
- use only high-quality fuel;
- check the tightness of the connection between the cylinder head and the exhaust manifold;
- If you find that the integrity of the gasket is damaged, do not wait until it burns out completely, replace it;
- When buying an exhaust manifold gasket, choose a quality product from well-known manufacturers.
In order to fully reveal the capabilities of the engine, you need to buy a spider for the Lada, drive the car into a pit, disassemble the standard VAZ exhaust system, and install the spider on the Lada. You can buy a spider for any Lada model. From the rear-wheel drive classic VAZ 2101 to the latest:
- Lada Granta;
- Lada Priora;
- Lada Kalina.
In addition to passenger cars, you can buy a spider for Lada 4x4 and Chevrolet Niva.
Only by installing a spider manifold on a Lada, you can increase engine performance without increasing fuel consumption, without increasing the cost of insurance and without increasing transport tax.
LADA 4×4 is an all-wheel drive vehicle with an engine capacity of 1.7 liters and a power of 83 horsepower. The maximum speed of the domestic “tank” is 142 km/h. It can easily pass almost any stone under the bottom thanks to its ground clearance of 20 centimeters. The trunk volume can reach 585 liters. Average fuel consumption is about 10 liters.
Many are attracted by the price of the car, because you can buy it for 400-500 thousand rubles. Is it a lot or a little - there is no objective assessment, since everyone gives their own. But is the all-wheel drive Niva worth even this money? Probably not, since there are many budget SUVs that are in many ways superior to the domestic 4x4.
| Motor modification | Availability of power steering | An exhaust manifold | EURO environmental class |
| 21214-41 | welded from stainless steel become | 3 | |
| 21214-34 | _ | cast iron | |
| 21214-33 | |||
| 21214-32* | |||
| 21214-31 | welded from stainless steel become | 4 | |
| 21214-30 | — |
*21214-32 – has fuel pipes with quick connectors, a flywheel for the clutch of 215 mm (200 mm on other models).
The geometry of the cylinder block 21214 and 21213 is the same. There are no liners in the cylinders. Due to the use of an ejector, the configuration of the front engine cover has been changed to accommodate the installation of a crankshaft position sensor. To mount the power steering, a hole is made on the block for installing a bracket; in addition, there is a threaded hole for installing a knock sensor, as well as threaded holes with studs for mounting the ignition module bracket.
The ShPG came from 21213. Crankshaft 21213-1005015 sets the piston stroke to 80mm. The crankshaft pulley is distinguished by the presence of teeth along the outer diameter for the operation of the crankshaft position sensor. The latest internal combustion engine models are equipped with a damping pulley (21214-1005058-10). The presence of a damper made it possible to reduce the load on the crankshaft to prevent cutting of the key, and also make the operation less noisy.
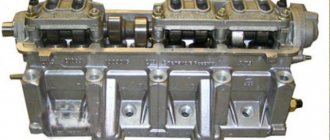
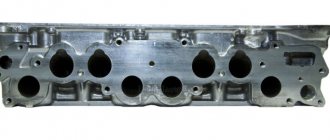
Cylinder head 21214-1003011-30 (36) was modified from the head from 21213. For modification, it was necessary to introduce holes for installing a phase sensor and studs for mounting the intake receiver. To install hydraulic compensators, bosses are cast in the head and have threaded holes in them. With the introduction of hydraulic thermal gap compensators, adjusting bolts were eliminated from the head design.
Oil under pressure is supplied to the hydraulic compensators through separate pipes. There are two types of heads: Russian 21214-1003015 and Canadian 21214-1003015-30. The differences between the heads are as follows: in the first, the diameter of the threads in the holes for hydraulic compensators is M18/1.5, the wells for hydraulic compensators do not have drainage holes;
Cylinder block. This weak point appears on various models of Nivov engines, including the previously discussed 21213. Due to insufficient quality control, the assembly unit is manufactured with a high percentage of factory defects. In short, the drilling depth of the intake manifold stud holes is not maintained, causing the holes to meet the camshaft stud holes.
In this way, L-shaped through channels are obtained. After installing the studs at the factory, the connections remain sealed for some time and the problem is not identified when the quality control department employees accept engine tests. After the sale of new cars with low mileage, during sharp braking, oil begins to seep through the studs onto the hot intake manifold, so much so that smoke from the oil burning in the manifold pours out from under the hood, and accordingly, there is nothing to breathe in the cabin.
Replacing the exhaust pipe (“pants”) of a VAZ 2107
When replacing the exhaust pipe, be sure to replace the gasket between it and the exhaust manifold. It is also better to change the nuts securing the “pants” to the manifold. The procedure is as follows:
- loosen the clamp and disconnect the pants from the resonator;
- unscrew the four nuts securing the exhaust pipe to the manifold;
Important: unscrew the nuts carefully so as not to twist the fastening studs. Otherwise you will have to drill out and replace the studs
- remove the “pants” (exhaust pipe) and gasket;
- install a new gasket;
- install a new exhaust pipe;
- connect the exhaust pipe to the resonator, tighten the fastening clamp;
- tighten the nuts securing the “pants” to the manifold.
If, after installing a new exhaust pipe, the exhaust system sags or hits the bottom, the following options are possible:
- the resonator or exhaust pipe is fixed at the wrong angles;
- engine mounts sagged.
In the first case, it is enough to loosen the clamps and install the parts correctly. In the second case, the engine mounts will have to be replaced.
Exhaust manifold/spider “Stinger sport” 4-1 8V for Chevrolet Niva 2123
- Description
- Characteristics
- Reviews
Car model: VAZ 2123 Chevrolet Niva Engine capacity: 8V Material: 08 PS steel, used for the manufacture of high-quality exhaust systems. This model can be made of stainless steel. Dimensions: primary pipe diameter 38 mm, outlet 51 mm, wall thickness 1.5 mm.
The flatness of the surface of the plate adjacent to the cylinder head is not more than 1 mm.
Weight - 5.1 kg Volume - 0.01 m3 Installation: when installing the product on a car, you will need to connect the standard resonator to the output end of the product using bolts. Installation without welding is also possible with:
Advantages: Installing this exhaust manifold on a car gives an increase in power. Can be used as a replacement for a failed standard cat-manifold. Additional information: during installation, you may need to extend the oxygen sensor and replace the program in the ECU (optional). Warranty: 6 months. If the product is wrapped with thermal tape, the warranty does not apply
Exhaust system design of VAZ 2107
Like most passenger cars, the VAZ 2107 has an exhaust system consisting of three main parts:
- a receiving pipe into which gases enter from the exhaust manifolds;
- VAZ 2107 resonator (additional muffler), where gases are directed from the exhaust pipe and where the exhaust sound is partially reduced;
- muffler, which absorbs most of the engine exhaust noise.
In addition to the above parts, the exhaust system includes:
- muffler mounting pad;
- pillow bolt;
- muffler suspension belt;
- clamp bolt and clamp securing the muffler to the resonator;
- clamp bolt and clamp securing the resonator to the exhaust pipe;
- clamp bolt and clamp securing the exhaust pipe to the body;
- nuts securing the exhaust pipe to the manifold;
- pad;
- locking plate;
Replacing the cylinder head gasket
After completing the previously described steps, they begin to replace the gasket itself on the Chevrolet cylinder block. First of all, dismantle the camshaft along with the bearings, disconnecting them from the cylinder head studs. In order not to suffer later, set the marks using a ratchet wrench and remove the shaft gear.
Next, the drive levers of the Chevrolet engine valves are disconnected, and then the hydraulic mounts are turned out.
- disconnect the oil pipes from the hydraulic supports;
- disconnect the sensor blocks of the Niva throttle valve, IAC (idle air control), detonation, coolant temperature, as well as the wires leading to the injectors;
- unscrew the cables from the spark plugs;
- find the sensor that controls the temperature of the antifreeze, slide the protective cap on it and disconnect the wire from it;
- Disconnect the exhaust pipe from the exhaust manifold;
- unscrew the bolts holding the inlet hose on it and move it to the side;
- use a screwdriver to loosen the clamps and disconnect the pipes of the absorber, thermostat, fluid supply to the radiator and heater;
- separate the fuel supply pipes from the cylinder head;
- remove the starter protective shield and Chevrolet chain tensioner;
- unscrew the power steering pump bracket from the engine;
- remove the camshaft chain and gear.
Afterwards, you need to unscrew all the bolts securing the cylinder head - there are 10 of them. To do this, use an E-Torx type wrench. Dismantle the Chevrolet block head itself (it is heavy - it is better to do this with a partner).
Next, the old gasket is removed. It sticks quite strongly to the base, so you will have to scrape off its fragments - try not to leave scratches. Sand the clean surface further and make sure that no debris gets into the coolant supply channels.
A new gasket is put in place and the cylinder head is placed on it. The latter is fixed in a certain order. To do everything correctly, check this diagram.
The bolts are first fixed so that the torque wrench shows 20.0 Nm. The final tightening is done with a torque of no less than 70 Nm and no more than 85. After this, the bolts in the same order are additionally turned 90 degrees with a wrench in two stages.
The Niva engine is assembled in the reverse order. Don't forget to add fresh coolant.
If you do not have confidence in your own abilities, then it is better to entrust the replacement of the gasket to specialists.
Step-by-step instructions for replacing the Niva gasket and exhaust manifold
Before you begin making this repair, you will need to complete the following steps:
- Remove the air filter along with the housing and carburetor
- Unscrew and remove the intake manifold
Next, we will need the following tool to carry out this operation:
- Head for 13
- Ratchet
- Extension
- The first step is to spray the connections between the exhaust manifold and the pants with some kind of lubricant so that the nuts can be unscrewed without any problems. And immediately unscrew the nuts from the studs in this place:
- After this, we unscrew the bolts securing the manifold itself to the cylinder head; this is where you will need an extension cord with a ratchet, since it will not be very convenient to do all this with other keys:
- Now you can remove the gasket between the manifold and the pants, separating them from each other. This is not so easy to do, but after a few minutes of effort you can do it:
- After this, you need to try to slide the pants down to release the collector and remove it from the pins. This procedure is also not a pleasant one and you will have to work a little to make it work:
- Then we replace this part in the reverse order of removal and it is also better to replace the gasket with a new one, since it is not intended for re-installation.
The price for the VAZ 2121 Niva exhaust manifold is around 700 rubles, so you won’t have to spend a lot of money on this repair.
conclusions
Dismantling the intake manifold of a 16-valve VAZ-2112 is quite easy and simple. Of course, it’s worth understanding at least a little about the design of the main power unit, but if desired, any car enthusiast can remove this unit.
Since I removed the flap for flushing, I decided to immediately replace the gaskets on the receiver; it is not known when they were changed before me. The procedure for removing it can be found on the Internet, but it’s a pleasure to remove it (((. At first I couldn’t feel the nuts, because I didn’t know where they were))) Then I couldn’t unscrew it because everything was stuck.
And then I couldn’t remove it because the breather pipe didn’t want to come off until I pryed it open with a screwdriver. He became like a stone. In general, in addition to the gaskets, I had to change both the breather and the oil dipstick seal.
Gaskets cost 65 rubles. , I’ll tell you right away, buy silicone ones, rubber ones are very difficult to install and they don’t last long.
The pipe and clamps and seal cost about 300 rubles.
Now the most interesting thing is that when I took it off, I was a little freaked out) the rubber bands were burnt out, there were some deposits in the receiver itself, there was generally some kind of dirt in the back that couldn’t be picked with a screwdriver. And there’s some kind of crap in the block, blackness, dirt, yuck... how could the car get like this? Now I have to do it! In general, look at the photo!
Full size These are gaskets, as if they were cauterized on one side
Full sizeBreaker who didn't want to take off
Full size Such poop inside the breather
None I’ll measure the compression test today, let’s see what it shows!
Description of the engine structure, the procedure for repairing the power unit of the Lada 2110 car, the stages of assembly and disassembly of parts of the Lada 2112 cylinder head, adjusting the engine valves with your own hands VAZ 2111, VAZ 2112, VAZ 2110. Maintenance of the engine of the Lada 2112 car. Instructions for repairing the cooling system, exhaust exhaust gases, power supply of the Lada 2111. Features of the 8 and 16 valve engines of the Lada 2110. Operation of the main components and assemblies of the engine Remove the plastic engine shield and disconnect the high-voltage wires from the spark plugs (see Replacing spark plugs for VAZ-2111, -2110 engines). Disconnect the throttle assembly from the receiver (see Removing the throttle assembly) and the throttle drive cable. We disconnect from the receiver the vacuum supply hose to the electro-pneumatic valve of the VAZ 2110... ...and the hose of the vacuum brake booster of the VAZ 2112.
Using a 10mm socket, unscrew the two nuts securing the VAZ 2112 receiver to the cylinder head cover supports.
Using a Phillips screwdriver, loosen the clamps securing the couplings connecting the receiver to the intake manifold.
We remove the VAZ 2111 receiver. Use a 10mm wrench to unscrew the bolt securing the guide tube of the oil level indicator of the VAZ 2112. To remove the intake manifold, use a 13mm socket to unscrew the five nuts securing it to the cylinder head of the VAZ 2110.
We remove the intake manifold of the VAZ 2112... ...and the manifold gasket. We install the VAZ 2111 intake manifold and receiver in the reverse order.
None Prepare a standard set of tools and perform the following sequence of actions:
- Remove the plastic engine shield and disconnect the high-voltage wires from the spark plugs (see “Replacing spark plugs”). We disconnect the throttle assembly from the receiver (see “Removing the throttle assembly”) and the throttle drive cable (see “Removing the throttle drive cable”).
- Disconnect the vacuum supply hose to the electro-pneumatic valve and the vacuum brake booster hose from the receiver.
- Using a 10mm socket, unscrew the two nuts securing the receiver to the cylinder head cover supports.
- Using a Phillips screwdriver, loosen the clamps securing the couplings connecting the receiver to the intake manifold.
- We remove the receiver.
- Using a 10mm wrench, unscrew the bolt securing the guide tube of the oil level indicator.
- To remove the intake manifold, use a 13mm head to unscrew the five nuts securing it to the cylinder head.
- Remove the intake manifold and manifold gasket.
At this point, the repair work to remove the receiver and intake manifold on the VAZ 2112 engine has been completed. Install the intake manifold and receiver in reverse order.
Source
Chevrolet car repair manuals and tips
Intake Pipe and Exhaust Manifold Gasket Replacement Guide
We remove the receiver (see “Replacing the receiver gasket”) and the fuel rail (see “Removing and installing the fuel rail”).
Using a 13mm socket, unscrew the bolt securing the front support bracket to the intake pipe.
Using a “13” wrench, loosen the tightening of the nut securing the front support bracket to the bracket of the right support of the power unit.
We remove the front support bracket from the intake pipe.
Using a 13mm socket, unscrew the bolt securing the rear support bracket to the intake pipe.
Using a 13mm wrench, loosen the upper starter mounting bolt and remove the rear support bracket from the intake pipe.
Using a 10mm spanner, unscrew the bolt securing the heater radiator outlet pipe bracket to the inlet pipe (for clarity, the heater radiator hose has been removed from the outlet pipe).
Using a 13mm socket, unscrew the nut securing the front eye of the power unit...
Using a 13mm socket, unscrew the nut for the rear fastening of the exhaust manifold screen to the cylinder head.
Similarly, unscrew the nut of the front fastening of the screen to the cylinder head. Using a 13mm socket with an extension, unscrew the middle fastening nut located between the inlet pipe and the screen.
Using a 13mm spanner, unscrew the nut securing the screen to the exhaust manifold.
We take out the exhaust manifold screen.
Using a 13mm spanner, unscrew the two nuts of the upper fastening (one on each side) of the intake pipe and exhaust manifold to the cylinder head...
...and two nuts for the upper mounting of the intake pipe.
Using a 13mm socket with an extension, unscrew the two nuts for the lower fastening of the intake pipe and exhaust manifold.
Remove the nine washers from the mounting studs. In four places at the junction of the intake pipe and exhaust manifold, thick washers are installed on studs. Disconnect the exhaust pipe from the exhaust manifold (see “Replacing the exhaust pipe”).
Using a 13mm spanner, unscrew the nut securing the starter shield to the exhaust manifold...
...and the bolt securing the shield to the bracket of the right support of the power unit.
We move the starter shield away from the exhaust manifold.
Using a 13mm spanner (or socket), unscrew the nut for the rear fastening of the exhaust manifold.
Using a high “13” head, unscrew the front nuts...
...and the middle exhaust manifold mounts.
Moving the exhaust manifold away from the cylinder head, remove the intake pipe from the cylinder head studs.
Removing the exhaust manifold...
...and the sealing gasket of the intake pipe and exhaust manifold.
Before installation, we clean the mating surfaces of the cylinder head, intake pipe and exhaust manifold from the remains of the old gasket and carbon deposits.
Having installed a new gasket, we carry out the assembly in the reverse order. Apply graphite lubricant to the cylinder head studs.
