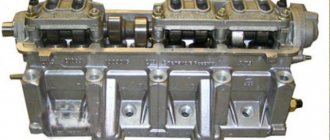
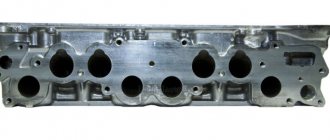
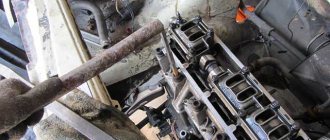
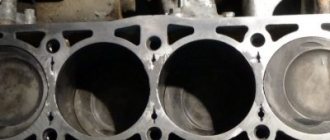
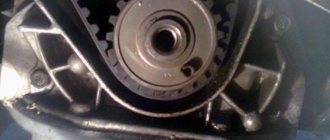
The engines of the Volzhsky Automobile Plant are quite reliable, but sooner or later they need repairs. Often, various internal combustion engine breakdowns occur due to the fault of the car owners themselves; replacing the VAZ cylinder head gasket is required in case of engine overheating.
If the gasket (cylinder head) burns out, the engine sputters and loses power, and it becomes impossible to operate the car with such a malfunction.
Signs of a malfunction of the cylinder head
There are several reasons for the head gasket to burn out on VAZ cars:
- motor overheating;
- poor tightening of cylinder head bolts;
- crack in the block head;
- deformed surface of the cylinder head or cylinder block.
The main cause of burnout of the cylinder head is overheating; the engine temperature is determined by the sensor on the instrument cluster. The engine can overheat due to various factors:
- insufficient level of antifreeze (antifreeze) in the cooling system;
- the ignition is set incorrectly (too late);
- the main cooling radiator is clogged;
- Intake and exhaust valves are jammed.
If there is severe overheating, the cylinder head may fail and the piston rings may become stuck. If, after replacing the cylinder head, the gasket burns out again, it is necessary to carry out more serious repairs and deal with the cause of the recurring defect.
- 1 Signs of a malfunction of the cylinder head
- 2 Features of replacing the cylinder head on rear-wheel drive VAZs
- 3 Replacing the cylinder head gasket of a VAZ 2106
- 4 Replacing the cylinder head gasket of a VAZ 2107 (engine 2105)
- 5 Replacing the cylinder head gasket VAZ 2109 (21099)
- 6 Replacing the cylinder head gasket VAZ 2114 (2115)
- 7 Replacing the cylinder head gasket VAZ 2110 (2112)
Features of replacing the cylinder head on rear-wheel drive VAZs
VAZ classic cars are equipped with engines of models 2101, 2103, 2105 and 2106, and VAZ 2106/2107 cars can be equipped with any of these engines. The principle of replacing the cylinder head on all “Classics” is almost the same, with one small difference - the ICE 2105 has a belt drive, while a timing chain is installed on all other VAZ power units.
If the sensor on the instrument panel shows a temperature above normal, it may not necessarily be a broken cylinder head gasket. Overheating also occurs for the following reasons:
Currently reading
How to maintain and charge a maintenance-free type of battery for...
ZIL 130 engine: a legend of the Soviet automobile industry
- the water pump is faulty (the impeller is torn off);
- the generator belt is not tensioned or is broken;
- The thermostat does not work properly;
- The radiator cap valve does not open.
There are signs by which you can determine that the PGBC has burned out:
- when the engine is running, thick white smoke (steam) comes out of the muffler pipe;
- Antifreeze leaves the radiator, but does not leak anywhere;
- the engine oil in the crankcase has turned white, that is, coolant gets into the oil;
- the engine troits, runs on two and three cylinders;
- antifreeze “throws out” from the radiator.
Replacing the cylinder head gasket of a VAZ 2106
Replacing the cylinder head gasket of a VAZ classic on an engine with a chain drive is generally a fairly simple job; the main difficulty is aligning the crankshaft and camshaft marks during assembly. If the marks are set incorrectly, the engine will not work normally, or may not start at all.
You can change the cylinder head on a “Classic” without a pit or a lift; before performing work, you should prepare the necessary tools and a container for draining the coolant. From the tool you will need:
- a set of car keys;
- slotted and Phillips screwdrivers;
- pliers;
- knob with extension;
- head 19 (for old style bolts) or multi-faceted head 12 (for new type bolts);
- hammer;
- mount.
We replace the PGBC on engines 2101/03/06 as follows (on a carburetor engine):
- turn off the ignition, put the car in neutral gear and on the handbrake;
- remove the terminal from the battery;
- drain the antifreeze from the radiator, also from the cylinder block. Even if the coolant is gone, there is still some left in the radiator;
- unscrew the nuts securing the air filter housing, remove the housing to the side;
- disconnect the gas rod and choke cable from the carburetor;
- free the block head from the water pipes (radiator and upper stove);
- discard the vacuum brake booster hose;
- unscrew the four nuts securing the exhaust pipe of the muffler;
- disconnect the high-voltage wires from the head;
- remove the distributor (you don’t have to dismantle it, but it will get in the way);
- disconnect the gasoline hose from the carburetor;
- remove the valve cover and place it aside;
- unscrew the 13 mm bolt with edges securing the cylinder head;
- remove the chain tensioner, unscrew the camshaft gear fastening;
- we throw the chain off the sprocket (gear), the chain can be dropped down, and then it will not be difficult to get it;
- unscrew the camshaft nuts (key 13), remove the shaft,
- pull off the cylinder head mounting nuts, unscrew the bolts and remove the cylinder head. In order not to lose the rocker, it is better to remove them from the head.
After dismantling the head, we carefully protect the surfaces of the block and the cylinder head itself; there should be no irregularities on them. During assembly, all parts are installed in place, but there are some features:
- so that the installed gasket does not slip on the surface of the block (if there are no guides in the block), the gasket can be carefully spread over the entire surface with lithol;
- before installing the cylinder head, install the piston of the first cylinder at TDC (at the top point);
- in order not to remove the chain from the pallet, you can fasten the chain to the shoe;
- Having installed the cylinder head, we place the rocker, making sure that they are all in their places;
- Tighten the cylinder head bolts evenly, from the middle, in several steps, in the order as in the figure below;
- We adjust the camshaft so that it is aligned with the fourth cylinder (the pin on the flange is located almost opposite the upper bolt on the body, picture below);
- after installing the camshaft, a sprocket with a chain is installed, and then the marks are aligned exactly, but first you need to tighten the chain with a tensioner;
- Before installing the tensioner, it should be recharged - loosen the central cap nut, recess the plunger, and tighten this nut;
- after assembling and tensioning the chain, the timing marks must match - the mark on the crankshaft pulley is located opposite the large mark of the chain cover;
- the alignment of the camshaft marks is indicated by arrows below in the figure;
- Having completed the assembly, fill in antifreeze and start the engine, check how it works.
VAZ 2106 Replacement of the Cylinder Head Gasket
Self-loading of the cylinder head gasket on a VAZ 2106 car
The quality of the VAZ 2106 engine depends on the condition of the cylinder head gasket. It is a disposable consumable that requires replacement each time the cylinder . The article describes what function the gasket performs and how to replace it on a VAZ 2106, and also attaches a video demonstrating the replacement procedure.
What is the function of the cylinder head gasket?
The cylinder head gasket is located between the cylinder head and the cylinder and serves several functions:
- Seals the place where the head adjoins the cylinder block;
- prevents oil leakage and coolant (OJ) from entering the cylinders;
- suppresses internal pressure and heat.
Thus, it separates three systems: gas distribution, cooling and lubrication. Experiencing heavy loads, it wears out quickly.
Gasket with traces of breakdown
Below are signs that can help you determine the need for replacement:
- insufficient pressure in one or more cylinders;
- foaming of the refrigerant, a drop in its level in the absence of an external leak, occurs due to gases entering the cooling system;
- emulsion on the oil dipstick, an increase in the oil level in the pan, the reason for this is the presence of antifreeze in the lubrication system;
- the appearance of oil stains on the surface of the coolant and the radiator neck indicates a broken gasket in the oil channel area;
- white smoke in the exhaust gases and the coolant level drops;
- extrusion of coolant from the expansion tank, since foam indicates a leak in one of the cylinders;
- The coolant level drops and the engine boils.
talks about the signs of gasket burnout.
- low-quality consumables;
- overheating of the power unit;
- improper tightening of cylinder head bolts;
- insufficient coolant level;
- Incorrect installation of the cylinder head.
Replacing the head gasket on a VAZ (classic). Do it yourself!
to replace it at home.
burnt
head
gasket
. _
VAZ 2103. The engine is boiling. replacing cylinder head gasket
VAZ
2103. The engine is boiling.
Replacing the cylinder head gasket
.
Replacement process
If signs of damage to the gasket are detected, it should be replaced immediately.
Set of tools
To perform the replacement procedure, you need to prepare:
- set of wrenches;
- pliers;
- screwdriver;
- torque wrench;
- coolant container;
- clean rags.
A set of necessary tools
Before replacing the machine, it is necessary to clean it to prevent dirt from getting into the disassembled engine.
Stages
The procedure for replacing the cylinder head gasket for a VAZ 2106 consists of the following steps:
- Disconnect the vehicle by disconnecting the negative terminal from the battery.
- Drain the coolant into a prepared container.
- Remove the air filter, valve cover, air damper control actuator.
- The next step is to align the mounting marks on the camshaft and crankshaft so that the valve timing is not restored during assembly.
- Then you need to remove the carburetor and ignition distributor using high-voltage wires.
- After loosening the tensioner cover nut, release the timing chain tension.
- After the gear is loosened, it must be dismantled. Remove the camshaft sprocket
The chain must be tied with a wire so that it does not accidentally fall into the engine.
- Then you need to remove the bearing housing from the camshaft.
- Next step. Disconnect the exhaust manifold from the cylinder head and all nozzles.
- After loosening the clamps, remove the radiator inlet pipe and thermostat bypass hose.
- Next, you need to unscrew the cylinder head mounting bolt, being located next to the ignition distributor.
- Then you need to unscrew the ten mounting bolts of the cylinder head and dismantle the device along with the bolts.
- Next you need to remove the old gasket.
- Before installing a new consumable, it is necessary to thoroughly clean the adjacent surfaces from dirt and debris from the old gasket.
- After degreasing the contact surfaces, you need to install a new consumable.
- The cylinder head mounting bolts must be tightened dynamo to the tightening torque prescribed in the VAZ 2106 operating manual.
- Then reassemble in reverse order. At the same time, we control the alignment of the marks and adjust the belt tension. Also adjust the valves.
- After final assembly, it is necessary to check the operation of the engine.
Installing a new printer
This replaced the gasket on a VAZ 2106.
There is nothing complicated in the procedure; only one car enthusiast, even with little repair experience, can do it. This way you can save on car maintenance.
“Replacing the cylinder head gasket with a VAZ classic”
This video demonstrates replacing the cylinder head gasket on a classic VAZ.
Source: https://sis26.ru/vaz-2106-zamena-prokladki-golovki-bloka-cilindrov/
Replacing the cylinder head gasket of a VAZ 2107 (engine 2105)
The 2105 engine has a timing belt drive, so replacing the cylinder head gasket differs only in removing and installing the gas distribution mechanism parts. The marks are set as shown in the figure below.
The cylinder head 2105 itself is slightly different, but the work is done in the same order as on other VAZ classic engines.
Replacing the cylinder head gasket VAZ 2109 (21099)
On all carburetor cars of the 2108-09-099 family, replacing the head gasket is quite simple, first remove the cylinder head:
- disconnect the battery terminal (ground wire) and drain the antifreeze;
- remove the air filter housing;
- We pull off the crankcase ventilation hose from the valve cover, having first unscrewed the clamp;
- as on the “Classic”, we disconnect from the carburetor: the gas cable, the choke cable, the gasoline hose from the fuel pump;
- remove all pipes from the cylinder head - vacuum booster, radiator, stove hose;
- unscrew the nuts securing the exhaust pipe; you can get to them from above, from under the hood;
- remove the timing belt cover;
- dismantle the valve cover (2 nuts);
- unscrew the cam gear mounting bolt;
- loosen the tension roller, remove the belt and the gear itself;
- unscrew the bolt securing the iron timing case to the cylinder head;
- we unscrew ten cylinder head bolts, the rest need not be removed (the carburetor, distributor and intake manifold remain in place).
At this point, the removal of the cylinder head is completed, we change the gasket, thoroughly cleaning the surfaces of the cylinder head and block. Labels are set as follows:
- the camshaft marks are aligned along the left edge of the cylinder head (as in the picture);
- The crankshaft marks are aligned on the flywheel (in the gearbox housing window).
After replacing the VAZ 2109 cylinder head gasket, fill in antifreeze and start the engine; as the engine warms up, add coolant to the expansion tank and monitor the engine temperature.
How to replace a cylinder head gasket
The engine is one of the most important units in a car, and cylinder head gaskets are one of its most vulnerable parts, because they are made of not very high-quality material. The consequences of this malfunction can significantly hit your pocket, and sometimes lead to a major overhaul of the entire engine. Therefore, you need to regularly monitor the condition of the cylinder head gaskets and, if necessary, replace them.
In what cases is replacement required?
The cylinder head gasket is replaced in the following cases:
- Damage in areas near combustion chambers
- An antifreeze leak was detected
- An engine oil leak was detected
The cause of gasket damage in the first case is engine overheating. In addition to the gasket, when overheated, the cylinder block and the plane of the head suffer, which takes the bulk of the damage. In case of overheating, in addition to replacing the gasket itself and processing the head plane, you need to carefully examine the cooling system. Overheating can be caused by faulty fans, a thermostat, or a simple hose leak.
External leaks can occur due to the gasket not being tightened properly. First, check how tight the head bolts are and tighten them if necessary. If the leak does not stop, then replacement is necessary to avoid complete engine failure.
Replacing cylinder head gaskets yourself
Replacement on all car models is almost the same. The only nuance is the order and parameters of the tightening torque of the fastening bolts. These numbers can be found in the manual of your model or on specialized forums and websites.
To replace, we will need to do the following:
- Removing the cylinder head cover
- Drain the cooling system fluid into a separate container
- We de-energize the car by removing the battery
- Remove the radiator inlet hose and thermostat bypass hose
- We remove the cover from the ignition distributor, as it will interfere with our repairs.
- Disconnect the heating hose and the vacuum regulator hose of the ignition distributor from the carburetor.
- We remove the air intake and move the throttle rod to the side. Remove the temperature control sensor from the cylinder head
- Next, align the marks on the camshaft drive sprocket with the mark on the camshaft bearing housing. This is necessary to avoid re-installing the distribution phases during the assembly process. After this, straighten the edges of the star fastening washer and unscrew the fastening bolt. There is no need to remove the star itself.
- Loosen the tensioner nut half a turn and use a screwdriver to press out the shoe. When the chain loosens, the nut can be tightened back.
- Now completely unscrew the star fastening bolt and remove it. Hold the chain so that it does not fall.
- Remove the camshaft bearing housing and unscrew the cylinder head nuts
After removing the bolts, remove the head cover and replace the cylinder head gasket.
The last step is to reassemble the parts in reverse order and adjust the valves. The sequence for tightening the head bolts is shown in the figure:
Source: https://tuning-vaz2106.ru/remont-vaza/kak-zamenit-prokladku-golovki-bloka-cilindrov.html
Replacement of cylinder head gasket VAZ 2114(2115)
On VAZ models 2113-14-15, injection 8-valve engines are mainly installed, so replacing the cylinder head gasket of a VAZ 2114 (2115) is slightly different from replacing the cylinder head gasket on a “nine”.
Unlike 2109 on the “fourteenth” and “fifteenth” models:
- the air filter housing is removed differently, and along with it you also need to disconnect the injector corrugation (pipe) and the plug from the air flow sensor;
- otherwise the fuel hoses are disconnected;
- there is no distributor on the engine, but the pipe goes behind the cylinder head;
- it will be necessary to remove the high-voltage wires, and it is better to remember their installation order (sometimes they are not numbered);
Otherwise, there are no fundamental differences in replacing the cylinder head gasket 2114 from 2109.
How to replace a cylinder head gasket
So, replacing the cylinder head gasket of a VAZ 2114 is not a complicated procedure, but it does require certain skills and knowledge. By the way, replacement is carried out both in case of damage to the seal and whenever the cylinder head is dismantled. The fact is that the gasket is disposable and is not suitable for re-installation.
Necessary tools and materials to replace the cylinder head gasket:
- keys “13”, “17”, “19” and a torque wrench;
- screwdrivers with a flat and Phillips head, socket wrenches (“10”, “13”, “17”, “Torx”), a head for unscrewing spark plugs;
- new VAZ gasket (catalog number 21083100302010 or equivalent ELRING 463915);
- clean rags, a container for draining used coolant.
The sequence of work performed to replace the head gasket:
- from the valve cover fittings, removing the crankcase ventilation hose and the supply hose, drain the coolant into a previously prepared container;
- unscrew the fastening bolts of the front timing cover using a “10” key (one in the center, two on the side);
- remove the timing cover and use a “10” key to unscrew the two fastening nuts connecting the throttle cable bracket and the receiver;
We also recommend reading the article about what cylinder head grinding is. From this article you will learn why grinding the cylinder head is necessary, as well as how this procedure is performed. - set the piston of the first cylinder to the TDC position of the compression stroke and use the “17” key to unscrew the camshaft pulley;
- if necessary, remove the key located in the groove of the camshaft nose;
- disconnect the hoses of the electric pneumatic valve, vacuum booster and fuel regulator in the fuel rail from the receiver;
- using a key “17”, loosen the nut securing the tension roller, using a key “10”, unscrew the nut securing the protective casing, bending the casing, unscrew the spark plugs;
- unscrew the two fastening nuts of the valve cover with a “10” key and remove it;
- remove the plug by unscrewing two nuts and one fixing bolt of the plug using a “10” wrench;
Using a “13” key, unscrew the six nuts securing the camshaft bearing housing in several approaches, evenly, until the pressure of the valve springs is relieved. - remove the rear camshaft bearing housing from the studs, installing the “E14 Torx” head, unscrew the 10 mounting bolts on the BC;
- loosen the clamps and remove the heater radiator inlet pipe and the inlet hoses of the throttle assembly from the outlet pipe, disconnect the thermostat;
- unscrew the fastening nuts and disconnect the fuel drain and supply hoses from the fuel pipes;
- remove the cylinder head, and then remove the old cylinder head gasket;
- replace the damaged seal with a new part and tighten the cylinder head mounting bolts in the sequence corresponding to the assembly diagram;
- We carry out the assembly in the reverse order, while maintaining the order and applying the recommended force when tightening the bolts.
Please note that the tightening order of the VAZ 2114 cylinder head bolts, as well as the force (tightening torque), must be strictly observed. In order for everything to be assembled correctly, you need to place a new, dry and clean gasket on the block using the installation sleeves (the hole with a copper edging for the passage of lubricating fluid in the gasket is located between the third and fourth cylinders).
Next, the VAZ 2114 head is installed on the block, while the crankshaft and camshaft must be in the correct TDC position (the two valves of the first cylinder are closed). Then we tighten the head bolts in four stages and in a certain sequence (tightening the bolts from the center, gradually moving equally towards the edges). The first tightening torque of the cylinder head bolts: 20 N•m (2 kgf•m), the second tightening torque of the cylinder head bolts: 69.4–85.7 N•m (7.1–8.7 kgf•m).
The final stage is the need to install the head parts and connect hoses, pipes and other elements to it in the reverse order. Then you can install the camshaft pulley with the protruding part of the hub to the vehicle’s internal combustion engine. We also note that, if necessary, the clearances in the valve drive are adjusted in parallel, as well as the timing belt tension is checked and adjusted/replaced.
Replacing the cylinder head gasket VAZ 2110 (2112)
On VAZ 2110 and 2112 cars, a 16-valve four-cylinder engine is often installed; it has almost the same cylinder block, but the cylinder head is different - it is two-shaft. It is somewhat more difficult to remove such a cylinder head; the timing marks are also installed differently.
We replace the PGBC as follows:
- We prepare everything for dismantling the cylinder head (remove the battery terminals, drain the antifreeze);
- completely disconnect the air filter housing with pipes;
- remove the oil filler cap, dismantle the decorative cover of the cylinder head (4 fasteners);
- disconnect the high-voltage wires, remove the ignition module;
- dismantle the upper timing belt casing, the most difficult thing to get to is the lower bolts;
- unscrew the tension roller, remove the timing belt;
- dismantle both camshafts, unscrew the bolts of the iron timing case to the cylinder head. You should immediately remove the dowels carefully, otherwise you may lose them. Before removing the gears, it is recommended to rotate the crankshaft and immediately set the timing belt to the marks;
- remove the intake manifold; after unscrewing the nuts, you need to pull it out of place;
- dismantle the valve cover by unscrewing all its fastening bolts;
- We disconnect all the existing wires and cylinder head fastenings, as well as the fuel rail, gasoline hoses (we unscrew the fittings with two horns and wrenches). When unscrewing the fittings, it should be taken into account that there is pressure in the fuel system, so it is better to bleed it off first;
- remove the protective cover of the exhaust manifold, disconnect the exhaust pipe of the muffler. It is inconvenient to get there; it is better to unscrew the nuts from below;
- unscrew the thermostat bolts (3 pcs., 5mm hexagon);
- twist the cylinder head mounting bolts (10 pcs.);
- Having disconnected everything that can hold the cylinder head under the hood, remove the cylinder head.
We clean the surfaces, install a new gasket, and mount the cylinder head in place. Before installing the cylinder head, it is necessary to set the piston of the 1st cylinder to TDC, and on the head itself you should check the installation of the camshafts by placing the gears on them - the marks should face up. Having replaced the cylinder head gasket of the VAZ 2110, we start the engine and, as the engine warms up, add antifreeze to the cooling system.
Factors influencing the price of the service - replacing the cylinder head of a VAZ in Moscow
The service is available for the following VAZ models:
1111 Oka210121022103210421052106210721082109210992110211121122113211421152120 Nadezhda2121 (4×4)212321292131 (4×4)23282329EL LadaGrantaKalina LargusPrioraRevolutionVestaXRAY
It is common knowledge that the cost of car repairs depends on several aspects. Among them are the following:
- cost of spare parts (original, China, alternative manufacturers);
- personnel qualifications;
- level of equipment of the service station (availability of painting booths, lifts, special tools and equipment, etc.).
For example, the price of the service - replacing the cylinder head of a VAZ in Moscow will also depend on factors such as the age, make and model of the car. We are confident that car services will compete for your order and offer the best conditions. The centers have a system of discounts for regular customers.
