How to replace coolant on a VAZ 2108-VAZ 21099?
Draining: 1) Let's start with the fact that there is nothing complicated about this; the main thing, as always when making repairs, is to know some of the nuances, first you will need to drive your car into the inspection hole and at the same time the car should stand level, in extreme cases it is allowed that the front part of the the car was slightly higher than the rear one, but not the other way around, besides, when the car enters the pit and you turn off the engine, be sure to let it cool completely, otherwise you will get burned by the coolant when you drain it, at operating temperature of the engine, the fluid temperature reaches about 85 -90 degrees.
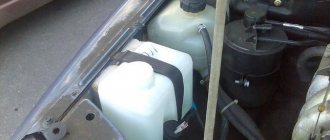
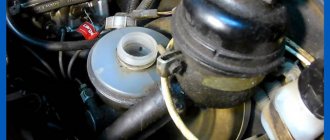
2) After preparing the car, open the hood, as soon as you open it, find the cap that covers the expansion tank (Indicated by the arrow) and unscrew it, depending on the year of manufacture of the car, this tank may look different, but is always present in the same place, which is shown in the photo below:
3) Now sit in the car and turn the heating knob all the way to the right (Unfortunately, the knob is not visible in the photo below, but the place to which you will need to turn it is indicated by an arrow), as soon as you turn it, get out of the car and climb under its bottom , while there, remove the crankcase protection so that it does not interfere with draining fluid from the radiator, or if instead of the protection you have a standard engine mudguard installed, which was installed from the factory on all cars of the Samara family, then read the detailed article on its removal, it is called: “Replacing the mudguard engine for VAZ."
4) After you remove all the interfering protection, proceed to draining the coolant, to do this, completely unscrew the two plugs, but before unscrewing, place an empty 10-liter container under them, that is, first start, for example, with the radiator plug, it is made in the form some kind of valve that needs to be unscrewed not with a key, but simply with your hands (This plug is indicated by a white arrow in the small photo, it is unfortunately poorly visible), as soon as you unscrew this plug, liquid will immediately flow out of the hole that it covered (Therefore, substitute the container in advance), wait until until this liquid is completely drained, as soon as it has drained, proceed to unscrewing the plug of the cooling jacket (Indicated by a red arrow, as you can see, this plug is very small), but to unscrew it you need to gain access to it and it is closed by the ignition module, so you will have to remove this module together with a bracket, for more details on how to remove the module, read the article: “Replacing the ignition module on a car”, after removing the module, completely unscrew the plug of the cooling jacket and wait until all the liquid has completely poured out of the hole, after draining the liquid, wipe all places on the which got liquid and the engine included.
Filling: 1. Firstly, screw back all the plugs that were removed earlier (Radiator plug and cooling jacket plug) and then proceed to pouring the coolant; on cars with carburetor and injection engines, the liquid is filled differently, first let’s disassemble the carburetor (If you have an injector, then read the section Note! below), for filling, stock up on a screwdriver with a Phillips blade and use it to slightly loosen the clamp that secures the heating hose (see large photo below), as soon as the clamp is loosened, disconnect this hose from the carburetor fitting and here you you will already need the help of an assistant (Although you can do it yourself if you don’t have an assistant with you), ask your assistant (Or do it yourself) to start pouring coolant into the expansion tank (you unscrewed the cap of this tank at the very beginning), all this must be done before until the liquid begins to flow out of the carburetor fitting (see the small photo below, the fitting is indicated by an arrow), as soon as it starts, immediately stop pouring it and connect the hose in its place and do not forget to secure it with a clamp, otherwise while driving disconnect.
Note! If you have an injection power system, then before you start pouring liquid, find the throttle assembly (it is also popularly called a throttle valve, but this is the wrong name) and after finding it, pick up a screwdriver and loosen the screw securing the supply hose with it liquid (Indicated by a red arrow), after loosening, disconnect the hose from the fitting (Indicated by a blue arrow) and start pouring liquid with one hand (You can ask an assistant) and with the other at this time hold (Or put it anywhere) the hose itself with your hand and as soon as liquid will flow out of it, stop filling it and connect the hose in its place and secure it with a screw, otherwise the hose will become disconnected while driving, thereby you will protect the cooling system from air locks and your car will not overheat and the stove will heat up normally!
2. After completed operations, bring the fluid level to normal (there is a MAX mark on the tank itself, this is the level to which the fluid needs to be filled) and start the car’s engine, let it idle for a while until the cooling fan starts working (If your fan has never worked, then just bring the engine to operating temperature), as soon as it starts, turn off the engine and wait until it cools down completely, during which time you can inspect the cooling system (In this case, look at all the places from where you disconnect the hoses, look at the radiator, there should be no leaks anywhere) and, if necessary, add more fluid to the expansion tank (But this is only when the engine has completely cooled down and under no circumstances unscrew the expansion tank cap while the engine is hot).
Additional video clip: You can see in more detail the process of replacing the fluid using the example of a VAZ 2110 car, everything is done there in exactly the same way as on cars of the Samara and Samara 2 family.
Note! So let’s add another word and recommend that you do the same by the way, now we’ll explain everything! Have you ever paid attention to the expansion tank cap? And it is very important and thanks to it, not only does the liquid not splash out, but it can create pressure in the expansion tank and, if necessary, due to the valve that is installed in it, release it when it crosses the required mark, in general there must be pressure in the expansion tank ( If it doesn’t, then the liquid will splash out), in addition, when the pressure increases, it must be bleed using a valve installed on the lid itself (If it does not bleed, then when the liquid is strongly heated, the pressure in the tank increases to such a state that the expansion tank is will literally burst and the remains will scatter throughout the engine and all the liquid will flow out, there have been quite a few such cases), but due to a faulty cap it may not bleed at all, and therefore this cap will bring many problems in the future, so choose You also need to look at it carefully, and for more details on how to check the functionality of this cover, see the video clip located just below:
https://www.youtube.com/watch?v=zlFT0xagm7o
DIY guide for replacing antifreeze in a VAZ-2109
It is better to drive the VAZ-2109 into a garage, in the basement of which there is a special inspection hole. But not every driver can afford such a luxury, so lifting the VAZ-2109 onto an overpass using a jack is quite enough. If this is not possible, simply place the machine on a level surface.
Replacing antifreeze in domestic cars consists of step-by-step actions:
- Find the terminals on the VAZ-2109 battery and remove them, armed with a key designed for 10. Then move the stove heater control lever to the right until it stops.
- Pull out the expansion tank cap.
- Carefully use wrenches to get rid of the crankcase protection fasteners; your task is to remove it.
- Place a container under the radiator after unscrewing the cap.
- Wait until the old antifreeze has completely drained into the canister. Screw the lid on the container and set it aside out of the way.
- Using a socket or a 13mm wrench, unscrew the drain plug located in the block. The antifreeze needs to be poured out from here too.
- Once the system has been cleared of all coolant, move on to the carburetor. Take a screwdriver and forcefully loosen the clamp securing the heating hose. Remove the hose.
- The VAZ-2109 injection engine has a throttle assembly, so it is necessary to loosen the screw on the antifreeze supply hose. Then disconnect the pipe.
- With the help of a friend, carefully fill in new antifreeze, and at this time the assistant should observe the fitting from where the pipe was removed. You need to install the pipe back as soon as the first drops of antifreeze appear, this means that the expansion tank is full.
- When the hose is mounted in the same place, add coolant to the maximum level indicated on the tank, install the terminals and start the VAZ-2109 engine. Leave the motor in the active position until the fan turns on; if this is not possible, at least wait until the thermostat opens. Pay attention to whether the heater is working correctly.
- If no problems or shortcomings are noticed, add more coolant, if necessary. Please note that at this time the engine must cool completely, otherwise hot antifreeze will burst out like a fountain when the expansion tank is opened, you and everyone nearby may get burned.
What does used brown antifreeze mean? It's time to flush the cooling system; it is better to do this with special cleaning products for cars.
Video instructions on how to replace antifreeze in a VAZ-2109 with your own hands are presented below:
Reasons for replacing coolant
- Preventative replacement. It is carried out every 40 – 60 thousand km or once a year or two. During this time, the liquid will lose its working qualities and cease to perform its functions.
- Expiration date. If you fill in a liquid whose shelf life expires in a few months, then after its expiration the liquid must be changed. The additives in the coolant will stop working, and this will lead to engine boiling and corrosion of parts.
- Color change. If the fluid changes color during the operation of the car, it must be changed. It may be expired or counterfeit.
- After some types of repairs.
Coolant replacement intervals
Over the years of operation, the coolant loses its physical and chemical properties, including protection against scale and corrosion, expansion properties when cooling and boiling, and provides lubrication of the centrifugal pump.
To avoid these malfunctions, it is necessary to inspect both the fluid and all units, and, if necessary, replace them during seasonal maintenance.
Owners of cars that have experienced fluid boiling need to take special care of the system, since the protective layer of paint on the walls of the cooling jacket is damaged and the engine block is severely corroded. You need to fill it with high-quality antifreeze and rinse it first.
So is it possible to mix?
Hypothetically, you CAN mix (but not everything and not always, let’s break it down into subgroups)! First, understand why you need this. I repeat once again, in any case, such a mixture can lead to improper functioning of the car’s cooling system. YOU NEED TO UNDERSTAND THIS! Well, now in more detail:
- TOSOL and G11 - the same base, the same additives, you can mix without fear. Will work the same at any load and temperature
- TOSOL with G12 – same base, different additives. Mixing is possible, but not advisable. The thing is that G12 works a little differently, it does not envelop the walls inside with a protective film, but fights the outbreaks (as I wrote above). As a result, in such a cocktail you get two types of additives, protective and anti-corrosion; how they will work together is not entirely clear. However, based on my experience, I can say that it is unlikely that sediment will form
- TOSOL and G13 are not recommended to be mixed at all. Firstly, G13 is a very expensive liquid (if you take the original one, say, produced by VOLKSWAGEN, it can cost up to 300 - 400 rubles a liter, and not that “badyaga”, which is produced I don’t understand where, and I don’t understand how, usually yellow) and pour in it TOSOL (or vice versa) is simply a crime, you are downgrading the class many times. Secondly, G13 uses propylene glycol instead of ethylene glycol (both are monohydric alcohols), but how they will interact with each other, and even at high temperatures, is UNCLEAR! Third, the additives here are different, G13 has a hybrid package of both anti-corrosion and protective additives, but antifreeze is only protective, in the end it’s also not clear what will happen. In such a mixture, there is a big possibility that sediment will form and the characteristics of this cocktail as a whole will drop (especially temperature), and this is bad - all the pipes and channels can become clogged, and boiling may already occur at temperatures less than 100 degrees, which is realistic is fraught with overheating.
Here is your answer, you can mix, BUT NOT EVERYTHING AND NOT ALWAYS!
Required accessories
Maintenance of the engine cooling system is possible with at least 8 liters of special composition. In the service book, Lada specialists display a list of suitable coolants:
- Antifreeze AM;
- "OZHK LENA";
- "LENA-40";
- Antifreeze A-40M;
- SPEKTROL ANTIFREEZE;
- AGIP ANTIFREEZE EXTRA;
- Glisantin G 03.
The accessories are an open-end wrench set to “13”, a screwdriver and a container for draining antifreeze with a volume of at least 8 liters.
Which coolant to choose?
There are two types of coolant: antifreeze and antifreeze. The car manufacturer VAZ recommends using antifreeze on older models. This coolant was developed in the USSR. It does not freeze down to -40 degrees. Antifreeze is much cheaper than antifreeze. It has a composition almost identical to green antifreeze. Therefore there is no difference between them.
Red and blue antifreezes differ from antifreeze in that the carboxylic acid they contain prevents additives from enveloping the pipes. This significantly improves engine cooling and helps the engine reach operating temperature faster. It turns out that both antifreeze and antifreeze do their job, but antifreeze does it faster and better. In addition, antifreeze additionally serves as a lubricant. It protects against corrosion and improves the operation of mechanisms.
How to drain and replace antifreeze in a VAZ 21099?
A pressing question for novice motorists is how to replace the coolant. Every driver can do this with his own hands. The coolant performs a very important function. By circulating through the cooling system, it prevents the engine from overheating, and in cold weather helps it quickly reach operating temperature.
Timely replacement of fluid is important for proper operation of the engine and cooling system. If the driver neglects this procedure, the car will be damaged. Firstly, the engine will constantly boil, which will lead to malfunction. Secondly, corrosion of metal parts will begin.
Some drivers use water instead of antifreeze. Such savings are useless and detrimental to the design of the machine. The cooling system mechanisms are subject to corrosion and quickly fail. In winter, the water in the radiator freezes. This leads to the fact that the car simply stops starting.
Reasons for replacing coolant
- Preventative replacement. It is carried out every 40 – 60 thousand km or once a year or two. During this time, the liquid will lose its working qualities and cease to perform its functions.
- Expiration date. If you fill in a liquid whose shelf life expires in a few months, then after its expiration the liquid must be changed. The additives in the coolant will stop working, and this will lead to engine boiling and corrosion of parts.
- Color change. If the fluid changes color during the operation of the car, it must be changed. It may be expired or counterfeit.
- After some types of repairs.
Which coolant to choose?
There are two types of coolant: antifreeze and antifreeze. The car manufacturer VAZ recommends using antifreeze on older models. This coolant was developed in the USSR. It does not freeze down to -40 degrees. Antifreeze is much cheaper than antifreeze. It has a composition almost identical to green antifreeze. Therefore there is no difference between them.
Red and blue antifreezes differ from antifreeze in that the carboxylic acid they contain prevents additives from enveloping the pipes. This significantly improves engine cooling and helps the engine reach operating temperature faster. It turns out that both antifreeze and antifreeze do their job, but antifreeze does it faster and better. In addition, antifreeze additionally serves as a lubricant. It protects against corrosion and improves the operation of mechanisms.
Preliminary
If the driver changes the coolant for the first time, he wonders how much antifreeze fits into the cooling system. On average, 8 liters of fluid are needed to replace.
The antifreeze must be replaced when the engine is cold. When the engine is running, the coolant temperature is above 80 degrees. By neglecting safety measures, the driver risks severe burns. In addition, you need to have with you:
- a container with a volume of 8 - 10 liters for draining old fluid;
- a set of keys;
- flushing liquid or water;
- ten-liter canister of antifreeze or antifreeze.
How to change antifreeze and antifreeze on a VAZ 21099
Coolant replacement:
- We park the car on level ground.
- We move the heater tap in the cabin to the maximum level.
- Unscrew the plug on the expansion tank. This will help depressurize the system.
- Remove the crankcase protection.
- Place a container under the radiator. We will drain the coolant into it. Unscrew the cap on the radiator. Drain.
- On the front of the cylinder block we find the drain plug. On a car with a carburetor, unscrew it. We continue to drain. On a car with an injection engine, an ignition module is installed above the plug. You can get to it using a 13mm socket with an extension. If there is no head, then you will have to remove the module. First, we turn off the power to the car. Removes three nuts securing the ignition module; they need to be unscrewed. Remove the module from the bracket to which it is attached. After the module has been removed, unscrew the plug and continue to drain the antifreeze.
- We wait until the antifreeze drains completely. We screw the plugs back. If the ignition module was removed, put it in place. We return the battery terminals to their place.
- If the drained brake fluid is dirty or has a rusty tint, then the system is flushed. To do this, pour water or flushing liquid into the tank, open the heater tap in the cabin and start the car for 3 minutes. Then let the liquid cool and drain it. It is advisable to ensure that the water is clean when drained. Not all drivers flush the cooling system. This item is optional. But if the system is dirty, then soon the coolant will need to be replaced again.
- After flushing the system, fill in new brake fluid. If the car has an injection engine, simply fill the antifreeze through the tank to the mark. If the engine is carburetor, then you need to open the fitting and fill in the liquid until it flows out of it. We tighten the fitting.
- We drive the filled coolant through the cooling system. To do this, turn the tap on the stove and start the engine. Then we check the coolant level and top it up to full if necessary.
Preliminary
If the driver changes the coolant for the first time, he wonders how much antifreeze fits into the cooling system. On average, 8 liters of fluid are needed to replace.
The antifreeze must be replaced when the engine is cold. When the engine is running, the coolant temperature is above 80 degrees. By neglecting safety measures, the driver risks severe burns. In addition, you need to have with you:
- a container with a volume of 8 - 10 liters for draining old fluid;
- a set of keys;
- flushing liquid or water;
- ten-liter canister of antifreeze or antifreeze.
Replacement
The procedure for replacing antifreeze can be divided into four main stages:
- Draining the old coolant;
- Flushing the system;
- Filling with new antifreeze;
- Checking the functionality of the system.
Now we will go through each stage separately.
Expansion tank
Draining old coolant
- To work you will need a pit or overpass. In garage conditions this is not a problem.
- The procedure should only be started with a cold engine. Do not add new coolant if you just turned off the engine a couple of minutes ago. Otherwise, there is a risk of cracks in the cylinder block.
- Remove the negative terminal from the battery.
- Place a prepared container with a volume of about 10 liters under the car.
- Remove the cap from the CO expansion tank.
- Using a socket or a 13mm wrench, unscrew the drain plug from the cylinder block.
- Hold the plug so that the coolant pressure does not blow it away. There is no point in losing such an element.
- When all the liquid has come out, screw the lid on.
- Drain the coolant now from the radiator by unscrewing the plastic plug. The liquid will flow into the prepared container.
- Screw the drain cap on by hand. No tool required here.
Drain procedure
Flushing
If you find traces of contamination in the drained antifreeze, the liquid has acquired a rusty tint, it is better to rinse the system thoroughly. If you ignore this recommendation, the new antifreeze will not last long, so you will soon have to change it again.
- For washing, use special compounds or ordinary water. It is better to use distilled water, but if you really want to save money, take tap water;
- Pour CO flushing liquid into the system through the neck of the expansion tank;
- Start the engine, raise the speed a little and let the engine run for about 10 minutes;
- Turn off the engine and repeat the draining procedure according to the instructions that you read above. Only now the system will not contain antifreeze, but a flushing composition;
- Repeat flushing as necessary until the water coming out of the drain holes is clear.
Flushing the system
Flushing is just a recommendation, not a mandatory procedure. But those who regularly flush the system claim that it works more reliably and longer this way. So decide for yourself what to do.
Replacement frequency
According to official regulations, the manufacturer provides for replacing the coolant in cars with carburetor or injector engines every 50-75 thousand kilometers. Such a large interval is due to the fact that it is at this interval of kilometers traveled that the refrigerant begins to lose its properties. And the use of used antifreeze is not allowed. It is not advisable to change the coolant more often than every 50 thousand km.
Signs of the need for urgent antifreeze replacement
The need to change the coolant earlier than required by official regulations may arise in several cases:
- If sediment has formed in the refrigerant. The presence of deposits in the substance indicates that it has begun to lose its properties. When sediment settles in a dense layer at the bottom of the expansion tank or in the lines, this leads to the fact that the liquid cannot circulate effectively through the pipes and channels. Refrigerant deposits are more noticeable at low air temperatures.
- Increase in coolant crystallization temperature. To determine at what temperature a substance will begin to freeze, you need to check the density of the refrigerant. The diagnostic procedure is carried out using a hydrometer. In the absence of a device, you can visually determine the increase in crystallization temperature. This refrigerant develops a yellow coating. It will not be visible in the liquid itself, but it can be clearly seen on the expansion tank plug in the engine compartment.
- Change in color of the refrigerant and formation of a brown tint. If the substance becomes browner, this indicates the presence of corrosive deposits on the metal components of the cooling system. A change in color may be due to the fact that the antifreeze additives have lost their performance characteristics.
- Overheating of the power unit. If the problem is not related to mechanical problems in the car engine, then you need to check the quality of the refrigerant.
The Avto-Blogger channel published a video that describes in detail the reasons for antifreeze leakage from the car’s cooling system.
Instructions for self-replacement
Below we will look at how to replace the coolant in the Nine.
What will be required for replacement?
If you change the refrigerant yourself, you will need the following:
- wrench 8;
- hex wrench 12;
- a cut-off bottle or bucket into which you will drain the used refrigerant;
- distilled water or a special product if there is a need to flush the cooling system.
From the video by AvtoDrive user you can learn how to replace the refrigerant in a VAZ 2109 car.
How to drain?
To completely drain the Antifreeze in a VAZ 2109 from the system, do the following:
- The vehicle is driven into a garage with a pit or onto an overpass. The surface on which the machine stands must be level. If it is not possible to provide such conditions, then make the front of the car a little higher. To do this, place the front wheels on a jack.
- Start the car's power unit and move the heater control knob to the extreme right position so that the heater blows hot air.
- Reach under the vehicle and remove the engine crankcase protection. To do this, unscrew the screws that secure it.
- Stop the engine and loosen the bolt holding the negative battery terminal. This is done to prevent a short circuit from occurring during the draining process.
- Unscrew the filler cap on the expansion tank. This will reduce the pressure when draining the waste substance.
- Place a container for collecting waste under the drain plug on the cylinder block. Unscrew the cap and the process of draining the waste liquid will begin.
- When draining is complete, replace the plug. Now you need to drain the working fluid from the cooling radiator. To do this, unscrew the plastic plug on the radiator, placing a container under it in advance. When the draining is complete, screw the lid back on.
How to properly wash?
If the drained refrigerant is too dirty or contains traces of deposits, the cooling system must be flushed. To do this, you can use distilled water or a special cleaning agent, which is sold at any car store.
The correct washing procedure is as follows:
- The distillate or flushing agent is poured into the VAZ 2109 power unit through the filler hole located on the tank under the hood. To do this, unscrew the cap and add enough liquid there so that its level is between the MIN and MAX marks on the container.
- Start the car engine and let it idle for about ten minutes.
- Turn off the engine and repeat the process of draining the substance.
- Assess the quality of the drained liquid. If it is too dirty and there are traces of sediment left in it, the procedure for flushing the system is repeated until the water becomes more or less clear.
An Aveo Show user in his video showed how to replace antifreeze and clean the cooling system in a VAZ 2109 car.
How to fill?
You need to fill in antifreeze as follows:
- Unscrew the reservoir cap in the engine compartment. For greater convenience, you can install a watering can in it.
- Make sure all caps (drain and radiator) are securely tightened. Check the integrity of hoses and lines. Make sure the thermostat is in working order.
- Pour fresh fluid into the expansion tank. The refrigerant level should be between the MIN and MAX marks.
- Tighten the expansion tank cap and start the engine.
- The engine should run for about ten minutes at idle speed.
- Reach under the car and make sure there are no coolant leaks.
How to drain all antifreeze from Lada Kalina yourself
Today Lada Kalina is a fairly popular type of vehicle. This brand of car is distinguished not only by high technical performance characteristics, but also by a moderate price category, which helps to increase demand among domestic consumers.
Current models
The car is presented on the modern market in three main body styles:
- Station wagon;
- Sedan;
- Hatchback.
Despite the wide range of existing advantages of such a vehicle, owners often have a question: how to drain antifreeze from Lada Kalina? Is it possible to carry out such an event on your own?
Advantages of the Lada Kalina vehicle
Before you start replacing antifreeze in vehicles, you need to find out what advantages such a unit has. The creators of Lada Kalina paid close attention to various features of the car. This made it possible to create a high-quality unit, equipped with the following options:
- electric power steering;
- centralized lock;
- airbags;
- increased level of vehicle rigidity;
- modernized interior ventilation system;
- wide viewing angle.
Breakdowns and leaks of coolant from the reservoir
Modern car enthusiasts know that coolant leaks quite often occur on the VAZ 2109, which leads to serious overheating of the engine. Factors influencing antifreeze leakage are:
- insufficient tightening of pipe clamps;
- the appearance of cracks or abrasions in the pipes;
- radiator malfunction;
- the appearance of an air lock when filling antifreeze;
- all sorts of breakdowns in the cooling system.
If there is still an antifreeze leak, then the first thing you should check is the pipe connecting the radiator and thermostat. If there is moisture at the junction of the tube and the thermostat, then there is a leak. In this case, the way out of the situation is to replace the gaskets.
Another serious problem is coolant leakage into the engine. A similar problem is diagnosed by checking the condition of the spark plugs. If a white coating forms on the spark plugs, it means that antifreeze is getting into the engine.
determine the coolant on a VAZ 2109
- the appearance of sediment at the bottom of the expansion tank under the hood;
- antifreeze loses its natural color and appears rusty;
- the appearance of flakes in the coolant, which are especially noticeable at high temperatures;
- the appearance of foam on the surface of the coolant, which indicates a loss of the basic properties of the coolant.
If these symptoms occur, you must immediately replace the coolant to prevent further damage to the engine, which could result in costly repairs.
Replacing coolant in the engine cooling system of VAZ 2108, 2109, 21099 cars
It would seem that a simple procedure for replacing the coolant (coolant) in the cooling system of a carburetor or injection engine of VAZ 2108, 2109, 21099 cars and their modifications has some features without knowledge of which, as a result, you can get a number of problems (for example, constant overheating of the engine and knocking out the cover expansion tank). Therefore, we will analyze the replacement procedure taking them into account.
Necessary tools, accessories and spare parts
— Socket wrench or socket “13”
— A canister or two coolants (antifreeze, antifreeze) – 8 liters
Details about choosing antifreeze or antifreeze: “Choosing coolant for the engine cooling system of VAZ 2108, 2109, 21099 cars.”
— Wide container for collecting old coolant (basin) with a capacity of at least 8 liters
— Funnel for filling liquid
— Phillips screwdriver for removing the pipe clamp
Preparatory work
— We install the car on a pit or overpass
— Remove the engine crankcase protection
— Remove the mudguards of the engine compartment
— We place a container under the engine to collect old coolant
— Let the engine cool down
The procedure for replacing the coolant in the engine cooling system of VAZ 2108, 2109, 21099 cars
Draining old coolant
— Drain the coolant from the radiator
To do this, unscrew the radiator drain plug by hand. Drain the liquid.
— Drain the coolant from the engine cylinder block
Unscrew the drain plug on the cylinder block. We use a key or head at “13”. Drain the liquid.
— Remove any remaining old coolant from the system
Unscrew and remove the plug from the expansion tank
After which a little more old fluid will flow out of the radiator and cylinder block drain holes.
We squeeze the radiator pipes with our hands to expel the last remaining liquid.
— We screw back the drain plugs of the radiator and block
Adding new coolant
— Remove the supply pipe from the carburetor heating unit or throttle assembly of an injection engine
— Fill in new coolant
Insert a funnel into the hole in the expansion tank and pour liquid through it. There is no need to add all the liquid at once. Fill in a couple of liters and squeeze the cooling system hoses. A couple more liters, then squeeze again. In this way, air is removed from the system. Air will also escape through the removed carburetor heater hose or throttle body. When liquid appears from it, put the hose back and tighten it with a clamp.
Video “Visual aid to replacing antifreeze”
User markozia in the video showed how to do the procedure for replacing the coolant on a VAZ 2109 car with your own hands.
Do you have any questions? Specialists and readers of the AUTODVIG website will help you ask a question
Was this article helpful?
Thank you for your opinion!
The article was useful. Please share the information with your friends.
Yes (100.00%)
No
X
Please write what is wrong and leave recommendations on the article
Cancel reply
Rate this article: ( 6 votes, average: 5.00 out of 5)
Discuss the article:
Replacing antifreeze on a VAZ 2109 in 10 steps
From time to time, the coolant in your car becomes unusable. How to independently replace antifreeze in a VAZ 2109 car without making mistakes? Just 10 instructional steps for motorists. Antifreeze is a trade and popular name for coolant for a car engine. Motorists are interested in how to drain antifreeze on a VAZ 2109 on their own. After all, over time, the liquid loses its properties and expires. This can be understood by the change in color of the coolant. Replacing antifreeze on a VAZ 2109 may be necessary in several cases: o expiration date; o the car owner’s desire to use a different brand of coolant; o carrying out repairs that require draining antifreeze. And other, rarer reasons that prompt a coolant change. To complete the task you will need: a key size “8”; hexagon sizes “12”; container for draining old antifreeze. Manipulations of replacing antifreeze or other automotive fluid require a very careful and careful approach. Coolant is toxic, so contact of the substance with exposed skin and eyes should be avoided. It tastes sweetish, but under no circumstances should it be swallowed. And it must be carefully protected from children and animals. Work must be carried out after the car has completely cooled down to eliminate the risk of burns. It is most convenient to replace the coolant in a special pit or using a lift.
WHEN IS IT NECESSARY TO REPLACE ANTISELF?
VAZ 2109 antifreeze needs to be replaced on time
So:
- This issue should not be overlooked in any case. Because if the antifreeze is unsuitable, the engine will not cool properly.
- If the engine does not cool to the required degree, then there may be problems with the cooling system (partial failure) and spare parts will have to be replaced.
- In the worst case, the engine may boil - this does not bode well for you and your car.
- Thus, the engine must be well cooled, especially in winter. In winter, problems most often arise with the cooling system.
- In view of this fact, it is better to prepare in advance. That is, in the fall it is necessary to change the antifreeze.
- It is advisable to change antifreeze every autumn closer to winter. You should also replace parts of your car's engine cooling system that are damaged or close to failure.
Note! It is especially recommended to change antifreeze every year on older cars, since there is a greater likelihood of rust contaminating the radiator and other parts of the cooling system.
- Also, if rusty antifreeze is detected in the car’s cooling system, it is extremely necessary to flush the system. This will be mentioned below.
WHAT TO CHOOSE?
What do we choose?
Many car owners often wonder about the choice of coolant - antifreeze or antifreeze: which is better? Let's try to figure out what's what without going into deep truths.
Antifreeze
- In fact, all coolants are and are called antifreeze. And antifreeze is no exception to the rule.
- In fact, antifreeze is just the name of one of the types of antifreeze developed in our area, for our area and for our cars.
- In terms of its performance and characteristics, antifreeze is in many ways inferior to other antifreezes.
- The price of antifreeze is much lower than other coolants.
- Antifreeze is more common among domestically produced cars.
Antifreeze
- There are very, very many antifreezes in the world. They differ in composition, base, color, and so on.
- Various antifreezes include various special additives that help better maintain the car's cooling system and at the same time increase the service life of the antifreeze itself.
- The cost of antifreeze is higher than antifreeze, and it is quite widespread.
Conclusion
Summarize. Antifreeze or other antifreeze?
So:
- Antifreeze is undoubtedly better in quality.
- BUT antifreeze is much more practical for several reasons.
- Antifreeze was SPECIALLY designed for our climate and our cars.
- Antifreeze is available in almost every domestic car that passes you.
- And this can sometimes save (in case of a breakdown on the road).
- There is enough antifreeze for the car to function normally and the cooling system to work as expected.
It is more practical and cheaper (which is very important) to use antifreeze.
WE CHANGE THE ANTIFICE OURSELVES
How to replace antifreeze on a VAZ 2109 yourself? The answer to this question is discussed below and until the end of the article. Be careful.
Important! Before replacing antifreeze, make sure that all parts of your car's cooling system are in working order and do not require repair. If this is not the case, then you should first repair the damaged parts or replace them, and then (or simultaneously) change the coolant.
Tools and accessories
What will be needed to ensure that the replacement of antifreeze on a VAZ 2109 occurs without wasting extra time and effort?
Prepare the following in advance:
- Antifreeze or antifreeze - 8 liters
- Container for drainage (to fit under the car)
- 13mm socket, extension and ratchet
- Or a 13mm wrench (open-end or socket)
- Key for 8
- Key for 10
- Screwdriver
- Watering can
Have you prepared? You can start working.
Draining antifreeze
Now we begin to drain the antifreeze. Remember, car repairs are best done in an inspection pit or overpass.
It’s still good on a lift, but this phenomenon is rarely seen in a garage:
Advice! Do not forget - you should replace the antifreeze on a cold engine. Under no circumstances should you fill in cold new antifreeze if you have just driven the car into the garage and it has not yet cooled down sufficiently. This threatens a crack in the cylinder block.
- So, our VAZ 2109 is in the pit and ready to drain the antifreeze.
- Before you start draining it, take a 10mm key and be sure to unscrew the negative terminal of the battery so that when you drain the antifreeze, a short circuit does not occur, and you don’t have to repair it later with an electrician.
- Place a previously prepared antifreeze container under the car, which should be about 10 liters in volume.
- Remove the cap on the expansion tank of the cooling system.
- Take a 13mm socket with the rest of the accessories or a 13mm wrench and unscrew the drain plug from the cylinder block.
VAZ 2109 antifreeze replacement
Attention! Hold the plug so that the pressure of the coolant does not blow it away and you do not lose it.
- After all the antifreeze has drained from there, you can screw the plug back on.
- Next, you need to drain the antifreeze from the radiator of the cooling system.
- To do this, unscrew the plastic plug, and the liquid also flows into the antifreeze container located under the car.
- Screw the plug back - it can be screwed in and out simply with your own hands (no tools required).
The first stage of replacing the antifreeze in the VAZ 2109 has been completed - we have drained the antifreeze. Go ahead!
Flushing the cooling system
Washing is done in some cases. One of them is rusty drained antifreeze. This means that the system is contaminated, and clean new antifreeze will not remain so for long - it will quickly become unusable.
So:
- Flushing is done using two means: a special flush for the cooling system or ordinary water (preferably distilled, but, in extreme cases, regular running water can also be used).
- The flushing fluid is poured into the cooling system through the neck of the vehicle's cooling system expansion tank.
- Then the engine starts and the car runs at low speeds for ten minutes.
- Next, you should turn off the engine and repeat the process of draining the coolant, which has already been described above.
- The system flushing procedure is repeated until the drained water is more or less clear in color or according to the instructions for special flushing of the cooling system.
After the system has been flushed, you can begin to fill in new antifreeze. By the way, flushing is not a necessary step in replacing antifreeze on a VAZ 2109 and other cars.
Pouring antifreeze
Replacing antifreeze in a VAZ 2109 yourself
So:
- We take a watering can and insert it into the neck of the expansion tank for convenience.
- We check that all plugs are tightened.
- Remember - it is important that the cooling system is intact and efficient.
- Gradually add antifreeze.
- After the entire system is filled, fill the expansion tank halfway with antifreeze.
Now comes the most important moment of all the work. It is necessary to remove air from the cooling system.
The following explains how to do this better and more efficiently:
- The first is the upper cooling pipe. Air in a liquid is known to rise. Therefore, it accumulates in the upper pipe. To remove it from there, you need to squeeze the pipe with your hand several times until you feel that there is liquid there.
- The second is bleeding the cooling system. This is done as follows.
- Using a screwdriver or a size 8 wrench, unscrew the clamp securing the return flow hose to the expansion tank of the cooling system (hereinafter referred to as return).
- After that, you should close the fitting on which the return line is put on with your finger so that no air escapes from there.
- Next comes the most interesting part - you need to blow into the expansion tank. Press the area of your face around your mouth into the filler neck and blow air.
- This creates pressure - coolant from the expansion tank enters the cooling system, and air comes out of the return.
- This procedure should be stopped when coolant flows out of the return line.
- Don't forget to put on and secure the return pipe to the expansion tank with a clamp.
- You should also reconnect the battery terminal and tighten the expansion tank cap.
Ending the process
And the last thing is to check the functionality of the cooling system in action:
- Start the engine and let it run for a while at medium speed.
- As the coolant in the system heats up (which you can see on the dashboard), coolant will flow from the return into the expansion tank.
- The liquid pouring out is a sign of good operation and successful replacement of antifreeze in the VAZ 2109.
- Also, do not forget to check the functionality of the thermostat, temperature sensor and cooling fan.
- When the temperature rises, the thermostat should open. This can be determined by the warm bottom of the thermostat.
- Wait until the cooling fan turns on and off - this means that the sensor and the fan itself are working well.
Now you know how to replace antifreeze in a VAZ 2109. Only after all these procedures and controls can you safely hit the road. Bon Voyage!
Didn't find the information you are looking for? on our forum.
