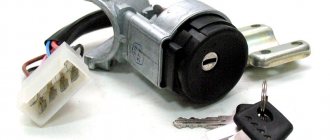
The ignition does not turn on on the VAZ 2112? One of the causes of the disease may be in the ignition switch. Don't rush to replace the ignition switch with a new one, first try checking it yourself.
Replacement
First, remove the negative terminal on the battery and remove the lower casing under the steering wheel.
1. Disconnect the ignition switch wiring harness connectors.
2. Having rested the chisel blade against the edge of the head of one of the bolts, lightly hit the chisel with a hammer to loosen the bolt.
3. Using pliers with narrow jaws, remove the bolt.
4. Similarly, unscrew the three remaining bolts securing the ignition switch.
5. Remove the lock mounting bracket...
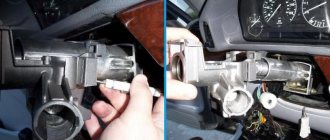
6. ...and the ignition switch itself from the steering column.
1. Before installing the ignition switch, insert the key into it and turn it to position I (“on”) so that the latch of the steering shaft locking mechanism is pushed into the lock body.
2. Install the ignition switch with mounting bracket on the steering column and hand-tighten the new mounting bolts.
3. Having removed the key from the ignition switch, we check the operation of the steering shaft locking mechanism. If the steering shaft does not lock after a full turn of the steering wheel, adjust the position of the ignition switch on the steering column so that the lock latch can fit into the groove on the steering shaft.
4. After making sure that the locking mechanism works, use a 10 mm spanner to tighten the bolts evenly (crosswise, half a turn) until their heads come off.
Geometric dimensions of the body at the link.
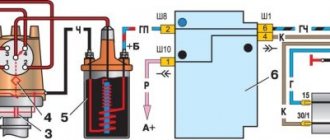
Connection diagram (pinout)
Connect and install the ignition switch in the reverse order, having previously recessed the tongue of the anti-theft device; to do this, you need to insert the key into the lock and turn it from position 0.
How to remove
Prepare the vehicle for operations. Remove the key from the ignition. Disconnect the cable from the negative terminal of the battery. To do this, simply use a wrench to loosen the terminal fastening nut and remove the wire. There is no need to remove the positive cable from the battery terminal.
Remove the steering wheel, steering column trim and steering column switch assembly. To do this, use a Phillips screwdriver to unscrew the four bolts securing the steering column trim and unscrew the three screws screwed into the steering column bracket. Lower the steering column adjustment lever all the way down and remove the lower casing. Then lift the lever all the way up and remove the upper casing.
Disconnect the connector of the wires coming from the steering column switch block. To remove the right steering column switch, squeeze the latches (top and bottom) with your fingers and remove it. Remove the left steering column switch in the same way. To remove the steering column switch connector, loosen the pinch bolt using a socket, disconnect the horn wires and remove the connector itself.
To remove the steering wheel, use a flat-blade screwdriver to pry up the horn button cover and remove it. After this, use a Phillips screwdriver to unscrew the two screws securing the steering wheel cover and remove the cover. Then remove the moving contact of the audio signal by unscrewing the three screws securing it and disconnecting the wire
Using a 24mm socket, unscrew the steering wheel mounting nut. Do not remove the nut completely. Using a rocking motion, pull the steering wheel toward you to remove it from the shaft. If it breaks off the shaft, a non-removed nut will protect your face from injury. If the steering wheel is very tight, have an assistant pull the steering wheel. At the same time, simultaneously strike with a hammer through a soft metal drift at the end of the steering shaft.
Disconnect the steering wheel slip ring wire. Then remove the ring itself by unscrewing the three screws securing it with a Phillips screwdriver. After this, remove the steering column switch block interlocked with the ignition switch (lock).
Tools you will need for your work
To perform the work you may need the following tools:
- chisel;
- hammer
- socket wrench 10;
- a set of standard screwdrivers and wrenches;
- pliers or round nose pliers;
- sandpaper.
An experienced master will spend about an hour on the job, a beginner will have to tinker twice as long. But this is a completely justified time investment, since it allows you to save money - as of January 10, 2019, the average price for replacing the ignition switch of VAZ 2112, 2110 and 2111 in car services costs 800 rubles. In addition, the car owner will be charged another 500 rubles for adjusting the system. While the complete unit itself costs about 1 thousand rubles. Replacing a contact group will cost the car owner about the same money, when the element itself costs an average of 300 rubles.
Pinout of lock VAZ-2110, VAZ-2111, VAZ-2112
Pinout of the ignition switch VAZ-2110:
- comes +12V for the microphone of the sensor of the inserted key;
- the mass comes when the driver's door is open;
- +12V goes to the starter (pin 50);
- +12V goes out after turning on the ignition (pin 15);
- +12V goes out when the key is inserted to pin 5 of the BSK;
- comes +12V to illuminate the lock cylinder;
- +12V comes from the battery (pin 30);
- not used.
Replacing the contact group
In the event that, as a result of diagnostics, a malfunction of the contact group is detected, you will still have to remove the ignition switch, since it will not be possible to get to it in any other way. After removing the element, disassemble it using the following algorithm:
- Disconnect the connectors with the backlight power wires.
- Remove the decorative plastic cover by releasing the 4 latches. Work carefully because these clips are easy to break off, and buying a cover separately is quite a task. It is not advisable to change the entire lock because of it.
- By bending the 2 clamps holding the contact group, remove it from the ignition switch.
The plastic cover can be removed using a screwdriver
Note. You will additionally need a small flat-head screwdriver as a tool to bend the latches.
The contact group is located immediately under the cover
First of all, examine the status of the contacts. If they have darkened (oxidized), then clean the current-carrying surfaces with fine sandpaper P1000. Then put the group in place and, without installing the lock, connect it to the vehicle's on-board electrical system to check its functionality. If unsuccessful, the part must be replaced. The same will have to be done if the contacts are burnt or the group does not work without any external signs of malfunction.
The part is removed after bending two latches
Instructions for removing the element
For disassembly you need to prepare a simple set of tools:
- 10 mm head and ratchet drive;
- Phillips screwdriver;
- narrow chisel (width 5-8 mm);
- hammer;
- round nose pliers with tapered, curved ends.
Ignition switch replacement tool
To successfully install a new or repaired lock in place, it is advisable to purchase 4 special fastening bolts with M6 threads with a head size of 10 mm and a length of 20 mm. Their feature is the heads that come off with a key at a certain tightening torque. After tearing off the heads, semicircular caps remain on the surface, which are much more difficult to unscrew for an untrained person. But you will have to do this during disassembly.
The battery must be disconnected before starting work.
Like any event related to tampering with the electrical part of the car, dismantling the ignition switch begins with disconnecting the negative terminal of the battery. Then proceed in this order:
- Using a Phillips screwdriver, remove the screws holding the two halves of the plastic frame of the steering column together.
- Lower the handle that fixes the position of the steering wheel during adjustment all the way down and remove the plastic panels. Disconnect the ignition switch block and carefully cut the tape connecting your bundle of wires to the common harness. In order not to cling to the steering column switch during operation, it can also be pulled out of the connector.
- On the metal casing of the steering column you will see a lock mount consisting of two clamps. They are held together by 4 bolts with the heads torn off (visible on the left side). Pointing the chisel at the semicircular caps, use a hammer to loosen the tightening of these bolts one by one.
- Using pliers and then your hands, unscrew all 4 bolts and remove the ignition switch.
Unscrewing the plastic steering column cover
Note. There are “dozens” in which not all the bolt heads are torn off during assembly. This simplifies the matter; the fasteners can be easily unscrewed with a 10 mm socket.
Bolts with intact heads can be unscrewed with a wrench
At the stage of disconnecting the connectors, it becomes possible to check the functionality of the contact group by measuring resistance, as described in the previous section. If you remove the lock due to the loss of the keys and want to move on, then after dismantling you need to do the following:
- On the “mother” block, which remains hanging after the lock is turned off, find contacts with thick wires of purple and blue color (the latter with a black stripe).
- Connect these terminals with any conductor, after which the ignition will turn on.
- The thick red wire leads to the starter. To start, its contact must be temporarily connected to the installed jumper. When the engine starts, the red wire must be disconnected.
This is how jumpers are inserted into the block to start the engine without a key.
Advice. It is more convenient to look at the colors of the conductors on the harness of the removed device, and then find them on the “mother”.
After unscrewing the fasteners and disconnecting the wires, the lock can be easily removed from the car
Assembly is carried out in the reverse order, but taking into account the following precautions:
- do not tighten the fastening bolts until you have accurately aligned the position of the lock on the casing so that the facing plastic panel fits smoothly into place;
- before final tightening the bolts, make sure that the lock snaps into place when turning the steering wheel, otherwise adjust the position of the lock;
- The tightening torque should be such that the heads of the new bolts come off and the round heads remain.
When installing and tightening the bolts, their heads should come off
If you think that special fasteners are not an obstacle for car thieves, then you can screw in regular bolts with M6 threads and carefully tighten them.
Dismantling the VAZ 2110 lock in the photo
This connector must be disconnected to remove the lock.
The steering column switch is easily removed from its socket
Appearance of the mount. It can be seen that not all the bolts are broken
Bolts without heads are torn out of place with a chisel
After unscrewing, the left mounting clamp is removed
The lock with the right clamp is held on by wires that need to be disconnected
After breaking the bolts with a chisel, they can be easily unscrewed with pliers
Training video on replacing the ignition switch
Do we replace the entire lock, or just the contact group?
The issue is purely economic in nature. It is clear that replacing the complete lock will cost three times more , so before replacing the ignition switch completely, it is worth understanding the causes of the malfunction. It is possible that it will be enough to simply replace the contact group if everything is in order with the cylinder and the mechanical part of the lock.
Appearance of the contact group
A startup problem may occur when the contacts on the contact group are burnt or oxidized.
Ideally, it is better to replace oxidized, and even more so burnt, contacts, however, they can simply be cleaned with very fine sandpaper. Diagnostics of the contact group is carried out using a multimeter in ohmmeter mode . Each pair of contacts on the terminal block is checked using the probes of a multimeter - we turn the key in the ignition switch and test each pair of contacts on the terminal block for a short circuit; if the multimeter shows zero resistance, everything is in order with the contacts.
We check each pair of contacts on the terminal block
There may be problems with the mechanical part of the lock, and in this case, experts do not recommend changing the cylinder yourself - firstly, it is quite difficult to find it on sale, and secondly, replacing the cylinder may be carried out incorrectly and, as a result, the entire lock will not work incorrect. In this case, it is more rational to buy a complete lock and replace it completely. It's more reliable and safer. Good luck to everyone and good travels!
Installation of a new larva
To replace the lock core due to mechanical failure, remove it from the vehicle as described above. Then follow this algorithm:
- Insert the key into the slot and use a Phillips screwdriver to unscrew the 3 screws holding the 2 halves of the lock body together.
- Separate the housing while holding it with the key facing up. If you hold the lock in a different position during disassembly and do not insert the key, the insides will spill out and you will not understand how to put them back together. In this case, the ball with springs may get lost.
- Remove the locking mechanism, which consists of two spring-loaded parts, and pull out the spring itself.
- After removing the key, carefully remove the core so that the ball with the spring (located on the side of the cylinder) is not lost.
To disassemble the case, you need to unscrew 3 screws
Before replacing, it is necessary to remove the return spring from the old cylinder, since it is not sold complete with a new core. The spring is inside the part on the back side in a cocked state; it must be installed in the same form on the new cylinder. Also, do not forget to remove the thin spring from the hole where the ball is inserted.
The locking mechanism tongue peeks out from the bottom of the case
Important point. Remember that if you replace the core because it is broken, the new key will no longer fit the door lock. There are 2 options: use two separate keys or simultaneously change the cylinder in the door. The last method becomes the only applicable one when all the keys are lost.
The larva must be pulled out so as not to lose the details
When installing the core, you need to move the spring for the ball into the hole and insert the part into the body. Then push the larva all the way, while simultaneously inserting the ball into the socket. After that, all that remains is to assemble the locking mechanism and tighten the housing with screws. When finished, check the operation of the ignition switch by turning the key to different positions.
The ejection spring from the old core needs to be moved to the new one
Disassembly and replacement procedure
When the source of the malfunction is identified, the question immediately arises: how to disassemble the ignition switch on a VAZ 2110.
To do this, first it is removed. Since the preparatory work has already been done, the following actions remain:
- The housing mounting bolts are unscrewed.
- The lid made of plastic material is removed. The lock is removed.
Replacing the larva
Before changing the ignition switch on a VAZ, sometimes it is enough to replace the cylinder.
The process consists of several steps:
- A small diameter pin holding the cylinder is removed from the side. The work is carried out using a thin screwdriver and a hammer.
- The old larva is removed and the new one is installed.
- To check, the steering wheel is turned and the reliability of the jamming is checked.
- Sometimes the blocking is adjusted.
Required spare parts
Depending on the type of repair, you may need:
- switch with assembly (articles: 2110-3704005, 2111-3704005, 2112-3704005, VLT21104-6105006, VLT21104-3704005);
- contract group (items: 2110-3704005, 2111-3704005, 2112-3704005);
- bolts with heads that can be torn off, or M6 bolts.
The nuances of replacing the ignition switch
You probably know that malfunctions of the VAZ 2110 ignition switch simply do not bypass anyone. First of all, it is worth saying that the ignition switch 2110 is the main device in the car’s starting system. If the engine does not work, then not a single car will ever move from its position. Secondly, thanks to this device, the anti-theft effect works, and if the engine starting device malfunctions, the vehicle may be stolen. Although this happens rarely, there are still enough “professionals” today who are able to start a car even if the engine starting device fails. Moreover, you can start the car without a key to the ignition.
The peculiarity of the ignition switch in the VAZ-2110 is that it is equipped with an anti-theft device and is characterized by a property that helps block the restart of the starter, eliminating the need to turn off the ignition. The key can only be pulled out of the keyhole when it is in the zero position. When the key is pulled out, a rod will be pulled out along with it, which is responsible for the operation of the anti-theft system. When switching from position 0 to 1, this rod will be removed and the contacts will close. When the car is running, you can use electrical appliances, such as the heating system or the player. All these devices are energized.
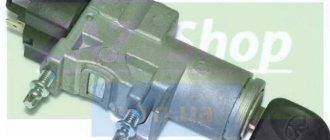
Ignition switch VAZ 2110
When replacement is necessary
Only in certain situations may it be necessary to replace the engine starter. Such situations include the following:
1. An attempt to steal a car was unsuccessful for the attackers, as a result of which the integrity of the engine starting device was damaged. 2. If the owner has lost the keys. 3. Faulty contacts.
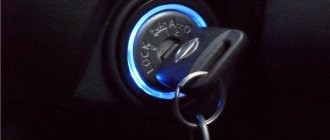
In the first situation, if there are faulty contacts, it is often enough to replace the ignition switch cylinder of the VAZ 2110. Although sometimes, when only the contacts are faulty, it is not at all necessary to completely replace the device. However, it won't hurt to buy a new device and replace it. This will take the same amount of time as if you perform an incomplete repair. You may want to think about purchasing modern devices. Such locks are equipped with a lighting system; the lighting in them is located around the cylinder. Such a lock will cost relatively little, and it will be very convenient to use at night. If the fault is only in the contacts, then it is very easy to check.
