At the beginning of 2021, AVTOVAZ showed a new 1.8-liter engine with a power of 122 hp. with index VAZ-21179. At first this engine was installed on the Lada XRAY, and then it appeared under the hood of the Lada Vesta sedan. Let's consider its characteristics, features and reviews from the owners of this power unit.
Dynamic characteristics
ICE 21179 is available with both a manual transmission and a robot.
Acceleration to 100 km/h with engine 21179
- 12.1 s (Vesta sedan + robot)
- 10.5 s (Vesta sedan cross + manual transmission pair 4.2)
- 12.7 s (Vesta sedan cross + robot)
- 12.9 s (Vesta SW + robot)
- 13.3 s (Vesta SW Cross + robot amt)
- 11.2 s (Vesta SW Cross + manual gearbox with main gear 4.2 instead of standard 3.9)
- 10.4 s (Xray + manual transmission on pair 4.2)
- 12.3 s (Xray + robot)
- 10.9 s (Xray Cross + mechanics)
*The car shows factory dynamic characteristics
Maximum speed 21179
- 180 km/h (21179 + manual transmission with 4.2 pair)
- 186 km/h (21179 + robot)
Vesta test on a manual transmission on the track
Real fuel consumption
According to AvtoVAZ: Fuel consumption depends on the vehicle and transmission. But we immediately note that in some operating modes the 21179 engine turned out to be much more economical than all 1.6 liter engines. What is the real fuel consumption on the West?
Real fuel consumption : After talking with car owners, it becomes clear that fuel consumption is not quite as economical as the factory tells us:
Vesta sedan + robot
- mixed consumption - 7.3 l per 100 km
- city - 9.3 l
- track - 6 l
(with a loaded weight of 1230-1380 kg depending on the configuration)
Vesta sedan cross + manual transmission
- mixed consumption - 7.7 l per 100 km
- city - 9.9l
- highway - 6.4 l
Vesta sedan cross + robot
- mixed consumption - 7.5 l per 100 km
- city - 9.6l
- highway - 6.2 l
Vesta SW + robot
- mixed consumption - 7.6 l per 100 km
- city - 9.9l
- highway - 6.2 l
Vesta SW Cross + robot amt
- mixed consumption - 7.7 l per 100 km
- city - 10.1 l
- highway - 6.3 l
Vesta SW Cross + manual transmission
- mixed consumption - 7.9 l per 100 km
- city - 10.7 l
- highway - 6.4 l
Xray + manual transmission
- mixed consumption - 7.2 l per 100 km
- city - 9.7 l
- highway - 6.1 l
Xray + robot
- mixed consumption - 6.8 l per 100 km
- city - 9.0 l
- track - 6 l
Xray Cross + mechanics
- mixed consumption - 7.5 l per 100 km
- city - 9.7 l
- highway - 6.3 l
Based on the power characteristics, it becomes clear why Vesta 1.8 has a decent amount of fuel. The reason for this is high torque at low speeds. The power unit has high efficiency, “Locomotive traction” starts almost from 1500 rpm.
Install the cylinder head
Dip the cylinder head mounting bolts into a container with engine oil, allow excess oil to drain, letting the bolts sit for at least 30 minutes. (technological container, motor oil).
Install the head gasket and cylinder head.
Tighten the fastening bolts. Tighten the bolts in four stages in the sequence shown in Figure 54 (replaceable Torx E14 head, wrench, extension, torque wrench, rotation angle measuring head):
Stage 1 – tightening with a torque of 12…20 N∙m (1.2…2.0) kgf∙m; Stage 2 – tightening with a torque of 26…34 N∙m (2.6…3.4) kgf∙m; Stage 3 – additional rotation of the bolts by 90°± 10°; stage 4 – additional rotation of the bolts by 90°± 10°.
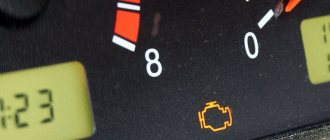
Disadvantages of engine 21179
The first 1.8 21179 engines rolled off the assembly line in 2021. Already after 3 years of use, the disadvantages of the “volumetric” motor are known.
The main drawback, according to the owners based on reviews, is the low engine life. What is the reason for this?
- To supply the phase shifter with engine oil, manufacturers drilled additional channels in the cylinder block, thereby calling into question the possibility of boring blocks to unprecedented repair sizes. For comparison, motorsports drivers bore “prioro” blocks 21126 from 82 mm to 84 mm, while civilian engines bore them to 83 mm. Having bored the engine block to dimensions of 83 mm per cylinder, the likelihood of opening the oil channel becomes high.
- Increased load on the crankshaft journal. Compared to the 21126 or 21129 engine, the crankshaft journal was reduced in diameter. Due to the higher piston stroke than on 1.6 engines, we get additional load on the crankshaft.
- The inserts are a calculation error by the engineers. significantly reduce the resource of the internal combustion engine.
- More complex engine maintenance. To change the timing belt, you need special tools, removing the valve cover, etc.
AvtoVAZ has set a goal for independent servicing from an official dealer. Now Lada is far from being a car that you can repair yourself in a garage.
- Oil burn - The connecting rod and piston group from the factory may not be installed in the correct size. (A frequent problem at AvtoVAZ, I encountered it personally). The way out of this situation is to replace the pistons under warranty (the manufacturer assures that the oil consumption will drop as the engine runs in).
- Another nuance is the use of solid oil scraper rings. The use of these rings under load leads to oil consumption. In other matters, like any 16kL VAZ engine, due to the use of these oil scraper rings, oil is consumed at high speeds.
- Knocking of hydraulic compensators - oil starvation, check the oil level
- The cut-off is 6200 rpm - a little not enough for a comfortable volume; you have to switch at the moment the car is directly ahead of you
Advantage of internal combustion engine 21179
- power/torque
- more efficient pump and oil pump
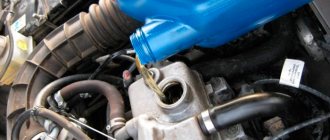
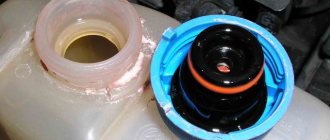
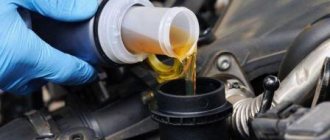
Engine oil
- 5W-30 5W-40 10W-40 15W40
Standard oils for VAZ engines. The replacement period is at least once every 10 thousand km. (advice for the benefit of the motor). When asked which oil is best to fill, there are endless battles, tests and correspondence on forums. People evaluate carbon deposits and other parameters that are incomprehensible to “distant” car enthusiasts. The author adheres to his opinion on this matter: it doesn’t matter what kind of oil, the main thing is that it is original from the factory, and not spilled from a barrel in a neighboring garage. Believe me, in practice, finding original oil is not so easy.
Install crankshaft
Install and secure the cylinder block on a stand (electric or manual hoist, stand for disassembling and assembling units).
Select sets of main and connecting rod bearing shells according to tables 9 and 10, respectively.
Sets of main and connecting rod bearing shells for the repair crankshaft should be selected according to the amount of reduction in the diameter of the main and connecting rod journals.
The reduction amount is marked on the first cheek of the crankshaft (for example, K 0.25; W 0.50). The size marking of the set of inserts is applied on the packaging. In addition, on the repair size liners, the repair reduction value is marked on the outer surface (-0.25; -0.50; -0.75; -1.00).
Lubricate the main and connecting rod bearing shells, thrust half rings, as well as the main and connecting rod journals of the crankshaft with engine oil (motor oil).
Place the shells in the main bearing sockets of the block. Install the liners with grooves on the cylinder block in the bed of the main bearings, and the liners without grooves - in the main bearing caps.
Place the crankshaft in the main bearings and insert two thrust half-rings into the sockets of the middle support.
WARNING
. Install the thrust half-rings with the grooves to the thrust surfaces of the crankshaft. Install a steel-aluminum half-ring (part 2101-1005183) on the timing drive side, and a cermet half-ring (yellow, part 2106-1005183) on the flywheel side.
Install the main bearing caps according to the marks. The marks on the covers should be located on the side where the water pump is installed.
Install and tighten the main bearing cap bolts. The tightening torque of the fastening bolts is 70…86 N∙m (7.0…8.6 kgf∙m) (replaceable head 17, wrench, extension, torque wrench).
Check crankshaft rotation. The shaft should rotate freely and without jamming by hand. If the rotation is tight or there are jams, it is necessary to remove the crankshaft and repeat the operation to select a set of bearings.
Check the axial clearance of the crankshaft. Install rack 2 with indicator 3 on cylinder block 1, Figure 51. Place the measuring rod of the indicator on the crankshaft flange 4, as shown in Figure 48, and set the indicator scale to zero. Moving the crankshaft using screwdrivers 5, measure the axial clearance of shaft 4.
The axial clearance of the crankshaft should be within 0.06...0.26 mm. If the axial gap is more than 0.26 mm, adjust the gap by replacing the normal thrust half-rings with half-rings increased by 0.127 mm. Enlarged steel-aluminum half-rings are marked “P” on a steel base. The enlarged metal-ceramic half-rings are not marked and have a thickness of 2.44...2.49 mm (ShM-PV-8 tripod, ICh-10 indicator, 2 flat-head screwdrivers, MK 25-1 micrometer).
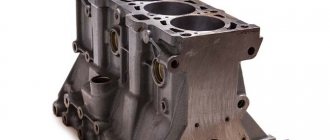
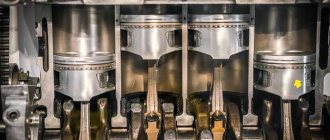
Engine Features
In appearance, the 179 engine is similar to all sixteen-valve VAZ engines. Unlike the first 1.8 small-scale engines 21128 and folk craftsmen, AvtoVAZ decided to achieve an increase in volume not by boring the cylinder block, but by using the stroke length of the piston itself on the same cylinder block. To do this, we had to develop an original crankshaft with an enlarged crank and make oil channels for the phase regulator, additional channels for the cooling system. Due to the increased cylinder volume, a larger diameter E-gas block throttle valve was installed and the intake ports were enlarged compared to 1.6 liter engines. up to 39mm. Also, the main feature of the 21179 engine is the variable valve timing.
- The piston stroke increased from to 84mm.
- crankshaft connecting rod journals decreased
- ShPG Federal Mogul – East. Among the features - the piston skirt is modified to increase contact and has a graphite coating.
- Oil scraper rings are chrome plated
- Compression height - 26.7mm
- Valves - mahle
- the “head” has additional oil channels
- High Performance Oil Pump - GMB
- The oil sump volume is 4.4 liters with an aluminum pan.
- Pump - GMB
- The developers abandoned the installation of the mass air flow sensor in favor of the DBP (pressure sensor) and DTV (air temperature sensor)
- Camshafts - Toyota Tsusho. Much lighter than the old cast iron ones.
- INA phase adjustment mechanism. (For the first time, a motor with variable valve timing is installed on the vase)
- The timing belt, as well as the injectors, are Continental.
The injectors have greater performance compared to the prioromotor. The timing belt resource is 180 thousand km. In other matters, the Priora claimed approximately the same resource mileage, but will the rollers and the pump last that long: you all know, dear readers, how it all ended. By the way, the videos are also from the German company INA.
Tuning a car VAZ 2110, 2111, 2112 Ten - Camshaft
Remove the camshaft gear pulley (see Composite camshaft drive pulley for an eight-valve engine).
To avoid losing the pulley key, remove it from the camshaft groove.
Using a 10mm wrench, unscrew the nut securing the rear timing belt cover.
Using a 10mm wrench, unscrew the two nuts securing the throttle cable bracket to the receiver...
...and remove the bracket.
Using a Phillips screwdriver, loosen the clamps securing the two crankcase ventilation outlet hoses and remove the hoses from the valve cover fittings.
Using a Phillips screwdriver, loosen the clamp securing the crankcase ventilation supply hose and remove the hose.
Using a 10mm wrench, unscrew the two nuts securing the valve cover.
Remove the valve cover.
Rubber sealing bushings are installed in the valve cover holes.
Remove the valve cover gasket.
Using a 10mm wrench, unscrew the two nuts securing the ends of the ground wires to the studs of the cylinder head plug and remove the wires from the studs.
Use a 10mm wrench to unscrew the two nuts...
...and one bolt securing the plug.
...and its O-ring.
Using a “13” wrench, evenly in several steps (until the pressure of the valve springs is removed), unscrew the ten nuts securing the camshaft bearing housings.
Remove the front one from the studs...
...and the rear camshaft bearing housings.
Moving the rear timing belt cover slightly away from the cylinder head, remove the camshaft.
Remove the camshaft oil seal.
We install the tuning camshaft in the following sequence.
We clean the mating surfaces of the cylinder head and bearing housings from sealant and oil.
Lubricate the bearing journals and camshaft cams with engine oil. We place the shaft in the cylinder head supports so that the cams of the first cylinder are directed upward (the figure shows the position of the cams of the first cylinder when the camshaft is placed in the cylinder head supports).
On the surfaces of the cylinder head that interface with the bearing housings in the area of the outer supports, apply a thin layer of sealant (arrows).
We install the bearing housings and tighten the nuts securing them in two steps.
Pre-tighten the nuts in the sequence shown in the figure until the surfaces of the bearing housings touch the cylinder head.
In this case, it is necessary to ensure that the installation sleeves of the housings fit freely into their sockets. We finally tighten the nuts to a torque of 21.6 N.m (2.2 kgf.m) in the same sequence.
After tightening the nuts, carefully remove any remaining sealant.
After lubricating the working edge of the new oil seal with engine oil, press it into place with a suitable piece of pipe.
We install the camshaft timing belt and timing belt. (See Composite camshaft pulley for eight-valve engine).
Turn the crankshaft clockwise until the timing marks on the camshaft sprocket and the rear timing belt cover align.
Then we turn the crankshaft another 40-50° (2.5-3 teeth on the camshaft pulley).
In this position of the shafts, we use a set of feeler gauges to check the gaps at the first...
... and the third camshaft cam.
The clearance between the camshaft lobes and the washers should be 0.20 mm for the intake valves and 0.35 mm for the exhaust valves. The clearance tolerance for all jaws is ±0.05 mm.
If the gap differs from the norm, then install a device for adjusting the valves on the studs of the camshaft bearing housings.
We introduce the “fang” of the device between the cam and the pusher.
We rotate the pusher so that the slot in its upper part faces forward (along the direction of the car).
By pressing the lever of the device, we recess the pusher with the “fang”...
...and install a clamp between the edge of the pusher and the camshaft, which holds the pusher in the lower position.
Move the lever of the device to the upper position.
Using tweezers, pry the adjusting washer through the pusher slot and remove it.
If you do not have a device for adjusting the valves, you can use two screwdrivers.
Using a powerful screwdriver, leaning on the cam, press the pusher down. By inserting the edge of another screwdriver (with a blade at least 10 mm wide) between the edge of the pusher and the camshaft, we fix the pusher.
Use tweezers to remove the adjusting washer.
Does valve 21179 bend on a 1.8L engine?
Car owners often ask this question. The answer is YES , the 1.8L engine bends the valves, just like absolutely all modern cars.
With the exception of motor 21129. Since the end of 2018, the ICE 21129 has stopped bending valves when the timing belt breaks, due to the use of pistons with recesses.
Due to the lighter piston and increased compression ratio in order to squeeze out the maximum power of the car during civilian use, with a wedge of a roller or pump, and as a result of a broken timing belt, major repairs are inevitable on absolutely any modern car.
First tests
Throughout 2009, design and finalization of drawings continued, and in August the first prototypes of the VAZ-21179 were assembled. The engines were handed over to the British for testing, and after a few months they confirmed all the indicators of the project, after which AvtoVAZ began fine-tuning the unit. Despite the success of the tests and the desire to quickly launch the engine into series, the project was frozen and relaunched several times. The reason lay in the change of management of the car plant and in some financial difficulties. However, unexpectedly for everyone, in February 2021 the VAZ-21179 engine went onto the assembly line and began mass production.
History of origin
Motor 21179 was already in the minds of the engineer much earlier than you can imagine. Even at the end of the USSR, developers began to think about the Lada C project and its power units. Even then, engineers “knew” this motor by its features and power characteristics. But the difficult economic situation of that time and the collapse of the USSR forced the engineers to completely forget the Lada-Ts project.
And now, after a long time, when Boo Anderson comes to the post of general manager of AvtoVAZ, the project is raised and developed again.
The main task was to create an engine with good low-end torque, which AvtoVAZ lacked for a confident, comfortable ride. “Tractor” 8-cl engines have long since become obsolete, but the new 16-cl engines had a more “sporty” character. The situation was corrected by the then 21127 engine, now 21129, which is installed on Vesta, Xray, and other AvtoVAZ models. Due to the intake receiver with variable geometry installed on it, the torque from the bottom began much earlier, unlike the Prioromotor (21126), and its shelf was much further, right up to the cutoff. But with the start of production of a sedan with a larger mass - the Vesta, and the Xray hatchback - the need for low-end engines reappeared.
The engine was run in and tested for a long time. As a result, during the testing process it turned out that the rings were already stuck at 4t.km., as a result, the heat zone was increased and the problem disappeared.
Nissan HR16DE engine with 110 hp power. It copes well with its task on front-wheel drive. But if you have all-wheel drive, it will strain, get hot, eat a lot and not drive.
Another factor in the creation of the 21179 motor is economics and politics. Because the Nissan engine, although it is assembled here, still belongs to Nissan. And in the event of an unfavorable economic situation, an increase in exchange rates, the cost of its production and sale may simply be unprofitable.
Start of production of motor 21179
Back in 2014, there were rumors about the possible production of a 1.8 liter engine with phase shifters. And yet it became a reality. Previously, OPP and its subsidiary Super-Auto were already engaged in the construction and installation of a 1.8 liter engine with index 21128, which was installed in Priora Sport. But that engine did not have a special resource.