Of all the service work that every driver has to carry out with his own car, such an operation as replacing the alternator belt is also often encountered.
The problem is that a vehicle needs not only fuel in the form of gasoline, diesel fuel or gas. Many systems and devices require electricity.
Without electricity, it is impossible to ignite the fuel in the engine, the lights and turns will stop working, and the windshield wiper will not turn on.
The battery has a small supply of electricity needed to start the power unit, and all remaining energy needs are provided by the generator.
In turn, like all additional equipment, the generator uses the mechanical energy of shaft rotation, converting it into electricity. The shafts are connected to each other by a special ring-shaped drive.
A belt whose life has long been exhausted
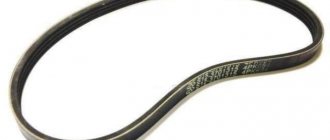
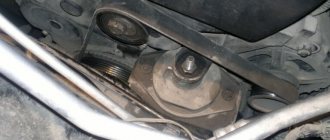
Like all components of a car, the drive has a limited resource, which, of course, is coming to an end. And the vehicle owner is faced with the problem of how to replace the alternator belt. The replacement itself is quite simple, and any car enthusiast should be able to carry it out independently, since a drive failure can occur far from the city. This is also better because you can save a decent amount.
When should you change the alternator belt?
The frequency of replacing the electric generator drive belt is indicated in the vehicle service manual. Please note that the service life of the same machine supplied to different markets may vary. This is due to different climatic conditions and dust levels in the air, which causes further degradation of the material from which the product is made.
For example, Volvo recommends the first replacement after 80,000 vehicles. km, and carry out each subsequent replacement after 60 thousand km. At the same time, in cars from the European market, the belt is replaced every 180 thousand. km. On VAZ cars this product is rarely used for more than 30 thousand. km.
A common symptom of a long belt is a whistling sound that occurs when starting the engine or after driving through a puddle. The source of noise is the sliding of the belt material along the surface of the pulley. Usually the whistle quickly disappears and appears again when starting the engine or after another puddle. In this case, the owner should check the belt tension and try to return it to normal.
What affects wear?
Factors affecting the service life of the drive belt:
- Product operating conditions. Ingress of dust, abrasives or chemicals will significantly reduce the life of the belt. Prolonged use at low ambient temperatures has a negative effect on the material.
- Condition of the pulleys. Runout or misalignment will damage the raceway and belt edge.
- Voltage. Low or excessive tension will accelerate belt wear.
- Date of manufacture of the belt. Rubber is subject to aging, so when packed in a warehouse, the belt may deteriorate. In addition, improper storage has a negative impact.
- Belt manufacturer. There are products from small companies made from low-quality materials. Such belts can fail after several thousand kilometers.
Let's sum it up
Taking into account the above information, it becomes clear how to change the alternator belt with your own hands. Moreover, the replacement itself does not require specialized tools or professional skills. In fact, even an ordinary car owner can often cope with such a task. The only caveat is to provide free access to the mechanism for adjusting the tension. On some cars this may be difficult.
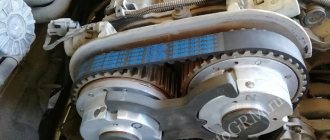
We also recommend reading the article on how to replace the timing belt on a Lada Granta with your own hands. From this article you will learn how to change the timing belt, as well as what you should pay attention to when replacing the timing belt.
One way or another, knowing how to install the alternator belt, you can quickly change the worn element yourself. At the same time, the replacement allows you to get rid of extraneous noise and whistles right on the spot without visiting a car service center. In turn, this approach allows you to save a little on the maintenance, repair and maintenance of the car.
Finally, we note that many owners prefer to change timing belts, alternator belts, pulleys and rollers not only for the sake of savings, but because properly performed independent maintenance guarantees the installation of high-quality spare parts and the accurate implementation of all adjustments. As a result, the replaced elements last a long time, and during operation there is often no extraneous noise, etc.
How to check the belt?
You should not only check the condition of the belt, but also periodically. Most car manufacturers recommend visually checking the belt and its tension every 6 months or after 25,000 kilometers. km. It doesn't matter whether the car is driving or parked.
Approximate sequence of checks:
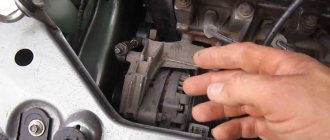
- Open the hood of the car. The drive belt is located on the pulley on the crankshaft side. Carefully check the condition and voltage while staying away from the cooling system fans. This is due to the fact that the fan can start at any time, even when the engine is cold.
- Check visual condition by holding the inside of the belt towards the light. Cracks, abrasions and peeling of the product are unacceptable. If the damage occurs in a small area, the belt is considered unsuitable for further use. The element is pulled through the crankshaft crank using a central nut.
- The tension is checked and the deflection is measured under a load of 10 kg. When the distance between the pulley axes is up to 300 mm, the deflection beam should be 6 mm. With a distance between the axes of 300-450 mm, a deflection of 12 mm is allowed.
Check the tension of the generator belt with maximum load, i.e. turn on all energy consumers except the starter. If there is no whistle, the tension is sufficient.
Checking for wear and its signs
Before you try to change the unit yourself, you need to make sure that it has actually exhausted its resource, does not perform the functions assigned to it and requires replacement.
The most important sign of wear is the appearance of a characteristic whistle during generator operation. This whistle can be heard by applying an appropriate load to the generating equipment. In practice it looks simple. You need to start the air conditioner or just turn on the high or low beam headlights. Next, the engine starts and the gas pedal is pressed. If at this moment a sweat appears from the engine compartment, the belt is loose.
Whistling and loosening of tension does not indicate complete wear. In some cases, it is only slightly damaged, but still suitable for further use.
A whistle does not signal a critical failure of the unit. But this is an obvious sign that the element will soon have to be changed.
When the device wears out and the tension decreases, the generator continues to function. Even if its efficiency decreases and the charge may be partially supplied, you can still get to a car service center or your own garage. But as soon as you find out what the price of work at a service station is for such a procedure, you will probably want to personally understand the nuances of replacing the alternator belt. There is nothing complicated here. But you will gain additional experience and save a significant part of your budget.
The constant noise from the generator is considered much worse than whistling. Moreover, it can appear under load and without any impact load from electrically dependent equipment.
How to tighten a belt
If the surface If there are no cracks or breaks in the belt, try tightening it. This procedure is suitable for both Russian-made cars and foreign cars equipped with a manual manual tensioner, which is often the generator itself. The belt is tensioned until it stops sliding on the pulleys. The car owner should remember that excessive voltage loads the alternator bearings and causes them to stop working.
If the belt tension does not allow normal operation, replace the part. Do not install shims under the idler pulleys as this will increase the length of the belt.
2163-13-12-08
Automatic tensioning device.
Install the removed parts in reverse order. Before installing the belt, the tension roller bracket must be turned clockwise and locked (see above).
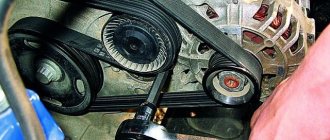
When installing the belt, place it on the pulleys and place it under the tension and support rollers in accordance with the drive diagram.
Attention! The drive pulleys for auxiliary units, generator, air conditioning compressor and power steering pump are six-ribbed, and the drive belt is five-ribbed.
Instructions for replacing the drive belt
Replacing the alternator drive belt is not a problem for most drivers. After removing the used strip, it is recommended to check the wear pattern. If it has damage to the edges and contacts, this may indicate misalignment of the pulleys. In this case, locate the damaged component and replace it. There is no point in putting a new belt on a damaged pulley, since the rubber quickly wears out on sharp edges. When replacing the belt, follow the sequence recommended by the vehicle manufacturer.
When replacing the alternator drive belt, it may be necessary to install a new tensioner and associated fasteners. For a list of parts that need to be replaced, see your vehicle's owner's manual.
What will be needed for replacement?
Before attempting to replace the alternator belt, prepare a set of tools and consumables (the maximum list is given):
- wrenches and sockets;
- new belt and tension roller;
- return rod for attaching the pulley
- assembly shovel for belt removal
- knife;
- protective gloves;
- a piece of paper and a pencil to draw a diagram of the installation.
A new aftermarket drive belt may be several millimeters longer than the original. The difference in length is compensated by the tensioner.
Scheme
Installing a belt on motors with two or three pulleys is easy. The situation changes when the belt is installed on an engine with more than one pulley. In this case, it is recommended to draw up an installation diagram for the product. This will speed up the installation process and avoid errors.
Schematic symbols:
- 1 — crankshaft pulley;
- 2 — generator pulley;
- 3 — guide pulley;
- 4 — air conditioning compressor clutch;
- 5 — pump pulley and additional booster pump drive pulley;
- 6 — belt;
- 7 - tension roller.
Algorithm of actions
The procedure varies depending on the engine design and the number of attachments. Below are step-by-step instructions for replacing belts on popular vehicles. In other cars the operation is similar.
By car VAZ Granta
To replace the belt on a VAZ Grant car without a tensioner, you can follow the algorithm:
- Use a knife to cut off the old strip.
- To turn on 3-4 turns, turn the generator mounting bolt from below.
- Unscrew the top mounting bolt completely and remove it from the hole.
- Slide the generator forward until the mounting tab is behind the bracket.
- Secure the mechanism with wire or other means.
- Place the belt over the alternator pulley and the top of the crankshaft pulley. Some car owners use an additional device to hold the strap on the device while putting it on.
- Use a wrench to turn the motor shaft until the belt fits completely.
- Lock the generator in its original position. Check the operation of the components at full load and at different crankshaft speeds.
On Kia Sid
The alternator belt can be replaced as follows:
- Remove the mounting bolt on top of the generator.
- Lift the retaining screw up from the guide slot.
- Rotate the device towards the bottom screw. If the mount is "locked", the generator can be turned by lightly tapping the wood with a hammer.
- Remove the used belt and pressure roller.
- Then install the new pulley, and only then can the belt be mounted.
- Tension the belt according to the instructions in the Operator's Manual. Check the operation of the device, if a whistle appears, increase the voltage slightly.
For Volkswagen Polo Sedan
An example of replacing a belt on a Volkswagen Polo Sedan engine with an automatic tensioner:
- Relieve the belt tension by loosening the tensioner mounting bolt. Nut size 16 mm.
- Rotate the pulley mounting bracket counterclockwise. The extension spring is compressed, making it difficult to rotate.
- Carefully remove the belt from the pulleys, crankshaft and drive units.
- Remove the pulley using a 16mm socket inserted into the recess under the alternator. If the pulley is not replaced, it is held in the compressed position by a metal rod inserted into a hole in the housing.
- Slide the belt onto the pulleys, then carefully release the tensioner. The tensioner automatically adjusts the tension level of the product.
Shkiv_01.ai
Diagram of the drive of auxiliary units of a car with power steering and air conditioning:
- 1 — auxiliary drive pulley;
- 2 - tension roller;
- 3 — power steering pump pulley;
- 4 — generator pulley;
- 5 — air conditioning compressor pulley;
- 6 - support roller.
The tension of the drive belt of auxiliary units of a car with power steering and air conditioning is adjusted automatically by a tensioner.
To replace the belt, remove the right mudguard of the engine compartment. The sequence of actions is shown in the photo below.
SHABLON.indd
. so that it is shifted to their outer edge 1, and the inner groove of the pulleys 2 remains free.
After installing the belt, slightly turn the tension roller with a key and remove the lock. Then, using a 18-inch socket with a ratchet, we turn the crankshaft clockwise three turns by the bolt securing its pulley to achieve the correct position of the belt.
More information about the design, maintenance and repair of Renault Logan produced before 2009 can be found in our Wikipedia (link)
