Raised floor in the trunk of a VAZ-2107 - putting things in order!
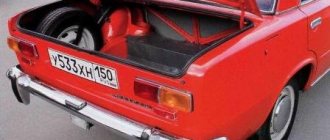
Dear friends, today we will tell you how to once and for all put things in order in the trunk of your seven, five, or any classic sedan. To do this, we will make a raised floor for our trunk with compartments for all the useful things that we are used to carrying with us. We will accompany the process of creating this tuning of our trunk with a detailed photo report with a description, so I think it will be clear and interesting. In our opinion, it is unlikely that it will be possible to organize perfect order in the trunk, and this modification is essentially a paradise for perfectionists. Go! So, let's throw everything out of the trunk. We immediately decided on the height, I needed it to fit the most necessary things and not to reduce the space in the trunk too much, since I don’t plan to remove the floor very often. I decided the height of the frame would be 11.5 cm. The top board is 84 cm, the bottom board is 78 cm, all the sides are 58 cm, with these dimensions the frame fits tightly into the trunk and does not move at all.
We cut out blanks from available material, mine is chipboard. It is better to cut with a jigsaw. Sand the ends and sides.
We mark and drill holes, assemble the frame. I used Euroscrews or Scientific Comformats because I like working with them. Who doesn’t want it, then use ordinary wood screws.
Next, we make partitions, here we immediately estimate roughly what will lie, for example, from a tool, unless, of course, you are a fan of everything lying in a common heap. I immediately decided what I would put in and what dimensions were needed for it.
Cut out the lid. If you don’t want to cut out like I do, you can make it a simple square. Size – 91*69 cm. Material – 9 mm plywood. If you are going to carry 4 bags of potatoes, then it is better to use something thicker (although I carried 3 bags without problems, the lid does not bend due to the partitions, which act as stiffeners)
We screw the lid to the base of the structure using hinges. All is ready.
We take everything apart again and begin to cover all the parts with carpet. To do this, take a ruler, scissors and a construction stapler. First, we mark all the parts on the carpet (it is usually 140 cm wide), then we begin to cut out the blanks. If there is no stapler, as in my case, then we do it the old fashioned way - nails and a hammer. It holds up just as well, but requires a little more fiddling.
Now we are finally assembling the covered structure; there is no need to disassemble it anymore.
For example, I made a small box for small bolts, cogs, etc. If you have to pull the false floor out of the trunk, then these small things will remain in the box and will not be scattered throughout the trunk.
I also got the idea to do something like this. If you need to put something large in, you can temporarily remove the partition.
The base is ready. We tighten the lid.
After covering the lid, screw it to the base, and everything is completely ready. We carry the entire structure for installation in the trunk. Here's what it looks like in the trunk:
We hope this idea will be received positively by fellow classicists. After all, everything should have its place. Good luck to everyone on the roads!
Alternative trunk opening for VAZ 2107
Many owners of domestic cars, due to the lack of opportunity to purchase a more expensive vehicle, are trying to make their cars more comfortable. One of the options for improving the functionality of the VAZ 2107 is to control the trunk lock from the passenger compartment. This can be done either using a button or using a cable, which eliminates the need to open the mechanism with a key.
Opening with a button
As the owner of the “Seven”, equipping the car with a device for opening the trunk with a button will not be difficult. The positive aspects of the electric drive include the following:
- convenience;
- practicality;
- following fashion.
Installing a trunk lock control button allows you to control the mechanism from inside the car
Some motorists believe that such an option on the VAZ 2107 is useless, but it’s still worth trying and seeing the usefulness of such a device. If you have decided to install an electric trunk drive, then first you will need to prepare the necessary parts:
- four-pin relay and a special terminal for it;
- activator;
- wires;
- button;
- female and male connectors, as well as electrical tape and heat shrink.
To install an electric lock on the trunk lid you will need an electric drive, wires, connectors, terminals and a button.
The activator is an electric drive, the operation of which is based on retraction or repulsion, depending on the installation diagram. First you need to remove the lock and install the drive rod. In order to be able to influence the lock tongue, you need to drill a hole in the side of the mechanism and bend the rod itself slightly. Once the rod is secured, the lock can be put in place. To avoid adjusting the mechanism, you should first mark its location with a marker or pencil. Next, you need to secure the electric drive, which will require 2 screws and a plate included with the device. Having fixed the product on the lid, proceed to the connection stage.
To be able to control the trunk lock from a button, you will need to connect the electric drive rod to the tongue, and attach the activator itself to the trunk lid
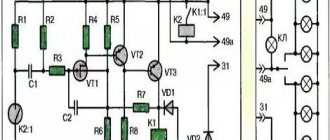
Before starting electrical work, remove the negative terminal from the battery and study the connection diagram.
Installation of the electric lock is carried out according to the electrical diagram
The electric drive device is supplied with power directly from the battery or through a fuse. Electrical installation consists of the following steps:
- Voltage is supplied from the battery to the relay in accordance with the diagram.
- Relay contact No. 86 is connected to the electric lock control button. The button is located on the dashboard in a convenient place.
- Using a wire, contact No. 30 of the relay is connected to the green conductor of the electric drive using connectors.
- The blue wire of the electric lock is connected to the vehicle ground.
- Check the operation of the device.
Video: installing an electric trunk lock on a VAZ 2107
Exiting the trunk lock cable to the passenger compartment
The trunk lock on the “seven” can be opened using a cable pulled into the car’s interior. To implement this idea you will need:
- cable 4 m long and 1.2 mm in diameter;
- braid 4 m long from bicycle cables;
- braid ends and cable clamps.
In order to be able to unlock the trunk lock using a cable, it is necessary to make holes in the mechanism to thread the cable and secure it to the tongue. Then they lay a cable from the lock to the driver's seat through the trunk lid, and install a suitable lever to open the mechanism. As a lever, you can use the hood opening mechanism from the VAZ 2109, on which the cable is attached. All that remains is to check the operation of the design.
Photo gallery: installation and routing of the cable to the trunk lock
To control the trunk lock using a cable, you will need the cable itself, a braid and some components
The cable is attached to the tongue of the trunk lock to control the mechanism
The cable from the trunk lock is laid to the driver's seat
The cable control lever is installed near the driver's seat
DIY acoustic trunk of VAZ 2114
Acoustic trunk option
Car audio is an art and you can’t argue with that. To achieve clear and powerful sound inside the car, owners resort to various tricks. The acoustic trunk of the VAZ 2114 is one of the ways that will help you get real and strong sound inside the car. You can build an acoustic trunk for a VAZ 2114 yourself, fortunately there is nothing complicated about it. Music, thirty years ago, at least in our country, was a rarity in a car. More precisely, it was there, but the sound evoked, to put it mildly, strange sensations. Today, car audio is a whole culture, a special sphere where beauty, art and high technology are combined in the most amazing way.
Acoustic trunk in VAZ 2114
On the other hand, all this can become lyrical for a certain number of drivers who are not going to spend crazy money to get real acoustic comfort. Yes, music, let it sound, but not necessarily at the highest level; average quality is enough for us.
Soundproofing the trunk
The procedure must be done efficiently; in addition to the trunk itself, its lid in the VAZ 2114 must also be soundproofed and modified.
The following material is useful for work: Hermeton A15 - 1 sheet (for arches), Comfort 6 (better than 10, it is much denser) 4 sheets and 30 sheets of Shumoff M3 (Shumoff P4), and as a vibration damper you can use Shumoff M2.
The procedure is performed in the following order:
- The roof, floor, and trunk door of a VAZ 2114 are covered with a vibration damper, soundproofing material is glued on top, the most problematic areas can be covered with the more effective Shumoff M4, plastic parts can be glued with an anti-creaking agent like Bitlon 5. In addition to noise insulation, the vibration damper acts as thermal insulation.
- You need to glue Vizomat hot - heat it with a hairdryer and put it in place, then roll it out with a roller, remove the gaps and roll out the bubbles, if this is not done, the vibration isolation will not work or will not perform its function well.
It is better to use solid sheets, cutting them so as to leave an overlap of a centimeter and a half between the cut parts, then there will be no gaps.
With sound insulation, you can get rid of body flaws in the rear of the car, and, if necessary, weld it.
How to make a false trunk floor 2114
The VAZ 2114, although a domestic car, can also look stylish, because well-chosen stops, linings, and moldings will give it the desired appearance, and a well-positioned spoiler and other technical changes can increase the aerodynamics of the car and its driving characteristics.
Today we will talk about the comfort of your favorite “butt” of your car. Each of the changes can be made in a variety of ways and completely customize the car.
To put things in order and make the best trunk of the VAZ 2114 you need:
- vibration and noise insulation;
- replacement (at least cleaning) of the casing;
- replacing the shelf and making design changes to the trunk;
- make good acoustics;
- automate trunk opening, display a button on the panel.


