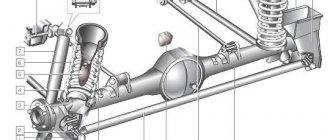
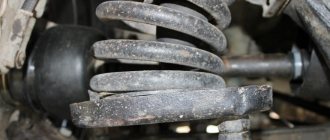
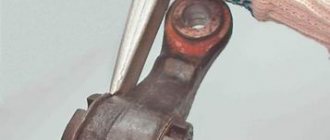
Wishbones on Priora - disassembly
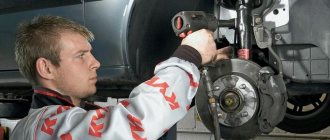
- We drive into a pit or lift the car on a lift. If you have a hole, jack up the front end and start disassembling it. We remove the wheels to provide access to the levers.
Note: To avoid problems during assembly, I recommend taking measurements of the control points (between the levers) and writing them down on paper. This will avoid confusion with setting gaps, castor and camber.
- In order for the fastening nuts to unscrew without problems, we treat the threaded connections with WD-40 penetrating fluid or an equivalent.
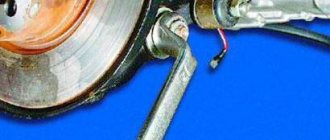
- One by one, unscrew the nuts securing the lever (ball, stabilizer link, etc.), marked in the photo.
- Once the lever has been successfully removed, assembly can begin.
Installation of wishbones on Lada Priora
- If the ball is “live”, you can fill it with new grease and install it in place; if not, be sure to replace it.
- We install the new lever in the following sequence: “halve” the lever (separate the two halves of the lever), install the part that acts as a stretcher, then into the beam, after that we assemble the lever, and at the end we insert the lever into the ear of the body.
- The right lever is more difficult to install, since the wheel drive interferes. In addition, installing the lever bolt required the help of a jack, which had to be used to jack up the steering knuckle.
- Many people have great problems installing stabilizer links, there are problems with the bolts, which is why I initially indicated that new longer bolts would be required. Also, often, due to the design of the levers, the bolts in the lever mount are skewed; a slight distortion is allowed, but if it is too large, you will have to think about something (adjust, add washers, etc.).
- Before tightening, all bolts must be lubricated with copper grease, “Litol”, or preferably worked off, this will simplify the disassembly process in the future. After everything is assembled, we check the distances between the control points with a tape measure, as you remember, we first took measurements. If everything matches everywhere, then most likely you won’t even have to do a wheel alignment. We tighten all the bolts and check that nothing is loose anywhere.
Now you can check the operation of the levers in practice. We go out onto the road, preferably where there are fewer cars, and enjoy the work done.
Results: the car responds better to the steering wheel, you can now take turns at a higher speed than before, and overall stability and controllability have improved.
Turning wheels with your own hands on a VAZ classic photo
The easiest way is to swap the brake caliper mounting brackets from the left side to the right. This way you can save a few centimeters of distance and leave the turner alone.
To install the hub, remove the edge, otherwise the hub will not fit into its seat. The tapered hub bearings remain in place, a cone sits on them and is secured with long bolts and washers.
All that remains is to install new extended brake hoses; for this it is best to simply buy Nivov brake hoses. The GAZelle has even longer brake hoses; they can also be used on the VAZ.
Buy regular spacers for the VAZ, you need 4 of them on each side - 8 pieces in total. Spacers need to be used to move the brake disc. Removal must be done, since the caliper is shifted by a centimeter by moving the brackets and installing spacer washers.
All that remains is to fit the spacers in place, inside the brake disc, and secure the spacers. The total height of the spacers, each equal to 5 mm, should compensate for the distance of the caliper displacement.
- Make extended tie rods using a standard end. Position the bend of the tip so that there is no contact with the parts. The bottleneck is the possible contact with the spar.
It is possible that the new mechanism will touch the internal parts of the body. They can be cut with a grinder, as they will not damage the outer surface of the body. Most often, body trimming cannot be avoided in the area of the upper ball joint.
Testing the operation of the entire mechanism may end in deformation of the overcooked bipod, so try to carry out “hard” tests, for example, do not go around the curb at full angle of rotation. A durable bipod is a guarantee of safety. Technical modification of the car is tuning the VAZ 2108 on your own.
Since you are reading this article, it means that you have finally decided to strengthen the body on your VAZ 2101. It doesn’t matter what prompted you to undertake this responsible and time-consuming process: deformation from an impact, car tuning, or just your hands itching, one thing is for sure - the price of repairs will pleasantly surprise you if you do all the repairs yourself.
Owner reviews
Car owners who have installed wishbones on their cars note:
- The steering wheel vibration has disappeared.
- Control has become more precise (no need to constantly adjust the movement at speed, the car holds straight better, instant response to the steering wheel).
- The performance of the suspension has improved.
- It has become easier to set castor.
Disadvantages are the increase in weight (by about 9 kg), as well as the high cost of the accessory (about 6,000 rubles).
Are you ready to install wishbones on your LADA car?
Let us remind you that we previously talked about other similar accessories. For example, about the front strut brace and subframe.
Good day.
I'll start my review with some background. Problems began with the so-called TV on a VAZ 2115 produced in 2002. This is an eternal problem for Samara. They have a weak margin of safety and over time, even without accidents, the metal in this place begins to crack, because it experiences heavy loads.
It was decided to repair and replace the factory front suspension arms with triangular ones, which change the load on the TV from longitudinal to transverse. And accordingly, such a problem will no longer exist. As they say, set it and forget it.
The former owner of the car has already repaired it, but not efficiently. The photo shows traces of welding. Therefore, the old metal was cut out and an overlay from a 2mm sheet was welded. I think this will be enough to spare.
I ordered the levers online. On the official website of For-Mash. Delivered quickly. Why For-Mash - because the price is reasonable, the website is informative, and it has been on the market for many years. At the same time, I bought a crab stretcher from an unknown manufacturer in the store, to be more confident.
This is what everything looks like assembled, but not installed. Sorry for the quality of the photo, I took it on my phone in the garage. The photo shows that there is a large supply for the nut on the lever. It doesn't look very nice. And it feels like it will interfere.
And this is the problem this resulted in during installation. You can tighten the lever nut and the crab fastening bolt, but there is one caveat. It is not possible to fasten the engine protection with such a lever release. He won't let you do it. Therefore, it will be necessary to saw off with a grinder or a metal saw, which is not good. I don’t have a grinder or saw. That’s why I’m temporarily driving without protection for now.
It is also possible to unscrew the crab fastening bolt only with an open-end wrench. The head doesn't fit. The procedure is as follows: first screw in the nut, then the bolt. It won't work any other way.
So I already installed them and rode them a little. The driving experience is a little lower in the review. I would like to draw your attention to the fact that the ball joint nut was not screwed on properly. There should be at least three threads left.
But nevertheless it holds up well. I haven’t tried removing the ball joint yet, but it looks like I can’t do it without a puller.
This is what adjusting the caster angle looks like. I adjusted it by eye for now. Then I'll go to the wheel alignment.
During installation, I encountered a problem with the length of the stabilizer bar mounting bolt being insufficient. The photo shows a bolt that was found in the garage. It sticks out a lot and this tip caught the wheel rim when turning it all the way to the wheel stop. Later I replaced it with an M10x110 bolt and it was quite enough and now nothing catches. So if you install such levers, do not forget to buy additional bolts with nuts and washers.
Turning out wheels for drifting on a classic with your own hands - work process
The sequence of work to increase the angle of rotation of the wheels of VAZ cars is as follows. It is not difficult to perform it, understanding why each action is performed.
- Cut off the limiters on the levers.
- Cut off the limiters on the steering gearbox.
- Buy 4 extended bolts with washers for the VAZ G8 generator.
- Install negative camber by replacing the bolts from the kit with purchased generator ones.
- Making a bipod.
The eversion axis is a straight line passing through the ball joints. The steering tip must be moved to this axis as much as possible.
To do this, carry out welding work on the bipod. You should know that the bipod is made of good metal that can be welded using any welding method.
Look at how you can tune the Lada Kalina!
When marking the bipod for trimming, it is necessary to align the rotation axis with the steering knuckle as much as possible, while the attachment point on the rod should be at the same level. Try to create a gap between the steering tip and the bipod lever at maximum eversion.
In the event that the shortened bipod that has been manufactured does come into contact with the brake caliper, it can always be moved forward.
Wishbone suspension, reinforced, lightweight (set) polyurethane elements
A set of wishbones for front-wheel drive VAZ cars with polyurethane silent blocks. Installed on VAZ 2108-21099, 2110-2112, 2113-2115, 11183-11194, 21703 cars.
Dear Clients! Many of you have encountered a problem when installing triangular arms of this type: the stabilizer link mounting bolt is very difficult to get into place (in some cases, only when applying a lot of force), which over time can lead to failure of the stabilizer link silent block due to large axial load on it. This problem arises due to the non-universality of the factory stabilizer, the axial loads from which, with different suspension configurations of a particular car, can fall on the shoulders of the stabilizer bar mounting bolt, and therefore directly on the silent block. To avoid such incidents, try to monitor the condition of the silent block and inspect it as often as possible, especially in cases of installing a large caster (longitudinal tilt of the front pillar). We also remind you that if you install wishbones, the length of the standard stabilizer bar mounting bolt is not sufficient, and it will have to be replaced with a longer one. In addition, on some Kalina cars, it was noticed that the reverse speed solenoid could be touched by the triangular lever. A solution to this problem can be a slight mechanical modification of the triangular lever at the point of contact or the removal of the solenoid.
Specifications:
