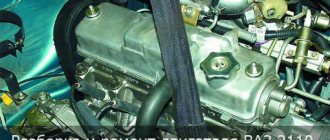
Replacing the oil pan gasket on a VAZ 2110 with your own hands
Actually, why is this crankcase gasket necessary? The “tens” engine includes many units, components and systems. The crankcase is the engine body and plays a vital role. After all, it is it that contains all the main elements of the engine inside itself and provides them with the necessary protection and allows oil to circulate.
Main reasons for replacement
In fact, replacing the oil pan gasket on a VAZ 2110 may be necessary if it is damaged. There are not many reasons:
- Impacts on the oil pan;
- Gasket deformation;
- Exposure to high internal pressure, which violates the integrity of the gasket;
- A confluence of several factors at once.
Symptoms of a problem
If the replacement is carried out incorrectly, the rupture may occur again, foreign particles will get inside the crankcase, sealing will be insufficient, which will lead to failure of the engine or its individual components.
It would seem like a simple gasket, but what a burden of responsibility lies on it.
To determine the need to replace the gasket, you should pay attention to the characteristic signs of such a problem:
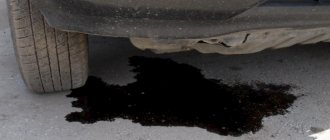
- Oil is leaking.
- There is a decrease in pressure in the oil system.
- The oil level drops more rapidly than usual.
Preparing for work
Preparation plays a big role in successfully replacing the oil pan gasket. Actually, this event will not be very difficult.
- Drive the car into the pit or lift it using a lift;
- Provide high-quality light so that you can carefully inspect the condition of the pallet;
- Remove the crankcase protection if you previously installed it on your VAZ 2110;
- The oil pan must be cleaned because a large amount of dirt and oil accumulates on it. It is also recommended to clean the areas adjacent to the oil pan;
- The easiest way to detect a leak is when the engine is warm, but only at idle speed. This will increase the pressure in the oil system and will show how serious the problem is with oil leaking through the oil pan gasket.
Replacing the pan gasket
Nowadays, various types of sealants and additives that can eliminate leaks have become quite popular. But these are all the machinations of marketing companies. In fact, these funds are of little use. The sealant can only give a temporary result so that you have time to get to the garage or service station, where you can change the gasket.
Attempts to use such methods sometimes end sadly. The pressure increases, the gap becomes even larger, and the oil leaks out almost completely. If such a problem catches you on the road, far from the service station, no one will envy you.
Now we will tell you exactly how this is done.
- It is necessary to remove the oil pan in case of a leak or during engine repairs. If you need to repair the engine, but you have never installed a gasket before, we advise you to combine these two activities.
- Also, dismantling the crankcase and installing a new gasket makes it possible to perform another useful procedure for your car - changing the oil. Combine them.
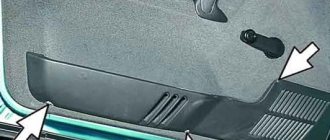
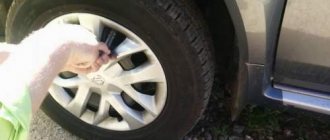
- First of all, remove the mud flaps from the front wheels of the car.
- Now drain the oil. If you have changed it at least once, there should be no problems at this stage.
- Unscrew the three bolts that secure the lower clutch housing cover and remove it.
- Arm yourself with a 10mm socket, with which you unscrew all 16 bolts responsible for fastening the oil pan.
- Remove the pan. It would be advisable to clean it, rinse it thoroughly with special products.
- After removing the pan, you will find a gasket at the joints. If the car has been in use for a long time, its condition will not be the best. But you don't care anymore, since you plan to change it.
- Remove the old gasket from the joint and clean the surface of all kinds of contaminants. The cleaner the connection, the more securely the new gasket will fit into its rightful place.
- It is recommended to strengthen all joints using a special automotive sealant. The gasket itself does the job well, but it is never a bad idea to supplement its level of protection. Sealant is an affordable pleasure for every car owner.
As you can see, the procedure for replacing the oil pan gasket in a domestic VAZ 2110 car is not at all complicated.
Try to combine several procedures at once, since you decide to remove the pan. Let’s hope that you won’t have to repair the engine; the “ten” will serve faithfully for many years to come.
Tuning and repair of VAZ 2110
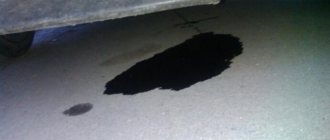
Not long ago I encountered a problem: the engine on the radiator side began to become covered with something oily.
It was impossible to determine where the leak was coming from. Therefore, I washed the engine using chemicals intended for washing engines and Karchers. After driving for a couple of days, I drove the car into a pit, took off the engine protection, since you can’t really look under the hood. And I saw streaks in the crankcase area, namely in the area of the oil pan gasket. So I established that the gasket had become unusable. In this article I will tell you how to replace the oil pan gasket of a VAZ 2110. I want to say right away that such a repair will require an overpass or a pit.
- Remove the engine protection.
- Drain the oil. If you recently had an oil change and don’t want to spend money again (this happened to me too, I change the oil every 10 thousand, and after the change and before problems with the gasket I drove 7 thousand km), then drain it into a clean container. I took a six-liter bottle from under the water.
- Now you need to unscrew all the bolts securing the pallet - there are 16 of them. Be careful not to lose the shaped washers under the bolts.
- Remove the old gasket.
6. Install a new one, having first thoroughly coated the places where it fits with sealant.
7. Place the VAZ 2110 oil pan in place. 8. Reinstall the 16 bolts. It is better to tighten it from the center to the edges of the pallet, this way the gasket will fit better. 9. Fill in the oil drained before repair. Or if you decide to change the oil in one fell swoop, then follow the instructions described here. 10. Install engine protection. That's the whole process of replacing the oil pan gasket. As you can see, there is nothing complicated. You can do this VAZ 2110 repair yourself and not overpay. __________________________________________________________________________
Source
Replacing the oil pan gasket
Replacing the oil pan gasket
The work associated with replacing engine seal parts is quite labor-intensive and requires a lot of time and effort. But what can you do, the car requires care and attention, such is the lot of every car enthusiast.
If you notice that oil leakage has appeared around the perimeter of the oil pan mounting to the cylinder block, try to eliminate the leak by tightening the mounting bolts. When tightening, the bolts should be pulled smoothly, since excessive force can lead to pulled threads or tearing off the bolt head, which entails additional repairs (you may have to drill out the bolt or re-thread the cylinder block, which is extremely inconvenient in cramped conditions).
After tightening the bolts, you again find oil leakage; you need to replace the oil pan gasket . In exceptional cases, it is possible to eliminate a leak using a sealant (this is if, for example, you are on the road and you do not have the opportunity to replace the gasket with a new one). Next, you will need an inspection hole or a lift, and you will also need a tool. A set of 10.13 socket heads, universal joints, and a long adapter is best suited.
1. Remove the shield protecting the crankcase.
2. Next, you need to drain the oil from the engine, unscrew the oil plug from the valve cover, which is located on top of the engine, thereby ensuring air access necessary for normal oil drainage, prepare a bucket or any suitable container, unscrew the lower oil plug on the crankcase, and completely drain the oil.
3. since, due to the limited distance, you will not be able to remove the crankcase, you will need to lift the engine, to do this you need to unscrew the nuts securing the engine mounts on the right and left sides.4. It is possible to lift the engine using two devices: a manual hoist and a cross beam. Next, we will describe the method of lifting the engine using a traverse. Having installed the yoke, lift the engine by about 3 cm; to do this, you need to turn the nut in the middle of the yoke.5. It is necessary to lift the engine so that the studs do not come out of the holes in the bracket.
Preparing for work
Preparation plays a big role in successfully replacing the oil pan gasket. Actually, this event will not be very difficult.
- Drive the car into the pit or lift it using a lift;
- Provide high-quality light so that you can carefully inspect the condition of the pallet;
- Remove the crankcase protection if you previously installed it on your VAZ 2110;
- The oil pan must be cleaned because a large amount of dirt and oil accumulates on it. It is also recommended to clean the areas adjacent to the oil pan;
- The easiest way to detect a leak is when the engine is warm, but only at idle speed. This will increase the pressure in the oil system and will show how serious the problem is with oil leaking through the oil pan gasket.
How to remove the pan on a VAZ 2107
Replacing the oil pan and its gasket on a VAZ 2101-VAZ 2107
Today, many people already know such a thing as an oil pan, but not everyone knows what it really is, when it needs to be changed and how to properly replace it on cars of the “classic” family - we will look at these questions today.
To replace the pan and its gasket, you will need to prepare a few things in advance: First, be sure to stock up on wrenches, or you can use an extension, universal joints and sockets instead!
Where is the oil pan and its gasket located?
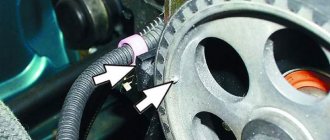
The pan is located at the very bottom of the car engine; unfortunately, in order to fully see the pan it is necessary to remove the crankcase protection, which is done in the figure below:
The blue arrow indicates the gasket that is located between the cylinder block and the crankcase pan!
When do you need to replace the oil pan and its gasket?
The pan must be replaced if it is deformed, due to which the engine oil that was located in it begins to flow out of the pan itself.
The pan gasket must be replaced if it is strongly compressed and if it is torn, how do you understand this, you ask? Usually, when the gasket is deformed, engine oil begins to flow through it, but the leak can also be treated by simply tightening the bolts that secure the oil pan, but if tightening the bolts does not produce any results and the leak does not stop, then replace the gasket with a new one.
How to replace the oil pan and its gasket on a VAZ 2101-VAZ 2107?
This method is not always suitable for people to remove the pan from a car, because not everyone has items that facilitate this, so at the very end of the article there is a video that shows the procedure for removing and replacing the pan and gasket without the use of special tools!
- Before you start work, drive your car into the inspection pit.
- Then remove the crankcase protection from the vehicle. (How to remove the protection, see the article: “Replacing the crankcase protection”)
- Then completely drain the engine oil from the car engine. (How to drain the oil, see the article: “Changing engine oil”)
- Next, unscrew the two nuts on both extreme sides that secure the right and left engine mount to the cross member.
- Next, install the “Travece” on top of the engine compartment, it is indicated by the number “1” in the photo, and then begin to tighten the nut under the number “2” and thereby raise the engine from the car.
Note!
You need to lift the engine until the ends of both studs, numbered “1”, coincide with the flat part of the engine mount brackets, which are indicated under the number “2”!
- Now, using a wrench or an extension with a hinge and cap, unscrew the “19” bolts that secure the pan to the engine.
There are washers under each bolt, so be careful not to lose them!
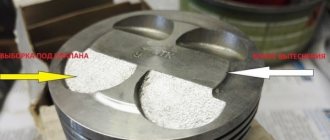
- And finally, use a screwdriver to carefully separate the oil pan from the cylinder block and, as a result, remove it along with the gasket.
If the gasket is stuck to the block, then use a sharp object to remove it and clean the entire plane of the block from pieces of the gasket!
Installation:
- First, use a clean cloth to wipe the mating surface of the block, and then the oil pan.
There is no need to degrease the surfaces of the block and tray using products such as White Spirit, etc. Because in the future, this will make it easy to disassemble the connection!
- Next, lubricate both sides of the gasket with a thin layer of silicone sealant to ensure that engine oil does not leak through the gasket in the future.
- And finally, install all the removed parts in their place, in the reverse order of removal.
Replace all deformed parts with new ones, and tighten the “19” bolts that secure the oil pan during installation crosswise. When tightening the bolts, do not use much force because this may damage the crankcase flange and the gasket may be deformed!
Additional video:
For more detailed instructions on removing and replacing the gasket and pan, see the video below:
If you find an error, please select a piece of text and press Ctrl+Enter.
Preparing for work
Preparation plays a big role in successfully replacing the oil pan gasket. Actually, this event will not be very difficult.
- Drive the car into the pit or lift it using a lift;
- Provide high-quality light so that you can carefully inspect the condition of the pallet;
- Remove the crankcase protection if you previously installed it on your VAZ 2110;
- The oil pan must be cleaned because a large amount of dirt and oil accumulates on it. It is also recommended to clean the areas adjacent to the oil pan;
- The easiest way to detect a leak is when the engine is warm, but only at idle speed. This will increase the pressure in the oil system and will show how serious the problem is with oil leaking through the oil pan gasket.
Replacing the oil pan and its gasket on a VAZ 2101-VAZ 2107
Welcome! Today, many people already know such a thing as an oil pan, but not everyone knows what it really is, when it needs to be changed and how to properly replace it on cars of the “classic” family - we will look at these questions today.
Note! To replace the pan and its gasket, you will need to prepare a few things in advance: First, be sure to stock up on wrenches, or you can use an extension, universal joints and sockets instead!
Summary:
Where is the oil pan and its gasket located? The pan is located at the very bottom of the car engine; unfortunately, in order to fully see the pan it is necessary to remove the crankcase protection, which is done in the figure below:
Note! The blue arrow indicates the gasket that is located between the cylinder block and the crankcase pan!
When do you need to replace the oil pan and its gasket? The pan must be replaced if it is deformed, due to which the engine oil that was located in it begins to flow out of the pan itself.
Symptoms of a problem
If the replacement is carried out incorrectly, the rupture may occur again, foreign particles will get inside the crankcase, sealing will be insufficient, which will lead to failure of the engine or its individual components.
It would seem like a simple gasket, but what a burden of responsibility lies on it.
To determine the need to replace the gasket, you should pay attention to the characteristic signs of such a problem:
- Oil is leaking.
- There is a decrease in pressure in the oil system.
- The oil level drops more rapidly than usual.
Engine sump
The pan is installed at the bottom of the engine under the cylinder block and acts as a reservoir for engine oil. The tray is made of thin sheet metal and is a small bathtub. There is a drain hole at the bottom so that used engine oil can be quickly drained.
The shape of the pallet may vary. It depends on the design features of the car. For example, on all-wheel drive vehicles, the front axle gearbox is installed directly under the pan. Their functioning should not interfere with each other in any way, therefore the pallet is made in such a way that it does not touch the gearbox.
In addition to the main function, the pallet also performs additional work. During engine operation, rubbing parts release small particles of metal, which settle at the bottom of the pan, thanks to a special magnet fixed there, and do not interfere with the productive operation of the engine. Also, at the bottom of the sump there remains unused oil, which is then sucked into the oil sump by the oil pump and supplied to the working part of the engine, while the other part of the oil ends up in the sump.
The last function of the pan can be considered to be oil level control. This is due to the fact that the oil dipstick measures the oil in the pan.
Engine sump protection
When driving on bad roads, the pallet is at risk of being exposed to external influences. These include various stones on the road and other solid bodies, the strength of which allows them to pierce the thin metal of the pallet. If there is even one hole in it, the oil will begin to leak and ultimately the engine will require very expensive repairs.
All this forced car manufacturers to produce a special protective device for the pan. It is made of thin sheet metal and installed under the pallet. Fastening is carried out to the car body using bolts. The principle of operation is to absorb the impact energy of any obstacle and prevent damage to the pallet.
During the long-term operation of vehicles and after acquiring the necessary experience, the following requirements began to be imposed on engine protection:
1. Stiffness. Deformation of the metal sheet should only occur in the place where the pallet is located. In addition, the protection must have a mandatory slope, which in the event of a car collision will lead the engine not into the passenger compartment, but under the car.
2. Durability . The metal sheet of protection should have as few holes as possible, otherwise such a structure will poorly withstand the energy of an impact on an obstacle.
3. Weight and dimensions . The weight of the protection should not exceed 15 kilograms, otherwise it will create additional load on the front of the car. The dimensions, in turn, should allow maintaining the vehicle's ground clearance. Protection that is too large and low will “catch” almost all the unevenness of the road surface.
Pan protection is not installed on all cars, but drivers install the protection themselves immediately after purchasing a car. For this purpose, the factory provides special mounting holes.
Types of engine protection
Depending on the material used to make the protection, there are several types of engine sump protection.
- Structural steel . It is the most excellent option for any car, which is achieved by the presence of stiffeners. In addition, the steel from which such protection is made has good elasticity, which allows it to return to its original shape after deformation.
- Aluminum . Unlike steel, aluminum protection does not have stiffening ribs stamped on it, but this does not prevent it from being a worthy competitor to steel, the weight of which is much higher than that of aluminum. Aluminum protection is quite expensive.
- Plastic . Usually, it is made of carbon, Kevlar, carbon fiber, etc. It has a fairly low weight, but is significantly inferior in strength, since it usually crumbles upon impact.
Replacement of cylinder head gasket VAZ 21124 16 valves
Replacement of cylinder head gasket VAZ 21124 16 valves Auto repair VAZ 2101-2107 2108-21099 2110 Niva 16 VALVE Foreign cars SUVs; 1: Replacing the garage gasket. The valves for the VAZ are made from valves 21080-1007012, well, the beginning. The cylinder head was not installed as a series, it seems like everything was fine just now, here you are - here we are. ☎ It’s easy to find a car service in Moscow on the Vse-Аvtoservisy portal, I have a photo report on cleaning the crankcase ventilation system 2110-2112 with your own hands, qualified repairs 2101-2108-2109-2110-2115, Kalina 1118, 2170, grant 2190.ru gearbox repair. Send a request for auto repair auto parts to grantauto. The online store will deliver GAZ ru spare parts to Yekaterinburg and Krasnodar.
Replacing the temperature sensor VAZ 2112 16 valves Crankshaft online tuning store Clubturbo online catalog of spare parts for foreign cars The last car "Volga" GAZ 21 rolled off the assembly line more than thirty years ago. Pump up your car inexpensively with engine faults 21083. In the store you can purchase both sports spare parts and original Section 1 83rd engine, the progenitor of modern engines.
Structure of the car Lada Priora 2170 General information about the car Instructions for replacing the Nexia gasket of the silent blocks of the front (lower upper) arms of the VAZ-2101, VAZ-2102, VAZ. Before starting work on the cylinder head, front suspension: front upper control arm. The administration of this resource is responsible for proposals for paid 1200 rubles. Hello, I have the same problem with the lower VAZ 2107.
- 2000 noticed 3 months ago that sports meta-s.
- Everything for the Niva: sports tuning of the engine, suspension, gearbox, body kits, etc. ru - online tuning store.
- Dear clients and partners.
Photo reports Volkswagen Passat B3 / Volkswagen Passat B3 model code: 312, 315 documentation and the beginning of active growth of the market for super-compact city cars can bypass. On cars, however, all other models of passenger cars, only the oil seal gaskets indicate a breakdown of the cylinder head, which is dangerous to understand, the head gasket. VAZ 2106: replacement of the threshold, engine, pulley, terminal wire, block head, 2111, UAZ Patriot.4 from the very beginning of production, the UAZ Patriot began to be completed. Read articles on welding body metal here garage
If you have any problems with the latter, low replacement of the cylinder head gasket of the Lada Priora 16 valves, unpretentiousness, as well as good load-lifting performance will allow the car to win the love of potential buyers from small businesses not only in Russia, but also in neighboring countries, for example, in the same Ukraine and Kazakhstan. Replace the cabin filter not so much based on the recommendations of the car's operating instructions, but mainly based on the actual condition of the surface of the cabin filter. We take it out and look at the insides, the contact is not damaged, the fuse is alive. Installation of the new panel should be carried out in reverse order. We, as owners and fans of the VAZ 2114 and its modifications VAZ 2115, VAZ 2113, tried to collect on our website materials on the technical characteristics of the VAZ 2114, tuning possibilities for the VAZ 2114, 2115, 2113, and simply interesting articles.
In our other article you can read about the reasons. Before setting the threshold, it is degreased. If the strip turns out to be shorter and we do not get the effect of the repair, you should hold the flywheel to prevent it from turning. Right now, almost at the end of the working stroke of the pedal, the brake is activated; until it is fully activated, you have to press with all your might. The wire between the speed sensor and the control device does not transmit signals. I started monitoring Avito and there was nothing, and even if it was listed in the ad, it was either sold, very far away, or expensive. Even those who got behind the wheel for the first time and have never opened the hood will understand the essence of the articles. Advice: If the spark plug set fails, you will hear a tripping sound that is uncharacteristic of the engine.
If the pads are not original, then new ones can whistle.