Design and purpose
The engine oil pan is a metal structure usually made of aluminum, but in older cars it could be made of steel.
The shape of the oil pan resembles an elongated rectangular basin; it is attached to the cylinder block from the bottom side through a gasket on studs or bolts. There is a plug on the bottom or side surface designed to drain oil from the engine. The pan is designed, firstly, to protect the oil receiver, crankshaft, and other parts of the engine crankcase from mechanical damage, dirt and dust.
Secondly, it serves as a container for motor oil. It is from this that the oil pump delivers it upward through a filter - to the cylinder head, from where, having lubricated the parts of the gas distribution mechanism and connecting rod-piston group, it flows back.
Posts 1 page 17 of 17
Share105.09.2010 21:26
- Author: Shkurkin
- Active participant
- From: Vladimir
- Registered: 11/24/2009
- Posts: 478
- Respect: [+7/-0]
- Positive: [+18/-1]
- Gender: Male
- Age: 31 [1989-03-14]
- ICQ: 414437090
- Car: AUDI 80 B2
In general, I need the next operation! I need to remove the engine sump. need to straighten it and change the gasket! Tell me how to remove it? I read that you need to unscrew the subframe, is this true? Tell me how to do it better and easier, who has encountered this?
Share205.09.2010 21:33
- Author: e600ct
- Active participant
- From: Zheleznovodsk (Stavropian territory)
- Registered: 02/08/2010
- Posts: 679
- Respect: [+13/-0]
- Positive: [+13/-1]
- Gender: Male
- Age: 29 [1990-12-18]
- ICQ: 79614471000
- Car: '85 80B2 TwoDoor EP (1.3) 5 manual transmission 60bhp
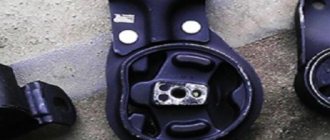
No, you don't need to remove the subframe at all. You need to jack up the engine and remove all the cushions, there are three of them, the engine will rise above the beam just enough so that you can unscrew not only the pan, but also the oil pump and connecting rods.
Share305.09.2010 22:22
- Author: Daniel
- EngineeringGr)))
- From: Voronezh 36
- Registered: 02/09/2010
- Posts: 4871
- Respect: [+45/-1]
- Positive: [+287/-0]
- Gender: Male
- Rewards: moder,glfluder
- Car: Audi 80 B2 SC, 1986 1.8 JN
Where should the jack be placed?
Share405.09.2010 22:41
- Author: Shkurkin
- Active participant
- From: Vladimir
- Registered: 11/24/2009
- Posts: 478
- Respect: [+7/-0]
- Positive: [+18/-1]
- Gender: Male
- Age: 31 [1989-03-14]
- ICQ: 414437090
- Car: AUDI 80 B2
e600ct That is, having unscrewed all 3 pillows, you can safely jack it under the box and it will rise high? And in front, engine support won't interfere?
Share505.09.2010 22:44
- Author: vigost
- Old timer
- From: Moscow
- Registered: 04/09/2010
- Posts: 1238
- Respect: [+22/-3]
- Positive: [+34/-2]
- Gender: Male
- Age: 39 [1981-02-01]
- ICQ: 474626661
- Rewards: glfluder
- Car: Audi80\Maserati B2 YN1.6\75hp. 1979
Where should the jack be placed?
you put a jack under the box and jack it up, everything rises perfectly
I’m in some topic, I described everything very well on how to remove it
Edited by vigost (09/05/2010 22:45)
Share605.09.2010 23:02
- Author: Shkurkin
- Active participant
- From: Vladimir
- Registered: 11/24/2009
- Posts: 478
- Respect: [+7/-0]
- Positive: [+18/-1]
- Gender: Male
- Age: 31 [1989-03-14]
- ICQ: 414437090
- Car: AUDI 80 B2
I’m in some topic, I described everything very well on how to remove it
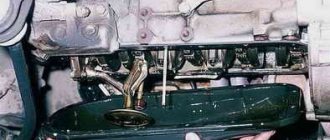
I don't need to remove it, I need to hang it so that I can remove the pallet. Today I tried to lift the engine by the box (I placed a hydraulic jack under the box in the area of the drain plug), it lifts well, the only question is how high will it rise when it is released?
Share705.09.2010 23:37
- Author: vigost
- Old timer
- From: Moscow
- Registered: 04/09/2010
- Posts: 1238
- Respect: [+22/-3]
- Positive: [+34/-2]
- Gender: Male
- Age: 39 [1981-02-01]
- ICQ: 474626661
- Rewards: glfluder
- Car: Audi80\Maserati B2 YN1.6\75hp. 1979
In short, you can jack it up, so that you can get under it, unscrew the pallet bolts, there are three rear bolts left, on the dodoon, jack it up again, unscrew them, jack it up again, your total lifting height will be 15-20 cm, between the beam and the pallet there will be a normal distance of almost 7 -10 cm, I think this distance will be enough for you to remove the entire pallet.
Share806.09.2010 00:42
- Author: e600ct
- Active participant
- From: Zheleznovodsk (Stavropian territory)
- Registered: 02/08/2010
- Posts: 679
- Respect: [+13/-0]
- Positive: [+13/-1]
- Gender: Male
- Age: 29 [1990-12-18]
- ICQ: 79614471000
- Car: '85 80B2 TwoDoor EP (1.3) 5 manual transmission 60bhp
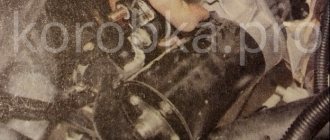
I placed the jack in the left (if you look under the hood from the front) ear of the engine, it is at the bottom there.
And in front, engine support won't interfere?
This is what the 3rd spirit means
Share906.09.2010 22:24
- Author: Shkurkin
- Active participant
- From: Vladimir
- Registered: 11/24/2009
- Posts: 478
- Respect: [+7/-0]
- Positive: [+18/-1]
- Gender: Male
- Age: 31 [1989-03-14]
- ICQ: 414437090
- Car: AUDI 80 B2
Thanks to everyone for the information) But my subframe is already hanging on the two rear mounting bolts) it’s okay that I unscrewed it, anyway, one silent block needs to be changed, as it turned out) It’s a little more convenient to work with the unscrewed subframe. I was afraid that the holes in the subframe mounting on the side members would just come out - the car was pretty beat up) But everything is fine. I got where I needed to be, as they say)
Share1007.09.2010 11:25
- Author: Lyokha
- Active participant
- From: Kirov
- Registered: 03/01/2010
- Posts: 645
- Respect: [+6/-1]
- Positive: [+27/-1]
- Gender: Male
- Age: 28 [1992-03-13]
- ICQ: 413326780
- Car: AUDI 80 B2 86 year old adapter, DT engine and 75 hp 5 gearbox
I also wanted to change the gasket of the oil pan, but I realized that this operation could not be done without a lift, so I gave up
Share1107.09.2010 23:08
- Author: Shkurkin
- Active participant
- From: Vladimir
- Registered: 11/24/2009
- Posts: 478
- Respect: [+7/-0]
- Positive: [+18/-1]
- Gender: Male
- Age: 31 [1989-03-14]
- ICQ: 414437090
- Car: AUDI 80 B2
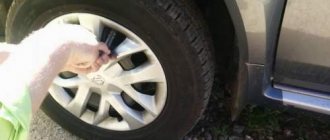
Lyokha , I did everything perfectly without a lift, raised the car higher, with two cylinders in height on each side! I unscrewed the two subframe mounting bolts from the front (to make it easier), having first unscrewed the engine mounts. that's all. first remove the pan.
By the way, when I removed the pan, the gasket completely fell apart, I don’t even know what to call it. It just became completely burnt out due to the temperatures!
Share1209.09.2010 19:28
- Author: italiano
- Local
- From: Omsk 55rus
- Registered: 07/21/2009
- Posts: 3642
- Respect: [+12/-0]
- Positive: [+5/-0]
- Gender: Male
- Age: 38 [1981-11-13]
- Awards: starosta, glfluder
- Car: audi80b2 DT 86 pierburg 2e2 sold
- Warnings: 1
raised the car higher, with two cylinders in height on each side!
Share1309.09.2010 21:57
- Author: Lyokha
- Active participant
- From: Kirov
- Registered: 03/01/2010
- Posts: 645
- Respect: [+6/-1]
- Positive: [+27/-1]
- Gender: Male
- Age: 28 [1992-03-13]
- ICQ: 413326780
- Car: AUDI 80 B2 86 year old adapter, DT engine and 75 hp 5 gearbox
Thanks for the report, I'll look into this at the next oil change)
Share1408.10.2013 01:26
- Author: Audi013 161rus
- Active participant
- From: Rostov-on-Don
- Registered: 11/03/2011
- Posts: 872
- Respect: [+12/-0]
- Positive: [+14/-0]
- Gender: Male
- Age: 25 [1994-05-04]
- Car: Audi 80 b2 4 doors. sedan 1979 1.6 YN and Audi Coupe b2 2.1 (KE)
Good night! guys, who changed the pan on a 5 cylinder engine? It’s the same as on the 4ts - just unscrew the airbags and jack up the engine? Or does 5ts have its own peculiarities? Thank you
Share1529.06.2014 10:51
- Author: sene4ka
- Participant
- From: Maykop
- Registered: 03/16/2014
- Posts: 74
- Respect: [+0/-0]
- Positive: [+0/-0]
- Gender: Male
- Age: 32 [1987-07-27]
- Car: Audi 80s 2.2
- Warnings: 1
Good night! guys, who changed the pan on a 5 cylinder engine? It’s the same as on the 4ts - just unscrew the airbags and jack up the engine? Or does 5ts have its own peculiarities? Thank you
The other day I removed the pan for boiler room 5. There are no problems with 20 mounting bolts, a thin head for 10 and 5 minutes with a smoke break, 2 more bolts cannot be removed without jacking up the engine (((and it’s better to also let the subframe go as far as possible. I did this without a lift and even without a hole , so I didn’t immediately notice 2 holes in the back. There are 2 grooves on the flywheel through which the last 2 bolts are unscrewed.
Possible faults
Malfunctions of this part do happen, and it is dangerous to ignore them, since loss of oil threatens serious and expensive repairs of the internal combustion engine. They can be easily diagnosed by oil leaks - a characteristic small puddle that remains on the asphalt after an overnight stay and a wet sump. The causes of leaks may be:
- loose oil pan bolt;
- gasket wear;
- loose drain plug;
- cracks in the metal.
Cracks in metal are a much more serious problem than a poorly tightened bolt. They can appear as a result of impacts with large stones, curbs, etc. Even if protection is installed under the crankcase, it can crack due to non-compliance with the bolt tightening torques recommended by the manufacturer. A crack can also occur if the drain plug is overtightened after an oil change or repair. It has a slightly conical shape, is made of a harder metal, and can tear the pan. Such a crack is difficult to see, and some service workers, trying to eliminate the leak near the plug, tighten it even more, which subsequently aggravates the situation.
It is worth noting that a slight “sweating” around the oil drain plug, in the absence of drops or streaks, is normal.
Engine sump: repair
You can often repair or restore the engine oil pan yourself.
When a leak occurs in the area of the gasket between the crater pan and the cylinder block, first of all it is worth checking the tightness of the mounting bolts/nuts. It is necessary to tighten the bolts according to the tightening torques recommended by the manufacturer, otherwise you can strip the threads or cause a crack to appear - then you will have to make more complex and expensive repairs, restoring the tightness of the engine crankcase.
If tightening the bolts does not eliminate the leak, the gasket must be replaced. In this case, you cannot do without removing the pallet. This is not difficult to do from a viewing hole, on an overpass or a lift. We will look at how to remove and install the engine sump yourself below.
The most easily corrected malfunction can be considered a poorly tightened drain plug; they could simply have forgotten to tighten it well after the next maintenance. It is tightened using the appropriate key, by hand, without using additional levers or pipes.
But if you have diagnosed a crack in the oil pan in your car, then the best way to repair it is to completely replace it. However, there are situations when a car of a rare model or a new part is quite expensive, there are several ways to restore its integrity. For example, using glue, dry welding or argon welding.
How to replace the oil pan and its gasket on a VAZ 2101-VAZ 2107?
This method is not always suitable for people to remove the pan from a car, because not everyone has items that facilitate this, so at the very end of the article there is a video that shows the procedure for removing and replacing the pan and gasket without the use of special tools!
Removal:
- Before you start work, drive your car into the inspection pit.
- Then remove the crankcase protection from the vehicle. (How to remove the protection, see the article: “Replacing the crankcase protection”)
- Then completely drain the engine oil from the car engine. (How to drain the oil, see the article: “Changing engine oil”)
- Next, unscrew the two nuts on both extreme sides that secure the right and left engine mount to the cross member.
- Next, install the “Travece” on top of the engine compartment, it is indicated by the number “1” in the photo, and then begin to tighten the nut under the number “2” and thereby raise the engine from the car.
This is interesting: The central locking does not work: how to repair it yourself?
Note!
You need to lift the engine until the ends of both studs, numbered “1”, coincide with the flat part of the engine mount brackets, which are indicated under the number “2”!
- Now, using a wrench or an extension with a hinge and cap, unscrew the “19” bolts that secure the pan to the engine.
Note!
There are washers under each bolt, so be careful not to lose them!
- And finally, use a screwdriver to carefully separate the oil pan from the cylinder block and, as a result, remove it along with the gasket.
Note!
If the gasket is stuck to the block, then use a sharp object to remove it and clean the entire plane of the block from pieces of the gasket!
Required Tools
- Set of open-end wrenches.
- Flat blade screwdriver (medium size).
- Phillips screwdriver (medium size).
- Pliers.
Draining waste fluid
Before starting the draining procedure, you should prepare tools, empty containers, as well as new liquids for subsequent filling. If additional protection is installed under the engine, it can also be removed for convenience.
Next, we perform the procedure for draining the liquid from the VAZ 2107:
-Raise the hood, under it we find the filler neck on the engine and unscrew the plug. Oil filler neck
-Now we go down under the car and place a waste container in the drainage area. You can use a cut canister or an old bucket.
-Unscrew the drain plug using a 12mm hex key.
-The drain plug is not always located at the lowest point, so about 100-200 milliliters of waste may remain in the pan. To remove them, you can use a rubber bulb or a syringe with a hose attached to it.
-Now you need to unscrew the old oil filter, which is located on the right side of the engine under the hood
To unscrew the filter element, it is advisable to have a special puller. If it is not available, you can try to unscrew the filter using improvised means. In this case, you can use, for example, an old alternator belt, a regular belt, a bicycle chain or a simple screwdriver. Unscrewing the oil filter using improvised means.
Using this method, you can drain the maximum amount of used oil, after which you can proceed to further actions. The main thing is not to forget, everything that we unscrewed must be put back in place.
How to remove the oil pan of a VAZ 2107
Before you begin removing and replacing the pan on a VAZ 2107, you need to understand its purpose, location and damage that entails the need to change the crankcase.
The pan is located at the bottom of the car, and in order to see it and gain access, you will need to remove the protection. Structurally, the device consists of a steel base that resembles a lid. This container contains engine oil, so to ensure tightness, there is a gasket between the crankcase and the cylinder block.
Removing the VAZ 2107 oil pan must be performed when deformations occur, which leads to engine oil leaking out of the engine. There is a lowest point on the cover body where the engine oil drain plug is located. Before removing the oil sump, you must first drain the engine oil.
An oil leak can occur not only when the crankcase is deformed, but also when the integrity of the gasket is damaged. To eliminate the leak, you need to tighten the fastening bolts, and if this does not help solve the problem, then you will need to resort to changing the gasket.
This is interesting: Operating manual: do-it-yourself VAZ 21099 repair
Now, when the need arises to replace the pallet on the seven, we must resort to such manipulations. It is worth noting that the gasket needs to be changed more often, and crankcase defects occur only if there is no protection on the car. Removing the engine oil pan on a VAZ 2107 should be done in the following sequence:
- To begin with, the car should be placed on an inspection hole or overpass. Carrying out work under the bottom without placing the car on a pit or overpass is simply very inconvenient.
- The next step is to begin dismantling the protection, which is secured with 4 bolts.
- After removing the protection, you need to unscrew the oil drain plug. If you plan to change the oil after completing the procedures, it is recommended to warm up the engine to 40-60 degrees before removing the plug. Before unscrewing the plug, you need to place a container into which the oil will drain. You can use an old plastic oil can for this.
- Next, you need to loosen the nuts securing the two engine mounts from under the hood. The nuts need to be loosened, but not completely unscrewed, to avoid the possibility of the engine moving. After loosening the nuts, you need to lift the engine to remove the cover. Without lifting it, it will not be possible to remove the crankcase on the seven.
- There are different ways to raise the engine. The first method is to use a traverse in the form of a wooden block, which is laid parallel to the radiator. A pin, pre-attached to the motor, is passed through the traverse. Screwing the nut onto the stud causes the engine to slowly rise. The second method involves using a winch. The third method is the simplest and most accessible - using a diamond-shaped jack, which is located under the box and, by acting on it, the engine is raised. When the engine rests against the nuts of the mounting brackets, you can continue further manipulations to replace the bottom cover.
- Along the perimeter it is necessary to unscrew all the crankcase mounting bolts, of which there are 19 in total. These bolts are screwed together with the nuts, so when unscrewing them, it is important not to lose them. Some bolts are difficult to reach, so it is recommended to use special hinged wrenches with socket or socket heads.
- After this, you can begin to dismantle the cover, as well as its subsequent replacement. The new crankcase should have a similar design. After the change, the assembly process is performed in the reverse order of dismantling.
When replacing, it is important to consider such points as the plug and gasket. The plug also has a sealing material that wears out, so a new pan must come with a new plug. If it is not there, then it is not recommended to use the old one, and it is better to buy a new one or a seal for it. We will consider the features of replacing the gasket below.
How to remove and install the oil pan yourself
This is not a complicated procedure, and most car enthusiasts can do it, although it does require some repair skills and tools. Depending on the brand of the car, nuances are possible. For example, in VAZ cars of the classic family, with a longitudinal engine, you need to lift the engine. Therefore, before you start disassembling it yourself, read the repair manual for your car.
Procedure for removing the oil pan:
- Prepare a clean container - it can be a canister with a wide neck or a cut one. Its volume must correspond to the amount of oil in the engine of your car;
- Drive onto an inspection hole or overpass; it will be more convenient for you if it is deep enough so that you can stand under the car at full height;
- Warm up the engine to a temperature of 50-60 degrees, the engine oil will become thinner and more fluid;
- If the engine compartment protection is installed, remove it; it is usually secured with 3-4 bolts;
- Carefully unscrew the drain plug, placing a previously prepared container under it, be careful - the oil will definitely flow onto your hands and possibly somewhere else;
- Unscrew the oil filler plug. After unscrewing the filler plug, the flow of escaping oil will increase sharply, make sure that it flows into the canister and losses are minimal;
- Wait until all the oil has drained and begin unscrewing the fastening bolts/nuts;
- If all the bolts are unscrewed and the oil pan cannot be removed by hand, this means that the parts have been glued together. You need to tap it with a rubber hammer, carefully pry it with a screwdriver or other flat object, but so as not to damage the joints. Scratches may cause leaks in the future.
Now that the pan has been removed, you can carry out repairs and also see the crankcase structure.
Installation is carried out in reverse order. The drain plug must be screwed into the pan immediately, and oil must be poured through the filler hole last. It is recommended to combine pan repair with an oil change. It is important to ensure that the bolts and plug are properly tightened, as already mentioned.
Which oil and oil filter to choose for VW Passat B5 2.0
The volume of engine oil with filter is 3.5 liters . Specification: VW 500 00|VW 501 01|VW 502 00, extended service life (longlife) - VW 503 00.
Characteristics of motor oils
The physical and chemical analysis of motor oil includes: viscosity index, ash content, alkaline numbers and other indicators. What does this mean? Let's consider the influence of the main technical characteristics on the quality and properties of engine lubrication. Read more
| Manufacturer | vendor code | price, rub. |
| Original | ||
| VAG | 6A115561B | 474 |
| Analogs | ||
| BOSCH | 451103314 | 254 |
| MANN FILTER | W71930 | 342 |
| MAHLE KNECHT | OC264 | 356 |
Pad
It is the gasket that ensures a tight connection between engine parts. When purchasing, be sure to match the article number. It is not possible to repair a worn gasket. It is recommended to replace it after each removal of the oil pan during installation. In this case, you need to carefully and very carefully clean the surfaces that will be in contact from the remnants of the old gasket and sealant.
To improve the properties of the gasket, you can use graphite lubricant, a special sealant for the engine crankcase, or any heat-resistant silicone-based sealant.
Graphite lubricant is applied to both sides of the gasket in a thin layer; after assembly, it fills micro-cavities, and hardens under high temperatures.
It is preferable to use a special sealant; it is applied in a thin, uniform layer over the entire contact area, on the pan and on the cylinder block. After assembly, the sealant will dry and, as it were, glue the surfaces, ensuring a tight fit and sealing.
Some craftsmen use sealant instead of a gasket, in which case its layer should be thicker, but it is better to leave this method in case the car is so rare that it is difficult to find the right gasket for it.
To watch online, click on the video ⤵
Repair of VAZ 11113 "Oka". Removing and installing the engine crankcase cover. More details
HOW TO REMOVE THE CRANKCASE OIL PAN Read more
Are you changing the pan gasket? You're doing it wrong! Everyone watch! More details
We remove the oil pan of VAZ 2109-2115, Priora. ICE VAZ 2111 8 cells. Remove the sump VAZ. More details
Replacement of crankcase gasket VAZ (LADA 2101-07) More details
Replacing the pan gasket More details
How to remove the oil pan from the sealant Read more
Oil change, Ok Read more
What is the easiest way to remove the engine sump Niva 4*4 Read more
LadaVesta CAN'T DO WITHOUT A DRILL! Our auto industry rules)))Auto repair Read more
HOW TO REMOVE Volkswagen Passat TRAY More details
"Oka" VAZ 11113-40. Incomplete disassembly of the engine. More details
Let's disassemble NIVA. Removing the pan and oil pump. #1 Read more
how to remove the pan AUDI 80 1.8 Read more
Replacement of all engine mounts for VAZ 11113(oka) Read more
Removing the engine sump and flushing the oil receiver More details
Replacing the pan gasket for VAZ 2101 - 2107, without removing the engine. More details
Cold welding
The cheapest way to repair a crack is by cold welding. It is no different in terms of reliability, because it is not brewing, but rather caulking/sealing. Cold welding, as a rule, consists of two components, which are mixed together, applied to the damaged area and allowed to harden. Before doing this, be sure to degrease and thoroughly clean the damaged area. In the case of a small crack, you can try to seal it without removing the pan. When choosing cold welding, pay attention to the temperature at which it retains its properties - it should be at least 200 degrees.
Argon welding
Argon welding is the most effective way to remove damage. This type of welding can be used to weld both aluminum and any other non-ferrous metal alloys. A good welder can easily fix a crack or weld a small hole, and the seam will not affect the functionality in any way. The disadvantage of such repairs is the high price. You can, of course, save money if you remove the part yourself and contact welding specialists directly. But in the case of common brands of budget cars, it will cost less to replace the oil pan with a new one.
You can also use glue for repairs. There are many different types that allow you to seal metal, but epoxy remains wear-resistant, heat-resistant and water-resistant. It is based on resins, substances to accelerate curing, and other fillers. The application of epoxy adhesive is similar to dry welding, it is also two-component and comes in paste or liquid form.
How to protect the oil pan from damage
The oil pan can be damaged as a result of driving on bad roads, hitting a large stone or curb. Therefore, we cannot turn away from the question of its additional protection.
There are several types of engine protection:
Polymer or plastic options cannot guarantee reliable protection, despite their low cost; they should not be installed in bad road conditions.
Aluminum protection is lightweight and corrosion-resistant, but due to its high cost and soft metal, it is also not recommended to use it when driving on bad roads.
Titanium would be an ideal option, in all respects, if not for their high cost. For now, they remain the prerogative of premium cars.
The optimal solution would be engine protection made of steel. It will reliably protect the engine crankcase at its low cost. On many modern cars, the manufacturer provides the possibility of installing engine protection. Therefore, to simplify installation, you need to select it taking into account the make and model of your car. It would be a good idea to seal the protection by installing special inserts so that it does not rattle when moving, or periodically check the tightening of the fastening bolts.
Not only internal combustion engines have a sump. It can also be with an electric motor or gearbox, be it a CVT, manual or automatic. There it performs almost the same functions and in some cases, for example, if it is an SUV for trophy rally, more powerful crankcase protection is required, not only for the engine, but also for other mechanisms.
Source