Disassembly and repair of the VAZ 2110 engine
Video on overhaul and engine assembly of a VAZ 2112 car, as well as detailed instructions with photo support for disassembling a VAZ 2110 engine.
Repairing a VAZ 2110 engine, like any other car model, is not an easy job, but it can still be done. If you know even a little about technology, you will be able to do it. To carry out repairs, you must at least disassemble the engine. We bring to your attention a hint on how and in what sequence to perform such work.
Major renovation
When approaching a mileage of 150,000 km, the VAZ 2110 engine begins to act up. This period is considered optimal for overhauling the power unit. Timely replacement of consumables and their quality have an important impact on engine life.
The figure of 150,000 km may change downward if maintenance schedules are not met and the quality of the oil and filters is poor. To delay overhauls, it is necessary to carry out engine diagnostics.
The technology for engine overhaul requires removing the engine from the vehicle.
Engine overhaul is the restoration of components and parts of the power unit to factory specifications. To compare the performance of the engine in use with the factory specifications, you will need special measuring instruments.
Before starting major repairs, you must read the repair instructions and evaluate the scope of work. The repair process itself is simple, but takes a lot of time.
Detailed instructions for disassembling and repairing the VAZ 2110 engine:
2. Remove the clutch from the engine.
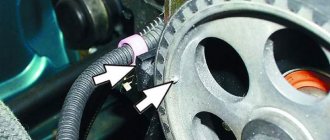
3. Remove the tension roller, camshaft drive belt and spacer washer, which is installed under the tension roller.
4. Remove the toothed pulley from the camshaft.
5. We unscrew four bolts, three of which attach the water pump. Unscrew the fastening nut on the rear cover of the camshaft drive belt and remove the cover.
6. To remove the water pump, insert a screwdriver between the block and the flange of the pump housing and thus move it from its seat. After completing these operations, remove the water pump.
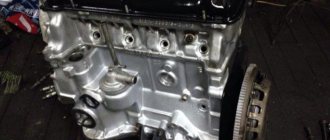
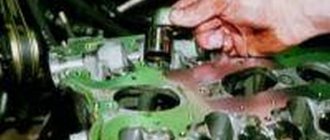
7. Remove the head from the cylinder block.
8. Unscrew the bolts (there are 16 of them) securing the oil sump, then remove it together with the gasket.
9. Unscrew the bolts (there are 3 of them) securing the oil receiver and remove it. Please note that there are spring washers under the bolt heads.
10. Unscrew the bolt in the oil sump that secures the oil level sensor. Don't forget that there is a spring washer under the bolt head. We remove the sensor from the cylinder block; if necessary, you can rotate the crankshaft so that its counterweight does not interfere with removing the sensor.
11. Then rotate the crankshaft so that the piston that is being removed hits BDC (bottom dead center). It is necessary to unscrew the two fastening nuts to remove the connecting rod cover.
12. Now remove the connecting rod cover. In cases where it is difficult to dismantle the cover, you can first remove it with light blows of a hammer. It may be that the cylinder number on the cap will not be visible, in which case the cap should be marked with the cylinder number.
13. Using the handle of a hammer, push the connecting rod inside the cylinder, then carefully remove the piston and connecting rod from the cylinder. During the process, you need to make sure that the lower head of the connecting rod does not touch the cylinder mirror, since this can damage it. We remove the remaining pistons in the same way.
14. If you need to remove the piston from the connecting rod, then mark it with the cylinder number so as not to confuse them when installing them. There should also be a cylinder number on the connecting rod: if it is not visible, then we mark the connecting rod as well.
16. Unscrew the bolts (there are 6 of them), remove the crankshaft rear oil seal holder and the gasket. Remember that there are spring washers under the bolt heads.
17. Remove the toothed pulley from the crankshaft. If the key does not fit tightly in the groove of the shaft elbows, be sure to remove it so that it does not get lost.
18. Unscrew the six bolts, under the heads of which there are spring washers, and remove the oil pump and gasket.
19. We unscrew the mounting bolts on the five covers (each with 2 bolts) of the main bearings.
21. Remove the crankshaft of the VAZ 2110 car.
22. We remove the crankshaft thrust half-rings on the middle support.
23. If you do not plan to replace the liners, then as you remove them, remove them from the block beds and from the main bearing caps.
24. On the non-working side we mark the liners relative to the beds and covers.
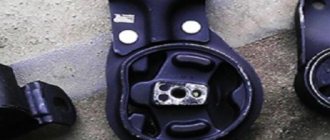
25. If there is a need to remove the engine mounts and generator brackets, unscrew the bolts (3 pieces) securing them and remove the water pump supply pipe by unscrewing its fastening.
26. Remove the piston rings using a special puller. If there is no such device, then remove the rings from the piston by carefully releasing the ring locks.
27. Remove the oil scraper ring expansion spring from the auto engine piston.
28. Remove the retaining rings that hold the piston pin on both sides of the piston. There are recesses in the piston bosses for easy removal of the rings.
29. Using a suitable mandrel, push the pin out of the piston, then remove the piston from the connecting rod.
30. Remove the liners from the connecting rod and its cover. If they remain on the crankshaft, remove them from the shaft. If replacement of the liners is not required, then as they are removed, we mark them with respect to the numbers of the covers and connecting rods.
This completes the process of disassembling the VAZ 2110 engine. Good luck with the completion of the renovation.
Detailed video lesson: engine assembly
Video about overhaul of VAZ internal combustion engine:
Video - VAZ 2112 engine assembly:
Source
Do-it-yourself VAZ 2110 engine repair 8 valves injector video
I would like to recommend you the car sharing service Kar5 https://shacaring.ru/town/adler/ - this is an opportunity to not spend money on taxis and car rentals and at the same time have complete comfort. I really like it! I recommend!
Video on overhaul and engine assembly of a VAZ 2112 car, as well as detailed instructions with photo support for disassembling a VAZ 2110 engine.
Repairing a VAZ 2110 engine, like any other car model, is not an easy job, but it can still be done. If you know even a little about technology, you will be able to do it. To carry out repairs, you must at least disassemble the engine. We bring to your attention a hint on how and in what sequence to perform such work.
How much does it cost to overhaul a VAZ 2110?
Depending on the type of engine, the estimated cost of removing/installing an 8-valve engine is from 3,000 rubles , and a 16-valve engine is from 4,000 rubles . The approximate cost of cylinder head repair, excluding the cost of parts, is from 3,500 rubles and from 5,500 rubles , respectively. On average, boring a cylinder block will cost from 1,200 rubles. Replacing sleeves will cost from 2500 rubles .
The average cost of a major overhaul of a VAZ 2110 engine equipped with 8 valves will be from 12,000 rubles . Repairing an engine with 16 valves will cost from 19,000 rubles .
Disassembly and repair of the VAZ 2110 engine
Video on overhaul and engine assembly of a VAZ 2112 car, as well as detailed instructions with photo support for disassembling a VAZ 2110 engine.
Repairing a VAZ 2110 engine, like any other car model, is not an easy job, but it can still be done. If you know even a little about technology, you will be able to do it. To carry out repairs, you must at least disassemble the engine. We bring to your attention a hint on how and in what sequence to perform such work.
Signs of major repairs
Based on the following signs, you can determine the need for overhaul of the power unit:
- Increased oil consumption - the piston rings or valve guides may have failed. First of all, you need to check for cracks leading to oil leakage.
- Noises and knocks in the engine. A possible cause of the malfunction is the failure of the connecting rod or main bearings.
- Loss of engine power. There are many reasons for loss of power. Unstable engine operation may be due to lack of compression.
- Engine failures.
If several signs appear together, urgent major repairs are required.
Features of engine assembly and installation on Lada 2010.
Crankshaft gear and its malfunctions
The crankshaft sets the operating rhythm of the components and mechanisms of the internal combustion engine using belt or gear drives. All internal combustion engine units operate in time with the crankshaft.
Crankshaft gear: structure and functions
The crankshaft gear is the gear through which the engine equipment rotates. Depending on engineering solutions, it has the shape of a gear with teeth for a chain or belt.
As a rule, timing gears (lower) and oil pump drives are installed on the crankshaft. The gears are mounted with a tight fit, fixed on the keyway, and pressed with threaded fasteners.
Engine design with chain drive of oil pump and timing belt
Crankshaft gear malfunctions
Common crankshaft gear problems include:
Detailed instructions for disassembling and repairing the VAZ 2110 engine:
2. Remove the clutch from the engine.
3. Remove the tension roller, camshaft drive belt and spacer washer, which is installed under the tension roller.
4. Remove the toothed pulley from the camshaft.
5. We unscrew four bolts, three of which attach the water pump. Unscrew the fastening nut on the rear cover of the camshaft drive belt and remove the cover.
6. To remove the water pump, insert a screwdriver between the block and the flange of the pump housing and thus move it from its seat. After completing these operations, remove the water pump.
7. Remove the head from the cylinder block.
8. Unscrew the bolts (there are 16 of them) securing the oil sump, then remove it together with the gasket.
9. Unscrew the bolts (there are 3 of them) securing the oil receiver and remove it. Please note that there are spring washers under the bolt heads.
10. Unscrew the bolt in the oil sump that secures the oil level sensor. Don't forget that there is a spring washer under the bolt head. We remove the sensor from the cylinder block; if necessary, you can rotate the crankshaft so that its counterweight does not interfere with removing the sensor.
11. Then rotate the crankshaft so that the piston that is being removed hits BDC (bottom dead center). It is necessary to unscrew the two fastening nuts to remove the connecting rod cover.
12. Now remove the connecting rod cover. In cases where it is difficult to dismantle the cover, you can first remove it with light blows of a hammer. It may be that the cylinder number on the cap will not be visible, in which case the cap should be marked with the cylinder number.
13. Using the handle of a hammer, push the connecting rod inside the cylinder, then carefully remove the piston and connecting rod from the cylinder. During the process, you need to make sure that the lower head of the connecting rod does not touch the cylinder mirror, since this can damage it. We remove the remaining pistons in the same way.
14. If you need to remove the piston from the connecting rod, then mark it with the cylinder number so as not to confuse them when installing them. There should also be a cylinder number on the connecting rod: if it is not visible, then we mark the connecting rod as well.
16. Unscrew the bolts (there are 6 of them), remove the crankshaft rear oil seal holder and the gasket. Remember that there are spring washers under the bolt heads.
17. Remove the toothed pulley from the crankshaft. If the key does not fit tightly in the groove of the shaft elbows, be sure to remove it so that it does not get lost.
18. Unscrew the six bolts, under the heads of which there are spring washers, and remove the oil pump and gasket.
19. We unscrew the mounting bolts on the five covers (each with 2 bolts) of the main bearings.
21. Remove the crankshaft of the VAZ 2110 car.
22. We remove the crankshaft thrust half-rings on the middle support.
23. If you do not plan to replace the liners, then as you remove them, remove them from the block beds and from the main bearing caps.
24. On the non-working side we mark the liners relative to the beds and covers.
25. If there is a need to remove the engine mounts and generator brackets, unscrew the bolts (3 pieces) securing them and remove the water pump supply pipe by unscrewing its fastening.
26. Remove the piston rings using a special puller. If there is no such device, then remove the rings from the piston by carefully releasing the ring locks.
27. Remove the oil scraper ring expansion spring from the auto engine piston.
28. Remove the retaining rings that hold the piston pin on both sides of the piston. There are recesses in the piston bosses for easy removal of the rings.
29. Using a suitable mandrel, push the pin out of the piston, then remove the piston from the connecting rod.
30. Remove the liners from the connecting rod and its cover. If they remain on the crankshaft, remove them from the shaft. If replacement of the liners is not required, then as they are removed, we mark them with respect to the numbers of the covers and connecting rods.
This completes the process of disassembling the VAZ 2110 engine. Good luck with the completion of the renovation.
Detailed video lesson: engine assembly
Video about overhaul of VAZ internal combustion engine:
Video - VAZ 2112 engine assembly:
A practical look at the structure and functioning of the VAZ 2110 engine
Note. Today, the majority of “ten” car owners have an eight-valve injection engine under the hood, so considering this model is the most popular option of all those currently existing.
Engine design VAZ 2110 8 valve
Today, most “ten” are equipped with a 1.5 liter injection engine. The main features of the injection engine for the VAZ 2110 are:
The structure and principle of operation of the crank mechanism
VAZ 2110 16 valve engine device
The cylinder block is made of strong and reliable metal - cast iron. The total diameter of all cylinders will be approximately 82 mm, which in turn allows you to directly increase its diameter if there is a need to replace the piston group. In particular:
Functions and structure of the crankshaft
The crankshaft is located at the bottom of the block, while simultaneously rotating on five main bearings, which in turn have removable roofs. The roofs themselves are attached to the block using special fastening bolts.
Note. Axial displacement of the crankshaft is impossible, since the central (middle) support of the main bearing is equipped with a special socket that contains half rings. It is these half rings that prevent axial displacement of the crankshaft.
Aluminum and steel are the base material for the manufacture of the front half-rings, while cermet is the base material for the manufacture of the rear half-rings:
Note. If play appears on the crankshaft, it must be replaced immediately. Structure of bearing shells
The crankshaft itself has the following structure:
There are drilled channels on the inner surface of the shaft, which, in turn, are covered with plugs. These channels simultaneously perform two functions:
Structure and functional purpose of the piston group
The VAZ 2110 engine consists of many elements
So, steel is the main base material for connecting rods, which also have a double cross-section. If the connecting rod is processed, then the roofs must also be replaced, since these two elements are not interchangeable with respect to each other. The cylinder number is stamped both on the cap and on the connecting rods. Piston structure:
Note. Piston hole and boss are different names for the same element.
There is a recess at the bottom of the piston that protects the valve from bending if the drive belt breaks.
The structure of the gas distribution mechanism and the block head
The VAZ 2110 16 valve engine consists of a gas distribution mechanism
The block head is common to all front-wheel drive vases. The block head is mounted using 10 specialized screws. Before proceeding directly to the installation of the block head, it is imperative to place a special metal gasket under it.
Note. The metal spacer is for one-time use only.
The upper part of the block head contains 5 camshaft supports.
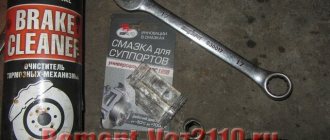
Tools
To repair a VAZ 2110 engine without a service station, you will need serviceable tools. It is prohibited to use keys that do not fit the size and keys with worn edges.
The handles of the tools used must be plastic or wooden with a smooth and sanded surface. Tools with wooden handles should be reinforced with metal rings - this will prevent the tool from splitting when unscrewing engine elements.
Schematic cross-sectional representation of the engine.
Overhaul of the VAZ 2110 Engine with Your Own Hands
Repair of VAZ 2110 engine
The main advantage of slot machines for power units of Russian cars in terms of engine repair
a lot of information. This allows for repairs. engine
VAZ 2110
their Hands
.
Restoring the engine
Currently, the 1.5-liter 8-valve engine is in demand in the top ten. The VAZ 2110 injector runs only on gasoline, with 4 cylinders located transversely.
tools
The handles of the tools used must be plastic or wooden with a smooth and clean surface. Tools with wooden handles should be reinforced with metal rings - this will prevent the tool from cracking when unscrewing engine elements.
External view of the engine section.
Security measures
Do not use a chisel or hammer when loosening nuts.
To avoid unforeseen situations when repairing the engine, there should be a sign on the steering wheel of the VAZ: “Do not start the engine - repair work continues”
The inspection pit must be equipped with sides. A vehicle can only enter the inspection hole if there are no people in it. Inspect the vehicle using an electric lamp with a protective grid of no more than 36 volts.
How to overhaul a vase with an engine 2109 |
Before you begin repairing the engine in a pit, you must put the car on the handbrake and in first gear.
For Lada repair 2110
With the wheels removed, metal stands must be installed.
Capital renovation
or engine replacement, what to choose?
Overhaul of the VAZ 2110 engine (part 1)
Let's show you how to repair an engine
what is needed, and approximate spare parts and prices.
repair
Approaching a mileage of 150,000 km, the VAZ 2110 engine begins to waste. This period is considered optimal for major repairs of the unit. Timely replacement of consumables and their quality have a significant impact on the service life of the engine.
The figure of 150,000 km may change downwards in case of non-compliance with operating conditions and poor quality of oil filters. To postpone major repairs, it is necessary to perform engine diagnostics.
Technology that requires capital engine repair
requires removing the engine from the car
An engine overhaul is the restoration of transmission components and parts to factory settings. Special sensors will be required to compare the performance of the used engine with the factory specifications.
What determines the cost of overhauling a VAZ 2110 engine?
The cost of repair work depends on the following main factors:
- Models of the installed engine.
- The degree of wear of its components and parts.
- Number of spare parts to be replaced.
- Availability of additional work on repair of cylinder head, shafts, cylinders.
- Car mechanic qualifications and workshop equipment.
During the overhaul process, it may be necessary to replace or repair other engine-related components and assemblies, requiring additional financial costs.
Engine operating temperature
We have learned the resource, now we move on to another important indicator. The optimal operating temperature is 90-95°C. After 97°C, engine number 126 with 16 valves will “slow down” a little, but according to the rules, temperatures up to 100°C are considered normal. If the Lada unit is operated with this indicator, then you need to be sure that the radiator fan is running at this time. When you see an indicator below +90°C on the dashboard, you need to assume that this is underheating. Of course, in cold weather the power plant needs more time for the temperature to reach normal levels.
Dismantling the cylinder head
First of all, to get to the cylinder head, you need to remove the cylinder head cover. For different 16-valve engines, this operation is different, and the cover part numbers also look different: 2112-1003260 (-10) and 21124-1003260.
Engine cover VAZ-21124 (1.6 l)
You will also need to remove the timing belt - there are no differences between different engines.
Let's look at how the exhaust manifold can be detached from the cylinder head. On engine 21120:
- Remove the exhaust pipe of the muffler: unscrew two nuts 1 (key “13”), remove the clamping bar, unscrew six nuts 2 (key “14”) and dismantle, not forgetting to turn off the oxygen sensor. The photo shows three of the six nuts.
Elements of the exhaust pipe
Everything important is under the screen
Now we will talk about engine 21124:
How to disassemble the mounting bracket
Operation with additional muffler
Here we believed that the VUT hose was disconnected from the intake module. Finally, the spark plugs are unscrewed on any of the engines (a “16” tubular wrench).
The tightening torques for the mounting screws are given in another text. In general, on VAZ-2112 hatchbacks, cylinder head repairs begin by replacing the “extended” screws with new ones. The length should be 95mm or less.
The order of unscrewing (left) and tightening the mounting screws
Design features
The main part of the engine, the cylinder block (catalog number 11193-1002011), also differs in size from its predecessor. It is factory painted blue. Its height, the distance from the crankshaft axis to the upper plane, became 197.1 mm, versus 194.8 mm on the 2112 model.
The dimensions of the holes for the block head mounting bolts have changed; they are from the hoist with M10×1.25 threads. The main bearing supports on the 124th engine, from the second to the fifth, are equipped with channels designed to supply oil that cools the piston during operation.
The crankshaft installed is the same as on models 21126 and 11194, with the marking 11183 cast on the sixth counterweight. Due to the crank radius of 37.8 mm, a piston stroke of 75.6 mm was provided. A toothed pulley is installed on the shaft for timing belt drive. The belt is 25.4 mm wide and has 136 teeth, parabolic in shape. Belt service life is 45,000 km.
The pulley is designed to drive additional units using a V-belt. Three types of belts are used, differing in length, depending on the equipment:
The pulley is designed in such a way that it acts as a damper, reducing the torque loads acting on the shaft. Another function is to determine the position of the crankshaft using a sensor and a gear mounted in the damper.
The improvement affected the pistons. Their bottoms are made with valve recesses 5.53 mm deep to avoid the valves hitting the piston bottom when the timing belt breaks.
On previous VAZ 16v models without recesses or with recesses of shallower depth, in such a situation there was a risk of bending the valves, which led to expensive repairs. So, concerns and frequently arising questions about whether the valves bend on this engine have been removed.
Oil scraper and compression rings are made of steel or cast iron. The pistons and connecting rods are connected using floating pins, 22 mm in diameter, 60.5 mm in length, secured with retaining rings. The pins and connecting rods are borrowed from the VAZ 2110 modification.
The block head for the 16 valve LADA 21124 engine has an enlarged docking area for the intake manifold flange. Both camshafts for the exhaust and intake valves, as well as the valves themselves, springs, and hydraulic compensators have also been preserved from the previous modification of the engine.
In order to avoid confusion, the shafts are marked with a digital code. If it ends at 14, then this is the exhaust valve shaft, if at 15, then this is the intake shaft.
Another difference is that there is a raw strip on the intake shaft, next to the first pushrod. By adding hydraulic compensators to the design, the manufacturer eliminated the need to maintain valves in terms of adjustment. But, they are very sensitive to the cleanliness and quality of the lubricant. Low-quality oil will quickly damage parts and must be replaced; such repairs are not provided for the VAZ 124.
The spring-valve group is similar to model 2112. Valves with one spring and rods with a diameter of 7 mm (on eight-valve heads their diameter is 8 mm). Toothed pulleys with marks for setting the valve timing are installed on the camshafts. Compared to model 2112, the marks are shifted relative to each other by 2°.
Just like the shafts, the pulleys have differences in design and markings - on the inlet, a strip is welded on the back side, on the outlet it is missing. Both pulleys have markings in the form of circles on the hub.
Injectors for VAZ 2110–2112 cars
Cars of the “tenth” family are equipped with various injection engines, each of which is designed to work with a specific model of injectors. Despite the fact that they have their own “names,” motorists usually use a “folk” classification based on color and thickness. For example: black thin ones.
This simplification usually works, but does not fully guarantee the compatibility of the injector with the engine. To avoid having to contact the chip tuner once again to correct the firmware of the electronic injection control unit, check the part number before purchasing.
Table: compatibility of injectors and engines of VAZ 2110–2112 cars
| Engine | Volume (l) | Number of valves | Controller (ECU) | Firmware | Injectors | |
| Siemens | Bosch | |||||
| VAZ-2111 | 1,5 | 8 | M1.5.4 | January-5.1 | VAZ6238 (thick gray) | 0 280 150 996 (turquoise thick) |
| VAZ-2111 | 1,5 | 8 | M7.9.7 | January-7.2 | VAZ6393 (beige thick) | 0 280 158 502 (black thin) |
| VAZ-21114 | 1,6 | 8 | M7.9.7 | January-7.2 | VAZ20734 (orange thin) VAZ20734 (yellow thick) | 0 280 158 017 (black thin) |
| VAZ-2112 | 1,5 | 16 | M1.5.4 | January-5.1 | VAZ6238 (thick gray) | 0 280 150 996 (turquoise thick) |
| VAZ-21124 | 1,6 | 16 | M7.9.7 | January-7.2 | VAZ20735 (blue thin) VAZ20735 (pink thick) | 0 280 158 022 (black thin) |
Photo gallery: injectors for VAZ 2110–2112 cars
Differences between injectors for eight and sixteen valve engines
Among some motorists there is an opinion that the injectors for the “ten” differ depending on the number of engine valves. Others believe that the determining factor is the volume of the cylinders.
Clogged injectors can cause the car to jerk when driving. Details: https://vazweb.ru/desyatka/pitanie/dergaetsya-pri-dvizhenii.html
In reality, neither one nor the other is wrong. The parts must match the engine design, model and firmware of the electronic control unit.
When replacing, it is best to install the same ones that were installed previously. Otherwise, there may be difficulties with startup and operation in transient conditions. To eliminate the shortcomings, you will have to adjust the firmware, which is almost impossible in a garage environment.
In-cylinder fuel injection has been known since the very dawn of the automobile industry. In the early 1890s, the German Rudolf Diesel and the Englishman Herbert Ackroyd-Stewart secured the rights to their own designs for an internal combustion engine running on fuel oil.
Vladimir Bekrenev
bvy.su
Overhaul of 8 and 16 valve VAZ 2110 engines
The tenth model was created with extensive use of components and assemblies of the previous model - 2108. At the beginning, the car was equipped with a 1.5-liter VAZ-21083 8-valve engine with a carburetor. At the next stage, a more powerful VAZ-2111 engine with the same volume and number of valves, equipped with a direct fuel injection system, was installed.
More than 1 million cars equipped with such an engine were sold in Russia. The VAZ-21114 power plant with its volume increased to 1.6 liters made it possible to increase power and reduce fuel consumption. Over time, a more dynamic 16-valve version of the 1.5 liter VAZ-21120 engine was developed, which turned out to be not entirely successful due to design errors.
On the next modification of the VAZ-21124 engine, the cubes were increased, which made it possible to increase the power to 100 hp. and show good performance. Finally, the sixth version of the VAZ 2110 car was equipped with an imported 2-liter, injection, 16-valve Opel X20XEV CTi engine, which allowed the car to accelerate to speeds of over 200 km/h.
The service life of engines installed on the VAZ 2110 model is on average about 250 thousand km . Since such cars have been traveling on the roads for a long time and many have not only overcome this milestone, but some have surpassed it, the question arises of carrying out a major overhaul of the power plant.
What is an engine overhaul? This is work aimed at restoring the performance of the engine and bringing the technical characteristics to factory specifications. Due to the variety of types of power plants installed on a car, major repairs for each specific vehicle may differ in the degree of complexity of the work and the range of necessary spare parts.
As with most cars, a thorough engine repair is not complete without dismantling it, completely disassembling it, cleaning it, and identifying inoperable parts and components.
The geometric parameters of the crankshaft and camshafts, the quality of the surfaces of the cylinders and cylinder head, and the condition of the valves are checked. Piston rings and liners are replaced, new gaskets, seals, fuel and oil filters, and spark plugs are installed. The assembled motor is returned to its place and run-in. Having finally adjusted the ignition and fuel supply systems, everything is ready to continue using the car.
How much does engine No. 126 cost?
As it turns out, buying a new 16-valve unit for a Lada Priora is an expensive proposition. Today you can purchase a 16 valve 1.6 liter EURO-3 and EURO-4 engine. The first option costs approximately 102 thousand rubles, and the second – 103 thousand. Motorists are also interested in how much it costs to purchase a used Lada unit. Used ones can be purchased even for 20 thousand rubles. But you can find out what condition this unit is in only after a complete disassembly or a trip to a car service center. The average price for a used one is 50-60 thousand rubles.
One of our old clients changed his car to a VAZ 21124 (engine capacity 1.6 liters, 16 valve). The car is not new, the mileage on the odometer is 85 thousand km. After some time, problems appeared - antifreeze immediately left the cooling system in large quantities, the expansion tank inflated, and the client had to constantly add antifreeze. After an intercity trip, the car was brought in for repairs - the oil pressure light was blinking, the hydraulic compensators were knocking. After inspecting the car, a verdict was given - the mileage was incorrect, but the car was in good condition. Compression measurements showed a difference of up to 2 atmospheres across the cylinders. We will disassemble the engine, look for and eliminate the causes of the problems.We remove the attachments, then the valve cover and camshaft bed. The hydraulic compensators turned slightly blue from oil starvation, but the client was lucky - the camshaft journals and beds in the cylinder head are in good condition - here expensive repairs can be avoided.
We remove the cylinder head - this is the reason for the escaping antifreeze - a burnt gasket. Judging by the rust, the previous owner did not want to repair the engine and filled it with water, so he sold the car. The head plane requires milling.
The cylinders are still in very good condition, the factory honor is visible. Water was leaking into the second cylinder through the gasket and there are signs of rust on the surface of the cylinder. However, the water here has not yet had time to cause wear on the cylinder surface - if the client had ridden on the water longer, not a trace of honing would have remained.
We are condemning the catalyst to be replaced - the gas joint studs are stuck tightly, but the main reason for the replacement is that the insides of the catalyst have sintered and crumbled.
We dismantle the cylinder block from the car - without a comprehensive overhaul and troubleshooting - further assembly and starting of the engine will be like roulette.
The block is completely disassembled. All crankshaft journals are measured with a micrometer - the journals are wear-free, at the upper tolerance limit. But the liners, especially the main ones on the last neck, have traces of oil starvation. A little more and the liner could have turned. The mating plane of the block, which has extensive areas of corrosion, was milled.
Since there was no talk of tuning the engine (the client asked for a standard overhaul), the ShPG from Priora was not installed. Since the cylinders are in good condition, we limited ourselves to replacing the pistons (the engine had group B) and installed group C. The connecting rods remained original, 2110. The piston rings were replaced with kits, Kolbenschmidt. Such a replacement will still add a few horsepower to the engine, due to the reduction of mechanical losses due to friction. All parts were washed. The oil pump was opened and the gears, housing and pressure reducing valve parts were carefully inspected - no defects were found. The crankshaft bearings and thrust half-rings were replaced with new ones, the crankshaft remained at its nominal size. All seals and gaskets were renewed. The pump was installed new - factory. The flywheel is still in excellent condition, as is the clutch - the previous owner replaced it with a Kraft. We limited ourselves to only replacing the release bearing with a VAZ one (the Kraft release bearing has a weak point - a plastic inner sleeve, which often crumbles).
It's time to work on the head. It was completely disassembled, the valves were dried out. The mating plane has been damaged by water and rust, traces of gasket burnout are visible.
The exhaust guides are worn out - the valves are loose. The valves themselves are in good condition - we grind the working chamfers on a special machine, thereby saving the client money on new valves. We repress the exhaust bushings with new ones. The valve stem seals have turned into crackers, they are also replaced with new ones - GOETZE. The head is washed, the plane is milled, the chamfers of the seats are processed on an AZ VV80 machine - the cutter creates three chamfers at the same time, after which no grinding is required. The valves simply dry out.
We update the timing belt and rollers - install the PowerGrip kit (GATES) . We install a metal cylinder head gasket from Priora. Oil filter - MANN. The catalyst is replaced with a 4-1 stainless steel “spider”. It is placed in its regular place. It was not possible to find an intermediate pipe from the catalyst to the resonator on sale - I had to cut off the stuck studs of the catalyst and use an old pipe. We connect the gas joint (with a new gasket) with hardened bolts with copper nuts and grommets. We also update the round graphite ring in the next gas joint, along with the bolts and springs.
We glue the camshaft bed and valve cover with Loctite anaerobic sealant (silicone sealants cannot be used!), we update the spark plugs - install NGK. New hydraulic pushers were installed - INA. Fill in oil with Lukoil Lux 10W40.
So, everything is assembled, we start the engine. The pressure light goes out, the hydraulics fill with oil and go quiet. The motor runs smoothly.
After running for an hour at idle, the car is given to the client.
The results of major repairs are summarized in standard estimates, which can be found in the Price List section.
Article written: August 27, 2012 Author of the article, photo-video materials: © Quasar Prohibited without the written permission of the author: reprint of the article in whole or in part, reprint and use of photo-video materials, as well as their modification and editing for the purpose of further publication on third parties sites.
Maintenance
The service interval for the Priora engine is approximately 15 thousand km. This is what the plant that produces this unit does. Experts recommend carrying out the first check after 3 thousand km. Basically, at this stage, more attention should be paid to the places where the fastenings for mounted equipment are located. In addition, during the first inspection and maintenance, the oil or oil filters must be changed.
If the engine has an 8-valve design, then it is necessary to check the condition of the valve clearances during the first check. If the engine has a 16-valve design, then such actions will not be necessary, since such a unit has hydraulic compensators. Similar checks are also carried out after 15 thousand kilometers for the Priora.
When the odometer already shows more than 30 thousand km, you will need to not only replace the oil filters, but also the oily liquid itself. Be sure to also change the spark plugs, and then the filters in the power system.
Often, at approximately this mileage, the timing rollers begin to function poorly or completely break. If the Priora has an 8-valve engine, then the gasket in the valve mechanism cover should also be replaced.
When the mark on the odometer reaches 45 thousand km, you should change the oil again. It is imperative to check the tension in the timing belts. Moreover, these actions are carried out for engines with both 8 and 16 valves.
Then scheduled maintenance is carried out when the mileage reaches 60 thousand km. This time you need to pay attention to the spark plugs and generator drive belts. Sometimes you need to flush the power system. This is especially true for the place where the throttle pipe is located. It is recommended to change the sensors that control idle speed at this time.
When the mileage reaches 75 thousand km, on a unit with 8 valves it is necessary to change the timing belts. The same applies to the oxygen sensor. It is also better to replace the coolant, since by this time it has already partially or completely lost its functions.
Further maintenance will be repeated for the Priora. As a result, the minimum risk for this engine is approximately 100 thousand km. Sometimes, if all the rules are followed and proper maintenance is performed, it is possible to stretch this time to 200 thousand kilometers. Of course, if you change the design (tuning), this increases the power of the unit. But even if you comply with all the requirements, sooner or later you will not be able to do without repairs. Of course, following the rules will delay this, but you will have to either replace the parts yourself or contact a specialist.
VAZ engine: engine life and what it depends on
So, let’s immediately note that the average indicator for VAZ engines on the “classic” is the mark of 150 thousand km. mileage As for more modern versions of internal combustion engines, you can often hear that such engines “run” about 200 thousand km. and even more, but the plant itself determines the same 150 thousand.
As you can see, the official indicators can be considered conditional. First of all, the life of the engine greatly depends on a number of nuances during the maintenance and operation of the vehicle. For example, let's take the VAZ-2114 engine.
Let's start with the fact that the engine in this model is 8-valve and has a factory declared resource of 150 thousand km. Moreover, in practice, in some cases such units reach the capital only after 200-250 thousand km. Motors with 16 valves can go even more (up to 300 thousand).
- First of all, the service life of the engine directly depends on the driving style and the conditions in which the vehicle is operated. In other words, if you constantly rev the engine to high speeds and delay upshifting, accelerate aggressively from a stop, etc., then the life of the engine is greatly reduced.
Driving at low speeds is also harmful to the engine, when, for example, the driver drives in 5th gear at a speed of 40-50 km/h. In this case, the load increases greatly if, for example, the car is going uphill, but instead of engaging a lower gear, the driver simply presses the gas harder. Often in this case, engine detonation occurs, which destroys the engine.
In both the first and second cases, the engine is guaranteed increased and accelerated wear. Taking into account the above, it becomes clear that a quiet ride without sudden starts and high speeds is considered optimal, while it is also not advisable to allow the speed to drop below 2 thousand rpm. in every gear while driving.
As for operating conditions, towing other cars or using a trailer, as well as constant driving within the city at low speed (start-stop mode), frequent engine starts (especially cold) and stops, short trips during which the internal combustion engine does not have time to reach operating conditions temperature, driving on dusty roads or operating the vehicle in difficult conditions also reduces the life of the engine. This is especially true if the engine is not serviced in a timely manner, adjusted for such conditions.
- The next factor that can both shorten and extend the “life” of an internal combustion engine is maintenance. Such maintenance should be understood as the planned replacement of technical fluids and consumables.
This means that the oil must be selected correctly and changed before the lubricating fluid loses its properties. Experienced drivers also know well that it is better to change the oil not according to mileage, but according to engine hours, and also make allowances for the conditions in which the car is operated.
In practice, it turns out that as part of normal everyday use, it is optimal to change semi-synthetics no later than 6-7 thousand km. mileage, and it is better to replace synthetics at 9-10 thousand km. This recommendation is the main answer to the question of how to increase the life of the motor. If the owner follows the above recommendations, then the VAZ engine may well last about 250 thousand km. before major repairs.
We also note that for many VAZ models, engine maintenance is not limited to just changing the oil, oil and air filter. Consumables that need to be changed also include spark plugs and high-voltage wires, antifreeze/antifreeze to maintain the optimal operating temperature of the internal combustion engine. It may also be necessary to adjust the thermal clearances of the valves, set the OZ, replace the timing belt and rollers, clean the injector and other procedures.
- Timely troubleshooting completes the list of those factors that can increase the service life of a VAZ engine or any other internal combustion engine. The reason is obvious, since even a minor breakdown, which at the initial stage does not pose a threat, if ignored and continued operation of the vehicle, can develop into a serious problem.
It becomes clear that the normal operation of all main systems and processes (ignition, cooling, power supply and mixture formation) will allow for complete combustion of the mixture of fuel and air in the cylinders, avoid engine sticking, and slow down the process of oxidation and aging of the engine oil.
Cleaning valve channels
To remove any valve, you will need to remove the camshaft. All screws on the bearing housing must be unscrewed evenly and tightened with a force of 10 N*m. The hydraulic compensator can be removed with a magnet, and then the valve is desiccated by compressing the spring with a puller (see photo).
How to remove the valve
There may be carbon deposits in the valve channels. It is cleared:
Grinding is carried out as follows: a rubber pipe is placed on the valve, a paste with diamond chips is applied (one drop), then the valve is pressed into the channel and scrolled. It will also be possible to change the valve stem seals (2112-1007026). You can’t do this without a special puller.
Cap puller
On any car, including the VAZ-2112, cylinder head repair comes down to cleaning and checking, as well as correcting geometry defects. In the latter case we are talking about milling. The presence of cracks and chips is a reason for replacement, not repair.